
You know that person. It could be your significant other, a child, a co-worker, or a friend. That person that says one thing, but you can tell by their face, they mean something completely different. You probably just pictured them in your head. Maybe you remember the exact conversation. Perhaps it went like this:
You: Okay?
Them: Fine.
Spoiler Alert: It wasn't fine.
Wouldn't it be great if you could know the sentiment behind what they were saying? With OpenTok and Azure's Face API you can!
In this tutorial, we will build a multi-party video conference that allows us to analyze the sentiment of each participant based on their facial expression. Then we'll display that sentiment as an emoji over their video.
Prerequisites
Before getting started, you'll need a few things:
- A TokBox Account — create one for free if you haven't already
- A free Azure Account with Face API Cognitive Service
- Optional: Ngrok for test deployment
Want to skip to the end? You can find all the source code for this tutorial on GitHub.
Getting Started
We'll use JavaScript to do the heavy lifting, so let's get the HTML & CSS out of the way.
mkdir video-sentiment
cd video-sentiment
In the root of the video-sentiment folder, create an index.html file and copy the following to it.
<!DOCTYPE html>
<html>
  <head>
    <title>OpenTok Sentiment Analysis</title>

    <link href="https://emoji-css.afeld.me/emoji.css" rel="stylesheet" type="text/css" />
    <link href="css/app.css" rel="stylesheet" type="text/css" />

    <script src="https://static.opentok.com/v2/js/opentok.min.js"></script>

    <!-- Polyfill for fetch API so that we can fetch the sessionId and token in IE11 -->
    <script src="https://cdn.jsdelivr.net/npm/promise-polyfill@7/dist/polyfill.min.js" charset="utf-8"></script>
    <script src="https://cdnjs.cloudflare.com/ajax/libs/fetch/2.0.3/fetch.min.js" charset="utf-8"></script>
  </head>
  <body>

    <div id="videos">
      <div id="subscriber"></div>
      <div id="publisher"></div>
    </div>

    <!-- Footer will go here -->

    <script type="text/javascript" src="js/config.js"></script>
    <script type="text/javascript" src="js/app.js"></script>
  </body>
</html>
Next, create a css directory and add an app.css file to it. Copy the CSS below into that file.
body,
html {
  height: 100%;
  background-color: black;
  margin: 0;
  padding: 0;
  font-family: Arial, Helvetica, sans-serif;
}

#videos {
  width: 100%;
  height: 50%;
  margin-left: auto;
  margin-right: auto;
}

#subscriber {
  width: 100%;
  height: 100%;
}

#publisher {
  position: absolute;
  bottom: 50px;
  right: 0px;
  z-index: 100;
}

.OT_subscriber {
  width: 300px !important;
  height: 200px !important;
  float: left;
  margin: 5px !important;
}

.OT_widget-container {
  padding: 6px 0 0 6px !important;
  background-color: #70B7FD !important;
}

#publisher .OT_widget-container {
  padding: 6px 0 0 6px !important;
  background-color: hotpink !important;
}

.sentiment {
  position: absolute;
  z-index: 9000;
  height: 100px;
  width: 100px;
  font-size: 48px;
}

footer {
  position: absolute;
  left: 0;
  right: 0;
  bottom: 0;
  height: 30px;
  padding: 10px;
  background-color: gray;
}

button {
  font-size: 16px;
  padding: 5px 10px;
  display: inline;
}

ul {
  float: right;
  display: inline;
  list-style: none;
  padding: 5px 10px;
  margin: 0;
}

li {
  display: inline;
  background-color: lightgrey;
  padding: 10px;
  display: none;
}
li.used {
  display: inline;
}
Let's Get Configured
Great! Now we can make that pretty HTML & CSS do something. Create a js folder and add a config.js file.
The config.js file contains configuration parameters that we'll get from our TokBox and Azure accounts. Copy the following into the config.js file.
// Replace these values with those generated in your TokBox and Azure Accounts
const OPENTOK_API_KEY = '';
const OPENTOK_SESSION_ID = '';
const OPENTOK_TOKEN = '';
const AZURE_FACE_API_SUBSCRIPTION_KEY = '';
const AZURE_FACE_API_ENDPOINT = '';
OpenTok Settings
We'll get the OPENTOK_API_KEY, OPENTOK_SESSION_ID and OPENTOK_TOKEN variables from our TokBox Account.
In your TokBox Account, click the 'Projects' menu and 'Create New Project.' Then click the 'Create Custom Project' button. Give your new project a name and press the 'Create' button. You can leave the preferred codec as 'VP8'.
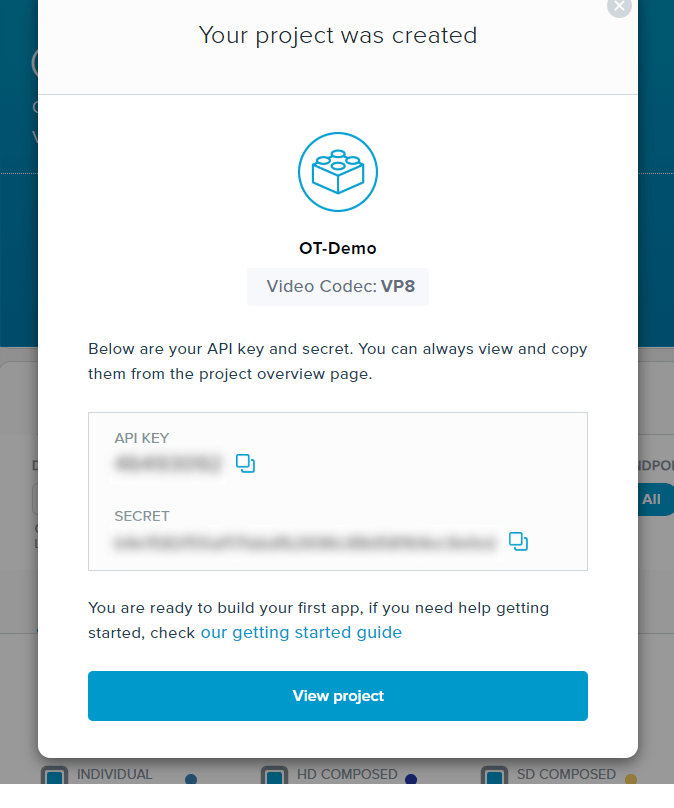
You can then copy your API Key and paste it as the value for the OPENTOK_API_KEY setting.
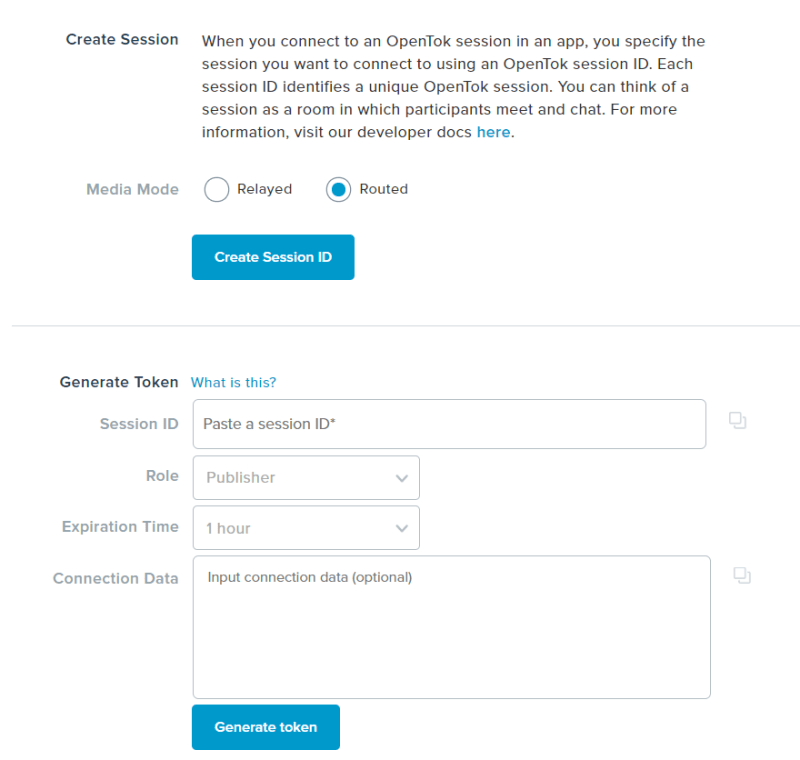
Next, click on "View Project". At the bottom of the project detail page, you'll find the Project Tools where you can create a Session ID and Token. Choose "Routed" for your session's media mode and press the "Create Session ID" button. Then, copy the generated Session ID and paste it as the value of the OPENTOK_SESSION_ID setting.
Finally, paste the generated session ID into the Session ID field of the Generate Token form and press the "Generate Token" button. Copy the generated Token as the value of the OPENTOK_TOKEN setting.
Azure Face API Settings
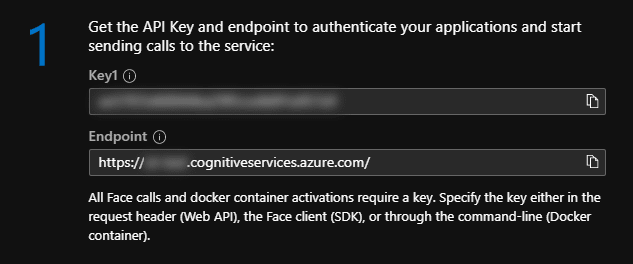
Log into your Azure account and create a new Face API Cognitive Service. Once created, click on the service and go to the "Quick start" blade. There you'll find your Key and Endpoint. Copy these two values to the AZURE_FACE_API_SUBSCRIPTION_KEY and AZURE_FACE_API_ENDPOINT settings, respectively.
I Feel Seen
With our configuration ready, let's add some JavaScript to connect to an OpenTok session. Add an app.js file to the js folder and copy the following to it.
var opentok_api_key;
var opentok_session_id;
var opentok_token;
var azure_face_api_subscription_key;
var azure_face_api_endpoint;

// See the config.js file.
if (OPENTOK_API_KEY &&
  OPENTOK_SESSION_ID &&
  OPENTOK_TOKEN &&
  AZURE_FACE_API_SUBSCRIPTION_KEY &&
  AZURE_FACE_API_ENDPOINT) {

  opentok_api_key = OPENTOK_API_KEY;
  opentok_session_id = OPENTOK_SESSION_ID;
  opentok_token = OPENTOK_TOKEN;
  azure_face_api_subscription_key = AZURE_FACE_API_SUBSCRIPTION_KEY;
  azure_face_api_endpoint = AZURE_FACE_API_ENDPOINT;

  initializeSession();

} else {

  alert('Failed to get configuration variables. Make sure you have updated the config.js file.');

}

// Handling all of our errors here by logging them to the console
function handleError(error) {
  if (error) {
    console.log(error.message);
  }
}

function dataURItoBlob(dataURI) {
  // convert base64/URLEncoded data component to raw binary data held in a string
  var byteString;
  if (dataURI.split(",")[0].indexOf("base64") >= 0)
    byteString = atob(dataURI.split(",")[1]);
  else byteString = unescape(dataURI.split(",")[1]);

  // separate out the mime component
  var mimeString = dataURI
    .split(",")[0]
    .split(":")[1]
    .split(";")[0];

  // write the bytes of the string to a typed array
  var ia = new Uint8Array(byteString.length);
  for (var i = 0; i < byteString.length; i++) {
    ia[i] = byteString.charCodeAt(i);
  }

  return new Blob([ia], { type: mimeString });
}

var streams = [];
var emotions = [];
Four things are going on here:
- We load variables based on those we specified in the
config.jsfile - We create a
handleErrormethod that we'll use throughout when an error occurs - We add a
dataURItoBlobmethod that we'll use to convert a base64/URLEncoded image to a blob for sending to Azure Face API - We added two arrays named
streamsandemotions
The streams array will hold all active participant streams so we can access them to capture images to send to the Azure Face API.
The emotions array will hold strings that represent any emotions returned by Azure Face API. This will be used to display a legend of emojis to the user dynamically.
Initializing the OpenTok Session
Add the initializeSession method below to the bottom of the app.js file.
function initializeSession() {
  var session = OT.initSession(opentok_api_key, opentok_session_id);

  // Subscribe to a newly created streams and add
  // them to our collection of active streams.
  session.on("streamCreated", function (event) {
    streams.push(event.stream);
    session.subscribe(
      event.stream,
      "subscriber",
      {
        insertMode: "append"
      },
      handleError
    );
  });

  // Remove streams from our array when they are destroyed.
  session.on("streamDestroyed", function (event) {
    streams = streams.filter(f => f.id !== event.stream.id);
  });

  // Create a publisher
  var publisher = OT.initPublisher(
    "publisher",
    {
      insertMode: "append"
    },
    handleError
  );

  // Connect to the session
  session.connect(opentok_token, function (error) {
    // If the connection is successful, initialize a publisher and publish to the session
    if (error) {
      handleError(error);
    } else {
      session.publish(publisher, handleError);
    }
  });
}
The initializeSession method initializes our OpenTok client with the session we specified with the Session ID. It then adds event handlers for the streamCreated and streamDestroyed events to manage adding and removing streams from our streams array. Finally, it connects to the session using the Token we set in our config.js file.
You can now open the index.html in Chrome or Firefox. When you load the page, you may need to allow the browser to access your webcam and microphone. After that, you should see a video stream of yourself (or whatever your webcam is looking at) displaying on the page.
If that worked, mute your audio then open another tab (keeping the original open) and load the same file. You should now be able to see a second video.
Troubleshooting tip: If there's no video showing up on the page, open the "console" tab in your browser tools (command+option+i on Mac, CTRL+i on Windows) and check for errors. The most likely issue is that your OpenTok API key, session ID, or token is not set up properly. Since you hardcoded your credentials, it's also possible that your token has expired.
I Know That Look
Now we can see and hear participants, but what is their face telling us that their mouth isn't? Let's add a button that allows us to analyze each participant.
In the index.html file, replace the comment that says <!-- Footer will go here --> with the following:
<footer>
    <button id="analyze" type="button" onclick="processImages();">Analyze</button>

    <ul>
        <li name="em-angry"><i class="em em-angry"></i> Angry</li>
        <li name="em-frowning"><i class="em em-frowning"></i> Contempt</li>
        <li name="em-face_vomiting"><i class="em em-face_vomiting"></i> Disgust</li>
        <li name="em-fearful"><i class="em em-fearful"></i> Fear</li>
        <li name="em-grin"><i class="em em-grin"></i> Happiness</li>
        <li name="em-neutral_face"><i class="em em-neutral_face"></i> Neutral</li>
        <li name="em-cry"><i class="em em-cry"></i> Sadness</li>
        <li name="em-astonished"><i class="em em-astonished"></i> Surprise</li>
    </ul>
</footer>
This adds a footer at the bottom of the page with an "Analyze" button and an unordered list that we'll use as a legend between emojis and sentiments.
Now let's add the JavaScript to handle our sentiment analysis. Add the following to the bottom of the app.js file.
function assignEmoji(emojiClass, index) {
  var widgets = document.getElementsByClassName('OT_widget-container');
  emotions.push(emojiClass);

  var sentimentDiv = document.createElement("div");
  sentimentDiv.classList.add("sentiment");
  sentimentDiv.classList.add("em");
  sentimentDiv.classList.add(emojiClass);

  widgets[index].appendChild(sentimentDiv);

  const legendEl = document.getElementsByName(emojiClass);
  legendEl[0].classList.add('used');
}

function processEmotion(faces, index) {
  // for each face identified in the result
  for (i = 0; i < faces.length; i++) {
    const maxEmotion = Object.entries(
      faces[i].faceAttributes.emotion
    ).reduce((memo, [key, value]) =>
      memo[1] > value ? memo : [key, value]
    );

    let emojiClass = 'em-neutral_face';
    switch (maxEmotion[0]) {
      case 'angry':
        emojiClass = 'em-angry';
        break;
      case 'contempt':
        emojiClass = 'em-frowning';
        break;
      case 'disgust':
        emojiClass = 'em-face_vomiting';
        break;
      case 'fear':
        emojiClass = 'em-fearful';
        break;
      case 'happiness':
        emojiClass = 'em-grin';
        break;
      case 'sadness':
        emojiClass = 'em-cry';
        break;
      case 'surprise':
        emojiClass = 'em-astonished';
        break;
      default:
        break;
    }
    assignEmoji(emojiClass, index);
  }
}

// Gets a <video> element and draws it to a new
// canvas object. Then creates a jpeg blob from that
// canvas and sends to Azure Face API to get emotion
// data.
function sendToAzure(video, index) {
  // Get the stream object associated with this
  // <video> element.
  var stream = streams[index];

  var canvas = document.createElement("canvas");
  canvas.height = stream.videoDimensions.height;
  canvas.width = stream.videoDimensions.width;

  var ctx = canvas.getContext("2d");
  ctx.drawImage(video, 0, 0, canvas.width, canvas.height);

  var dataURL = canvas.toDataURL("image/jpeg", 0.8);
  var blob = dataURItoBlob(dataURL);
  var fd = new FormData(document.forms[0]);
  fd.append("canvasImage", blob);

  // Perform the REST API call.
  var uriBase = `${azure_face_api_endpoint}/face/v1.0/detect`;

  // Request parameters.
  var params = 'returnFaceId=true&returnFaceLandmarks=false&returnFaceAttributes=emotion';

  const xhr = new XMLHttpRequest();
  xhr.open('POST', `${uriBase}?${params}`);
  xhr.responseType = 'json';
  xhr.setRequestHeader('Content-Type', 'application/octet-stream');
  xhr.setRequestHeader("Ocp-Apim-Subscription-Key", azure_face_api_subscription_key);

  xhr.send(blob);

  xhr.onload = () => {

    if (xhr.status == 200) {
      processEmotion(xhr.response, index);
    } else {
      var errorString = `(${xhr.status}) ${xhr.statusText}`;
      alert(errorString);
    }
  }
}

// Reset emojis and loop through all <video> elements and call
// sendToAzure
function processImages() {
  emotions = [];
  var sentiments = document.getElementsByClassName('sentiment');
  var usedListItems = document.getElementsByClassName('used');
  var videos = document.getElementsByTagName('video');

  // Remove any existing sentiment & emotion objects
  if (sentiments.length > 0) {
    for (s = 0; s < sentiments.length; s++) {
      sentiments[s].remove();
    }
  }
  if (usedListItems.length > 0) {
    for (l = 0; l < usedListItems.length; l++) {
      usedListItems[l].classList.remove('used');
    }
  }

  for (v = 0; v < (videos.length - 1); v++) {
    sendToAzure(videos[v], v);
  }
}
Let's review what this code does.
The assignEmoji method takes in a CSS class associated with the emotion for a specific video stream and the index of that stream in our UI. It does the following:
- Adds the provided class to our
emotionsarray - Adds a div over the appropriate video panel with the class for the emoji to display
- Adds a
usedclass to theliin our footer for that emoji so that it will display in the legend
The processEmotion method receives the payload of face data from the Azure Face API and identifies the emotion with the highest ranking. It then calls assignEmoji with the appropriate CSS class for that emotion and the index of the video it is processing.
The sendToAzure method receives an HTML video element and the index of that video object on our page. It gets the stream associated with that video element and then creates an HTML canvas in the same dimensions as the stream. Next, it draws a capture of the stream to the new canvas and sends an XMLHttpRequest to the Azure Face API with the image it created. The Azure Face API will return a JSON object that we will then send to the processEmotion method.
Lastly, the processImages method clears any existing emojis from the UI and gets all HTML video tags in the DOM and sends them to the sendToAzure method to be processed. This method is called by our "Analyze" button in the footer.
What Are You Really Thinking?
Now when we open the index.html page in our browsers we can press the "Analyze" button to see what emotion Azure's Face API has identified. There are a few limitations at the moment. For instance, if Azure Face API recognizes two faces in the frame it will return data for both, but our code currently only adds an emoji for the first.
Also, I'm not certain, but it may not work for teenagers. I made my teenage daughter test it dozens of times but it only returned "disgust" and "contempt" as the emotions. Maybe this wasn't such a good idea. Maybe it's better to not know what they really think. ??

Further Reading
Want to learn more about using sentiment analysis with Nexmo? Check out the following blog posts:


Oldest comments (1)
That was a very detailed tutorial. Thanks for sharing. I compiled a list of API for those interested in sentiment analysis using api. I hope it is useful.