What Is Elastic Beanstalk?
Elastic Beanstalk is a cloud computing service provided by AWS that makes it easier to deploy, manage, and scale web applications and services.
With Elastic Beanstalk, you can quickly deploy your applications and let AWS handle the underlying infrastructure requirements.
Elastic Beanstalk supports various programming languages and frameworks, including Java, .NET, Python, Ruby, and Node.js.
To get started with Elastic Beanstalk, you simply upload your application code and Elastic Beanstalk handles the deployment, scaling, and monitoring of your application.
Elastic Beanstalk automatically provisions and configures the necessary infrastructure components such as EC2 instances, load balancers, and databases.
Elastic Beanstalk offers various deployment options, including a web-based console, command-line interface, and APIs.
You can also integrate Elastic Beanstalk with other AWS services such as Amazon RDS, Amazon S3, and Amazon CloudWatch for more advanced use cases.
Overall, Elastic Beanstalk provides a simple and convenient way to deploy and manage web applications on AWS without worrying about the underlying infrastructure.
Why To Use It?
The Elastic Beanstalk service was created for making the deployment process easy for developers.
As a developer, you don’t have to worry about setting up the infrastructure, load-balancing, auto-scaling, etc.
These things are taken care of by AWS and you just have to worry about writing code.
Pre-Requisites
To use Elastic Beanstalk, you will need an AWS account and some familiarity with AWS.
You will also need to have your application code ready and have it in a deployable format, such as a JAR file for Java applications or a ZIP file for Python, or Node applications.
Additionally, you will need to have a basic understanding of the programming language and framework your application is built on.
Deployment Process
In this article, we will be deploying a sample Node application using Elastic Beanstalk service.
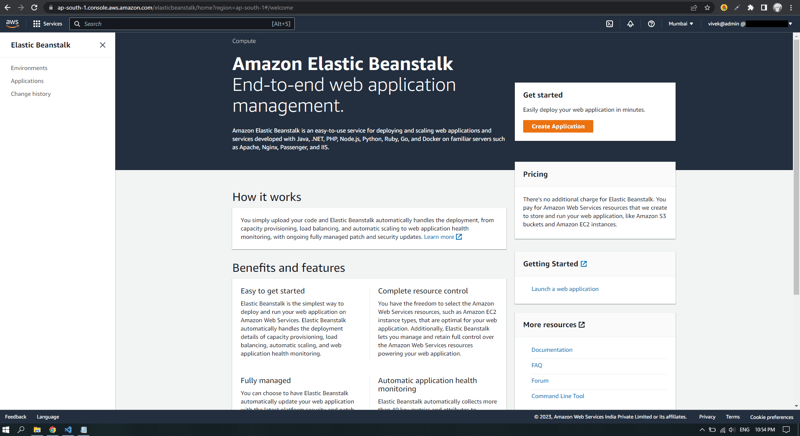
- Navigate to the Elastic Beanstalk service in AWS and you can see the get started page. To create a fresh new application, click on the
Create Applicationoption.
- To create an Elastic Beanstalk application, follow these steps:
- Navigate to the Elastic Beanstalk service in AWS and click on "Create Application".
- Enter a name for your application and select the platform and language on which your application is built on.
- Choose the environment type and configuration options that best fit your needs.
- Upload your application code and configure any necessary settings, such as environment variables or database connections.
- Review and confirm your settings, then click
Create Application.
Once your application is created, Elastic Beanstalk will automatically provision the necessary infrastructure and deploy your application.
You can monitor and manage your application through the Elastic Beanstalk console or API.
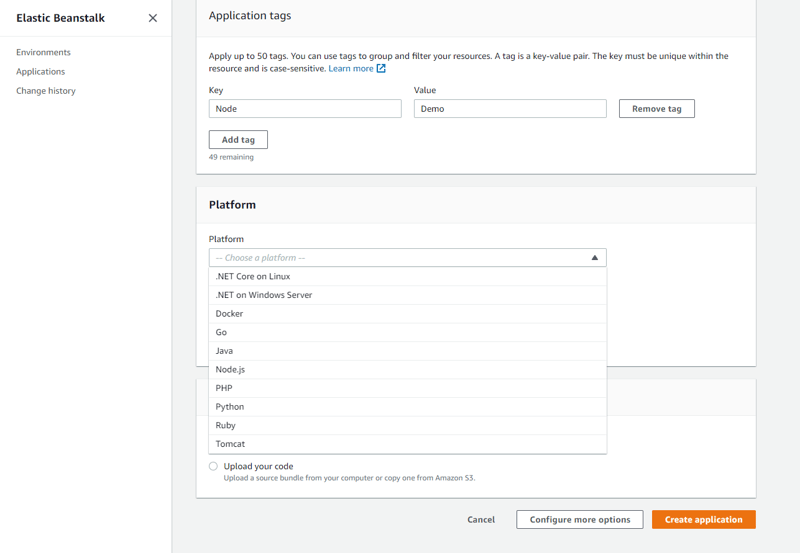
As you can see in the above image, Elastic Beanstalk supports different platforms including .NET, Java, Python, Node, etc.
I will select Node.js as my platform and use a sample application code for initial deployment. Here is the complete configuration.
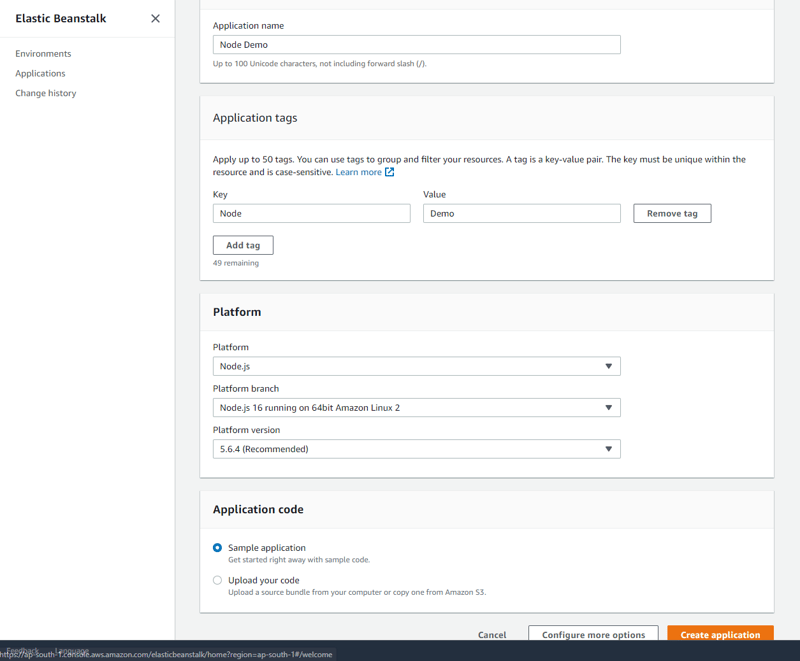
Now, click on the create application option to start the deployment process.
The deployment process takes some time between 3-5 minutes. As the deployment process continues, the Elastic Beanstalk service creates the following resources automatically -
- EC2 Instance
- Load Balancers
- Auto Scaling Groups
- S3 Buckets
- CloudWatch Alarms
- Once the application is successfully created and deployed, you can see the following screen
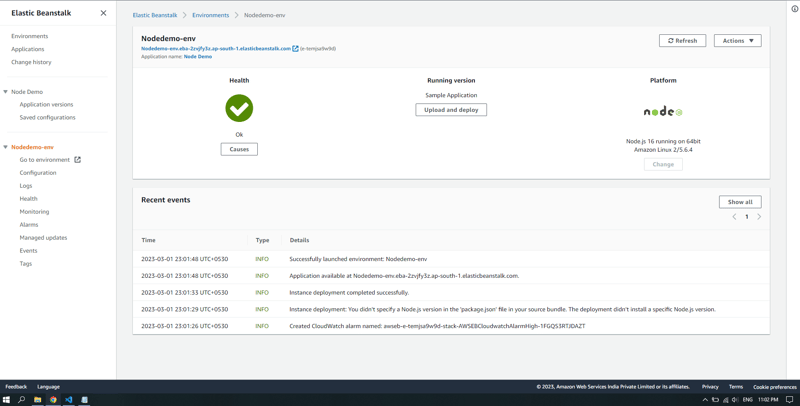
The green check icon indicates that the application is successfully deployed on the service.
You can click on the Go to environment option to see the deployed application.
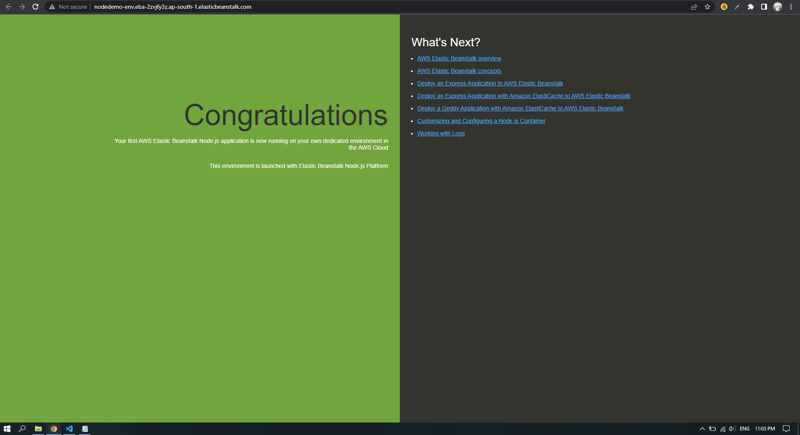
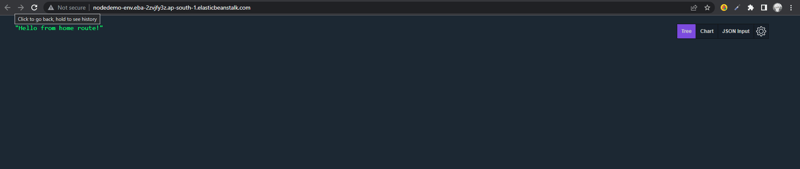
In our case, I used a sample application for initial deployment and it looks like this when I open the link
The URL in the address bar is a public URL of your deployed application, you can use DNS services to route to your custom domains as well.
Deploying Custom Node Application
Till this point, we successfully created and deployed a sample Node application using Elastic Beanstalk service. Now, let’s look at how we can deploy our custom code using the same.
The service allows developers to deploy a zipped version of build files or source code directly on the web.
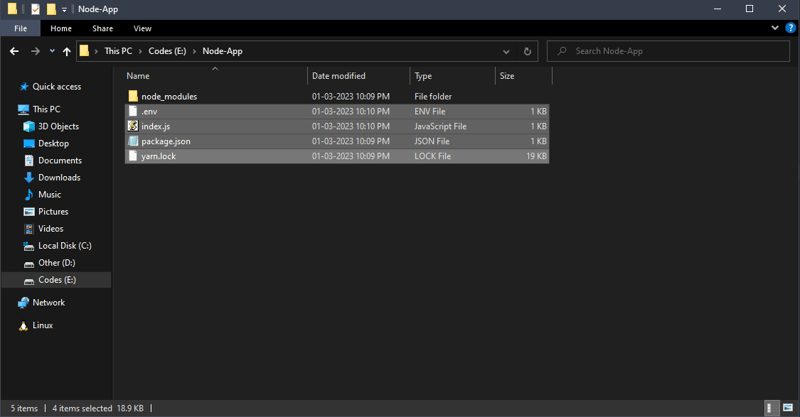
Here I have a sample Node and Express API application.
- Create a zip folder of all files from your project excluding
node_modules.
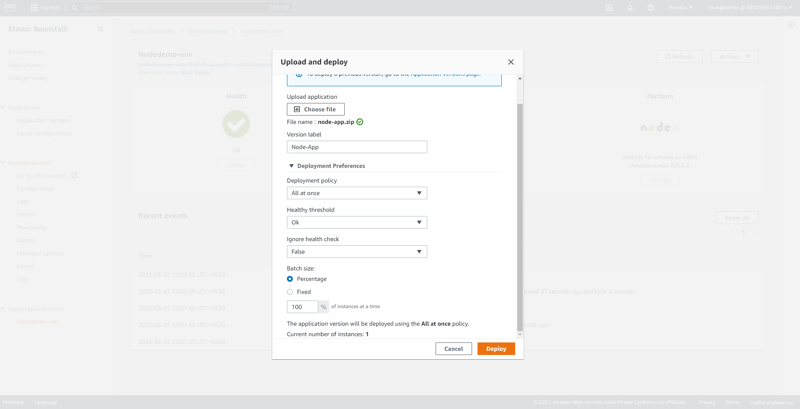
- Click on the
Upload and Deployoption to deploy your custom application on the service.
- After clicking on the
Upload and Deployoption, it will open a prompt where you can upload your zip file and add any optional configuration.
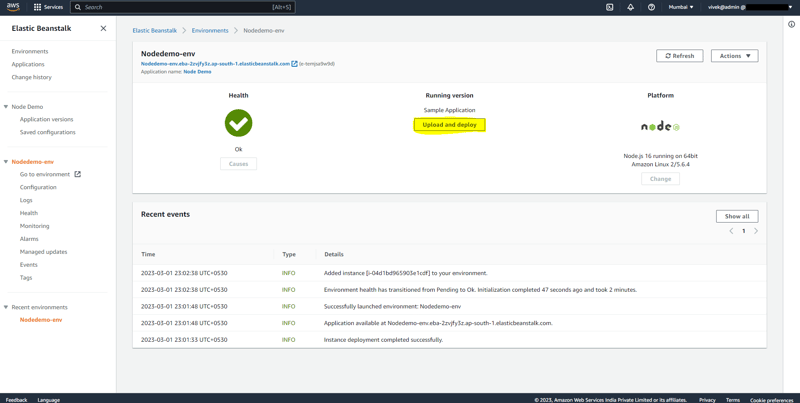
- After successful deployment, you can see the following screen.
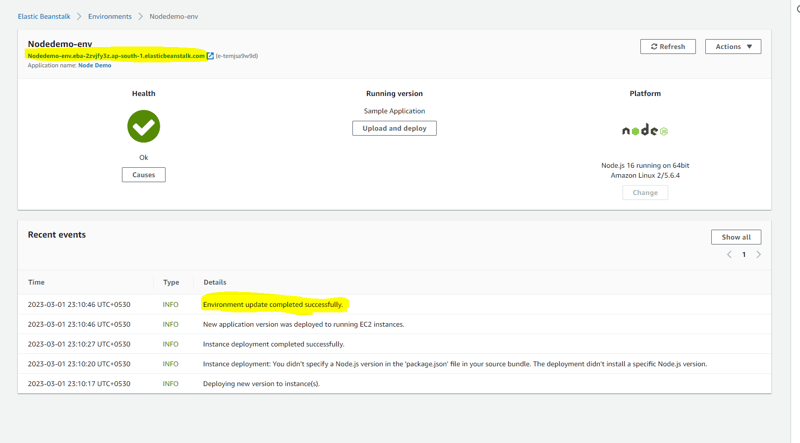
The green check icon indicates that the operation was successful. If you see a red icon then it means some error occurred during the deployment process.
You can see detailed information in Recent Events and Logs.
To browse your application, you can click on highlighted URL in the above image or click on the Go to environment option from the left pane.
This URL is public and can be used for browsing your application.
- As you can see in the below images, I can successfully navigate through all routes specified in my Node + Express API application.

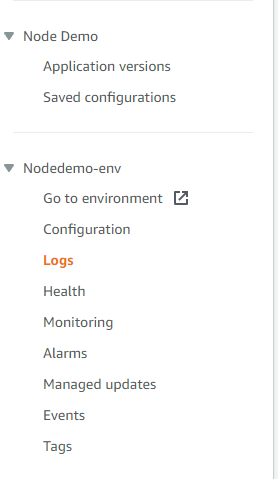
- Elastic Beanstalk service provides more options including log management, application health and monitoring, managing application event and updates, and setting up alarms. You can explore these features according to your needs.
More Deployment Options
In this article, we deployed a sample Node + Express API application by manually uploading the build folder.
AWS provides the following different ways to automate the deployment process using Elastic Beanstalk service -
- Elastic Beanstalk CLI
One option for automating the deployment process with Elastic Beanstalk is to use the Elastic Beanstalk Command Line Interface (CLI).
The CLI allows you to deploy and manage your applications from the command line and can be used to integrate Elastic Beanstalk with other tools and processes.
You can read more about CLI here.
- AWS CodePipeline for CI/CD
AWS provides a Continuous Deployment (CD) service for Elastic Beanstalk called AWS CodePipeline.
With CodePipeline, you can automate the deployment process of your Elastic Beanstalk application by creating a pipeline that includes stages for building, testing, and deploying your application.
You can also integrate CodePipeline with other AWS services such as AWS CodeCommit, AWS CodeBuild, and AWS CodeDeploy for more advanced use cases.
To learn more about CodePipeline, you can visit the official documentation.
Deleting Deployments
There are no charges required to use Elastic Beanstalk service but you will have to pay for the resources (EC2 and S3) created to store and run your application.
In this section, we will see how to clean up your deployments and remove resources to avoid billing for unused/stale deployments.
- You can start by deleting application versions from the Elastic Beanstalk dashboard page.
Select applications that you want to delete and click on Actions to proceed with the deletion.
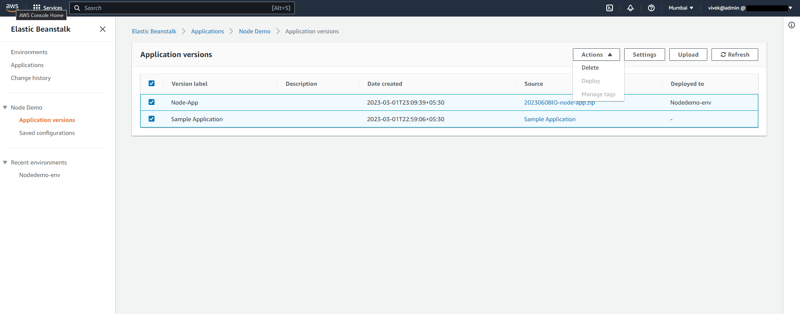
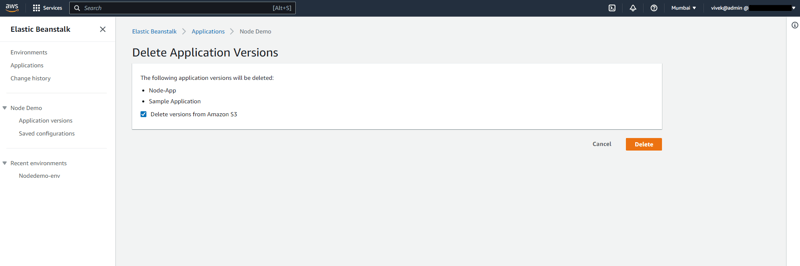
On the next screen, you will see confirmation for deletion.
Make sure to select Delete versions from Amazon S3 to remove bucket objects created during the deployment process and click on delete to remove selected applications.
- You can then remove the application environment from the dashboard.
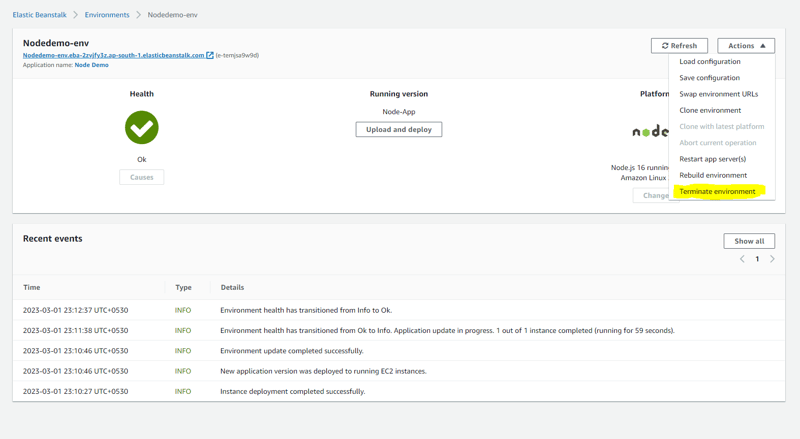
- Click on the
Terminate environmentoption to stop the current deployment. Upon clicking, it will open a prompt for confirming environment termination. Fill in the environment details and click onTerminateto stop the deployment.
Now you have successfully removed deployment for selected applications. The cleanup of Elastic Beanstalk removes all the created resources automatically except for S3 buckets.
You have to manually delete S3 buckets from the S3 console.
Summary
This article provides an overview of Elastic Beanstalk, a cloud computing service provided by AWS that simplifies the deployment, management, and scaling of web applications and services.
The article includes instructions for deploying a sample Node application and custom Node and Express API application using Elastic Beanstalk.
Additionally, the article covers deployment options, including Elastic Beanstalk CLI and AWS CodePipeline, and provides instructions for deleting deployments to avoid billing for unused resources.


Oldest comments (5)
Nice article Vivek, Try to crosspost it across multiple platforms using Scattr.io
Thanks! Will definitely check out.
Nice article Vivek :)
Thank you!
Very good article! I did one similar using Quarkus.