The challenges with Security Headers for WordPress
Beyond the regular challenges of CSP, Configuring a strong Content-Security-Policy for your WordPress site has various challenges, including:
- Maintaining different security headers policies for different parts of your site – Client facing (Ads tracking) – WP-admin (more strict policy) – Checkout pages (Woocommerce, Magacart).
- Coming up with the correct policy that protects the site, but doesn’t break it Self discovery of all the dozens of directives needed for every different service and feature used by your site can be time consuming and error-prone.
- Updating the policies Manual pushing of headers is also time consuming and error-prone.
The RapidSec WordPress Plugin for CSP and Security Headers solves all these challenges simply and effectively.
This article will explain in detail how to set up CSP protection and monitoring for your WordPress site – based the blog.rapidsec.com WordPress implementation, in 8 easy steps:
1. Install the RapidSec Plugin
Install the RapidSec plugin from one of these sources:
- Download from the WordPress Marketplace RapidSec Listing
- A zip that you can download the Latest RapidSec WordPress Plugin.
- Directly in your blog WP-admin: Plugins -> Add New -> (search) RapidSec -> Install Now

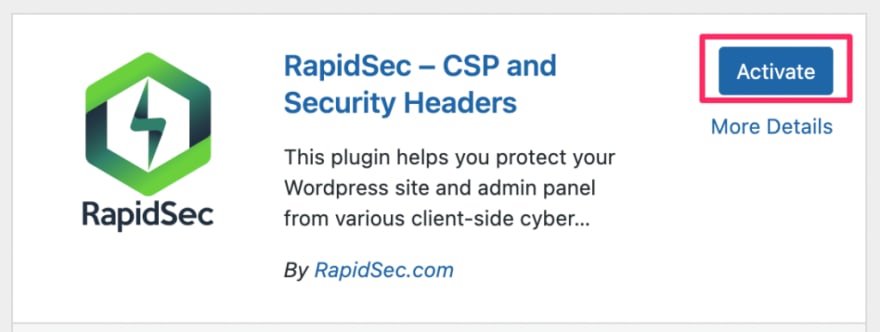
Now, go ahead and Activate the plugin:
We suggest enabling auto-updates from the plugins page so that you are running the latest and best version of the plugin, and then visit the RapidSec Settings page:

The plugin support two RapidSec project tokens: one for the front end site (which your users can see), and another for the /wp-admin/ section of the site. A third integration for the Woo-commerce cart is coming soon.

2. Create Your RapidSec Projects

In order to get the project tokens – start by Signing up to RapidSec.com – you can use either Google Login or a simple username-password. There is a 14 day free trial with (almost) unlimited access, and a generous free tier after that.
Note: many RapidSec customers sign up for the root account with a shared account such a security@yourcompany.com , and later send individual invites to team members
Give your project a name and click Create Project :


Next:
Choose the WordPress Plugin option
Copy the Token for the production environment (or other if you are first integrating another environment).
3. Add your Token to the WordPress plugin

Next:
Paste the front-end Token
Click “Check” and make sure you see the “Version 0” message (if this is a new integration).
Optionally lower the policy fetching interval for the time of the integration.
Save Changes!
4. Validate that your integration worked
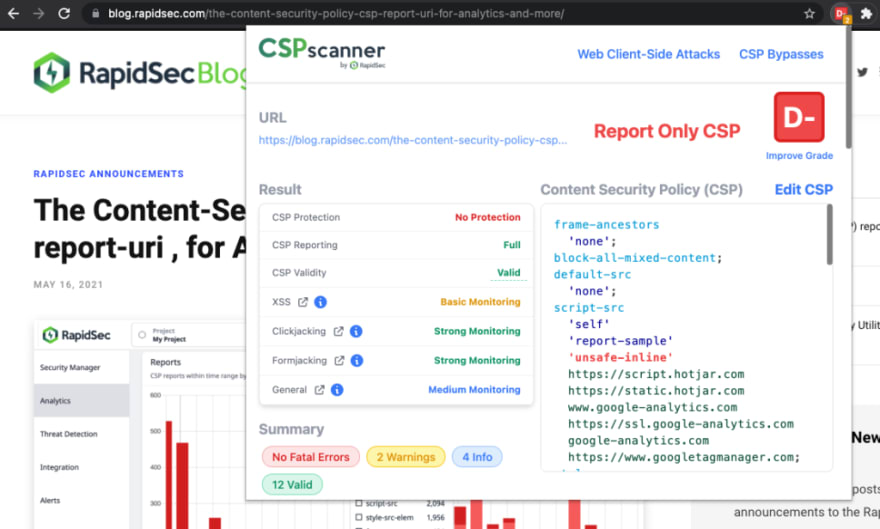
Open the homepage of your site (or any other page on the site front-end that is facing the users). You can use the CSP scanner extension to check if a Content-Security-Policy-Report-Only has been set to your site. You can also use the online CSPscanner.com utility.
Another way to validate the integration is to open the developer console and see wether it is activating “Report-Only” Content-Security-Policy reports.

Notes:
- Make sure that you browse the site in multiple routes, so that you invoke a wide CSP violations (in report only mode), which will help RapidSec map out all the directives needed for your content security policy.
- Make sure that you visit the site from incognito (not logged in as the admin), and disable ad / tracking blocker extensions on your browser when scanning through the site. This will make sure that legitimate parts of the site are mapped out.
5. Build your first CSP version
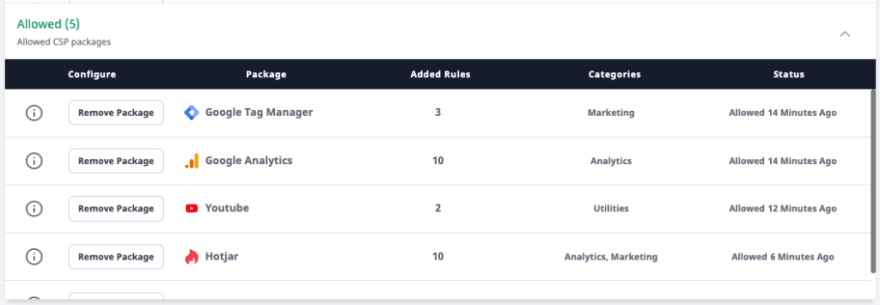
Your RapidSec UI should now unlock the “Security Manager” – where you will build your first CSP tailored for your site. In this case – we see that there are many violation types created multiple services: Hotjar, Google Tag Manager, Google fonts, Google Analytics, Youtube (for embedded videos). Many people who try to build a Content-Security-Policy without RapidSec, have a hard time mapping out all these needed directives. For example, Hotjar needs 10 different directives allowed in your policy – some of them with * which make them even harder to properly integrate.

This is why RapidSec allows CSP packages for dozens of popular services.
Lets add Hotjar via it’s package:


We also add Google Tag Manager, Google Analytics, Google fonts, and Youtube in a similar way, which has cleared out the “noise” from the reports:
6. Publish your new CSP
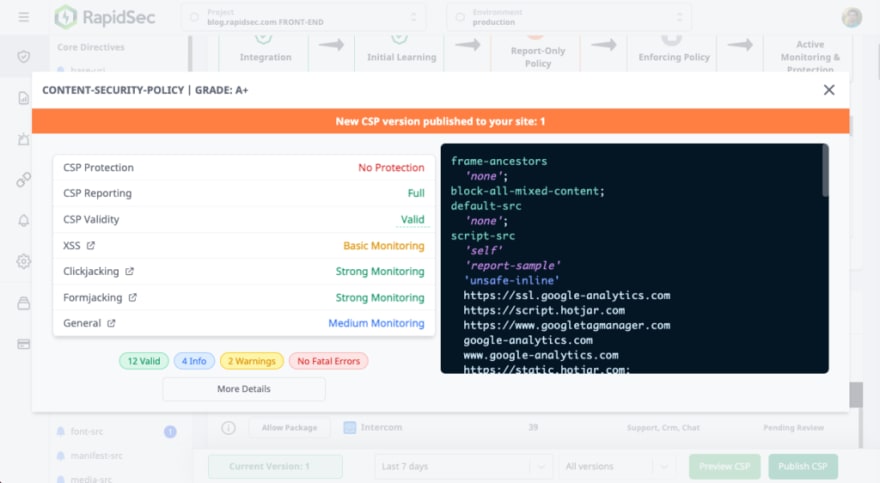
The Security Manager Bottom section shows you your Draft 1 CSP version:
![]()
Click Preview CSP to see what your version looks like, or just Publish CSP to deploy to your site front end. Don’t worry, there is no risk as this is still a learning Report-Only policy.
Now refresh your site, and you will be able to see the new policy in the CSP Scanner Extension.
7. Refine your CSP

Now that you have your first version live, let’s see how we can enhance it further.
There are 4 pending items to review.
For this simple tutorial, we won’t review the script-src (it’s explained inside the product),
We will clean the style-src, img-src, and font-src.
Styling Directives (Style-src):

Content Directives (img-src, font-src):
Generally, you can be more permissive with content directives.


![]()
Don’t forget to publish again!
Now let your CSP do some learning – it needs to also map out some real traffic by your users, before you move further to Enforced Policy. More on that in a future blot post – feel free to request specific topics in the comments.
8. Integrate your Wp-Admin
Repeat steps 2 to 8 to create a separate project and token for your Admin part of the WordPress site. This is generally easier, as the admin section has fewer users and components (less packages and features need to be allowed).
Securing your WordPress admin panel is crucial agains XSS and supply chain attacks that could lead to Admin account takeover.
Closing thoughts
In this article you learned how to integrate the RapidSec WordPress plugin into your site, while tackling the major obstacles with easy
- Clear separation for maintaining different security headers policies for different parts of your site Create different RapidSec projects for the front-end (facing the users) and the Wp-Admin
- Coming up with the initial policy RapidSec has prebuilt packages for dozens of popular services, and in addition ability to easily create custom rules, based on what is happening in your site.
- Updating the policies Easily publish new versions of your policies in 1 click. The system includes version control and analytics to make life even easier for you.
If you haven’t yet, Sign Up for A Free RapidSec Trial and start protecting your site and users.
Become CSP Compliant Today
RapidSec CSP and Security Headers provide audit-ready evidence for enterprise audits, with an easily manageable suite.
[
Book a Demo
](https://app.rapidsec.com/book-a-demo)
The post Setting up a Content-Security-Policy for WordPress using RapidSec first appeared on RapidSec Blog.


Top comments (0)