
CRUD (Create, Read, Update and Delete) operations are an essential part of every modern application. Most moderns apps today tend to make use of these operations. For end-users, CRUD operations allow them to fill out forms, edit data, manage their admin panels, user settings, and so on, and in this tutorial, we would look at how we can implement these operations using Flutter and Firebase.
GOAL
In this article, we’ll be building a Todo List App and readers will learn the mode of operation of CRUD functionality, and how to easily integrate it for use in an application.
Prerequisites
To follow up with this tutorial, background knowledge of Flutter is required. Also, you need to have:
- Latest Flutter SDK installed on your machine
- Firebase Account
What is Firebase?
Firebase is a NoSQL database program that stores data in a JSON-like format. It is a Backend-as-a-service (Baas) developed by Google to help enable developers to develop Android Applications, IOS Applications, Web Applications.
Why Firebase?
Firebase makes app development relatively easy. With Firebase, one can focus on developing mobile or web applications this is because the internal functions needed to make the app interactive are being handled by the Firebase Interface. Therefore, you have more time to yourself developing the apps that users are going to want to use.
Setting Up Firebase
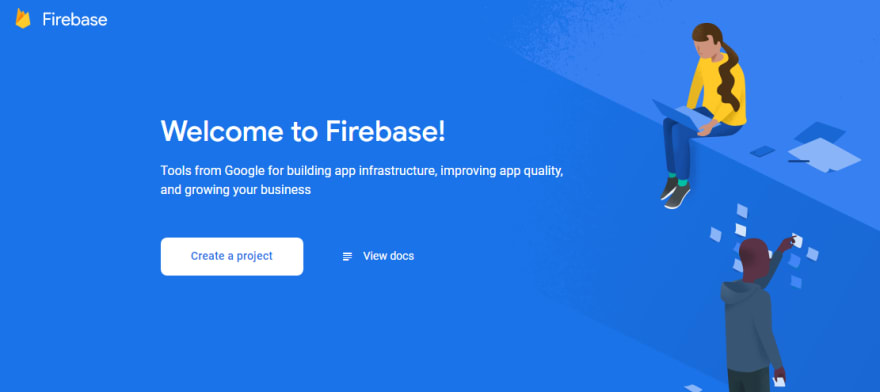
If you are new to Firebase, head over to Firebase to get started in creating your account and creating a Firebase project.
Creating A Flutter Project
In your desired text editor or IDE (I’ll be using VS Code for this tutorial), open the terminal and type the following:
flutter create todo_app
cd todo_app
This creates a flutter project with the name todo_app and this is where we will write the User Interface of our Todo List Application.
File Structure

Building The User Interface
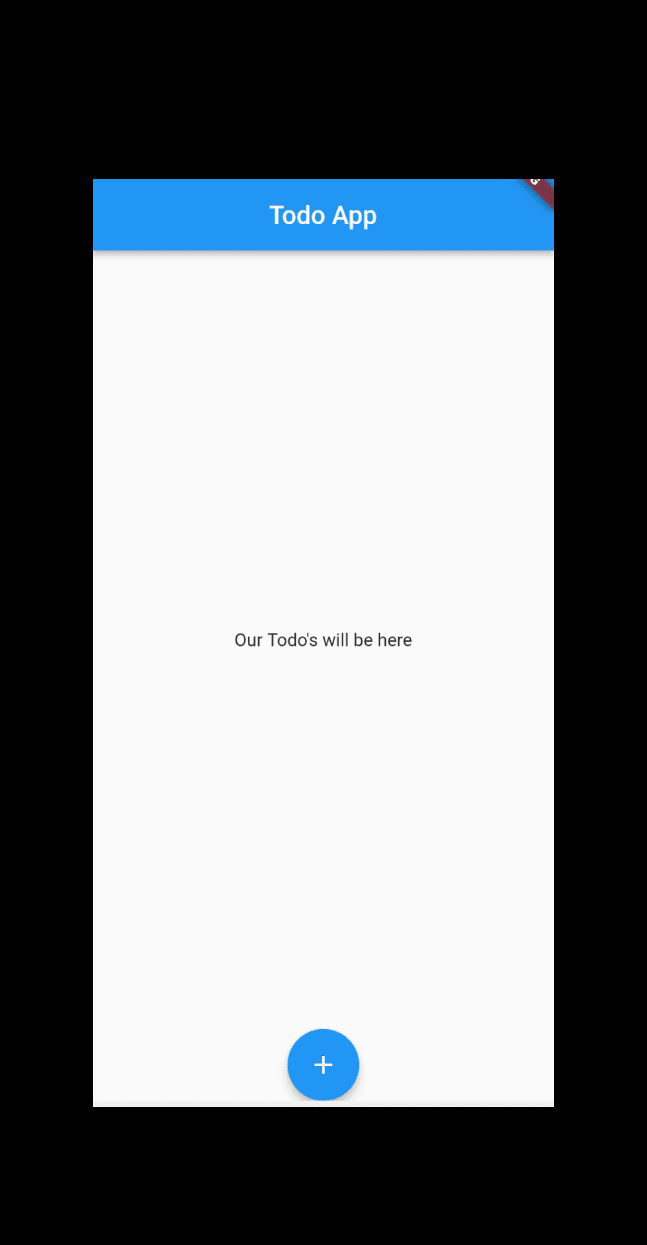
Here, I do not depend on the UI. We just need to consider the functionalities. This is the UI of our app written in the main. dart file:
Getting Firebase Plugins
Here we will add the firebase plugins to our flutter project. The first plugin firebase_core is a Flutter plugin to be used to access the Firebase Core API, which enables connecting to multiple Firebase apps. While the second plugin cloud_firestore is a Flutter plugin used to access the Cloud Firestore API.
In your terminal enter the following code:
    flutter pub add firebase_core
    flutter pub add cloud_firestore
This will add firebase dependencies in our `pubspec.yaml file as shown below:

Once the installations are complete, import them into your main.dart file as shown below:
import 'package:firebase_core/firebase_core.dart';
import 'package:cloud_firestore/cloud_firestore.dart';
Copy and Paste the code below on your main. dart file
import 'package:flutter/material.dart';

import 'package:firebase_core/firebase_core.dart';
import 'package:cloud_firestore/cloud_firestore.dart';

void main() async {
  WidgetsFlutterBinding.ensureInitialized();
  await Firebase.initializeApp();
  runApp(const MyApp());
}
class MyApp extends StatelessWidget {
  const MyApp({Key? key}) : super(key: key);
  // This widget is the root of your application.
  @override
  Widget build(BuildContext context) {
    return MaterialApp(
      theme: ThemeData(
        primarySwatch: Colors.blue,
      ),
      home: const MyHomePage(),
    );
  }
}
class MyHomePage extends StatelessWidget {
  const MyHomePage({Key? key}) : super(key: key);
  @override
  Widget build(BuildContext context) {
    return Scaffold(
      bottomNavigationBar: FloatingActionButton(
        onPressed: () {
          showModalBottomSheet(
            context: context,
            builder: showBottomSheet,
          );
        },
        child: const Icon(Icons.add),
      ),
      appBar: AppBar(
        title: const Text('Todo App'),
        centerTitle: true,
      ),
      body: Center(child: Text('Our Todo Will Be Here')),
    );
  }
}
Widget showBottomSheet(BuildContext context) {
  String? value;
  return Padding(
    padding: const EdgeInsets.only(top: 20),
    child: Column(
      children: [
        SizedBox(
          width: MediaQuery.of(context).size.width * 0.9,
          child: TextField(
            decoration: const InputDecoration(
              border: OutlineInputBorder(),
              labelText: 'Add Todo',
              hintText: 'Enter An Item',
            ),
            onChanged: (String _val) {
              value = _val;
            },
          ),
        ),
        TextButton(
            style: ButtonStyle(
                backgroundColor:
                    MaterialStateProperty.all(Colors.lightBlueAccent)),
            onPressed: () {
              // Todo: The Create Functionality will be here
            },
            child: const Text(
              'ADD',
              style: TextStyle(color: Colors.white),
            ))
      ],
    ),
  );
}
In the code above, we have an asynchronous function that initializes our Firebase. We need to do that otherwise, we will have an error.
We also have a stateless widget that returns a Scaffold and we also have a button where we can add our to-do list items in our app.
Creating A Firebase Project
Navigate your browser to Console to go to the firebase console so that we can create our firebase project.
Click on the Create A Project button to start creating our firebase project
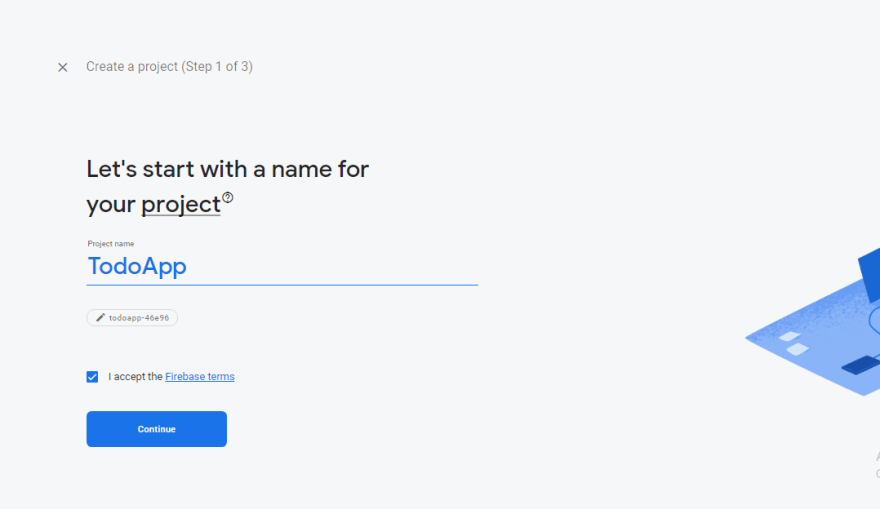
Add the desired name of our project in my case TodoApp and also accept the Firebase terms and hit continue.

Enable Google Analytics for your project and hit continue.

Choose Your Location and accept the Google Analytics Terms and hit the Create Project button to continue.

This will create resources that we can use in creating our application. Hit the continue button when completed.
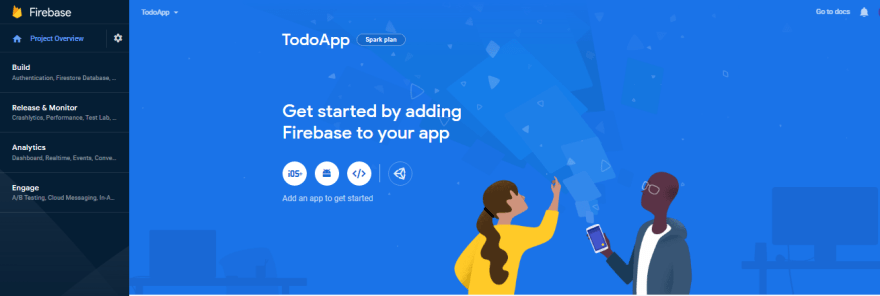
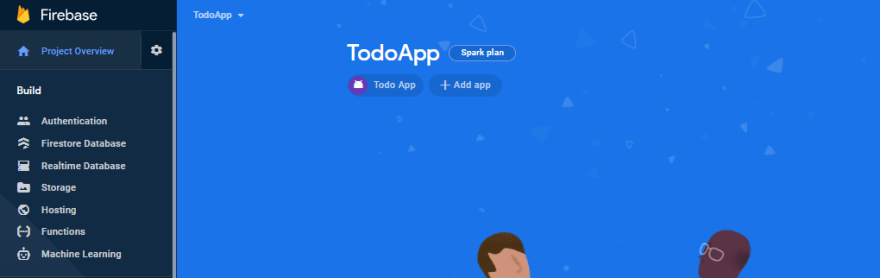
This takes us to our firebase project page, you can see the name of our app above (TodoApp in my case).
Adding Firebase Dependencies To Our Flutter Project
Now we will add or register an app to our firebase project click on the android logo as seen on the image above to register your android app.
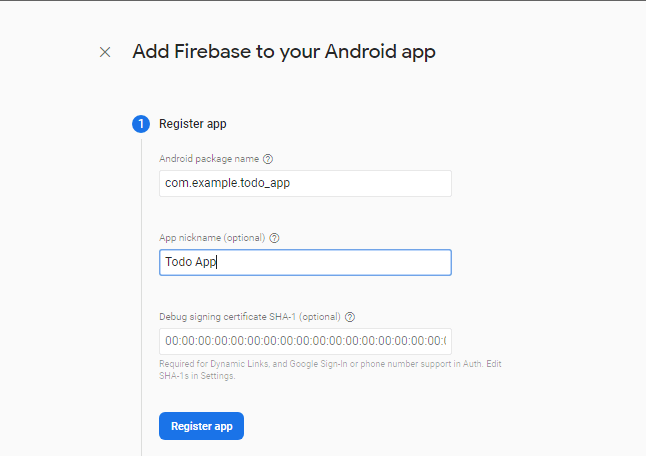
To get your android package name should follow this format com.example.your-flutter-project-name. In my case com.example.todo_app. Add a nickname of your choice and click on the Register App button.

Next, download the google-services.json file and it to your app module of our flutter project as shown below:

Hit The Next Button if you have done that.

In our android level build.gradle file, add the following code in your flutter project in my case I have this:

Here I have added the codes in our build.gradle file. Then head over to the app-level build.gradle file(android>app>build.gradle) and add the code as seen above. In my case, I have this:

Note: Firebase uses a minSdkVersion of 19 upwards and set the multiDexEnabled true to add multidex support.
If that is completed go back to firebase and hit the Next button to continue.

Hit the Continue To Console button to continue.
I’ll be building the android app only. For IOS users registration of your app is easy and almost the same step in registering our android app.
Now run the code. If everything runs perfectly then congratulations you just added Firebase to our Flutter project. If you still encounter an error, remember to change your minSdkVersion 19 and also add the MultiDexEnabled true.
Creating A Database
On the Build Panel, click on the Firestore Database so we can create a database and a collection
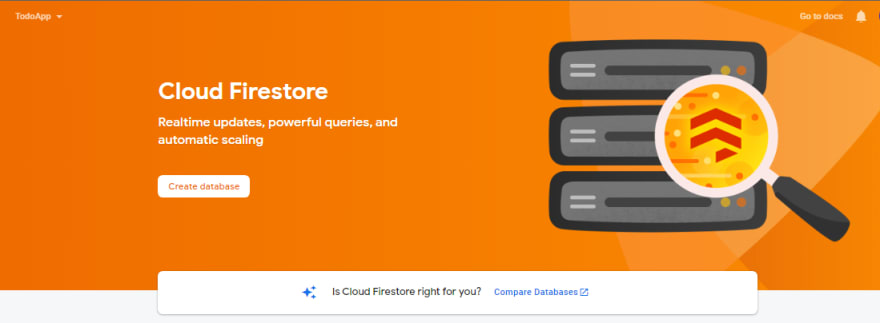
Click on the Create database button to continue.

While creating the database click on start in test mode and hit the Next button to continue.

In setting the cloud firestore location, you can choose a location of your choice. I will be using the nam5(us-central) as seen above. Click the Enable button when done.
Creating A Collection

This is our database and here you can add a lot of features to your app. We will create a Collection for our database. Click on the Start collection to continue.

Set the Collection ID and hit Next.

For the Document ID click on Auto-ID and it will generate one for you add a field and set a value and click Save.

Here you can see that we have added a collection with the name todos and it has a field of buy milk.
Implementing Operations
Here, we will begin Implementing our operations to make our app functional.
Creating/Adding An Item
Copy Paste the code below:
import 'package:flutter/material.dart';
import 'package:firebase_core/firebase_core.dart';
import 'package:cloud_firestore/cloud_firestore.dart';

void main() async {
  WidgetsFlutterBinding.ensureInitialized();
  await Firebase.initializeApp();
  runApp(const MyApp());
}
final db = FirebaseFirestore.instance;
String? value;

class MyApp extends StatelessWidget {
  const MyApp({Key? key}) : super(key: key);
  // This widget is the root of your application.
  @override
  Widget build(BuildContext context) {
    return MaterialApp(
      theme: ThemeData(
        primarySwatch: Colors.blue,
      ),
      home: const MyHomePage(),
    );
  }
}
class MyHomePage extends StatelessWidget {
  const MyHomePage({Key? key}) : super(key: key);
  @override
  Widget build(BuildContext context) {
    return Scaffold(
      bottomNavigationBar: FloatingActionButton(
        onPressed: () {
          showModalBottomSheet(
            context: context,
            builder: showBottomSheet,
          );
        },
        child: const Icon(Icons.add),
      ),
      appBar: AppBar(
        title: const Text('Todo App'),
        centerTitle: true,
      ),
      body: Text("Our Todo's will be here"),
      ),
    );
  }
}
Widget showBottomSheet(BuildContext context) {
  return Padding(
    padding: const EdgeInsets.only(top: 20),
    child: Column(
      // mainAxisAlignment: MainAxisAlignment.center,
      children: [
        SizedBox(
          width: MediaQuery.of(context).size.width * 0.9,
          child: TextField(
            decoration: const InputDecoration(
              border: OutlineInputBorder(),
              labelText: 'Add Todo',
              hintText: 'Enter An Item',
            ),
            onChanged: (String _val) {
              value = _val;
            },
          ),
        ),
        TextButton(
            style: ButtonStyle(
                backgroundColor:
                    MaterialStateProperty.all(Colors.lightBlueAccent)),
            onPressed: () {
              db.collection('todos').add({'todo': value});
              Navigator.pop(context);
            },
            child: const Text(
              'ADD',
              style: TextStyle(color: Colors.white),
            ))
      ],
    ),
  );
}
In line 9, we created an instance of our Firebase and passed it in the variable db. Line 10 will hold the value of our todo’s. Line 77 shows you how to add data to your Database. So if we click on the add button, the value of our textfield is stored in the database although we don't see it on our app if you head over to the database we created, you'll see the item added to our database.
Retrieving An Item
Firebase provides us with a DocumentSnapshot. To access these snapshots in our Flutter app, we are going to use a widget called StreamBuilder. The StreamBuilder widget listens for changes made in our database and displays those changes in our app.
StreamBuilder(
        stream: db.collection('todos').snapshots(),
        builder: (BuildContext context, AsyncSnapshot snapshot) {
          if (!snapshot.hasData) {
            return const Center(
              child: CircularProgressIndicator(),
            );
          }
          return ListView.builder(
            itemCount: snapshot.data?.docs.length,
            itemBuilder: (context, int index) {
              DocumentSnapshot documentSnapshot = snapshot.data.docs[index];
              return ListTile(
                title: Text(documentSnapshot['todo']),
                onTap: () {

                  showModalBottomSheet(
                    context: context,
                    builder: (BuildContext context) {
                      return showBottomSheet(context);
                    },
                  );
                },
                trailing: IconButton(
                  icon: const Icon(
                    Icons.delete_outline,
                  ),
                  onPressed: () {
                    // Here We Will Add The Delete Feature
                  },
                ),
              );
            },
          );
        },
      ),
In the body property, add the code above. Here we added a StreamBuilder widget that listens for changes in our app and displays those changes through the ListTile widget built by the Flutter team. Lastly, we checked to see if the snapshot has data before retrieving it because the stream can emit an empty snapshot.
Updating And Delete An Item
Here, we will add both the Update And Delete functionalities of our Todo App
import 'package:flutter/material.dart';
import 'package:firebase_core/firebase_core.dart';
import 'package:cloud_firestore/cloud_firestore.dart';

void main() async {
  WidgetsFlutterBinding.ensureInitialized();
  await Firebase.initializeApp();
  runApp(const MyApp());
}

final db = FirebaseFirestore.instance;
String? value;

class MyApp extends StatelessWidget {
  const MyApp({Key? key}) : super(key: key);
  // This widget is the root of your application.
  @override
  Widget build(BuildContext context) {
    return MaterialApp(
      theme: ThemeData(
        primarySwatch: Colors.blue,
      ),
      home: const MyHomePage(),
    );
  }
}
class MyHomePage extends StatelessWidget {
  const MyHomePage({Key? key}) : super(key: key);
  @override
  Widget build(BuildContext context) {
    return Scaffold(
      bottomNavigationBar: FloatingActionButton(
        onPressed: () {
          // When the User clicks on the button, display a BottomSheet
          showModalBottomSheet(
            context: context,
            builder: (context) {
              return showBottomSheet(context, false, null);
            },
          );
        },
        child: const Icon(Icons.add),
      ),
      appBar: AppBar(
        title: const Text('Todo App'),
        centerTitle: true,
      ),
      body: StreamBuilder(
        // Reading Items form our Database Using the StreamBuilder widget
        stream: db.collection('todos').snapshots(),
        builder: (BuildContext context, AsyncSnapshot snapshot) {
          if (!snapshot.hasData) {
            return const Center(
              child: CircularProgressIndicator(),
            );
          }
          return ListView.builder(
            itemCount: snapshot.data?.docs.length,
            itemBuilder: (context, int index) {
              DocumentSnapshot documentSnapshot = snapshot.data.docs[index];
              return ListTile(
                title: Text(documentSnapshot['todo']),
                onTap: () {
                  // Here We Will Add The Update Feature and passed the value 'true' to the is update
                  // feature.
                  showModalBottomSheet(
                    context: context,
                    builder: (BuildContext context) {
                      return showBottomSheet(context, true, documentSnapshot);
                    },
                  );
                },
                trailing: IconButton(
                  icon: const Icon(
                    Icons.delete_outline,
                  ),
                  onPressed: () {
                    // Here We Will Add The Delete Feature
                    db.collection('todos').doc(documentSnapshot.id).delete();
                  },
                ),
              );
            },
          );
        },
      ),
    );
  }
}
showBottomSheet(
    BuildContext context, bool isUpdate, DocumentSnapshot? documentSnapshot) {
  // Added the isUpdate argument to check if our item has been updated
  return Padding(
    padding: const EdgeInsets.only(top: 20),
    child: Column(
      children: [
        SizedBox(
          width: MediaQuery.of(context).size.width * 0.9,
          child: TextField(
            decoration: InputDecoration(
              border: const OutlineInputBorder(),
              // Used a ternary operator to check if isUpdate is true then display
              // Update Todo.
              labelText: isUpdate ? 'Update Todo' : 'Add Todo',
              hintText: 'Enter An Item',
            ),
            onChanged: (String _val) {
              // Storing the value of the text entered in the variable value.
              value = _val;
            },
          ),
        ),
        TextButton(
            style: ButtonStyle(
              backgroundColor:
                  MaterialStateProperty.all(Colors.lightBlueAccent),
            ),
            onPressed: () {
              // Check to see if isUpdate is true then update the value else add the value
              if (isUpdate) {
                db.collection('todos').doc(documentSnapshot?.id).update({
                  'todo': value,
                });
              } else {
                db.collection('todos').add({'todo': value});
              }
              Navigator.pop(context);
            },
            child: isUpdate
                ? const Text(
                    'UPDATE',
                    style: TextStyle(color: Colors.white),
                  )
                : const Text('ADD', style: TextStyle(color: Colors.white))),
      ],
    ),
  );
}
Here we added the Update and Delete Functionality for our app as seen in the code above. Here we added new arguments isUpdate which is of type bool and documtentSnapshot which is of type DocumentSnapshot and at the onTap property of our ListTile we passed isUpdate to be true because we want to update the item when we tap on the ListTile.
We used ternary-operators in lines 99 and also in lines 124-129 to display different values in our app.
Testing The Application
Conclusion
We have finally come to the end of this tutorial. We’ve learned how to build a CRUD app with Flutter and Firebase, and how to perform CRUD operations.
To check out the full code, visit the GitHub repository.


Top comments (0)