
How to Manage Secrets with GitHub Actions using Doppler.
Summary
Managing access and private keys with GitHub Actions is vital in managing continuous deployment and integration in building applications. Over time, there have been several inventions on how best to do this, but there’s always a risk of issues with workflows and mismanaging secrets for software developers and teams.
For this, Doppler has provided a better and easier way of managing secrets when managing application CI/CD with GitHub Actions. Throughout this tutorial, we’ll focus on using Doppler as an effective secret manager for managing our Node.js and React application with GitHub Actions.
Goals
In this post, you will learn how to build a simple Notes application with Node.js and React.js, connect it to GitHub actions for running CI/CD. We’ll then set up our project with Doppler to store our application’s secret keys instead of on GitHub Actions or even native .env files. At the end of this tutorial, you will learn how to use Doppler for managing secrets with Github Actions.
Introduction to Managing Secrets with GitHub Actions
One of the issues DevOps and Software Engineers have when running continuous integration and deployment with GitHub Actions is handing secret keys and tokens required for authenticating the application against them. For GitHub Actions, logging your application’s secret can be very lengthy and stressful; any mistake in logging an application’s secrets can result in a developer getting terminated and even cause the company to lose millions.
Intro To Doppler Secret Management
Doppler is a universal secret manager that aims to reduce the stress and issues associated with managing secrets with GitHub Actions. With Doppler, there is no need for teams to share and handle application secrets on GitHubActions. Doppler provides a CLI that gives developers a central environment of their application environment. Doppler also allows DevOps Teams and Engineers to access secrets from a single, and easy to use platform.
It’s also important to point out that Doppler supports all languages and tech stacks and is built to support all kinds of application types. One of such integrations is GitHub Actions for DevOps teams and Engineers. In our next section, we will look at managing our application’s secrets with Doppler on GitHub Actions.
Setup a MERN Stack App With Doppler Using GitHub Actions
In this section, we will learn how to manage application secrets on GitHub Actions with Doppler. In our application, we connected a Node.js powered backend in sending images and as a database for storing data from our application.
We also added the ability of users to choose which category of photos to select. Users will also be able to get random images from our API. All these will involve many API keys that our application’s front end will utilize. For our application’s env file, Doppler will be used to secure our application’s secrets.

In the image above, we have our application file structure, but our focus here will be our project’s .env file which contains all the secrets for our application to connect our server and image API. Inside our env file, we have:
REACT_APP_UNSPLASH_ACCESS_KEY=x_x4KNbXEt0xxxxxxxxxxxxxxxxxxx REACT_APP_UNSPLASH_SECRET_KEY=NFOWuGDXZxxxxxxxxxxxxxxxxxxxxx
Setting Up Doppler
In order to use Doppler, first, we will create an account here. After creating an account, you’re prompted to create a workspace that can be any name you choose. Doppler also provides user-friendly prompts explaining your functionalities and which ones are optional and necessary.
Create a MERN Stack Project
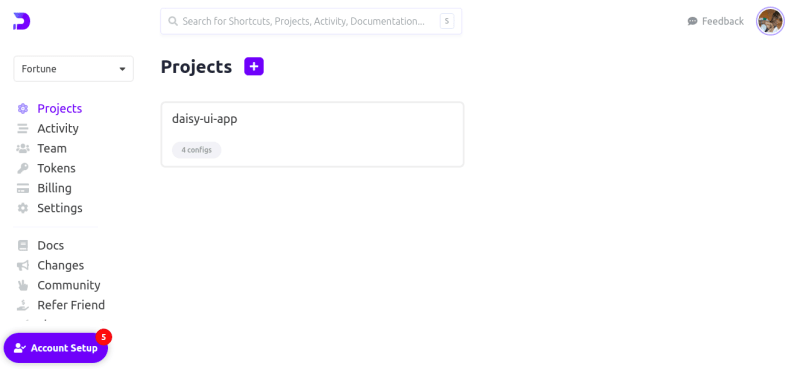
To create a project on Doppler, we will navigate to the build to create a project after creating our Doppler workspace. Next, we will add our project details such as project name and project description, and if done correctly, our dashboard should look like the image below:
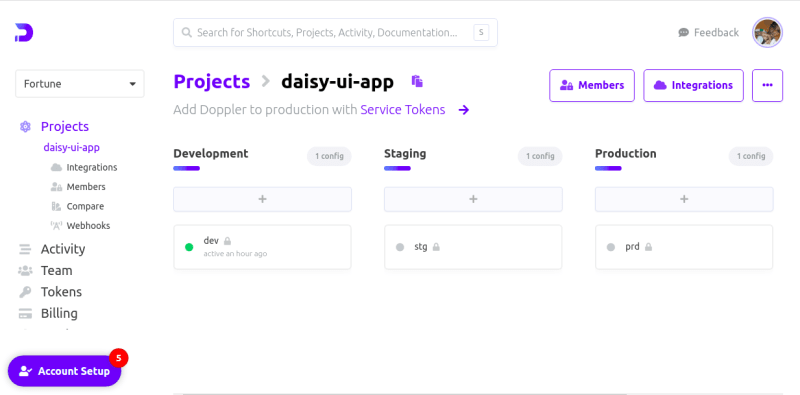
After we’ve created our application, we will see a dashboard with our application environments dev, staging and production as shown in the image below:
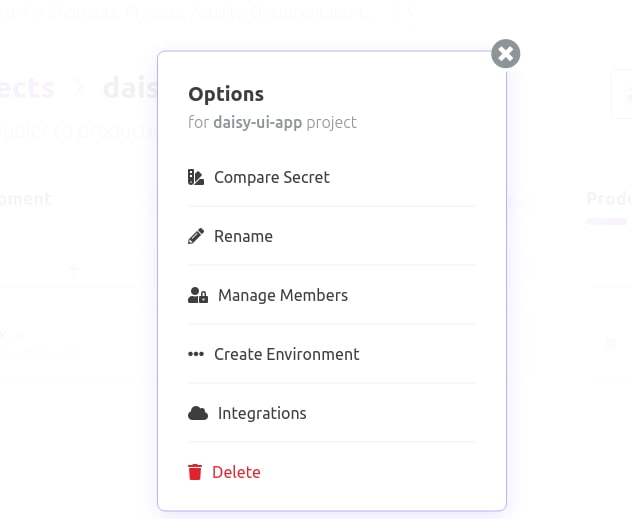
If we notice, our application doesn’t have a staging, dev or production environment, so we will create a new environment that we will call GitHub. You can create a unique, environment by clicking on the hamburger menu like the image below:
Authorising Doppler in GitHub Actions
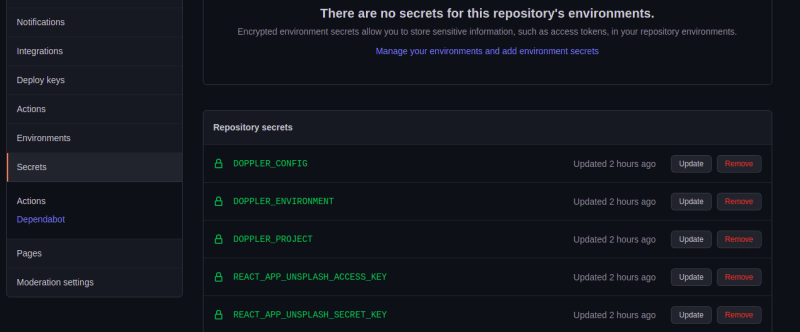
After creating our environment variables as we did above next is o connect Doppler to our GitHub repositories. To do this, click on the integrations button on the right side of our Doppler dashboard and select GitHub from the options as shown below:
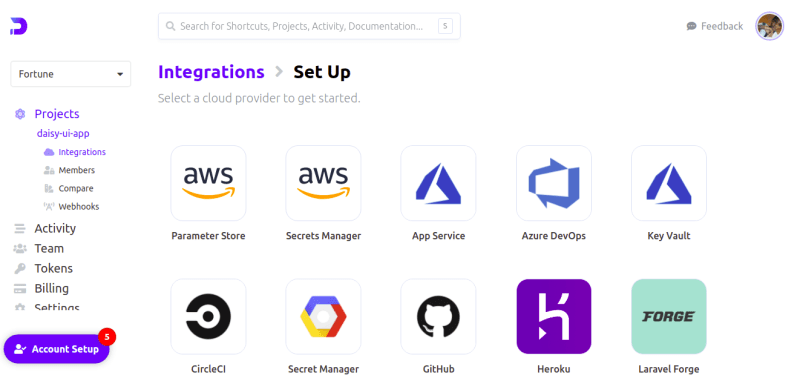
After we’ve selected GitHub for our integration, we will click on Set Up Integration and let Doppler complete our secrets setup. With workspace built this, every time we change or remove a secret in Doppler, it automatically reflects on our GitHub Actions page.
Now we have our project set up on the Doppler website, let’s set our project our local environment using the Doppler CLI
First, let’s proceed to install the Doppler CLI, which will help us in the development stage of our application.
    # Install pre-reqs
    sudo apt-get update && sudo apt-get install -y apt-transport-https ca-certificates curl gnupg
    # Add Doppler's GPG key
    curl -sLf --retry 3 --tlsv1.2 --proto "=https" 'https://packages.doppler.com/public/cli/gpg.DE2A7741A397C129.key' | sudo apt-key add -
    # Add Doppler's apt repo
    echo "deb https://packages.doppler.com/public/cli/deb/debian any-version main" | sudo tee /etc/apt/sources.list.d/doppler-cli.list
    # Fetch and install the latest doppler cli
    sudo apt-get update && sudo apt-get install doppler
Now, we’ve finished configuring and installing Doppler CLI on our local machine, run the following code to confirm that it was installed successfully.
    doppler  --version
    # v3.32.0
Next, let’s authenticate our local development with the remote development environment as they need to be in sync.
    doppler login
    ? Open the authorization page in your browser? Yes
    Your auth code is:
    XXXXh_XXXX_cybele_hour_XXXXo_XXXXmonica
    Waiting...
This opens the browser to log into your account and authenticate your local environment. Fill in your email or login with Google, then copy and paste the auth token displayed on the terminal to authenticate Doppler.
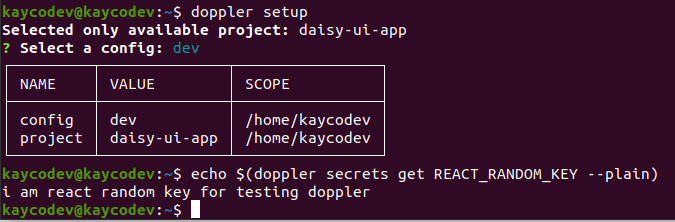
Run the doppler setup command inside the root and select the right option to configure your local environment. Now let’s return to our remote project on the website and click on the dev section of the project. Then click on the Add Secret to add a new secret as below:
kaycodev@kaycodev:~$ doppler setup
    Selected only available project: daisy-ui-app
    ? Select a config: daisyui
    ┌─────────┬──────────────┬────────────────┐
    │ NAME    │ VALUE        │ SCOPE          │
    ├─────────┼──────────────┼────────────────┤
    │ config  │ daisyui      │ /home/kaycodev │
    │ project │ daisy-ui-app │ /home/kaycodev │
    ig  │ daisyui      │ /home/kaycodev │
    │ project │ daisy-ui-app │ /home/kaycodev │
    └─────────┴──────────────┴────────────────┘
Next, let’s return to our small project and click on the dev section of our project. Then click on the Add Secret. Return back to your terminal and run the code block below to confirm that your secret key is in sync with your remote environment. Your private address is shown in the image below:
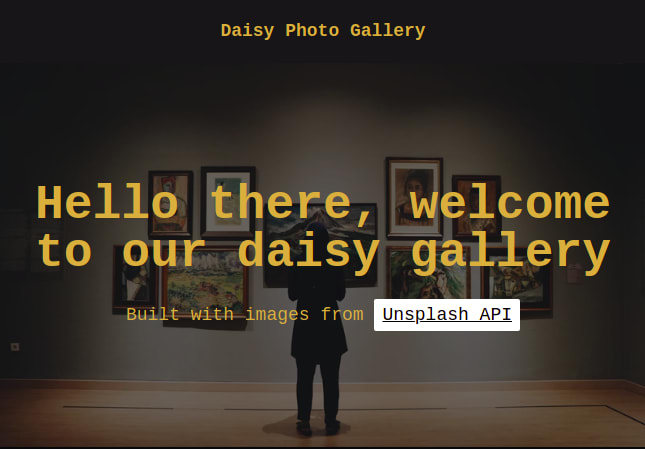
Now, let’s start our application by running yarn start on our terminal, if done correctly, our browser tab will look like the image below:
Conclusion
We’ve successfully set up Doppler for a MERN stack application to secure and manage our application’s secret keys. We eliminated the need to have a .env file. Using Doppler, we can now manage these secret keys amongst a development team, giving access to a particular project or workspace on our Doppler dashboard. We can also add Doppler to any native JavaScript application. You can find the code used in this tutorial on GitHub. You. If can learn more about Doppler here.


Top comments (0)