Tailwind CSS is one of my favourite frameworks to work with when I want to quickly build a page because of how easy it is to directly style the elements from the template without having to access CSS files.
Another thing I like to use to complement my Tailwind CSS workflow is a component library such as Flowbite which helps me with pre-built components including interactivity such as tooltips, dropdowns, navigation bars, modals, and more.
One of the things that hasn't been covered too much in the Tailwind CSS area are blog related components and pages, so that's why today I want to show you how you can build a simple blog template/article layout using Tailwind CSS and Flowbite.
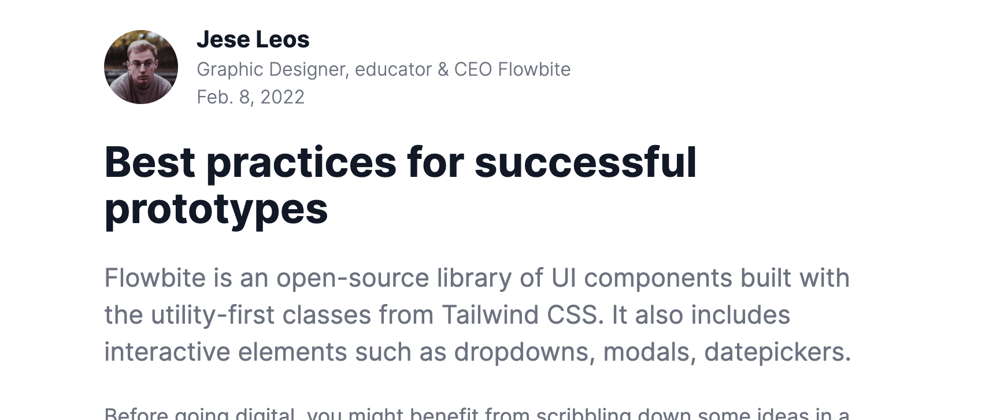
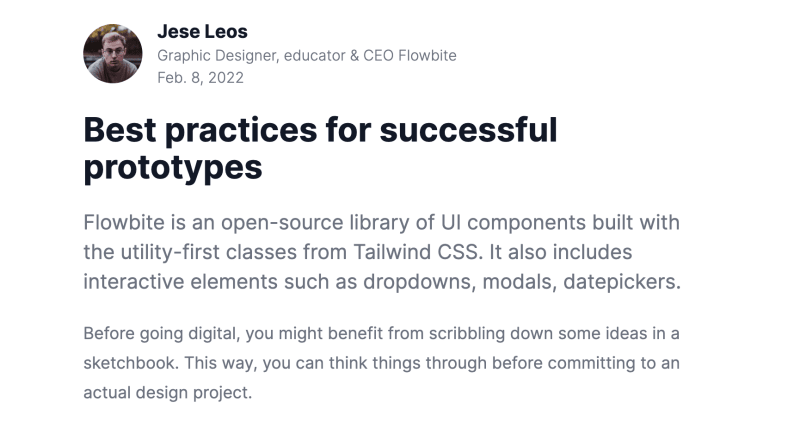
Here's a preview of how the page will look like:
Let's get started!
Requirements
First of all, make sure that you have both Tailwind CSS and Flowbite installed on your local project. You can do this via the CDN configuration or installing it via NPM:
Now that we you have both installed we can get started building the page.
Building a blog template
The first thing we need to think about is what an article needs in terms of content. In this example, we will show the following things:
- author
- author profile picture
- author description
- post date
- post content
- comments
- related articles
- newsletter CTA
- footer
We can take one of the blog templates coded in Tailwind CSS from the Flowbite Blocks collection so that we don't have to do everything from the ground up.

You can just click on the "show code" button and copy-paste the HTML markup and add it inside your project.
Even though you do that, you will still have to install a plugin to make sure that the article content will be styled correctly.
To do that, you'll have to install the Flowbite Typography plugin:
npm i -D flowbite-typography
Then add it inside the tailwind.config.js file:
module.exports = {
  theme: {
    // ...
  },
  plugins: [
    require('flowbite-typography'),
    // ...
  ],
}
And now it should all work!
Dark mode
You can even activate dark mode with Tailwind CSS because the classes from the example above also include support for dark mode.
You can check out this Tailwind CSS dark mode tutorial to learn how to build a dark mode switcher.
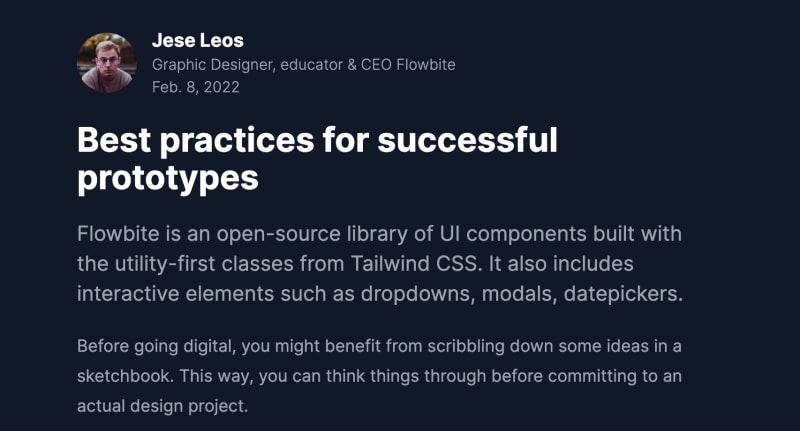
Here's how the article will look in dark mode:
Blog template examples
There's a whole collection of blog templates, comment sections, related articles, and blog sections that you can check out under the "Publisher UI" category from Flowbite Blocks.
Article with background image
Get started with this article layout with a featured background image, author, post category, comments section, and a right sidebar with widgets.

View preview and code example.
Community blog posts
Use this blog template to show an article with post reactions, comments section, author details, post date, post category, and more.

View preview and code example.
Featured article with header
Use this blog post layout to show a featured title with a lead paragraph, social media share icons, and a comments section.

View preview and code example.
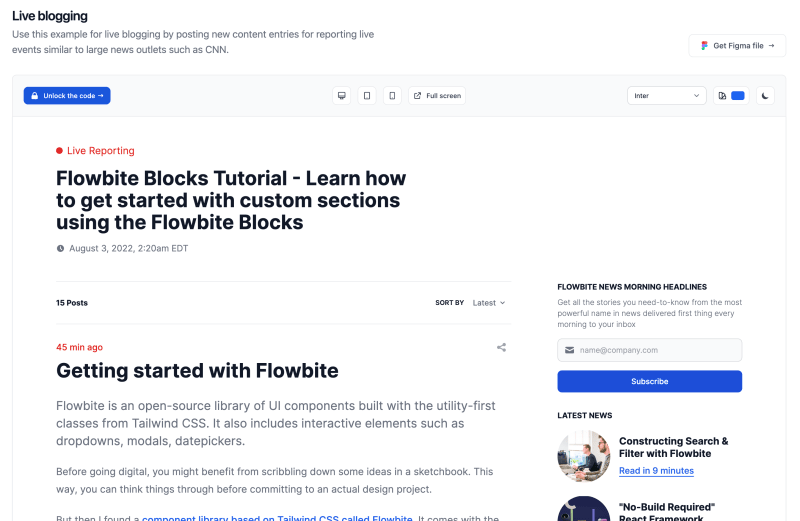
Live blogging
Use this example for live blogging by posting new content entries for reporting live events similar to large news outlets such as CNN.
View preview and code example.
Right sidebar article
This example can be used as a standard article layout where the main content is on the left side and a sidebar with widgets on the right similar to WordPress.

View preview and code example.
- Tailwind CSS Blog Templates
- Tailwind CSS Comments Sections
- Tailwind CSS Blog Sections
- Tailwind CSS Related Articles
Credits
This tutorial could only be created due to the two awesome open-source projects:


Top comments (0)