In this article, I'm going to build a static site with Hugo and use webpack to bundle assets.
Hugo is a lovely tool for building static sites, and if you've ever used a static site generator before, it'll probably feel pretty familiar.
I'm going to try and keep the webpack config as simple as possible, while still being able to be useful and reliable. The point of this config is to be able to write vanilla javascript and CSS without having to think will it work in IE or Safari.
Javascript code will use Babel to be transpiled and polyfilled, and styles will use Autoprefixer (and PostCSS by extension).
At the end of the article, you can see all the final webpack related files. I also have a demo in this Github project.
Creating a Hugo Project
This section is mostly for context on what I'm working with. If you've already got a Hugo project setup, then you can probably just skip this section.
Create a new site with hugo new site demo-site then cd into it.
Next I'm going to run hugo new posts/demo-post.md so we have something to work with.
This is what I put in my new post:
---
title: "Demo Post"
date: 2020-03-04T19:18:46-06:00
draft: true
---

Lorem ipsum dolor sit amet, consectetur adipiscing elit, sed do eiusmod tempor incididunt ut labore et dolore magna aliqua.
Lacus vel facilisis volutpat est velit egestas.
Et egestas quis ipsum suspendisse ultrices gravida dictum fusce. Adipiscing vitae proin sagittis nisl rhoncus mattis rhoncus.
Dui accumsan sit amet nulla facilisi morbi tempus iaculis.
Praesent semper feugiat nibh sed pulvinar proin.
Quis ipsum suspendisse ultrices gravida dictum fusce.
Enim nec dui nunc mattis.
In nulla posuere sollicitudin aliquam ultrices sagittis orci a.
Sagittis vitae et leo duis ut.
Ultrices mi tempus imperdiet nulla malesuada pellentesque elit eget gravida.

Habitasse platea dictumst quisque sagittis.
Placerat vestibulum lectus mauris ultrices eros in.
Risus pretium quam vulputate dignissim suspendisse in est.
Vestibulum mattis ullamcorper velit sed.
Et malesuada fames ac turpis.
Egestas diam in arcu cursus euismod quis.
Pellentesque habitant morbi tristique senectus et.
Sed vulputate odio ut enim.
Nulla facilisi nullam vehicula ipsum a arcu cursus vitae.
Bibendum at varius vel pharetra.
Non arcu risus quis varius.
That's all I'm going to have for content on this demo site. Similarly, these templates are going to be super minimal (read, ugly).
First I'm going to create a file in layouts/_default/baseof.html and make it look like this:
<!DOCTYPE html>
<html lang="en">
<head>
  <meta charset="UTF-8">
  <meta name="viewport" content="width=device-width, initial-scale=1.0">

  <title>{{ .Title }}</title>
</head>
<body>
  <main id="content">
    {{- block "main" .}}{{- end}}
  </main>
</body>
</html>
As the name implies, this template will be used as the default frame for other pages.
Now I'm going to create a template at layouts/_default/list.html. This template is basically a catch all for any page that lists things.
Here's what I put in this file:
{{ define "main" }}
  <h1>{{ .Title }}</h1>

  <div>
    {{ range .Pages }}
      <article>
        <header>
          <h2>
            <a href="{{ .RelPermalink }}">{{ .Title }}</a>
          </h2>
        </header>

        <p>{{ .Summary }}</p>
      </article>
    {{ end }}
  </div>
{{ end }}
Lastly, I'm going to create layouts/_default/single.html. Like list.html, this is going to be a catch all template for any page that isn't an index page.
The template looks like this:
{{ define "main" }}
  <header>
    <h1>{{ .Title }}</h1>
    <h2>{{ .Date.Format "Jan 2, 2006" }}</h2>
  </header>

  <div>
    {{ .Content }}
  </div>
{{ end }}
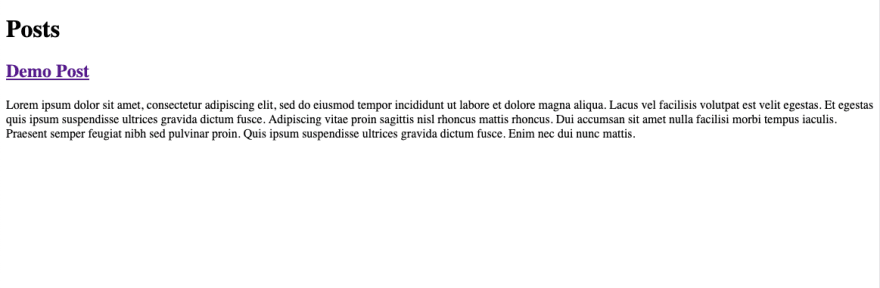
At this point, you should be able to run hugo server -D then visit http://localhost:1313/posts, and see something like this:
If you click on the post title, you'll see something like this:

I'm not really showing off what Hugo can do, so if you're new to it, I suggest taking a look at the template lookup order guide to see how you can be more specific with your templates.
Also if you're not aware, you can create content/_index.md or content/posts/_index.md to have dynamic content on those list pages.
Be sure to also add public (the default build directory) to your .gitignore.
Adding webpack
Alright, let's get into some fun things.
Before we can bundle things, we need to make things to bundle. I'm going to create src/js/app.js and just add a hello world to it:
console.log('hello world');
Now, let's install some packages.
yarn add -D webpack webpack-cli
Don't forget to add node_modules to your .gitignore
Now create a webpack.config.js file. For bundling javascript, this is pretty much the minimum we need.
const path = require('path');

module.exports = {
  entry: [path.resolve('src', 'js', 'app.js')],
  output: {
    path: path.resolve('static', 'assets'),
    filename: 'bundle.js',
  },
};
Here are some things to note.
Using a src directory and the structure inside of src is mostly arbitrary. You don't want Hugo to do anything with the unprocessed files (which is why they're in src instead of, say, static), but otherwise you have free rein.
Speaking of things that don't matter, neither does the output file name being bundle.js. We'll need to reference it later, but otherwise it's pretty arbitrary.
What does matter is the path of your output. Out of the box, Hugo is setup to include things in static in the final build (so static/assets/bundle.js will be available as /assets/bundle.js).
If you already have a static/assets directory, you'll probably want to change the path in your webpack config to keep build artifacts separate. If you need to, you can also make Hugo aware of other directories for static files
Lastly, add static/assets (or whatever path you used) to your .gitignore (you shouldn't commit build artifacts).
Anyway.
In your package.json some scripts for building things.
{
  "scripts": {
    "start": "webpack --mode=development --watch",
    "build": "webpack --mode=production"
  },
  // ...
}
yarn start will be ran in tandem with hugo server -D. When actually building your site, run yarn build before your hugo build command.
But there's still one last thing we need to do, and that's actually reference our javascript in our template.
Inside the head or bottom of body for baseof.html, add:
<script src="/assets/bundle.js"></script>
Now you should see hello world logged in your console.
The dev server built into Hugo should reload your browser when changes are made to static/assets (i.e. when webpack finishes building), so you probably don't need to add the webpack dev server or browsersync. That said, I'll quickly show how to add the webpack dev server at the end of this article.
At this point, if you're familiar with webpack, there's probably not much else you'll gain from this article. The rest of it is just configuring loaders.
Transpiling and Polyfilling JS
To prevent problems later on, now is a good point to setup transpiling and polyfilling of our javascript. To do this, we're going to use Babel (and core-js).
yarn add -D babel-loader @babel/core @babel/preset-env core-js
Next, in the exported object inside of webpack.config.js add:
module.exports = {
  // ...
  module: {
    rules: [
      {
        test: /\.js$/,
        exclude: /node_modules/,
        use: ['babel-loader'],
      },
    ],
  },
};
Adding this rule to our webpack config will make webpack run any file that ends with .js through Babel. However, it excludes files from our node_modules, so if a library isn't itself transpiled then you will need to change the regex for exclude to something like this /node_modules\/(?![some_package|some_other_package])/.
Before we configure babel, let's quickly define what browsers we support.
Open up your package.json and add a browserslist key.
This step is not needed if you already have a browserslist source.
For my use I'm going to add "browserslist": "> 1%". This is basically saying "only support browsers that make up more than 1% of browser usage".
Protip: if you run npx browserslist '> 1%' then you can see what browsers that will be.
Now we can actually configure babel. I'm going to add the following to .babelrc:
{
  "presets": [
    [
      "@babel/preset-env",
      {
        "corejs": 3,
        "useBuiltIns": "usage"
      }
    ]
  ]
}
Out of the box with @babel/preset-env, newer syntax like const and let will be turned into older equivalents (var in those cases case).
I'm also setting the version of core-js to be whatever the version was added earlier (in my case 3).
Lastly, I'm setting useBuiltIns to usage. This will make it so when some kind of javascript is used that isn't supported by one of the browsers I support, babel will include a polyfill from core-js.
So I'm able to write something like this:
const x = ['a', 'b'];
x.forEach(y => console.log(y));
And it will turn into this (excluding bundling done by webpack):
"use strict";

require("core-js/modules/es.array.for-each");

var x = ['a', 'b'];
x.forEach(function (y) {
  return console.log(y);
});
Babel will look to your browserslist settings and determine if it needs to include a polyfill. Eventually running the same code through Babel with the same settings will not change it, because eventually every browser that's used will be able to support forEach.
A quick note though, if you want to use async await in your javascript, be sure to add the @babel/plugin-transform-regenerator plugin.
Lastly, even though I used .babelrc, you could use babel.config.js or even just put this in your package.json. If you wanted, you could even change the syntax for how babel-loader is set and just put your babel config in your webpack config.
{
  test: /\.js$/,
  exclude: /node_modules/,
  use: {
    loader: 'babel-loader',
    options: {
      // babel config here
    },
  },
}
Don't forget to restart your webpack command.
Adding Some Style
Now that we've got Webpack to transpile, polyfill, and bundle our javascript, let's get it some styles on this page.
For this demo, I'm going to stick to pretty much just vanilla CSS with PostCSS. Fortunatly, you can still use PostCSS and Autoprefixer with other loaders. So if you want to also have Sass for example, you'll just also add the sass-loader.
What Autoprefixer will do, is look at our browserslist, and automatically add vendor prefixes to our built CSS. So we can give it something like this:
.example {
  position: sticky;
}
and Autoprefixer will spit out something like this:
.example {
  position: -webkit-sticky;
  position: sticky;
}
What prefixes it adds is based of the browserslist we set earlier. As time goes on and browsers get better, less things will be prefixed.
Alright, let's get started.
Like before, let's add some stuff to build, so we'll know when our setup is working. I'm going to use src/styles/app.css:
body {
  background-color: mistyrose;
}
Now we're going to install some more packages.
yarn add -D css-loader postcss-loader autoprefixer mini-css-extract-plugin
After that, let's create a postcss.config.js and make it look something like this:
module.exports = {
  plugins: [
    require('autoprefixer'),
  ],
};
Now we're going to make a few changes to webpack.config.js.
First, in the entries list, add the path your styles. In my case, I'd add path.resolve('src', 'styles', 'app.css').
Now import the MiniCssExtractPlugin (const MiniCssExtractPlugin = require('mini-css-extract-plugin')), and add this rule to the rules array:
{
  test: /\.css$/,
  use: [
    MiniCssExtractPlugin.loader,
    'css-loader',
    'postcss-loader',
  ],
},
Next we need to crate an array for plugins in the exported object, and add an instance of MiniCssExtractPlugin to it:
module.exports = {
  entry: [
    // ...
  ],
  output: {
    // ...
  }
  module: {
    // ...
  },
  plugins: [new MiniCssExtractPlugin()],
};
What's happening here is, we're telling webpack to use our CSS as an entrypoint of stuff to bundle. If you wanted, you could instead import your CSS in your entry javascript file.
The rule we added will make it so webpack can understand what to do with CSS, run it through PostCSS (which we have set up to add prefixes to our styles), then use the MiniCssExtractPlugin plugin to output it to a CSS file.
If you wanted to you could use the style-loader and have your styles applied through javascript. This has drawbacks of depending on javascript to be loaded before styles are applied.
The last thing we need to do is get our styles into our HTML.
By default, the extracted styles will go into a file named main.css. So, in the head of baseof.html, add:
<link rel="stylesheet" href="/assets/main.css">
Now when you restart webpack and visit the site, you should see your styles applied.
Conclusion
If you've completely been following along, then congratulations, we've made a very ugly site! But at least we made it in a cool way 😎.
For the most part, you should be able to go pretty far with this setup (especially if you add something like Sass for your styles. But if you do stick with just PostCSS, be sure to check out postcss-import to help with splitting code).
Pair this setup with a CMS like Forestry.io or Netlify CMS, and setup autodeploying to a service like ZEIT Now or (Netlify)(https://www.netlify.com/), then you'll have a really solid base for building blogs or marketing sites in a really low maitenance way.
Netlify even has a service for adding forms to static sites (other form services available) (https://www.netlify.com/products/forms)
Here's the final webpack related files.
// webpack.config.js
const MiniCssExtractPlugin = require('mini-css-extract-plugin');
const path = require('path');

module.exports = {
  entry: [
    path.resolve('src', 'js', 'app.js'),
    path.resolve('src', 'styles', 'app.css'),
  ],
  output: {
    path: path.resolve('static', 'assets'),
    filename: 'bundle.js',
  },
  module: {
    rules: [
      {
        test: /\.js$/,
        exclude: /node_modules/,
        use: ['babel-loader'],
      },
      {
        test: /\.css$/,
        use: [
          MiniCssExtractPlugin.loader,
          'css-loader',
          'postcss-loader',
        ],
      },
    ],
  },
  plugins: [new MiniCssExtractPlugin()],
};
// .babelrc
{
  "presets": [
    [
      "@babel/preset-env",
      {
        "corejs": 3,
        "useBuiltIns": "usage"
      }
    ]
  ]
}
// postcss.config.js
module.exports = {
  plugins: [
    require('autoprefixer'),
  ],
};
// package.json
{
  "private": true,
  "browserslist": "> 1%",
  "scripts": {
    "start": "webpack --mode=development --watch",
    "build": "webpack --mode=production"
  },
  "devDependencies": {
    "@babel/core": "^7.8.7",
    "@babel/preset-env": "^7.8.7",
    "autoprefixer": "^9.7.4",
    "babel-loader": "^8.0.6",
    "core-js": "^3.6.4",
    "css-loader": "^3.4.2",
    "mini-css-extract-plugin": "^0.9.0",
    "postcss-loader": "^3.0.0",
    "webpack": "^4.42.0",
    "webpack-cli": "^3.3.11"
  }
}
package.json Tip
I recommend using something like the package npm-run-all.
This package would let you modify your package.json scripts to be something like this:
{
  "scripts": {
    "start": "run-p start:*",
    "start:hugo": "hugo server -D",
    "start:webpack": "webpack --mode=development --watch",
    "build": "run-s build:webpack build:hugo",
    "build:hugo": "hugo",
    "build:webpack": "webpack --mode=production"
  }
  // ...
}
So when you run yarn start or yarn build both webpack and Hugo run their respective commands.
Webpack Dev Server
In my opinion the Hugo server automatically reloading when changes are made to the built assets is good enough for me. Personally I'd rather avoid having more to configure than is needed.
But if you'd prefer to use the webpack dev server, it's pretty easy to drop in.
First add webpack-dev-server as a dev dependency, then modify your webpack config to have devServer options.
{
  devServer: {
    contentBase: path.resolve('public'),
    watchContentBase: true,
    publicPath: '/assets',
  },
  entry: [
    // ...
  ],
  output: {
    // ...
  },
  module: {
    // ...
  },
  plugins: {
    // ...
  },
}
Lastly, instead of running hugo server + webpack --watch you'll run hugo --watch + webpack-dev-server.
What this does is make Hugo build your site whenever you change content or templates, then the webpack dev server will host the built HTML from hugo.


Top comments (6)
Hello @tegandbiscuits
There's an error in the file
.babelrc:Thank you for this guide!
Is there a good reason to not use Hugo Pipes for autoprefixing / sass preprocessing?
When you want to generate a public folder, Hugo not will not generate automatically SCSS files to your
assetsfolder.Do you have an example repo?
I put out an example repo github.com/tegandbiscuits/hugo-web...
(I'm glad you asked, because it made me realize I accidentally used the wrong path when importing the javascript, so if things were working that might've been why)