Intro
Contact forms can be annoying if you have to deal with an email provider, server-side logic, and all that. So this is a quick and easy way you can work around it by taking advantage of a free Slack app called Incoming-Webhooks. You can Post directly to the channel using only client-side technologies with a simple Javascript fetch. Neat right?
Technologies and concepts covered
Familiarity with React is recommended for this tutorial. However it is fairly basic, so if you're a beginner with React then this tutorial is for you. This tutorial will be using the following technologies and concepts:
- Implementing an App in a Slack Workspace
- Next.js
- React hooks
- useState
- Functional components in React
- ES6 syntax
- Promises using the ".then -> .catch" syntax
Prerequisite
You will need to have a Slack workspace (that you have sufficient priveledges in) to add the Incoming-Webhooks app for this tutorial. To create a new workspace, head on over to slack.com.
To add the Incoming-Webhooks app, search the app marketplace. Open up your new or existing workspace, and use the three-dot "more" dropdown in the sidebar to add apps.

Browse the App Directory for Incoming-Webhooks. Once you've added it to your workspace, head to the "Configuration" tab. The important item here for connecting our application is the URL to which we will be POSTing our Fetch. Under "Edit Configuration", scroll down until you find this URL. It should look like this:

Project setup
I did this with my existing portfolio website project. You might as well too if you are looking for a simple way to add a contact form to your React app portfolio. But if you'd like to kick your project off from scratch with the technology I used and follow along, you'll need to use Next.js. So go ahead and start a basic project with that. Their quickstart docs can be found here Next.js. You will need to run the following in the directory of your choosing for a new project:
npx create-next-app
# or
yarn create next-app
Next.js comes with a bunch of cool features out of the box, so you don't need much setup to get rolling. I like to build my apps with a pages/Components type of structure, where my page layout logic is in the pages, and then re-usable components are in the Components folder. I've also got a utils folder for my fetch logic. The important files for this tutorial end up looking like this structure:
── src
│   ├── Components
│   │   ├── SlackContact
│   │   │   ├── SlackContact.js
│   ├── pages
│   │   ├── index.js
│   └── utils
        ├── fetchSlack.js
Go ahead and create those files now, or refer back to this tree and create the files as you go. Whatever work flow is most comfortable for you.
Build the page
Let's use functional components to start and build our page layout. Our index.js file is where the page will live, and where we will be able to control the layout of our components. In this case, we only will have the one component, SlackContact.js. But moving forward you may want to add other items to your page like a nav bar, footer, etc.
Next.js looks in the pages directory for it's page routing, so this is set up out of the box and really straight forward. If you wanted a new page at the path /whatever, all you need to do is create a new file in the pages directory called whatever.js.
// index.js
import React from 'react';
import Head from 'next/head'

export default function Home() {
  return (
    <>
      <Head>
        <title>Tateronaut | Home</title>
      </Head>

      <main>
        <p>stuff will go here!</p>
      </main>
    </>
  )
}
Simple enough. You can see we're using some Next.js functionality with their built in next/head component, which lets us add things like the page title, or page links in the Head part of the DOM.
Initialize the component
Alright, head on over to the SlackContact.js file to start our component. Very similar to the above, let's get a basic functional component going using ES6 arrow function syntax for funzies. You'll notice I'm using another library, "nes-react", which is a super fun retro video game style library that I really like.
// SlackContact.js
import React, { useState } from 'react';
import { Container } from 'nes-react';

export const SlackContact = () => {

  return (
    <Container title='Contact My Slackbot'>
      <h1>Contact Me!</h1>
    </Container>
  );
};

export default SlackContact;
Sweet, now we can import our component in our page, and we will be done with the index.js file.
// index.js
import React from 'react';
import Head from 'next/head';
import SlackContact from '../../Components/SlackContact/SlackContact';

export default function Home() {
  return (
    <>
      <Head>
        <title>Tateronaut | Home</title>
      </Head>

      <main>
        <SlackContact />
      </main>
    </>
  )
}
Fetch logic
Now we are going to work on the logic for Posting to our slack channel. Create a file in your utils folder called fetchSlack.js. This is basically straight from MDN's documentation on using fetch, but adapted for our purposes.
// fetchSlack.js
export const fetchSlack = async (url='', data={}) => {
  const res = await fetch(url, {
    method: 'POST', // *GET, POST, PUT, DELETE, etc.
    mode: 'no-cors', // no-cors, *cors, same-origin
    cache: 'no-cache', // *default, no-cache, reload, force-cache, only-if-cached
    credentials: 'include', // include, *same-origin, omit
    headers: {
      'Content-Type': 'application/json'
      // 'Content-Type': 'application/x-www-form-urlencoded',
    },
    redirect: 'follow', // manual, *follow, error
    referrerPolicy: 'no-referrer', // no-referrer, *no-referrer-when-downgrade, origin, origin-when-cross-origin, same-origin, strict-origin, strict-origin-when-cross-origin, unsafe-url
    body: JSON.stringify(data) // body data type must match "Content-Type" header
  });
  return res;
}
export default fetchSlack;
You could just add this straight into your SlackContact.js component. But that would make the component messier and more difficult to unit test. Keeping our fetch logic outside the component in the /utils folder is a more readable approach.
Build the contact form
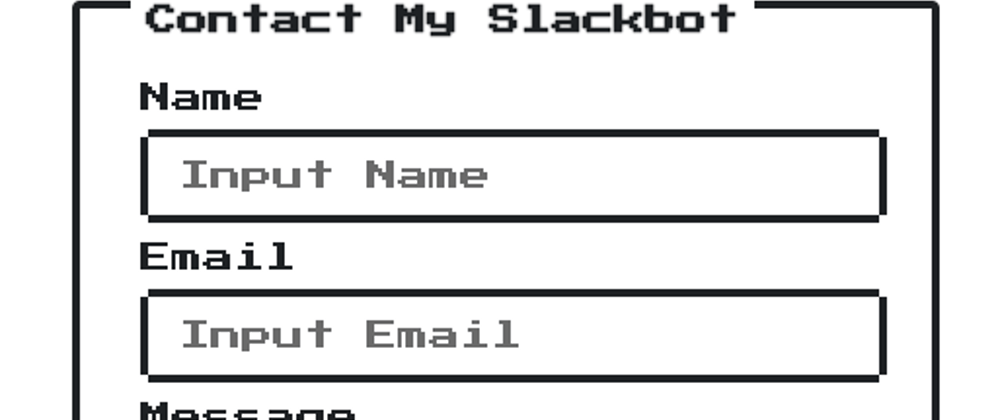
Alright, now we're going to build the UI for the form. Switch back to your SlackContact.js and add a text area, and two text input fields. I'm using the ones that came with nes-react, but you can use whatever components you'd like for these.
We will also be adding in our useState hook, and setting up our local state for the input fields.
// SlackContact.js
import React, { useState } from 'react';

import { Container, TextInput, TextArea, Button } from "nes-react";

export const SlackContact = () => {
  const [name, setName] = useState('');
  const [email, setEmail] = useState('');
  const [message, setMessage] = useState('');

  return (
    <Container title="Contact My Slackbot" className='slack-contact'>
          <TextInput
            label="Name"
            placeholder="Input Name"
            value={name}
            onChange={e => {setName(e.target.value)}}
          />
          <TextInput
            label="Email"
            placeholder="Input Email"
            value={email}
            onChange={e => {setEmail(e.target.value)}}
          />
          <TextArea
            label="Message"
            placeholder="Start Writing"
            value={message}
            onChange={e => {setMessage(e.target.value)}}
          />
          <Button onClick={handleClick} success>SEND IT!</Button>
    </Container>
  );
};

export default SlackContact
;
That is a working contact form, that you could use to send the information stored in your local state anywhere. At this point though it is just a pretty UI, that doesn't do anything when you use the submit button. Note that handleClick hasn't been defined. Let's add that in now. This is where we will bring in our our fetchSlack function that we wrote in our /utils folder. We also need to define and add in the URL that we got from the Incoming-Webhooks app configuration in the Prerequisites section of this tutorial. You may want to store this in your .env file for security purposes, so that other people can't post to your channel by getting your URL off your code repository if it is public. But that is outside the scope of this project. The updated SlackContact.js file will look like this:
// SlackContact.js
import React, { useState } from 'react';

import { Container, TextInput, TextArea, Button } from "nes-react";

/** helpers */
import fetchSlack from '../../utils/fetchSlack';

export const SlackContact = () => {
  const [name, setName] = useState('');
  const [email, setEmail] = useState('');
  const [message, setMessage] = useState('');

  const webhookURL = '<YOUR WEBHOOK URL>';
  const myData = {
    "text": `Name: ${name} \n${email} \n${message}`
  }

  const handleClick = () => {
    fetchSlack(webhookURL, myData)
      .then(response => console.log(response))
      .then(data=>{
        return data;
      })
      .catch(err => {
        console.error('There was an ERROR!!!',err)
      });
  }


  return (
    <Container title="Contact My Slackbot" className='slack-contact'>
          <TextInput
            label="Name"
            placeholder="Input Name"
            value={name}
            onChange={e => {setName(e.target.value)}}
          />
          <TextInput
            label="Email"
            placeholder="Input Email"
            value={email}
            onChange={e => {setEmail(e.target.value)}}
          />
          <TextArea
            label="Message"
            placeholder="Start Writing"
            value={message}
            onChange={e => {setMessage(e.target.value)}}
          />
          <Button onClick={handleClick} success>SEND IT!</Button>
    </Container>
  );
};

export default SlackContact
;
Conclusion
And that should be all you need to get started posting to a slack channel. I hope it was clear enough to follow along. If I missed anything, or it doesn't seem obvious, let me know in the comments.
For next steps, you might want to add some basic form validation. We can do that by improving the onChange functions of each of our text inputs. Some basic things like checking that the email matches simple email requirements would be nice. Additionally, it might be helpful to move the useState items out of local state, and use a state management tool like Redux so that these values are accessible to other components in our application.
I hope you enjoyed this article!


Top comments (3)
Great walkthrough of how to get this working! I feel like web hooks are an oft-overlooked super power in many systems!
Thank you!
Thanks!
Some comments have been hidden by the post's author - find out more