
In the last tutorial, we learned a little about dart programming language. In this tutorial we will get started with the framework itself and learn to build basic applications with flutter. If at anytime you need to refer to dart concepts, you can visit the last tutorial.

Install flutter
First and foremost we need to install flutter before using it to build beautiful applications. Since, it is a quite time taking process and steps are different for different operating systems. I'm going to recommend to follow the flutter official documents for installation instructions https://flutter.dev/docs/get-started/install.
Getting started with Flutter
Before starting with the development, we need to first check that everything is setup correctly. For this run the following command:
flutter doctor
If you get similar output as below, then your flutter installation is working correctly.
Doctor summary (to see all details, run flutter doctor -v):
[✓] Flutter (Channel master, 2.1.0-13.0.pre.86, on macOS 11.2.1 20D75 darwin-x64, locale en-IN)
[✓] Android toolchain - develop for Android devices (Android SDK version 29.0.2)
[✗] Xcode - develop for iOS and macOS
    ✗ Xcode installation is incomplete; a full installation is necessary for iOS development.
      Download at: https://developer.apple.com/xcode/download/
      Or install Xcode via the App Store.
      Once installed, run:
        sudo xcode-select --switch /Applications/Xcode.app/Contents/Developer
        sudo xcodebuild -runFirstLaunch
    ✗ CocoaPods not installed.
        CocoaPods is used to retrieve the iOS and macOS platform side's plugin code that responds to your plugin usage on the Dart side.
        Without CocoaPods, plugins will not work on iOS or macOS.
        For more info, see https://flutter.dev/platform-plugins
      To install see https://guides.cocoapods.org/using/getting-started.html#installation for instructions.
[✓] Chrome - develop for the web
[✓] Android Studio (version 3.5)
[✓] VS Code (version 1.56.0)
[✓] Connected device (2 available)
Create your first Flutter project
Let's create our first Flutter project. For this run the following command
flutter create -t app country_list
-t appoption is optional. It tells flutter command line to create a Flutter Application. This option helps to prevent AndroidX migration issue in the future.
So country_list directory is created. It will contain sample code for a counter app. Navigate to country_list project.
cd country_list/
Run your first Flutter project.
Use flutter run command the app in debug mode.
flutter run
It will start the sample counter app in flutter.
While application is running press r to Hot reload the app while R(shift+r) to Hot restart the app.
Both Hot reload and Hot restart are faster way to see the result of the code changes made on the screeen.
Hot reload maintains the app state while updating the UI almost instantaneously. Hot restart, by comparison, takes a little longer because it resets the app state to its initial conditions before updating the UI. Both of these are faster than doing a full restart, which requires recompiling the app.
Dart code for flutter app lives in lib/ directory. main.dart is the file from which the execution of the app starts. So we will be editing that file. Open lib/main.dart and delete all its content and replace it with following code:
import 'package:flutter/material.dart';

void main() {
  runApp(
    MaterialApp(
      debugShowCheckedModeBanner: false,
      home: HomePage(),
    )
  );
}

class HomePage extends StatelessWidget {
  @override
  Widget build(BuildContext context) {
    return Scaffold(
      appBar: AppBar(
        title: Text('First App')
      ),
      body: Center(
        child: Text('Hello World'),
      ),
    );
  }
}
You will see the following screen on re-running the application.
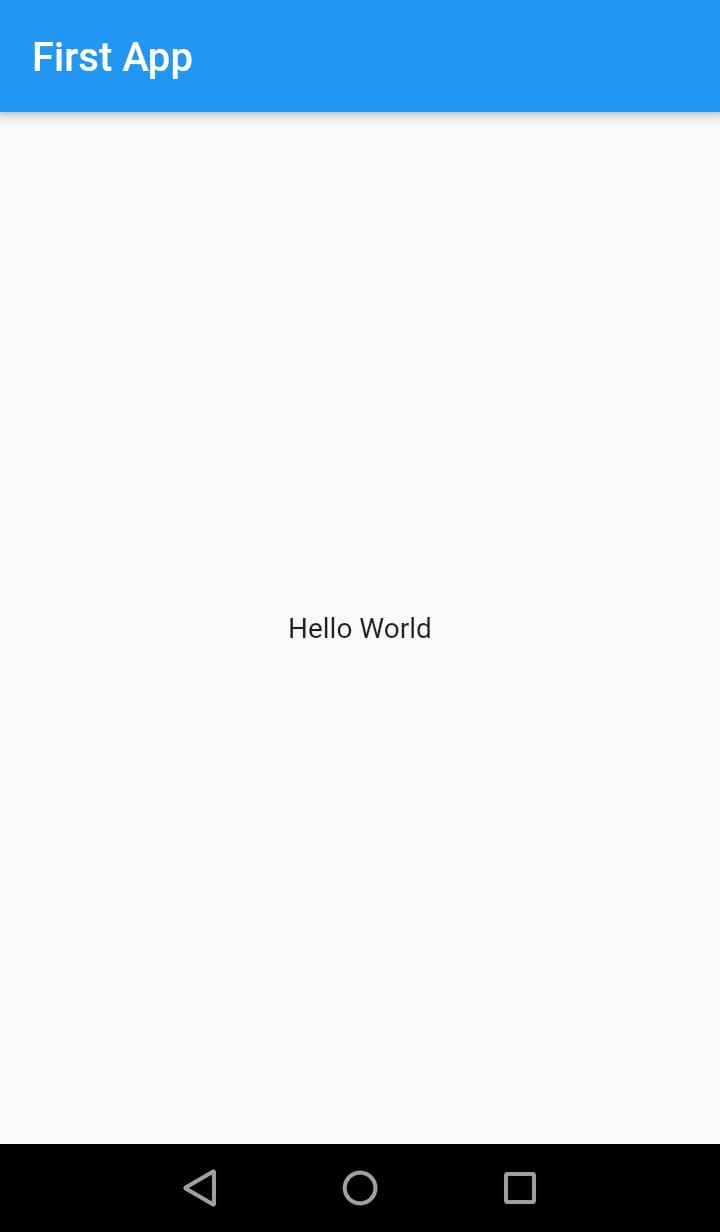
So let's understand what we did in the above code.
- In line 1 we imported flutter/material.dart package using
import 'package:flutter/material.dart';In flutter, we can import in-built as well as external package to achieve certain tasks. Material package we just imported contains all the important widgets that we are going to use today. - In the next line we defined main function. Execution of every dart program starts from main function. Dart compiler looks for this function to start execution.
- Within main function, we called runApp() function. This function attaches our app to the screen of the device on which it is running.
- MaterialApp widget is a convenience widget that wraps a number of widgets that are commonly required for material design applications. This app simplifies the process of design beautiful UIs based on material design. This is generally the outermost widget in our app. You certainly aren’t required to use MaterialApp in your project. You can use CupertinoApp to make iOS users feel at home, or you can even build your own set of custom widgets to fit your brand using WidgetsApp.
- In MaterialApp we passed
debugShowCheckedModeBanner: false. This removes the top-right debug banner from the app. - We set home property as HomePage widget. This sets HomePage as the home screen or the first screen of the app.
HomePage Widget
This is a custom widget. Basically there are two types of custom widgets are in flutter ie. Stateless and Stateful widget.
Stateless widgets are those widgets which does not have any state and it never changes. While Stateful widgets are those widgets which contains state and are dynamic. It can change its appearance in response to events triggered by user interactions or when it receives data.
We can create a custom widget class by either extending Stateless or Stateful class.
Here HomePage class represents a stateless widget since it extends Stateless class.
Every Stateless widget expects a build(BuildContext context) function to build UI of the widget. @override tells the compiler that we are overriding or redefining the build(BuildContext context) function. Widget keyword before function definition indicates that this function will return a Widget.
We return Scaffold widget from HomePage widget.
-
Scaffoldwidget implements the basic material design visual layout structure. It acts as a base to contain different parts of UI like AppBar, BottomNavigationBar, FloatingActionButton etc. - In the Scaffold, we pass
AppBar(title: Text('First App'),)to theappBarproperty to display an AppBar with title First App.
Notice in
titleproperty we passText('First App')widget instead of just passingFirst Appas string. This is because in flutter everything is a defined using widget including margin and padding.
- Then we define the
bodyproperty of the Scaffold which contains the main content of the screen. We setbodyasCenter(child: Text('Hello World'),).Centerwidget as name suggests center its childText('Hello World')with respect to its parent(in this case Scaffold).
Improve the app to display list of countries
Let's improve the look and functionality of the app. Currently, it just displays a "Hello World" text. Now we will display list of countries in a beautiful listview layout. This list of countries will be hardcoded in the app for now. We will make this list dynamic in the coming tutorials. After we are done, the app will look similar to this:
 .
.
Create CountryList Widget
We are going to create a seperate CountryList widget to display listview containing countries details.
class CountryList extends StatelessWidget {
  final List<String> countries = [ "Algeria", "Angola", "Benin", "Botswana", "Burkina Faso", "Burundi", "Cabo Verde", "Cameroon", "Chad",
  "Comoros ", "Congo (the)", "Côte d'Ivoire", "Djibouti", "Egypt", "Equatorial Guinea", "Eritrea", "Ethiopia",
  "Gabon", "Gambia ", "Ghana", "Guinea", "Guinea-Bissau", "Kenya", "Lesotho", "Liberia", "Libya", "Madagascar", "Malawi", "Mali"];
  @override
  Widget build(BuildContext context) {
    //Build method now contain just an empty container. We will add listview to this function.
    return Container();
  }
}
countries contain name of some random countries.
Some commononly used widget
Container
Container widget is a convenience widget that is used to contain other widgets. It helps to positioning and sizing of different widgets. It is similar to div in html.
Center(
  child: Container(
    margin: const EdgeInsets.all(10.0),
    color: Colors.amber[600],
    width: 48.0,
    height: 48.0,
  ),
)

Container widget with width and height as 48.0 is created. color property defines the background color of the container. In this case it is shade of ember.
Colors class contains different predefined colors. Details of these colors can be found on this page
To learn more about Container widget, you can refer Flutter doc about Container.
Row
A widget that displays its children in a horizontal array. Spacing between children is controlled using mainAxisAlignment property. It is similar to Flexbox in css with direction:row.
Row(
  children: const <Widget>[
    Expanded(
      child: Text('Deliver features faster', textAlign: TextAlign.center),
    ),
    Expanded(
      child: Text('Craft beautiful UIs', textAlign: TextAlign.center),
    ),
    Expanded(
      child: FittedBox(
        fit: BoxFit.contain, // otherwise the logo will be tiny
        child: FlutterLogo(),
      ),
    ),
  ],
)

To learn more about Row widget, you can refer Flutter doc about Row.
Column
A widget that displays its children in a vertical array. It is similar to Row except that it shows it children in vertical direction instead of horizontal. Spacing between children is controlled using mainAxisAlignment property. It is similar to Flexbox in css with direction:column.
Column(
  children: const <Widget>[
    Text('Deliver features faster'),
    Text('Craft beautiful UIs'),
    Expanded(
      child: FittedBox(
        fit: BoxFit.contain, // otherwise the logo will be tiny
        child: FlutterLogo(),
      ),
    ),
  ],
)

To learn more about Column widget, you can refer Flutter doc about Column.
Card
A material design card: a panel with slightly rounded corners and an elevation shadow.
Center(
  child: Card(
    child : Container(
      height: 100,
      width: 200,
      child: Center(
        child: Text('This is a Card', style: TextStyle(fontWeight: FontWeight.w500)),
      ),
    ),
  ),
)

Center(
  child: Card(
    child: Column(
      mainAxisSize: MainAxisSize.min,
      children: <Widget>[
        const ListTile(
          leading: Icon(Icons.album),
          title: Text('The Enchanted Nightingale'),
          subtitle: Text('Music by Julie Gable. Lyrics by Sidney Stein.'),
        ),
        Row(
          mainAxisAlignment: MainAxisAlignment.end,
          children: <Widget>[
            TextButton(
              child: const Text('BUY TICKETS'),
              onPressed: () {/* ... */},
            ),
            const SizedBox(width: 8),
            TextButton(
              child: const Text('LISTEN'),
              onPressed: () {/* ... */},
            ),
            const SizedBox(width: 8),
          ],
        ),
      ],
    ),
  ),
)

To learn more about Card widget, you can refer Flutter doc about Card.
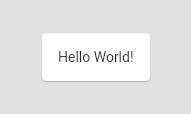
Padding
A widget that is used to add padding to its child. It shrinks its child by the given padding.
const Card(
  child: Padding(
    padding: EdgeInsets.all(16.0),
    child: Text('Hello World!'),
  ),
)
To learn more about Padding widget, you can refer Flutter doc about Padding.
ListView
ListView is used to display a scrollable list. It displays its children one after another in the scroll direction(vertical by default).
ListView accepts a children property. This children property will contain list of items we want to display.
ListView(
  padding: const EdgeInsets.all(8),
  children: <Widget>[
    Container(
      height: 50,
      color: Colors.amber[600],
      child: const Center(child: Text('Entry A')),
    ),
    Container(
      height: 50,
      color: Colors.amber[500],
      child: const Center(child: Text('Entry B')),
    ),
    Container(
      height: 50,
      color: Colors.amber[100],
      child: const Center(child: Text('Entry C')),
    ),
  ],
)

ListView displays all its children at once. These may lead to some performance issue if the list is very large. For this reason, we generally use ListView.builder constructor. It builds on demand and creates items as they’re scrolled onto the screen. It requires a itemBuilder function which takes build context and index of the current item and return a widget based on the index. It also takes several other optional property, one of which is itemCount and it represents the total no of items in the list.
To learn more about ListView widget, you can refer Flutter doc about ListView.
Now we are equipped with enough knowledge to build our required screen.
Our required will have a ListView of Cards. This Card will contain a Row of circular avatar for country abbreviation and country name. There will be padding inside card so that the content of the card does not touch edge of the card. And there will be padding outside the card as well so that the there will be spacing between cards. Now let's write code to achieve this result.
class CountryList extends StatelessWidget {
  final List<String> countries = [ "Algeria", "Angola", "Benin", "Botswana", "Burkina Faso", "Burundi", "Cabo Verde", "Cameroon", "Chad",
  "Comoros ", "Congo (the)", "Côte d'Ivoire", "Djibouti", "Egypt", "Equatorial Guinea", "Eritrea", "Ethiopia",
  "Gabon", "Gambia ", "Ghana", "Guinea", "Guinea-Bissau", "Kenya", "Lesotho", "Liberia", "Libya", "Madagascar", "Malawi", "Mali"];
  @override
  Widget build(BuildContext context) {
    return ListView.builder(
      itemCount: countries.length,
      itemBuilder: (BuildContext context, int index) => Padding(
        padding: const EdgeInsets.symmetric(horizontal: 8.0, vertical: 2.0),
        child: Card(
          child: Container(
            height: 70,
            child: Padding(
              padding: const EdgeInsets.all(8.0),
              child: Row(
                mainAxisAlignment: MainAxisAlignment.spaceBetween,
                children: [
                  CircleAvatar(
                    backgroundColor: Colors.red,
                    child: Text(
                      countries[index].substring(0, 2),
                      style: TextStyle(color: Colors.white),
                    ),
                  ),
                  Expanded(
                    child: Padding(
                      padding: const EdgeInsets.symmetric(horizontal: 8.0),
                      child: Text(
                        countries[index],
                        style: TextStyle(fontSize: 18),
                      ),
                    ),
                  ),
                ],
              ),
            ),
          ),
        ),
      ),
    );
  }
}
To display the CountryList widget we set
bodyof Scaffold in HomePage widget asbody: CountryList().
So your HomePage widget will look like this:
class HomePage extends StatelessWidget {
  @override
  Widget build(BuildContext context) {
    return Scaffold(
      appBar: AppBar(
        title: Text('First App')
      ),
      body: CountryList(),
    );
  }
}

CircleAvatar widget display a circular avatar with content as its child. Here it displays the first two letter of the country name.
Expanded widget causes a child to expand to fill the available horizontal space. Because of that Text widget with country name takes the all the space within the Card except the space taken by CircleAvatar widget.
mainAxisAlignment: MainAxisAlignment.spaceBetweenof Row widget places the free space evenly between the children ie. CircleAvatar and Expanded widget.EdgeInsets.all(8.0) makes all ie. top, bottom, right and left padding to be 8.0. Whereas EdgeInsets.symmetric(horizontal: 8.0) makes only the horizontal paddings ie. left and right to be 8.0.
We are almost done with this tutorial. There is just one issue we need to counter at the moment ie. background color of all the CircleAvatar is Colors.red. We need to make this random. So that all the CircleAvatar have different background Color.
To achieve this result, we need to generate random color. hex value.
To display a color in flutter using its hex value. We use
Colorclass. General format is Color(0xff123456). Where 0x shows its a hexadecimal number. Next two digits(ff) indicates the opacity of color. Next six digits(123456) indicates the hex value of the color.
We will use following code to generate random hex value
Color(
(Random().nextDouble() *
  0xFFFFFF)
  .toInt(),).withOpacity(1.0)
Random().nextDouble() generates a random double or floating point value from 0.0, inclusive, to 1.0, exclusive. We multiply this random value with largest possible hex value(white color). So it generates hex value of a color between black and white. This hex value is a double value. We convert it to a int using toInt() function. withOpacity(1.0) makes the opacity of Color 1.0.
Random() function is defined indart:mathso we need to import it first.
Final code
main.dart
import 'package:flutter/material.dart';
import 'dart:math';
void main() {
  runApp(
    MaterialApp(
      debugShowCheckedModeBanner: false,
      home: HomePage(),
    ),
  );
}

class HomePage extends StatelessWidget {
  @override
  Widget build(BuildContext context) {
    return Scaffold(
      appBar: AppBar(
        title: Text('First App')
      ),
      body: CountryList(),
    );
  }
}


class CountryList extends StatelessWidget {
  final List<String> countries = [ "Algeria", "Angola", "Benin", "Botswana", "Burkina Faso", "Burundi", "Cabo Verde", "Cameroon", "Chad",
  "Comoros ", "Congo (the)", "Côte d'Ivoire", "Djibouti", "Egypt", "Equatorial Guinea", "Eritrea", "Ethiopia",
  "Gabon", "Gambia ", "Ghana", "Guinea", "Guinea-Bissau", "Kenya", "Lesotho", "Liberia", "Libya", "Madagascar", "Malawi", "Mali"];
  @override
  Widget build(BuildContext context) {
    return ListView.builder(
      itemCount: countries.length,
      itemBuilder: (BuildContext context, int index) => Padding(
        padding: const EdgeInsets.symmetric(horizontal: 8.0, vertical: 2.0),
        child: Card(
          child: Container(
            height: 70,
            child: Padding(
              padding: const EdgeInsets.all(8.0),
              child: Row(
                mainAxisAlignment: MainAxisAlignment.spaceBetween,
                children: [
                  CircleAvatar(
                    backgroundColor: Color(
                      (Random().nextDouble() * 0xFFFFFF).toInt(),
                    ).withOpacity(1.0),
                    child: Text(
                      countries[index].substring(0, 2),
                      style: TextStyle(color: Colors.white),
                    ),
                  ),
                  Expanded(
                    child: Padding(
                      padding: const EdgeInsets.symmetric(horizontal: 8.0),
                      child: Text(
                        countries[index],
                        style: TextStyle(fontSize: 18),
                      ),
                    ),
                  ),
                ],
              ),
            ),
          ),
        ),
      ),
    );
  }
}

Wrapping up
So we are done with this part of tutorial. In this tutorial we learned to create our first flutter app with a beautiful listview containing different country name. In the next tutorial, we will learn to make app dynamic by fetching the coutries data from api instead of hardcoding it in the app.
You can find the source code of this tutorial on github.
Flutter tutorial
This repo contains all the apps built in Flutter tutorial series.
The source code for all of the app we are going to build in this series will live in different directory of this repo. For this tutorial source code is in country_list.
So that is it for me. See in you next tutorial. Thank you and Goodbye👋👋.


Top comments (3)
Wow, cool article! If you are interested in this topic, then look here dev.to/pablonax/flutter-templates-...
Thank you. I loved some of the templates in the article ❤️. They are a good way to start a flutter project.
yep, templates are a handy and simple solution to get your app started! By the way, I made another article where I compared free and paid templates, look if you're interested! Maybe you can share my article to develop the community together? dev.to/pablonax/free-vs-paid-flutt...