Last time, we took a look at adding chat to a Spring Boot app with the help of the TalkJS Chat API. This time, we will be reusing the same frontend code to add chat to a Flask app written in Python. This app is more or less similar to the previous one in terms of experience, but it uses Python. The same rules apply to this one as well. Ensure that you don’t replicate a similar setup for production since we are not implementing any authentication or authorization. This is a simpler example that showcases the integration between the two. The entire source code is available on GitHub.
Setting up a Python-Flask Application
You can install Python from their official website, but if you’re on Windows, the Windows Store also has Python. You can find it here. There are two additional dependencies that you need. One is flask and the other is flask_cors. You can install these using pip.
pip install -U flask-cors
pip install Flask
Note that flask_cors is only needed for allowing requests from the same host. We are also using sqlite3, but it comes out-of-the-box with Python.
Setting up the USERS table in SQLite
To setup a table in sqlite3 is very straightforward. You open a connection to the database. Then, execute a normal SQL statement using the execute() method on the connection. Note that we must use the execute() method for every statement execution.
conn = sqlite3.connect('test.db')
conn.execute('''CREATE TABLE IF NOT EXISTS USERS
        (ID INT PRIMARY KEY NOT NULL,
        DP CHAR(100) NOT NULL,
        EMAIL CHAR(100) NOT NULL,
        NAME CHAR(50) NOT NULL,
        ROLE CHAR(20) NOT NULL);''')
print("Table created successfully");
conn.close()
Once complete, close the database connection. Now that we have our table, we must set up the endpoints to insert users and retrieve them to the frontend.
Setting up the endpoints
Similar to the Spring Boot app, we have two endpoints, createUser and getUser. The first one is to create the user so that we can use them in the frontend, and the second one is to retrieve the user. We have given them a role attribute so that we can even theme the chat depending on their role in the future when they log in.
@app.route('/createUser/', methods=['POST'])
def createUser():
    conn = sqlite3.connect('test.db')
    requestData = request.json
    id = requestData['id']
    name = requestData['name']
    dp = requestData['dp']
    email = requestData['email']
    role = requestData['role']
    conn.execute("INSERT INTO USERS (ID,DP,EMAIL,NAME,ROLE) VALUES (?,?,?,?,?)",(id, dp, email, name, role));
    conn.commit()
    conn.close()
    return "User Created", 200
The first line denotes the endpoint and the methods you can use. Here, it is just POST. We open a connection to our test.db and retrieve the data from the request using Flask’s inbuilt methods. Once we have all the fields from the request, we execute an INSERT statement. Once the execution is complete, we commit and close the connection and return a 200 response with the user object.
The next endpoint is to retrieve the user. This API fetches the user based on the user id that is sent from the frontend. We use Flask’s inbuilt args method to get the query params and then retrieve the id from it.
@app.route('/getUser/', methods=['GET'])
def getUser():
    requestData = request.args
    id = requestData['id']
    conn = sqlite3.connect('test.db')
    cursor = conn.execute("SELECT * from USERS WHERE ID = ?", id)
    user = {
    'id': "",
    'name': "",
    'dp': "",
    'email': "",
    'role': ""
    }
    for row in cursor:
    user['id'] = row[0]
    user['dp'] = row[1]
    user['email'] = row[2]
    user['name'] = row[3]
    user['role'] = row[4]
    conn.close()
    response = jsonify(user)
    return response, 200
Once we get the id, we open up a connection to the database, and execute a SELECT statement passing the id. The difference here is that we get a cursor returned from the SELECT statement and we must query each row in it to get the actual data. There’s an empty user object to which we will append the retrieved data and once that’s done, we return it to the frontend with a 200 response.
Integrating with the frontend application
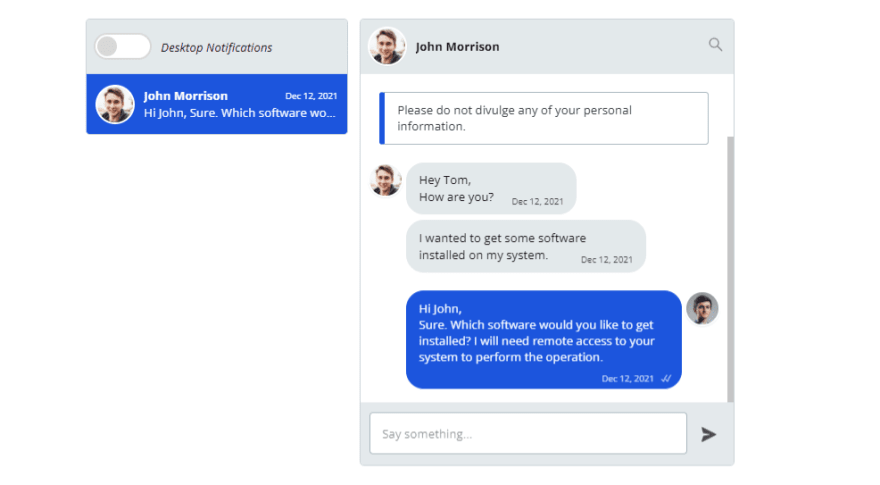
Refer to our previous article here to set up the frontend application. The source code is available in this GitHub repository. You can also look at our Getting Started guide to set up an application quickly. Once you have that setup, you should have a fully running chat application that retrieves user details from a Flask API and a database.


Latest comments (0)