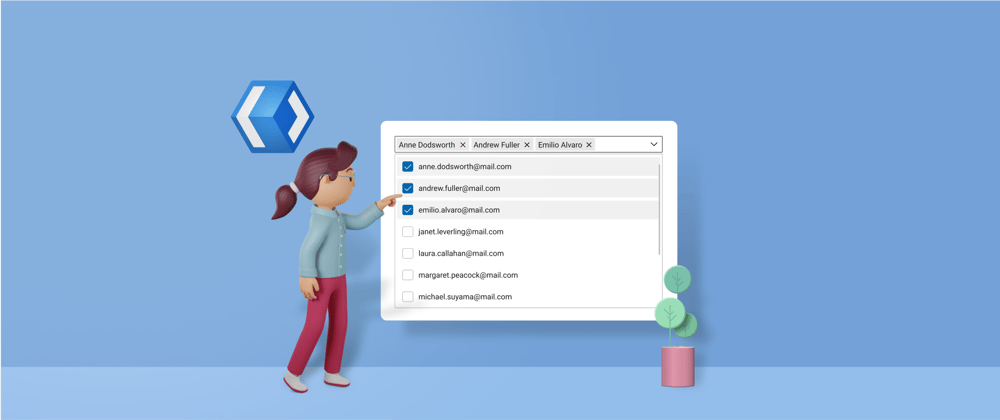
Syncfusion WinUI ComboBox (SfComboBox) is a selection control that allows users to type a value or choose an option from a predefined dropdown list. It supports both single and multiple selection. Multiple selection can be represented with checkboxes, too.
In this blog post, we are going to see how to use the multiple selection feature in the WinUI ComboBox control with code examples.
*Note: * Before proceeding, refer to the Getting Started with WinUI ComboBox documentation and Introducing the New WinUI 3 ComboBox blog.
Prepare data
Let’s create a model to store email information for people and populate it in the WinUI ComboBox control.
Refer to the following code.
Public class Person
{
    public string FirstName { get; set; }

    public string LastName { get; set; }

    public string EmailID { get; set; }
}
Then, create a ViewModel class to store the data source for the WinUI ComboBox control.
public class ViewModel : NotificationObject
{
    public ViewModel()
    {
        Persons = new ObservableCollection<Person>();
        Persons.Add(createNewPerson(“Anne”, “Dodsworth”, “anne.dodsworth@mail.com”));
        ...
    }

    public ObservableCollection<Person> Persons { get; set; }

    private Person CreateNewPerson(string firstName, string lastName, string eMail)
    {
        return new Person
        {
            FirstName = firstName,
            LastName = lastName,
            EmailID = eMail
        };
    }
}
Enable multiple selection
Single selection is the default selection mode in the WinUI ComboBox control. We can change it by setting the SelectionMode property as Multiple.
The multiple selection feature has two display modes: token and delimiter. Delimiter mode does not support editing. Since we have to choose people by editing, set the MultiSelectionDisplayMode property to Token mode.
Then, define the template to display email IDs in the dropdown list and the selected peoples’ names (both FirstName and LastName) in the editor.
Refer to the following code example.
<Grid>
    <Grid.DataContext>
        <local:ViewModel/>
    </Grid.DataContext>
    <editors:SfComboBox ItemsSource=”{Binding Persons}”
                        SelectionMode=”Multiple”
                        MultiSelectionDisplayMode=”Token”
                        PlaceholderText=”Try anne”>
        <editors:SfComboBox.ItemTemplate>
            <DataTemplate>
                <TextBlock Text=”{Binding EmailID}”/>
            </DataTemplate>
        </editors:SfComboBox.ItemTemplate>
        <editors:SfComboBox.TokenItemTemplate>
            <DataTemplate>
                <TextBlock>
                    <TextBlock.Inlines>
                        <Run Text=”{Binding FirstName}” />
                        <Run Text=”{Binding LastName}” />
                    </TextBlock.Inlines>
                </TextBlock>
            </DataTemplate>
        </editors:SfComboBox.TokenItemTemplate>
    </editors:SfComboBox>
</Grid>

Enable editing and filtering
Then, enable the editing, searching, and filtering behaviors as shown in the following code example.
<Grid>
    <editors:SfComboBox ItemsSource=”{Binding Persons}”
                        IsEditable=”True”
                        IsFilteringEnabled=”True”
                        IsTextSearchEnabled=”True”>
    </editors:SfComboBox>
</Grid>
Custom filtering
By default, filtering will be performed based on the DisplayMemberPath or TextMemberPath properties. The TextMemberPath property has high priority.
To filter items based on custom criteria, we need to define that custom filtering behavior in the IcomboBoxFilterBehavior interface.
Let us implement it in the ViewModel class. The GetMatchingIndexes event will be called whenever a user enters an input in the editor. This method will return indices of all items in the dropdown list that contain the input.
Refer to the following code example.
Public class ViewModel : NotificationObject, IcomboBoxFilterBehavior
{
    public List<int> GetMatchingIndexes(SfComboBox source, ComboBoxFilterInfo filterInfo)
    {
        var items = Persons;
        var ignoreCase = StringComparison.InvariantCultureIgnoreCase;

        // Get person details whose name or email id contains the given input.
        Var filteredItems = items.Where(
                                person => person.FirstName.Contains(filterInfo.Text, ignoreCase) ||
                                person.LastName.Contains(filterInfo.Text, ignoreCase) ||
                                person.EmailID.Contains(filterInfo.Text, ignoreCase));

        // Find the indices of the items to be shown in the drop-down.
        Var indices = filteredItems.Select<Person, int>(p => items.IndexOf(p)).ToList();

        return indices;
    }
}
Next, configure the filtering behavior in the ViewModel class.
<Grid>
    <editors:SfComboBox ItemsSource=”{Binding Persons}”
                        FilterBehavior=”{Binding}”>
    </editors:SfComboBox>
</Grid>
Now, we can easily filter items. But it will display items that contain the input in the order in which they are added in the ItemsSource.
For example: If I type n , I prefer to show Nancy first, instead of what is displayed in the following image.

To easily filter our required items alone, we have to reorder items based on priority. Let’s give high priority to items that StartsWith the input text. Then, the next priority goes to items that satisfy the Contains criteria. Also, we can avoid showing already selected items.
Refer to the following code example.
Public class ViewModel : NotificationObject, IcomboBoxFilterBehavior
{
    public List<int> GetMatchingIndexes(SfComboBox source, ComboBoxFilterInfo filterInfo)
    {
        var items = Persons;
        var ignoreCase = StringComparison.InvariantCultureIgnoreCase;

        // Avoid showing already selected items in the drop-down.
        Var unselectedItems = Persons.Except(source.SelectedItems).OfType<Person>();

        // Get person details whose name or email id starts with the given input.
        Var firstPriority = unselectedItems.Where(
                                person => person.FirstName.StartsWith(filterInfo.Text, ignoreCase) ||
                                person.LastName.StartsWith(filterInfo.Text, ignoreCase) ||
                                person.EmailID.StartsWith(filterInfo.Text, ignoreCase));

        // Append person whose name or email id contains the given input.
        Var secondPriority = unselectedItems.Except(firstPriority).Where(
                                person => person.FirstName.Contains(filterInfo.Text, ignoreCase) ||
                                person.LastName.Contains(filterInfo.Text, ignoreCase) ||
                                person.EmailID.Contains(filterInfo.Text, ignoreCase));

        // Find the indices of the item to be shown in the drop-down.
        Var indices = firstPriority.Union(secondPriority).Select<Person, int>(p => items.IndexOf(p)).ToList();

        return indices;
    }
}
Selecting custom items dynamically
The WinUI ComboBox allows selecting custom items that are not in the ItemsSource using the InputSubmitted event. This event will be fired when a given input does not match any of the items in the ItemsSource.
Now, set the required item (not in the dropdown list) in the Item property of the InputSubmitted event argument to easily add it to the selection list. This will help us send email to people outside our organization by adding them to the editor of the ComboBox control.
*Note: * Adding a custom item in the selection list will not include it in the ItemsSource of the WinUI ComboBox.
Refer to the following code example.
Private async void OnInputSubmitted(object sender, ComboBoxInputSubmittedEventArgs e)
{
    var emailString = e.Text;
    bool isEmail = Regex.IsMatch(emailString, @”\A(?:[a-z0-9!#$%&’*+/=?^_`{|}~-]+(?:\.[a-z0-9!#$%&’*+/=?^_`{|}~-]+)*@(?:[a-z0-9](?:[a-z0-9-]*[a-z0-9])?\.)+[a-z0-9](?:[a-z0-9-]*[a-z0-9])?)\Z”, RegexOptions.IgnoreCase);

    // If given input is in valid email format.
    if (isEmail)
    {
        // Create a new person for selection.
        Person newPerson = new Person();
        newPerson.EmailID = emailString;
        int atIndex = emailString.LastIndexOf(‘@’);
        int dotIndex = emailString.IndexOf(‘.’);
        string name = emailString.Substring(0, atIndex);
        if (name.Contains(‘.’))
        {
            newPerson.FirstName = name.Substring(0, dotIndex);
            newPerson.LastName = name.Substring(dotIndex + 1);
        }
        else
        {
            newPerson.FirstName = name;
        }
        e.Item = newPerson;
    }

    // If the email id is invalid, show error dialog.
    Else
    {
        var dialog = new ContentDialog();
        dialog.CloseButtonText = “Close”;
        dialog.Content = “Invalid email id!”;
        dialog.Title = “Error”;
        dialog.XamlRoot = this.Content.XamlRoot;
        await dialog.ShowAsync();
    }
}

GitHub reference
For more details, refer to the example for multiple selection made easy using the WinUI ComboBox control on GitHub.
Conclusion
Thanks for reading. I hope you enjoyed learning about the multiple selection feature in our WinUI ComboBox control. The WinUI ComboBox also supports styles, themes, placeholder text, and more. Try them out and leave your feedback in the comments section below!
You can download and check out our demo app in the Microsoft Store.
For current customers, the new version is available for download from the License and Downloads page. If you are not yet a Syncfusion customer, you can try our 30-day free trial to check out our newest features.
Also, you can contact us through our support forums, support portal, or feedback portal. We are always happy to assist you!


Top comments (0)