
In this blog post, we are going to discuss how to bind the Syncfusion Blazor DataGrid with a database using Dapper and perform CRUD operations. To demonstrate this, we are going to create a bug tracker database table in MS SQL Server and perform CRUD operations in that table in a Blazor server-side application.
Dapper
Dapper is a simple object mapper for .NET that owns the title of King of Micro ORM in terms of speed, as it’s virtually as fast as using a raw ADO.NET data reader. It is available as a NuGet package. An ORM (object-relational mapper) is responsible for mapping databases and programming languages.
Dapper is database independent. It does not contain any database-specific implementation. Arguably, it is chosen by people who want to write their own SQL query. It simply provides extension methods for the IDbConnection interface which helps users to query and perform CRUD operations in databases.
Dapper is in production use at Stack Overflow.
Creating the database
First things first, create a database named BugTracker and a table named Bugs to hold the list of bugs. The process to do this is explained in detail as follows:
- Open SQL Server 2017.
- Create a new database named BugTracker.
- Right-click on the created database and select New Query.
- Use the following SQL query to create a table named Bugs.
Create Table Bugs(
Id BigInt Identity(1,1) Primary Key Not Null,
Summary Varchar(400) Not Null,
BugPriority Varchar(100) Not Null,
Assignee Varchar(100),
BugStatus Varchar(100) Not Null)
The table design will look like the following screenshot.

Creating the Blazor server-side application
Open Visual Studio 2019, select Create a New Project , select Blazor App , and then click Next. 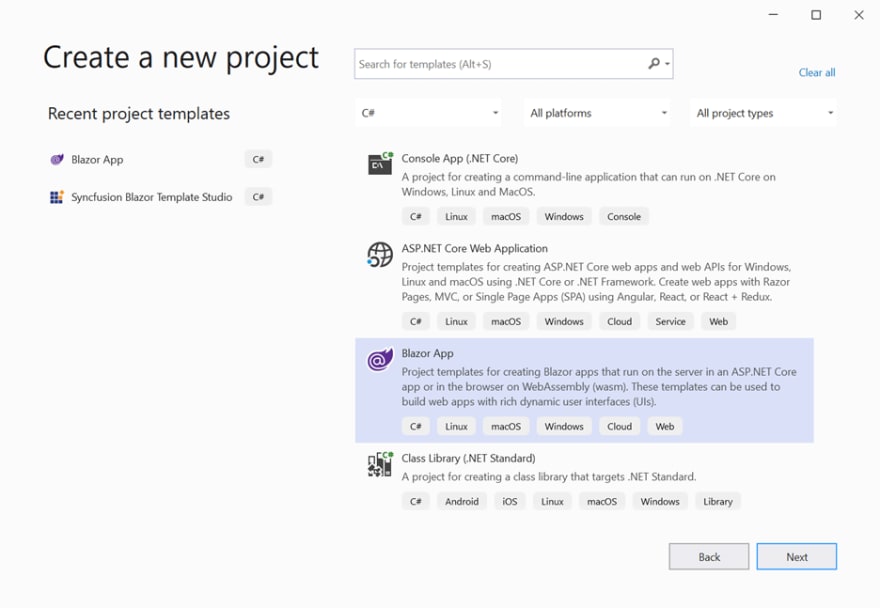
In the next window, provide the project name and click Create. In this example, I am using Dapper.CRUD as the Blazor project name.

Now select the Blazor Server App project template and click Create to create the Blazor server-side application.

Adding the Dapper package and creating a model class
To use Dapper and access the database in our Blazor application and perform CRUD operations, we need to install a few NuGet packages. Run the following commands in the Package Manager Console to install the necessary NuGet packages:
- Install-Package Dapper -Version 2.0.35 : Enables us to use Dapper in our Blazor application.
- Install-Package Microsoft.Data.SqlClient -Version 2.0.1 : Provides database access classes such as SqlConnection, SqlCommand, and so on. Also provides the data provider for MS SQL Server.
Most ORMs provide scaffolding options to create model classes, but Dapper doesn’t have any in-built scaffolding option. So, we need to create the model class manually. Here we are creating a class named Bug.cs in the Data folder as follows.

Creating data access layer
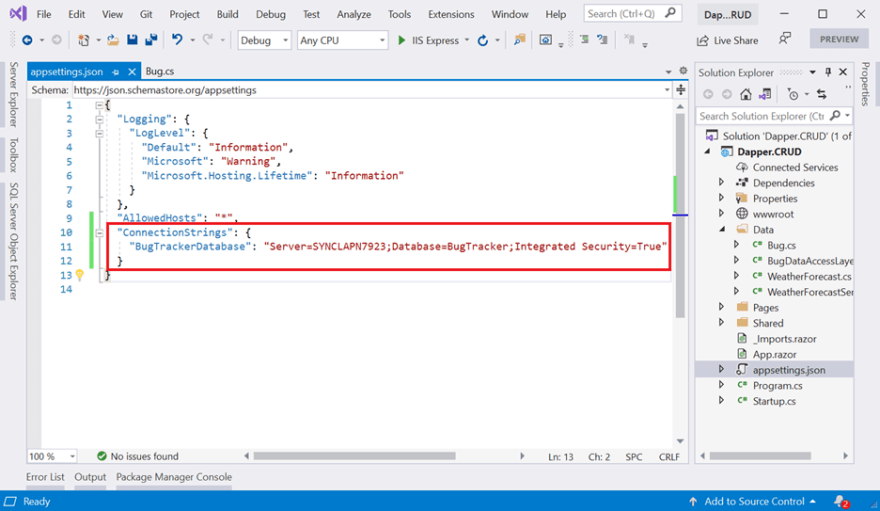
Before creating the data access layer, we need to set the connection string of our database in the appsettings.json file as illustrated in the following screenshot.
Now right-click on the Data folder and select Class to create a new class. Here I am naming it BugDataAccessLayer.cs. Now replace the code in this class with the following code, which contains code to handle CRUD operations in the Bugs table.
public class BugDataAccessLayer
{
    public IConfiguration Configuration;
    private const string BUGTRACKER_DATABASE = "BugTrackerDatabase";
    private const string SELECT_BUG = "select * from bugs";
    public BugDataAccessLayer(IConfiguration configuration)
    {
       Configuration = configuration; //Inject configuration to access Connection string from appsettings.json.
    }

    public async Task<List<Bug>> GetBugsAsync()
    {
       using (IDbConnection db = new SqlConnection(Configuration.GetConnectionString(BUGTRACKER_DATABASE)))
       {
           db.Open();
           IEnumerable<Bug> result = await db.QueryAsync<Bug>(SELECT_BUG);
           return result.ToList();
       }
    }

    public async Task<int> GetBugCountAsync()
    {
       using (IDbConnection db = new SqlConnection(Configuration.GetConnectionString(BUGTRACKER_DATABASE)))
       {
            db.Open();
            int result = await db.ExecuteScalarAsync<int>("select count(*) from bugs");
            return result;
       }
    }

    public async Task AddBugAsync(Bug bug)
    {
       using (IDbConnection db = new SqlConnection(Configuration.GetConnectionString(BUGTRACKER_DATABASE)))
       {
            db.Open();
            await db.ExecuteAsync("insert into bugs (Summary, BugPriority, Assignee, BugStatus) values (@Summary, @BugPriority, @Assignee, @BugStatus)", bug);
       }
    }

    public async Task UpdateBugAsync(Bug bug)
    {
       using (IDbConnection db = new SqlConnection(Configuration.GetConnectionString(BUGTRACKER_DATABASE)))
       {
            db.Open();
            await db.ExecuteAsync("update bugs set Summary=@Summary, BugPriority=@BugPriority, Assignee=@Assignee, BugStatus=@BugStatus where id=@Id", bug);
       }
    }

    public async Task RemoveBugAsync(int bugid)
    {
       using (IDbConnection db = new SqlConnection(Configuration.GetConnectionString(BUGTRACKER_DATABASE)))
       {
            db.Open();
            await db.ExecuteAsync("delete from bugs Where id=@BugId", new { BugId = bugid });
       }
    }
}
In the above code example:
- In the constructor of the BugDataAccessLayer , we have injected IConfiguration , which help us to get the connection string provided in appsettings.json.
- GetBugsAsync method performs the select operation and returns the list of bugs from the Bugs table.
- AddBugAsync method inserts a new bug into the Bugs table.
- UpdateBugAsync method updates the given bug object in the table.
- RemoveBugAsync method removes the given bug by its ID.
Now register BugDataAccessLayer as a scoped service in the Startup.cs file as follows.

Adding the Syncfusion Blazor component
To add a Syncfusion Blazor component to our application, run the following command in the Package Manager Console:
| Install-Package Syncfusion.Blazor -Version 18.3.0.50 |
Once the Syncfusion Blazor package is added to our dependencies section successfully, open the _Import.razor file and add the following namespaces, which are required to use Syncfusion Blazor components in this application.
@using Syncfusion.Blazor
@using Syncfusion.Blazor.Grids
@using Syncfusion.Blazor.Data
Open the Startup.cs file and register the Syncfusion service in the ConfigureService method as follows.
using Syncfusion.Blazor;

namespace Dapper.CRUD
{
    public class Startup
    {
        public Startup(IConfiguration configuration)
        {
            Configuration = configuration;
        }

        public IConfiguration Configuration { get; }

        // This method gets called by the runtime. Use this method to add services to the container.
        // For more information on how to configure your application, visit https://go.microsoft.com/fwlink/?LinkID=398940
        public void ConfigureServices(IServiceCollection services)
        {
            services.AddRazorPages();
            services.AddServerSideBlazor();
            services.AddSingleton<WeatherForecastService>();
            services.AddScoped<BugDataAccessLayer>();
            services.AddSyncfusionBlazor();
        }

       . . . . . .
    }
}
Syncfusion Blazor provides different themes. They are:
- Bootstrap4
- Material
- Office 365
- Bootstrap
- High Contrast
In this demo application, I am going to use the Bootstrap4 theme. To add the theme, open the Pages/_Host.cshtml file and add the following CSS reference code.
<link href="_content/Syncfusion.Blazor/styles/bootstrap4.css" rel="stylesheet" />
Creating the custom data adapter
One of the notable features in the DataGrid is its flexible data-binding capability using the SfDataManager component. It acts as an interface between the data source and the DataGrid to handle data requests and responses. DataManager provides various in-built data adapters to interact with data sources such as OData services, web APIs, and so on. If the built-in adapters provided don’t match our need, then we can simply use our own custom adapter to handle the data operations manually.
To bind the Bug table to the Syncfusion Blazor DataGrid, we are going to use the custom data binding feature.
The following points must be considered for creating a custom adapter:
- Our custom adapter must extend the *DataAdaptor * class.
- Override available CRUD methods to handle data querying and manipulation.
- Register our custom adapter class as service in the Startup.cs file.
Now, let’s create a new class named BugDataAdaptor.cs in the Data folder and replace the code in that class with the following.
public class BugDataAdaptor: DataAdaptor
{
   private BugDataAccessLayer _dataLayer;
   public BugDataAdaptor(BugDataAccessLayer bugDataAccessLayer)
   {
      _dataLayer = bugDataAccessLayer;
   }

   public override async Task<object> ReadAsync(DataManagerRequest dataManagerRequest, string key = null)
   {
       List<Bug> bugs = await _dataLayer.GetBugsAsync();
       int count = await _dataLayer.GetBugCountAsync();
       return dataManagerRequest.RequiresCounts ? new DataResult() { Result = bugs, Count = count } : count;
   }

   public override async Task<object> InsertAsync(DataManager dataManager, object data, string key)
   {
       await _dataLayer.AddBugAsync(data as Bug);
       return data;
    }

    public override async Task<object> UpdateAsync(DataManager dataManager, object data, string keyField, string key)
    {
        await _dataLayer.UpdateBugAsync(data as Bug);
        return data;
    }

    public override async Task<object> RemoveAsync(DataManager dataManager, object primaryKeyValue, string keyField, string key)
    {
        await _dataLayer.RemoveBugAsync(Convert.ToInt32(primaryKeyValue));
        return primaryKeyValue;
    }
}
In the above code example, we:
- Extended the BugDataAdaptor class from the *DataAdaptor * class.
- Injected a BugDataAccessLayer instance to perform data operations.
- Handled the CRUD methods.
Adding the Syncfusion Blazor DataGrid component
Now that the application is configured to use Syncfusion Blazor components, let’s include the following DataGrid component code in the Index.razor page.
@using Dapper.CRUD.Data

<SfGrid TValue="Bug" Toolbar="@(new List<string>() { "Add", "Edit", "Delete", "Update", "Cancel" })">
    <SfDataManager AdaptorInstance="typeof(BugDataAdaptor)" Adaptor="Adaptors.CustomAdaptor"></SfDataManager>
    <GridEditSettings AllowAdding="true" AllowEditing="true" AllowDeleting="true"></GridEditSettings>
    <GridColumns>
        <GridColumn Field="@nameof(Bug.Id)" IsPrimaryKey="true" Visible="false"></GridColumn>
        <GridColumn Field="@nameof(Bug.Summary)" Width="100"></GridColumn>
        <GridColumn Field="@nameof(Bug.BugPriority)" HeaderText="Priority" Width="100"></GridColumn>
        <GridColumn Field="@nameof(Bug.Assignee)" Width="100"></GridColumn>
        <GridColumn Field="@nameof(Bug.BugStatus)" HeaderText="Status" Width="100"></GridColumn>
    </GridColumns>
</SfGrid>
In the above code example, we:
- Defined the SfDataManager component to provide a data source to the grid. You can notice that we have specified the AdaptorInstance property with the type of the custom adapter we created in previous step and mentioned Adaptor property as Adaptors.CustomAdaptor.
- Specified TValue as *Bug * class.
- Enabled editing using the *GridEditSettings * component.
- Mentioned the Toolbar property with required toolbar options.
- Mentioned the Id column as a primary key column using IsPrimaryKey property and made it hidden.
Create a row
To create a new row in Blazor app, click the Add toolbar button. The new record edit form will look similar to the following screenshot.

Clicking the Update toolbar button will call the InsertAsync method of our BugDataAdaptor to insert the record in the Bug table. A successfully inserted record in the grid will look similar to the following screenshot.

Update a row
To edit a row in Blazor app, select any row and the click the Edit toolbar button. The edit form will look similar to the following screenshot.

Here we are updating the value of the Status field from Not started to In progress. Clicking the Update toolbar button will call the UpdateAsync method of our BugDataAdaptor to update the record in the Bug table. We have now successfully updated the record. Now the grid will look similar to the following screenshot.

Delete a row
To delete a row in Blazor app, select any row and click the Delete toolbar button. Clicking the Delete button will call the RemoveAsync method of our BugDataAdaptor to delete the record from the Bug table.
Resource
For more information, you can check out the Blazor DataGrid CRUD application using Dapper demo .
Conclusion
In this blog, we have learned the procedure to create a Blazor server-side application, include the Syncfusion Blazor DataGrid component in it and perform CRUD operations using Dapper ORM.
If you have any questions, please let us know in the comments section below. You can also contact us through our support forums, Direct-Trac, or feedback portal. We are always happy to assist you!
If you like this blog post, we think you’ll also like the following articles too:


Top comments (0)