
Stored procedures are pieces of reusable code that you can save in a database data dictionary. They help you extract, edit, and remove data from a database without writing the code to do so again and again. They save you time, reduce workloads, and increase productivity.
In this blog, we will see how to add stored procedures to an ASP .NET Core application using the SPToCore tool.
This blog is organized into the following sections:
- Prerequisites
- Download SPToCore tool
- Get stored procedure class file
- Add stored procedures in .NET Core application
- Notes
- Conclusion
Let’s get started!
Prerequisites
The following items should be installed in your machine.
Download the SPToCore tool
Download and extract the SPToCore tool from its GitHub location.
Get stored procedure class file
After downloading the SPToCore tool, we need to get the stored procedure class file.
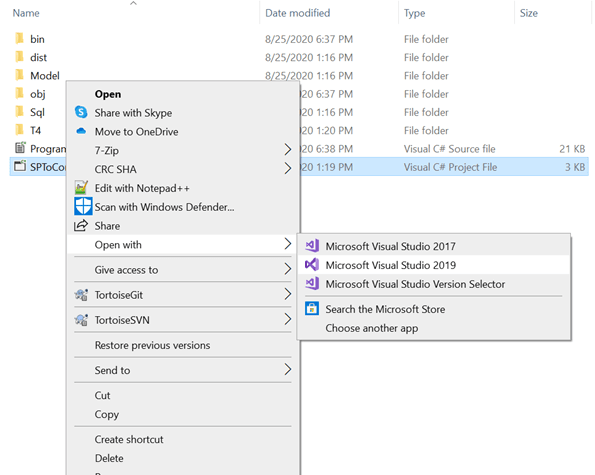
- Open the SPToCore tool using Visual Studio as shown in the following the screenshot.
- Open the program.cs file in the Solution Explorer. It will look like the following screenshot.

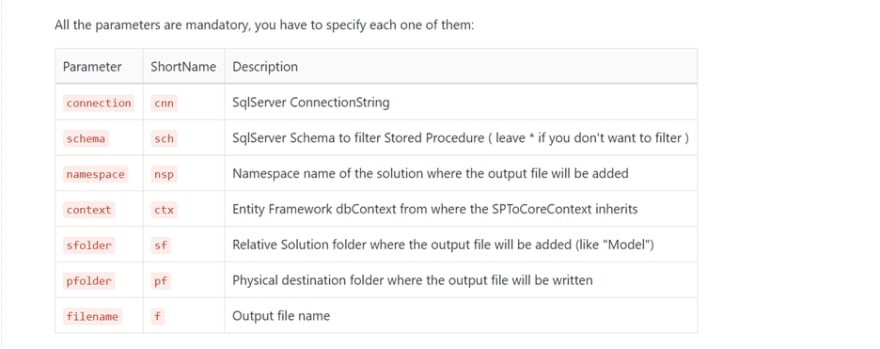
- In the code editor, enter your parameters as shown in the following screenshots.
 Parameter Details
The following parameter details are reproduced from the SPToCore GitHub README.
Parameter Details
The following parameter details are reproduced from the SPToCore GitHub README.
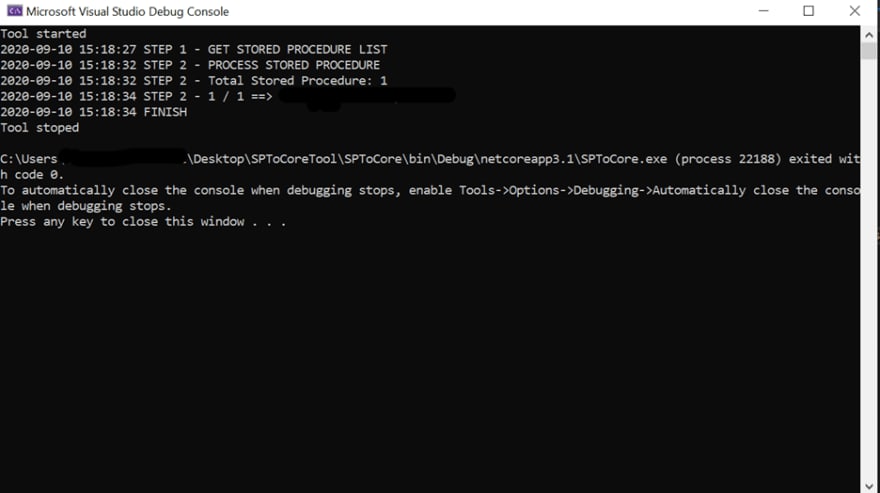
- After entering the parameters, run the SPToCore tool and it will open the following window.
- After completing the tool execution, check the output folder to ensure it is as you specified in the parameter.

- Open the automatically generated class file from the output folder in Visual Studio and it’ll show you the following code.

Now, you can attach this automatically generated class into your .NET Core application by following the steps in the next section.
How to add a stored procedure in a .NET Core application
- Open Visual Studio and create an ASP.NET Core Blazor application. Refer to the following screenshot.

- Create a folder and name it Entity.

- Then, copy your automatically generated class file and paste it in the Entity folder as shown below.

- Then, run the following commands in the package manager console to install the necessary NuGet packages.
| PM> Install-Package Microsoft.EntityFrameworkCore.SqlServer |
PM> Install-Package Microsoft.EntityFrameworkCore
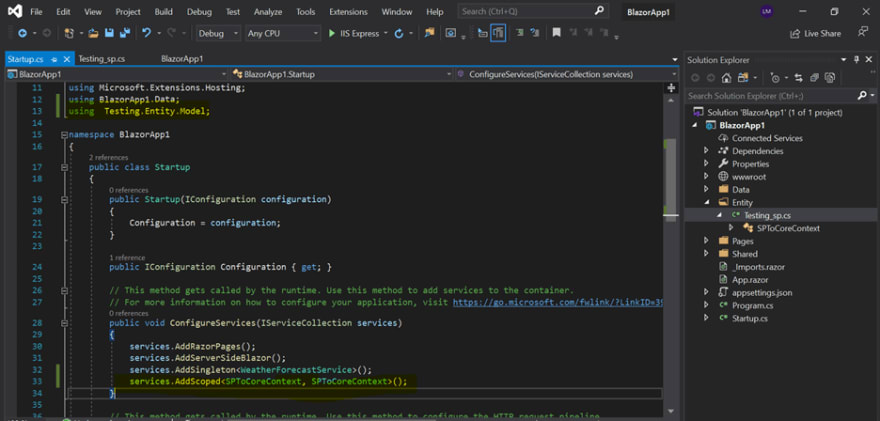
- Register your Entity class in the ConfigureServices method present in the startup class. Refer to the following screenshot.
- Then, inject the IConfiguration service into the automatically generated class using the automatically generated class constructor. This IConfiguration service is used to read configuration data from key-value pairs employing a sort of configuration source.

- Override the OnConfiguring method by passing the following code in the automatically generated class file.
protected override void OnConfiguring(DbContextOptionsBuilder optionsBuilder)
 {
optionsBuilder.UseSqlServer(_configuration.GetConnectionString("DBConnection"));
 }
In this method, we should provide a connection string. There are two ways to add a connection string:
- Hard-coded type.
- Get connection string from appsettings.json file.
We should not hard-code the connection string as this approach has some security issues. So, I recommend you get the connection string from the appsettings.json file.
How to add connection string
Enter your connection string in the appsettings.json file as shown below.
Note: Verify the connection string in the appsettings.json file and OnConfiguring method are the same.

- Finally, the stored procedure is added in your .NET Core application. You can execute the stored procedure by calling the async() method present in the automatically generated class file.
*Note: * A sample stored procedure calling is shown below.


Notes
If you would like to update the whole database, use the following command.
| Scaffold-DbContext -Connection name=MyConnection -Provider Microsoft.EntityFrameworkCore.SqlServer -OutputDir Models -Context MyDbContext -Force |
If you would like to update a target table, use the following command.
| Scaffold-DbContext "Server=(localdb)\mssqllocaldb;Database=DatabaseName;Trusted_Connection=True;" Microsoft.EntityFrameworkCore.SqlServer -OutputDir DirectoryNameOfYourModels -Tables employee -f |
If you’re using .NET Core CLI, then use the following command.
| dotnet ef dbcontext scaffold "Server=(localdb)\mssqllocaldb;Database=DatabaseName;Trusted_Connection=True;" Microsoft.EntityFrameworkCore.SqlServer -o DirectoryNameOfYourModels -t employee -f |
Conclusion
In this blog, we learned how to generate a stored procedure class using the SPToCore tool and how to incorporate the stored procedure in an ASP.NET Core application. With this you can retrieve, edit, and remove data from a database easily without the need to write the code again and again. This will definitely save you time, reduce your workload, and increase your productivity.
With over 70 components, our ASP.NET Core toolkit powered by Essential JS 2 contains all you need for building line-of-business applications, including popular widgets such as a DataGrid, Charts, Gantt Chart, Diagram, Spreadsheet, Scheduler, and more. Use them to jump-start your development!
For existing customers, the latest version is available for download from the License and Downloads page. If you are not yet a Syncfusion customer, you can try our 30-day free trial to check out the available features. Also, you can try our samples from this GitHub location.
If you wish to send us feedback, please use the comments given below. You can also contact us through our support forums, Direct-Trac, or feedback portal. We are always happy to assist you!


Top comments (0)