
Managing the files and folders of different users in a single file system is one of the most common use cases in an organization. But still, we need to maintain the privacy of the files, though they are in a single file system. In this blog, we will discuss changing the directories and files based on the user login in a Blazor application. We are going to use Syncfusion Blazor File Manager control to achieve this.
Syncfusion Blazor File Manager is a graphical user interface component for managing the file system. It allows users to perform common file operations like accessing, editing, and sorting files or folders. This component also provides easy navigation through folders to select a file or folder in the file system.
Let’s get started.
Initialize the Blazor File Manager
First things first, let’s initialize the Blazor File Manager component.
Note: Refer to the Getting Started with Blazor File Manager documentation to render the File Manager in your application.
- Add the Blazor File Manager component with local service in the razor file, as shown in the following code example.
@using Syncfusion.Blazor.FileManager

<SfFileManager TValue="FileManagerDirectoryContent">
    <FileManagerAjaxSettings Url="/api/Mail/FileOperations"
                             DownloadUrl="/api/Mail/Download"
                             UploadUrl="/api/Mail/Upload"
                             GetImageUrl="/api/Mail/GetImage">
    </FileManagerAjaxSettings>
</SfFileManager>
- Then, create a controller named MailController and add the following code in the MailController.cs file.
public class MailController: Controller
{
    public PhysicalFileProvider operation;
    public string basePath;
    string root = "wwwroot\\Files";

    [Obsolete]
    public MailController(IHostingEnvironment hostingEnvironment)
    {
        this.basePath = hostingEnvironment.ContentRootPath;
        this.operation = new PhysicalFileProvider();
        this.operation.RootFolder(this.basePath + "\\" + this.root);
    }

    // Processing the File Manager operations.
    [Route("FileOperations")]
    public object FileOperations([FromBody] FileManagerDirectoryContent args)
    {
        switch (args.Action)
        {
            // Add your custom action here.
            case "read":
                // Path - Current path; ShowHiddenItems - Boolean value to show/hide hidden items.
                return this.operation.ToCamelCase(this.operation.GetFiles(args.Path, args.ShowHiddenItems));
        ...
        }
        return null;
    }
}
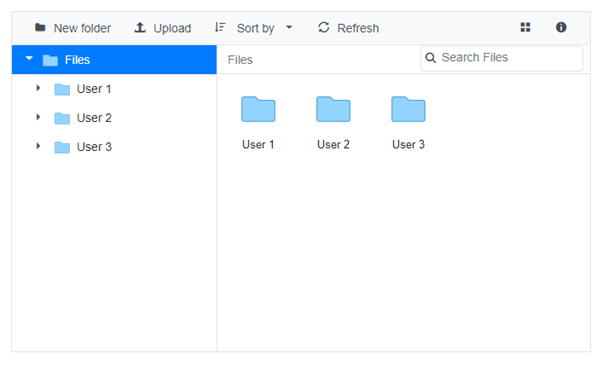
- Now, add the root path to display the folders and files in the Blazor File Manager component. Here, we have showcased the folder and files from the wwwroot\Files.
Then, the component will be rendered like in the following screenshot. We have displayed three different users’ details in the Files folder.
Add Entity Framework
We are going to use Entity Framework to handle logged-in user details. Follow these steps to configure Entity Framework in the application:
- Create a DBContext class named UserContext to connect to the Microsoft SQL Server database.Refer to the following code example.
using Microsoft.EntityFrameworkCore;
using Demo.Data;

namespace Demo.Shared.DataAccess
{
    public class UserContext : DbContext
    {
        public virtual DbSet<UserDetails> User { get; set; }

        protected override void OnConfiguring(DbContextOptionsBuilder optionsBuilder)
        {
            if (!optionsBuilder.IsConfigured)
            {
                // To make the sample runnable, replace your local file path for the MDF file here.
                optionsBuilder.UseSqlServer(@"Data Source=(LocalDB)\MSSQLLocalDB;AttachDbFilename='D:\Demo\Shared\App_Data\NORTHWND.MDF';Integrated Security=True;Connect Timeout=30");
            }
        }
    }
}
- Now, create a class named UserDataAccessLayer , which acts as the data access layer for retrieving the records from the database table. Also, add the methods GetUser ** and **UpdateUser in the UserDataAccessLayer.cs file to handle the read and update operations, respectively.Refer to the following code example.
using Microsoft.EntityFrameworkCore;
using Demo.Data;

namespace Demo.Shared.DataAccess
{
    public class UserDataAccessLayer
    {
        UserContext db = new UserContext();

        // Returns the User data from the database.
        public DbSet<UserDetails> GetUser()
        {
            try
            {
                return db.User;
            }
            catch
            {
                throw;
            }
        }

        // Update the existing data in the database.
        public void UpdateUser(UserDetails name)
        {
            try
            {
                db.Entry(name).State = EntityState.Modified;
                db.SaveChanges();
            }
            catch
            {
                throw;
            }
        }
    }
}
- We already created the controller class MailController to handle the file operations. Now, we are going to add methods to handle the data from the Entity Framework in this controller.Refer to the following code example.
// Get user ID from a data source.
[HttpGet("{id}")]
public object GetIndex()
{
    // Get the DataSource from Database.
    var data = db.GetUser().ToList();
    int UserId;
    var count = data.Count;
    if (count > 0)
    {
        UserId = (data[data.Count - 1].UserId);
    }
    else
    {
        UserId = 1;
    }
    return UserId;
}

// Get username from data source.
public object GetName()
{
    // Get the DataSource from Database.
    var data = db.GetUser().ToList();
    string name;
    var count = data.Count;
    if (count > 0)
    {
        name = (data[data.Count - 1].Name);
    }
    else
    {
        name = "User 1";
    }
    return name;
}

// Update user details into data source.
[Route("SetUser")]
public object SetUser([FromBody] User args)
{
    UserDetails CurrentUser = new UserDetails();
    CurrentUser.Id = 1;
    CurrentUser.UserId = args.UserId;
    CurrentUser.Name = args.Name;
    db.UpdateUser(CurrentUser);
    return null;
}
Add logged in page
Let’s use the Blazor Dropdown List component to switch the user login. To do so, add the list of user details as the data source for the Dropdown List component.
Refer to the following code.
@using Syncfusion.Blazor.DropDowns

<span>Signed in: </span>
<SfDropDownList TValue="string" TItem="User" Placeholder="Select a User" DataSource="@LocalData" Width="200px" @bind-Value="@DropVal">
    <DropDownListFieldSettings Value="UserId" Text="Name"></DropDownListFieldSettings>
    <DropDownListEvents TValue="string" TItem="User" ValueChange="OnSelected"></DropDownListEvents>
</SfDropDownList>

@code {

    public string DropVal;
    List<User> LocalData = new List<User> {
        new User() { UserId = 1, Name = "User 1" },
        new User() { UserId = 2, Name = "User 2" },
        new User() { UserId = 3, Name = "User 3" },
        };
    protected override async Task OnInitializedAsync()
    {
        // To get the signed item from the database.
        var id = await Http.GetJsonAsync<int>("api/Mail/index");
        this.DropVal = id.ToString();
    }
}
Update the Blazor File Manager based on logged in details
For initial rendering, get the logged-in user’s details from the data source and set the root folder using the RootFolder method in the controller.
var rootPath = this.root + "\\" + GetName();
this.operation.RootFolder(this.basePath + "\\" + this.root);
Then, add the change event in the Blazor Dropdown List component to handle the dynamic user login.
Refer to the following code example.
private async Task OnSelected(ChangeEventArgs<string, User> args)
{
    if (args.IsInteracted)
    {
        string stringPayload = await Task.Run(() => JsonSerializer.Serialize(args.ItemData));
        HttpContent httpContent = new StringContent(stringPayload, Encoding.UTF8, "application/json");
        await Http.PutJsonAsync("api/Mail/SetUser", args.ItemData);
        uriHelper.NavigateTo(uriHelper.Uri, forceLoad: true);
    }
}
Output
The following code example is the combined code in the Razor page.
@using Syncfusion.Blazor.FileManager
@using Syncfusion.Blazor.DropDowns
@using System.Text;
@using System.Text.Json;
@using Demo.Data;

@inject HttpClient Http
@inject NavigationManager uriHelper;

<span>Signed in: </span>
<SfDropDownList TValue="string" TItem="User" Placeholder="Select a User" DataSource="@LocalData" Width="200px" @bind-Value="@DropVal">
    <DropDownListFieldSettings Value="UserId" Text="Name"></DropDownListFieldSettings>
    <DropDownListEvents TValue="string" TItem="User" ValueChange="OnSelected"></DropDownListEvents>
</SfDropDownList>
<div style="margin: 20px 0">
    <SfFileManager TValue="FileManagerDirectoryContent">
        <FileManagerAjaxSettings Url="/api/Mail/FileOperations"
                                 DownloadUrl="/api/Mail/Download"
                                 UploadUrl="/api/Mail/Upload"
                                 GetImageUrl="/api/Mail/GetImage">
        </FileManagerAjaxSettings>
    </SfFileManager>
</div>

@code {

    public string DropVal;
    List<User> LocalData = new List<User> {
        new User() { UserId = 1, Name = "User 1" },
        new User() { UserId = 2, Name = "User 2" },
        new User() { UserId = 3, Name = "User 3" },
        };
    protected override async Task OnInitializedAsync()
    {
        // To get the signed item from the database.
        var id = await Http.GetJsonAsync<int>("api/Mail/index");
        this.DropVal = id.ToString();
    }
    private async Task OnSelected(ChangeEventArgs<string, User> args)
    {
        if (args.IsInteracted)
        {
            string stringPayload = await Task.Run(() => JsonSerializer.Serialize(args.ItemData));
            HttpContent httpContent = new StringContent(stringPayload, Encoding.UTF8, "application/json");
            await Http.PutJsonAsync("api/Mail/SetUser", args.ItemData);
            uriHelper.NavigateTo(uriHelper.Uri, forceLoad: true);
        }
    }
}
Next is the combined code for the controller page.
using Microsoft.AspNetCore.Mvc;
using System;
using System.Collections.Generic;
using System.Linq;
//File Manager's base functions are available in the below namespace.
using Syncfusion.EJ2.FileManager.Base;
//File Manager's operations are available in the below namespace.
using Syncfusion.EJ2.FileManager.PhysicalFileProvider;
using Microsoft.AspNetCore.Hosting;
using Microsoft.AspNetCore.Cors;
using Microsoft.AspNetCore.Http;
using Microsoft.AspNetCore.Http.Features;
using Newtonsoft.Json;
using Demo.Shared.DataAccess;
using Demo.Data;

namespace Demo.Server.Controllers
{
    [Route("api/[controller]")]
    [EnableCors("AllowAllOrigins")]
    public class MailController : Controller
    {
        public PhysicalFileProvider operation;
        UserDataAccessLayer db = new UserDataAccessLayer();
        public string basePath;
        string root = "wwwroot\\Files";

        [Obsolete]
        public MailController(IHostingEnvironment hostingEnvironment)
        {
            this.basePath = hostingEnvironment.ContentRootPath;
            this.operation = new PhysicalFileProvider();
        }

        // Processing the File Manager operations.
        [Route("FileOperations")]
        public object FileOperations([FromBody] FileManagerDirectoryContent args)
        {
            var rootPath = this.root + "\\" + GetName();
            this.operation.RootFolder(this.basePath + "\\" + rootPath);
            switch (args.Action)
            {
                // Add your custom action here.
                case "read":
                    // Path - Current path; ShowHiddenItems - Boolean value to show/hide hidden items.
                    return this.operation.ToCamelCase(this.operation.GetFiles(args.Path, args.ShowHiddenItems));
                case "delete":
                    // Path - Current path of the folder to be deleted; Names - Name of the files to be deleted.
                    return this.operation.ToCamelCase(this.operation.Delete(args.Path, args.Names));
                case "copy":
                    // Path - Path from where the file was copied; TargetPath - Path where the file/folder is to be copied; RenameFiles - Files with same name in the copied location that are confirmed for renaming; TargetData - Data of the copied file
                    return this.operation.ToCamelCase(this.operation.Copy(args.Path, args.TargetPath, args.Names, args.RenameFiles, args.TargetData));
                case "move":
                    // Path - Path from where the file was cut; TargetPath - Path where the file/folder is to be moved; RenameFiles - Files with same name in the moved location that are confirmed for renaming; TargetData - Data of the moved file
                    return this.operation.ToCamelCase(this.operation.Move(args.Path, args.TargetPath, args.Names, args.RenameFiles, args.TargetData));
                case "details":
                    // Path - Current path where details of file/folder are requested; Name - Names of the requested folders.
                    return this.operation.ToCamelCase(this.operation.Details(args.Path, args.Names));
                case "create":
                    // Path - Current path where the folder is to be created; Name - Name of the new folder.
                    return this.operation.ToCamelCase(this.operation.Create(args.Path, args.Name));
                case "search":
                    // Path - Current path where the search is performed; SearchString - String typed in the searchbox; CaseSensitive - Boolean value which specifies whether the search must be casesensitive.
                    return this.operation.ToCamelCase(this.operation.Search(args.Path, args.SearchString, args.ShowHiddenItems, args.CaseSensitive));
                case "rename":
                    // Path - Current path of the renamed file; Name - Old file name; NewName - New file name.
                    return this.operation.ToCamelCase(this.operation.Rename(args.Path, args.Name, args.NewName));
            }
            return null;
        }
        // Uploads the file(s) into a specified path.
        [Route("Upload")]
        public IActionResult Upload(string path, IList<IFormFile> uploadFiles, string action)
        {
            var rootPath = this.root + "\\" + GetName();
            this.operation.RootFolder(this.basePath + "\\" + rootPath);
            FileManagerResponse uploadResponse;
            uploadResponse = operation.Upload(path, uploadFiles, action, null);
            if (uploadResponse.Error != null)
            {
                Response.Clear();
                Response.ContentType = "application/json; charset=utf-8";
                Response.StatusCode = Convert.ToInt32(uploadResponse.Error.Code);
                Response.HttpContext.Features.Get<IHttpResponseFeature>().ReasonPhrase = uploadResponse.Error.Message;
            }
            return Content("");
        }

        // Downloads the selected file(s) and folder(s).
        [Route("Download")]
        public IActionResult Download(string downloadInput)
        {
            var rootPath = this.root + "\\" + GetName();
            this.operation.RootFolder(this.basePath + "\\" + rootPath);
            FileManagerDirectoryContent args = JsonConvert.DeserializeObject<FileManagerDirectoryContent>(downloadInput);
            return operation.Download(args.Path, args.Names, args.Data);
        }

        // Gets the image(s) from the given path.
        [Route("GetImage")]
        public IActionResult GetImage(FileManagerDirectoryContent args)
        {
            var rootPath = this.root + "\\" + GetName();
            this.operation.RootFolder(this.basePath + "\\" + rootPath);
            return this.operation.GetImage(args.Path, args.Id, false, null, null);
        }

        // Get user ID from data source.
        [HttpGet("{id}")]
        public object GetIndex()
        {
            // Get the DataSource from Database.
            var data = db.GetUser().ToList();
            int UserId;
            var count = data.Count;
            if (count > 0)
            {
                UserId = (data[data.Count - 1].UserId);
            }
            else
            {
                UserId = 1;
            }
            return UserId;
        }

        // Get the username from data source.
        public object GetName()
        {
            // Get the DataSource from Database
            var data = db.GetUser().ToList();
            string name;
            var count = data.Count;
            if (count > 0)
            {
                name = (data[data.Count - 1].Name);
            }
            else
            {
                name = "User 1";
            }
            return name;
        }

        // Update user details in data source.
        [Route("SetUser")]
        public object SetUser([FromBody] User args)
        {
            UserDetails CurrentUser = new UserDetails();
            CurrentUser.Id = 1;
            CurrentUser.UserId = args.UserId;
            CurrentUser.Name = args.Name;
            db.UpdateUser(CurrentUser);
            return null;
        }
    }
}
Finally, compile and run this codes. Then, the Blazor File Manager will display the files and folders based on the user login like the following .gif image.

GitHub Repository
For more information, refer to the code example in Dynamically Display Directory Content (Files and Folders) Based on User Login in the Blazor File Manager.
Summary
Thanks for reading! In this blog, we have seen how to easily change the directory content based on user login using the Blazor File Manager. This component is completely customizable and has flexible usage from the application’s point of view. Check out the Blazor File Manager’s demos and documentation for detailed explanations to proceed further. Let’s easily manage our files with the user-friendly features in our Blazor File Manager!
For existing customers, the new version is available for download from the License and Downloads page. If you are not yet a Syncfusion customer, you can try our 30-day free trial to check out our available features.
If you have any questions, please let us know in the comments section below. You can also contact us through our support forum, feedback portal, or Direct-Trac. We are always happy to assist you!


Top comments (0)