
In the server-side rendering approach, JavaScript code is compiled in the server, not in the browser. As a result, simple and meaningful HTML is created immediately in the browser.
Vue components generate and manipulate DOM in the browser by default. The same components can alternatively be rendered in HTML on the server, sent directly to the browser, and then “hydrated” into a fully interactive app on the client. A server-rendered VueJS project can also be deemed isomorphic (rendering pages on both the server and client-side).
In this article, I will guide you through the process of server-side rendering (SSR) with VueJS.
Why SSR for VueJS?
Faster page loads
Pages load faster with a server-side rendered application, which improves the user experience. Because server-rendered markup does not require all JavaScript to be downloaded and executed before being displayed, users will see a completely rendered page sooner.
Strong SEO
Page content may be generated before the page is loaded. Search engines can simply index and crawl content when rendered server-side, which is perfect for SEO (search engine optimization). SSR may be required if the content is fetched asynchronously on pages where SEO is crucial.
How does it work?
Server-side rendering works in the same way regardless of framework. We acquire the markup from the server when we browse a page by entering the URL or refreshing it. Then, when we visit the app, we only use client-side rendering because all of the necessary HTML is already present — the server is no longer required. The entire process is made up of two crucial components: rendering and hydration.
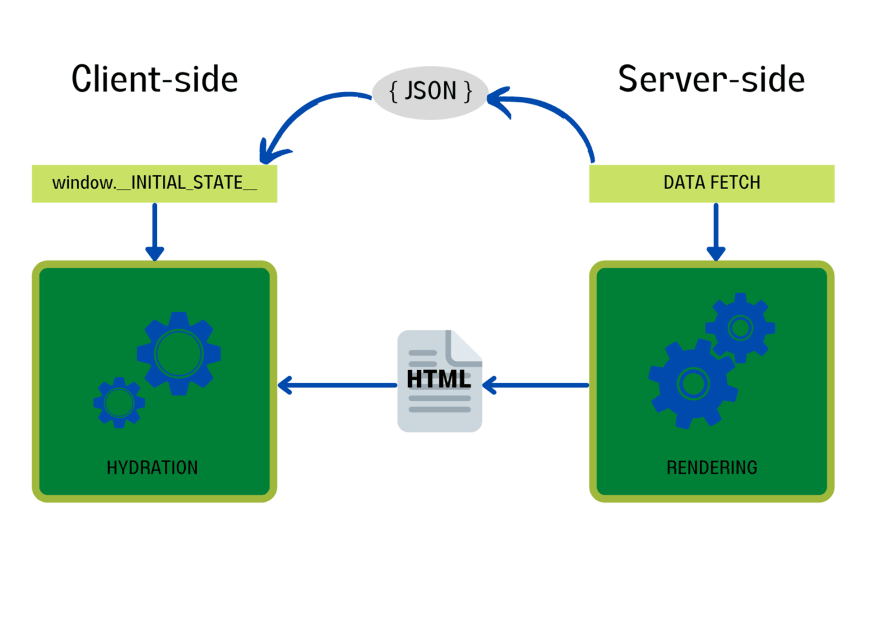 The server oversees the rendering. It’s handled in modern frameworks by a dedicated function that takes the components and renders them to a string, or by the router, which delivers rendered and matched components.

We obviously want to load some data asynchronously once we have the components we want to render on the page, and here is where we need to go beyond the frameworks.
Each component that requires external data must typically implement a separate function to retrieve it. We can execute this function for each component because we have access to the rendered components, and once all of the fetches are complete, we can send the completed markup to the client.
The browser has just received the rendered HTML. The hydration process now has complete control. The data and its raw representation in _INITIAL STATE_ are already present in a markup that comes from the server.
Hydration has two main goals:
- Register the received markup with the framework.
- Assign the data to the appropriate client-side properties.
The first objective framework operates automatically, but the second needs to be managed. The framework has the data allocated to the variables on the server-side, but we need to do it again on the client-side because the only data we have is included in the rendered HTML or supplied to the initial state in the window object.
Trade-offs
SSR requires a Node.js server to execute in order to function. Because when the compilation procedure is done on the server, your costs will go up a little.
You need workaround methods in some instances.
There are several libraries used along with VueJS for server-side rendering.
NuxtJS

Nuxt.js is a higher-level framework built on top of the Vue ecosystem that simplifies the development of universal Vue applications. Even better, it may be used as a static site generator. A fully SSR-compatible web app with a few tweaks is required with the Nuxt framework coupled to the Vue habitat.
ExpressJS

Express is an open-source, backend framework for Node.js applications that offers a comprehensive range of functionality for both web and mobile applications.
I will show you how to use NuxtJS for server-side rendering.
A step-by-step guide to implement SSR using Nuxt
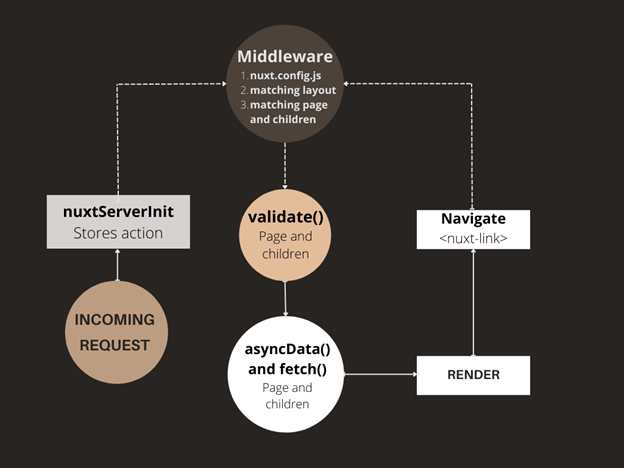
The following flow chart demonstrates what NuxtJS does when the server is called or when the user uses to move through the app.
Step 1: Create a Nuxt project.
Let’s start off by installing the required Vue packages.
| $ npm install -g vue-cli |
After you’ve installed them, you can use the following command to create a Nuxt.js project.
| $ npm init nuxt-app NuxtApp |
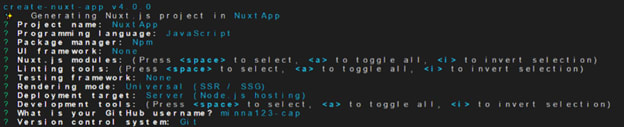
It will ask you a few questions, and the following were my answers for this project.
Step 2: Install the dependencies.
| $ cd NuxtApp |
$ npm install
After the npm dependencies are installed, run the project.
| $ npm run dev |
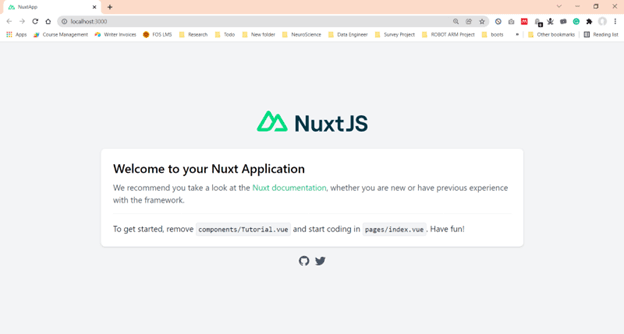
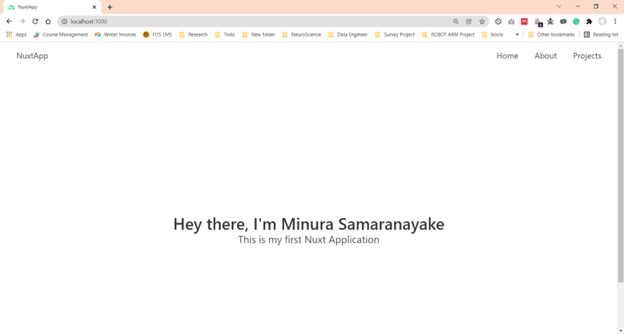
The application will now be running on http://localhost:3000. If all went well, you should see something like the following image.
Our app will contain three pages:
- Home page
- About page
- Projects page
Step 3: Create the master layout.
Open nuxt.config.js, which is the NuxtJS configuration file, and replace the existing code with the following code.
export default {
  // Global page headers: https://go.nuxtjs.dev/config-head

  head: {
    title: 'NuxtApp',
     htmlAttrs: {
       lang: 'en'
  },

  meta: [
    { charset: 'utf-8' },
    { name: 'viewport', content: 'width=device-width, initial-scale=1' },
    { hid: 'description', name: 'description', content: '' },
    { name: 'format-detection', content: 'telephone=no' }
  ],

  link: [
    { rel: 'icon', type: 'image/x-icon', href: '/favicon.ico' },
    { rel: 'stylesheet', href:
        'https://cdnjs.cloudflare.com/ajax/libs/bulma/0.6.0/css/bulma.min.css' },
    { rel: 'stylesheet', href: 'https://fonts.googleapis.com/css?
        family=Source+Code+Pro:400,700' }
  ]

},

// Global CSS: https://go.nuxtjs.dev/config-css
  CSS: [
  ],

// Plugins to run before rendering page: https://go.nuxtjs.dev/config-plugins
  plugins: [
  ],

// Auto import components: https://go.nuxtjs.dev/config-components
  components: true,

// Modules for dev and build (recommended): https://go.nuxtjs.dev/config-modules
  buildModules: [
  ],

// Modules: https://go.nuxtjs.dev/config-modules
  modules: [
  ],

// Build Configuration: https://go.nuxtjs.dev/config-build
  build: {
  }

}
Within the _ .nuxt_ folder and in the layouts folder, there is a default.vue file. Open it and replace its content with the following.
<template>
 <div>
  <nuxt/>
 </div>
</template>

<style>
  html {
    font-family: "Source Sans Pro", "Helvetica Neue", Arial, sans-serif;
  }
</style>
The actual content of the produced page will be replaced for
Step 4: Create components.
Navbar
Create a new Navbar.vue file in the components folder and paste the following code into it.
<template>
 <div class="container">
 <nav class="navbar" role="navigation" aria-label="main navigation">
   <div class="navbar-brand">
   <a class="navbar-item" href="/">Portfolio</a>
   <button class="button navbar-burger">
     <span></span>
     <span></span>
     <span></span>
   </button>
 </div>

  <div class="navbar-menu">
   <div class="navbar-end">
    <nuxt-link class="navbar-item" to="/">Home</nuxt-link>
    <nuxt-link class="navbar-item" to="/about">About</nuxt-link>
    <nuxt-link class="navbar-item" to="/projects">Projects</nuxt-link>
   </div>
  </div>
 </nav>
 </div>

</template>
Now add the navbar to the master layout by updating the default.vue file.
<template>
 <div>
  <navbar></navbar>
  <nuxt/>
 </div>
</template>

<script>
 import Navbar from '../components/Navbar'

 export default {
   components: {
    Navbar
   }

 }
</script>

<style>
 html {
   font-family: "Source Sans Pro", "Helvetica Neue", Arial, sans-serif;
 }
</style>
Home page
You’ll find an index.vue file in the pages folder. This is the file that is displayed when we go to our application’s home page. The routes generated by NuxtJS are based on the files in the pages folder.
<template>
 <section class="section is-large">
  <div class="container has-text-centered">
   <h1 class="title">Hey there, I'm Minura Samaranayake</h1>
   <h2 class="subtitle">This is my first Nuxt Application</h2>
  </div>
 </section>
</template>
If we visit the home route, the following page will be visible.
My Experience page
Within the pages folder, create a new e xperience.vue file and enter the following code.
<template>
 <section class="section is-medium">
 <div class="container has-text-centered">
   <h1 class="title">My Experience</h1>
   <p>
    Specialist in need. Generalist at heart. Experienced in Computer Vision, Full Stack Web Development and Technical Writing
   </p>
 </div>
 </section>
</template>
Once you navigate to the My Experience page through the navbar, you will see the following page.

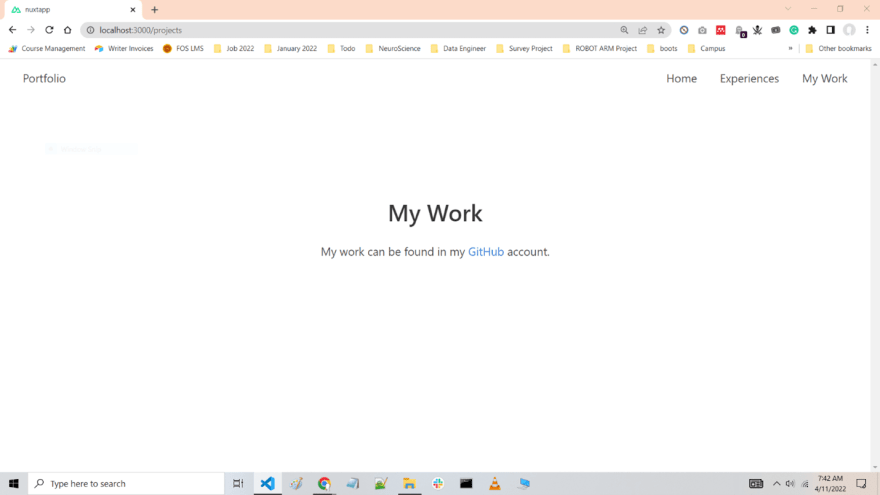
My Work page
Within the pages folder, create a new mywork.vue file and enter the following code.
<template>
 <section class="section is-medium">
  <div class="container has-text-centered">
   <h1 class="title">My Work</h1>
   <p>
    My work can be found in my <a href="https://github.com/minurasam" target="_blank">GitHub</a> account.<a href="https://github.com/minurasam" target="_blank">GitHub</a>.
   </p>
  </div>
 </section>
Once you navigate to the tab, you will see the following.
Now, we will generate a static site for the NuxtApp. Currently, the application has several Vue files. Use the _ nuxt generate_ command to create the static site.
| $ npm run generate |
Step 5: Deployment
Nuxt’s deployment is relatively straightforward. You can make an SSR app using the same codebase.
This is most likely what you wanted to achieve with NuxtJS. The core deployment approach is to perform the build process on whatever platform you want and configure a few things. We’ll use the Heroku example from their documentation.
Set up scripts in the package.json file for Heroku.
"scripts": {
  "dev": "nuxt",
  "build": "nuxt build",
  "start": "nuxt start",
  "heroku-postbuild": "npm run build"
}
Then, set up the Heroku environment using the heroku-cli (setup instructions).
\# set Heroku variables
heroku config:set NPM\_CONFIG\_PRODUCTION=false
heroku config:set HOST=0.0.0.0
heroku config:set NODE\_ENV=production
# deploy
git push heroku master
That is the end of the tutorial. Now your application will be ready and deployed for the world to view.
Conclusion
There are several ways of implementing server-side rendering with VueJS. However, in my opinion, NuxtJS is typically a better library to use for server-side rendering with VueJS. Nuxt is easier to implement and deploy with VueJS.
I encourage you to use Nuxt with VueJS during your development lifecycle and share your experience with the community.
Thank you for reading!
The Syncfusion Vue UI components library is the only suite you will ever need to build an app. It contains over 65 high-performance, lightweight, modular, and responsive UI components in a single package.
For questions, you can contact us through our support forum, support portal, or feedback portal. We are always happy to assist you!


Top comments (0)