
Visual Studio toolbox makes adding controls by just dragging to the designer easy to us. By default, the toolbox lists the framework controls. You can also add custom controls to it so that they can be used easily in Visual Studio projects. This blog explains 7 easy steps to add custom controls in Visual Studio toolbox.
When adding a control into the project using the Visual Studio toolbox, you don’t need to add the assembly references manually. The references are automatically added to the Visual Studio reference manager.
Add custom controls to Visual Studio toolbox
To add custom controls to Visual Studio, create a new project (ASP.NET Web Forms, WPF, or WinForms) and open the designer. The toolbox items will only be visible in the designer window. If the toolbox is not visible, click the View menu, and then select the Toolbox option. Now, the toolbox will be displayed. Then:
- To create a new tab for the custom controls, right-click anywhere in the Toolbox window, select Add Tab , and then provide a name for the new tab.
- Then, right-click anywhere inside the new tab, and then select Choose Items. The Choose Toolbox Items dialog box will be displayed.
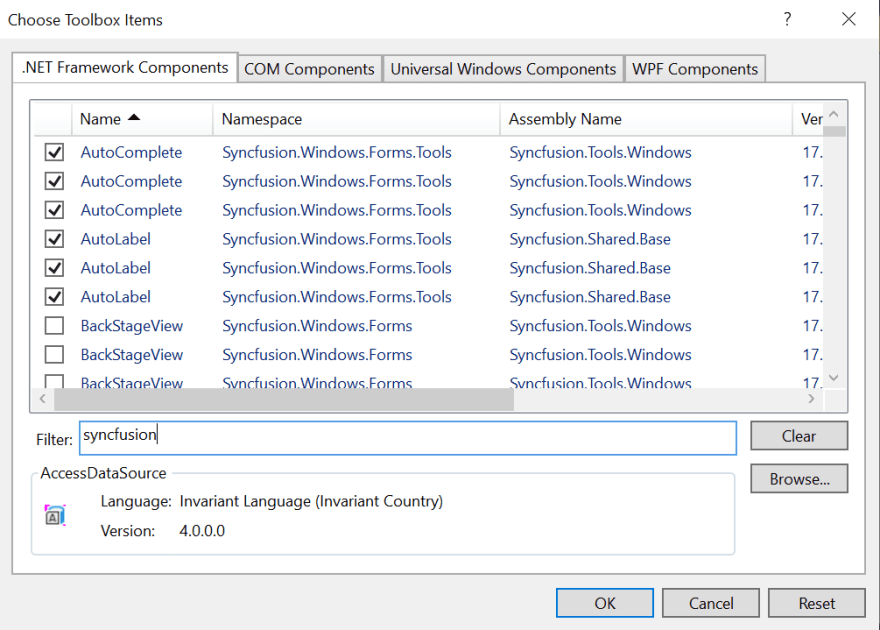
- This dialog box shows a list of controls present in GAC that can be added to the toolbox. The check box in the selected state means those items will already be present in the toolbox.
- Select the custom controls from the available list, and then click OK.
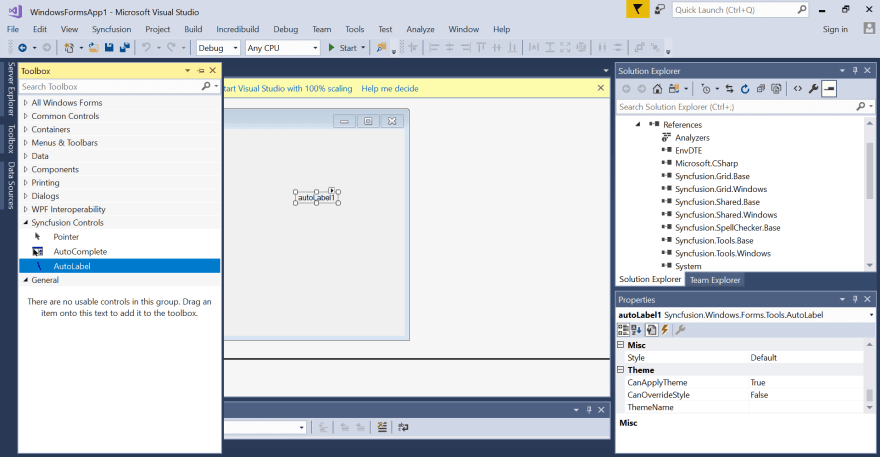
- The selected controls will now be displayed in Visual Studio toolbox.

- Alternatively, you can also add tools by navigating to the assembly location, and dragging the assembly directly to the newly created tab.
- Once the controls are added, you can drag the control to the designer from the Visual Studio Toolbox and start using it. The assembly reference will automatically be added in the reference manager.
To configure Syncfusion’s custom controls in your Visual Studio toolbox, refer to this documentation.
Conclusion
In this blog post, we’ve seen how to add custom controls to the Visual Studio toolbox. We hope this blog could help you to configure Visual Studio toolbox easily, to drag the custom controls to the designer.
Syncfusion provides around 1500 custom controls to ease the work of the developers on various platforms. Please have a look and make use of them in your application development.
If you have any questions or require clarification about our applications, please let us know in the comments below. You can also contact us through our support forum, Direct-Trac, or feedback portal. We are happy to assist you!
The post 7 Easy Steps to Add Custom Controls to Visual Studio Toolbox appeared first on Syncfusion Blogs.


Top comments (0)