Intro
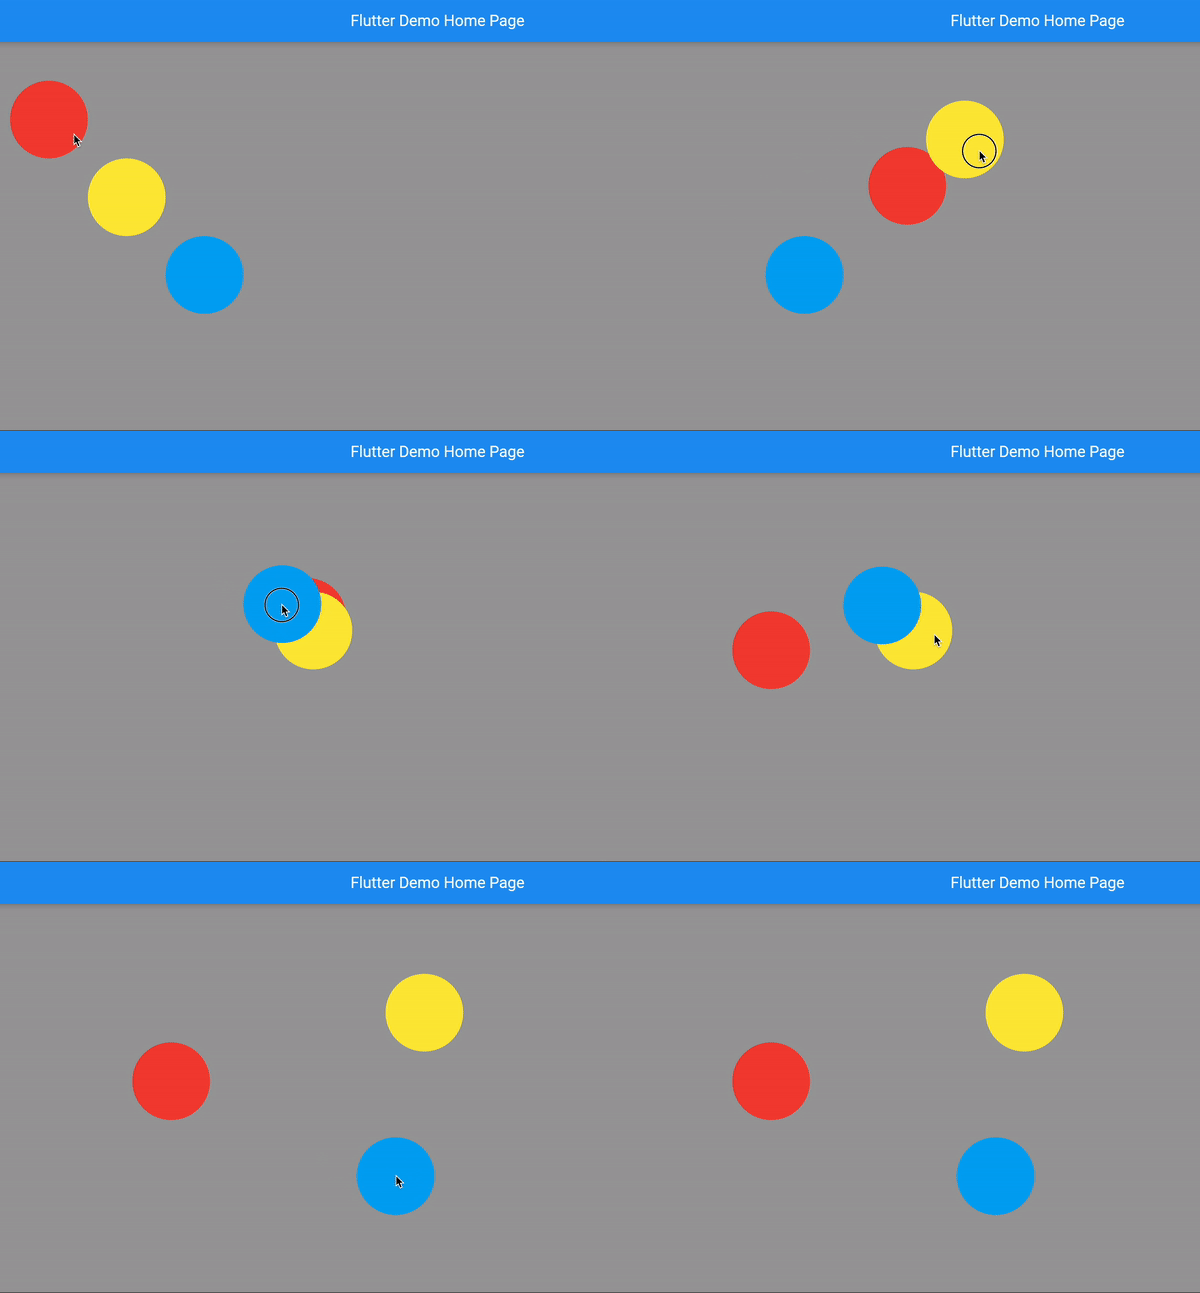
In this post, I’d like to share how to implement user interactive Drag & Drop using Flutter CustomPaint Widget. There’s no packages need to be installed since we’re going to use only what flutter and dart offers us. So, let’s dive in!
1. StatefulWidget with shape object data
class MyHomePage extends StatefulWidget {
  const MyHomePage({Key? key, required this.title}) : super(key: key);

  final String title;

  @override
  State<MyHomePage> createState() => _MyHomePageState();
}

class _MyHomePageState extends State<MyHomePage> {
  bool isDown = false;
  double x = 0.0;
  double y = 0.0;
  int? targetId;
  Map<int, Map<String, double>> pathList = {
    1: {"x": 100, "y": 100, "r": 50, "color": 0},
    2: {"x": 200, "y": 200, "r": 50, "color": 1},
    3: {"x": 300, "y": 300, "r": 50, "color": 2},
  };

  @override
  Widget build(BuildContext context) {
    return Scaffold(
        appBar: AppBar(
          title: Text(widget.title),
        ),
        body: Container(child: Text('dummy text'))
        );
  }
}
First, we need StatefulWidget to make reactive to user interaction.
- isDown → true if user touch or click down
- x, y → coordinate of user action contains
- targetId → id of shape object that user is currently pointing at
- pathList → shape data list that will be displayed in canvas. In this example, we only test with circle, so x and y of shape data will be the coordinate of center of circle, r is radius, color is index of a preset color list
2. Widgets to include
@override
  Widget build(BuildContext context) {
    return Scaffold(
        appBar: AppBar(
          title: Text(widget.title),
        ),
        body: GestureDetector(
          child: Container(
              width: MediaQuery.of(context).size.width,
              height: MediaQuery.of(context).size.height,
              color: Colors.grey,
              child: CustomPaint(
                foregroundPainter:
                    ShapePainter(down: isDown, x: x, y: y, pathList: pathList),
                size: Size(MediaQuery.of(context).size.width,
                    MediaQuery.of(context).size.height),
              )),
        ) // This trailing comma makes auto-formatting nicer for build methods.
        );
  }
Now, we need to fill up the widget tree.
- GestureDetector → it should be wrap all widgets related to user interaction that we’re going to detect
- CustomPaint → widget that provides canvas functionality
- ShapePainter → performs paint and repaint
3. Capture user interaction
// util function
bool isInObject(Map<String, double> data, double dx, double dy) {
  Path _tempPath = Path()
    ..addOval(Rect.fromCircle(
        center: Offset(data['x']!, data['y']!), radius: data['r']!));
  return _tempPath.contains(Offset(dx, dy));
}
// event handler
void _down(DragStartDetails details) {
    setState(() {
      isDown = true;
      x = details.localPosition.dx;
      y = details.localPosition.dy;
    });
  }

  void _up() {
    setState(() {
      isDown = false;
      targetId = null;
    });
  }

  void _move(DragUpdateDetails details) {
    if (isDown) {
      setState(() {
        x += details.delta.dx;
        y += details.delta.dy;
        targetId ??= pathList.keys
            .firstWhereOrNull((_id) => isInObject(pathList[_id]!, x, y));
        if (targetId != null) {
          pathList = {
            ...pathList,
            targetId!: {...pathList[targetId!]!, 'x': x, 'y': y}
          };
        }
      });
    }
  }

// map event handler to pan event
...
body: GestureDetector(
          onPanStart: (details) {
            _down(details);
          },
          onPanEnd: (details) {
            _up();
          },
          onPanUpdate: (details) {
            _move(details);
          },
...
Next is registering event handlers. In GestureDetector pan event is for Drag & Drop.
- onPanStart → set initial user action coordinate & set isDown to true
- onPanUpdate → when isDown is true, update user action coordinate & find target item & update related states(targetId, pathList)
- onPanEnd → set isDown to false
4. Draw using CustomPaint & CustomPainter
class ShapePainter extends CustomPainter {
  final colors = [Colors.red, Colors.yellow, Colors.lightBlue];
  Path path = Path();
  Paint _paint = Paint()
    ..color = Colors.red
    ..strokeWidth = 5
    ..strokeCap = StrokeCap.round;

  final bool down;
  final double x;
  final double y;
  Map<int, Map<String, double>> pathList;
  ShapePainter({
    required this.down,
    required this.x,
    required this.y,
    required this.pathList,
  });
  @override
  void paint(Canvas canvas, Size size) {
    for (var pathData in pathList.values) {
      _paint = _paint..color = colors[pathData['color']! as int];
      path = Path()
        ..addOval(Rect.fromCircle(
            center: Offset(pathData['x']!, pathData['y']!),
            radius: pathData['r']!));
      canvas.drawPath(path, _paint);
    }
  }

  @override
  bool shouldRepaint(ShapePainter oldDelegate) => down;
}
ShapePainter is the one who owns paint method. There’re not much logic, just drawing the data what upper widget gave it. Note that shouldRepaint is always called when user touch or mouse is down, so that update can be done only when user is in action.
Conclusion
I’m really interested in canvas in general. I hope this can help those who want to implement Drag & Drop using Flutter CustomPainter.
Cheers!


Oldest comments (0)