
Markdoc is Stripe’s newly open-sourced framework for authoring content. It’s the tools used to build the Stripe documentation and the framework on top of which many of the interesting and powerful features of the Stripe docs are built.
Every couple years, I can't resist yak shaving and rebuilding my personal site, cjav.dev. It’s built with 11ty. Currently, I'm just rendering long lists of links to blog posts, videos, and podcast episodes. It’s all haphazardly organized and I typically use CMD+F to find an old post that I need to reference. One benefit to the current system is how easy it is to author content and re-deploy. If I have an idea for a new blog post, I create a new markdown file and get to work. Once it’s got some words, no need to polish, I’ll commit and push which deploys the site to Netlify.
Over the past year, I’ve built some fun integrations with the Transistor.fm and YouTube APIs, and even built a little tool to visualize my progress towards my goals on Strava.
Some goals for the 2022 rebuild:
- Easy to author content
- Easy to deploy
- Easy to add API integrations
- Better surfacing of content
- Playground for automations (background jobs, small database)
I polled Twitter with a few options for a potential stack. My statistically insignificant poll shows bridgetown.rb followed closely by Markdoc + Next.js as the winners.
Some initial experimentation with Bridgetown.rb was very smooth. All of my existing content ported over nicely, the authoring experience was solid, and I could use Tailwind out of the box (h/t @andrewmcodes). It had support for API calls with Roda and I could see that working great to clone exactly what I have today. Bridgetown.rb is a great choice for any Rubyist building a personal site today.
As part of this exploration, I wanted to see if I could get the new Markdoc tools from Stripe to render my existing content and enable me to build custom Markdoc components that play nicely inside of a Rails app.
Markdoc ships with two built in renderers, one for React and one for HTML. The HTML example includes some Lit components 🔥. Since Rails already has lots of nice HTML-based tooling, I wanted to stick with the HTML renderer.
At a high level, I knew I needed to:
- Add Markdoc to the app
- Create an entry point for the Markdoc framework
- Add a build step that would recompile the Markdoc rendering logic if I added or removed components
- Create a way to call into the built JavaScript from Ruby
- Build some front end Lit components that work with the web components rendered by Markdoc
Let’s walk through the steps with a brand-new Rails application:
Create a new Rails application
rails new markdoc-rails -j esbuild
cd markdoc-rails
We’ll use esbuild to build our client side JavaScript, but also our markdoc renderer.
Install Markdoc
This’ll add @markdoc/markdoc to the root package.json. Which works, but I’m not sure this is the best approach. Maybe it should be in an isolated package.json in the Rails.root/markdoc directory where we’ll wire up the rendering logic. Leave a comment if you have a strong opinion!
npm install @markdoc/markdoc
We’ll create a new directory in the root of the rails app called markdoc this will contain the Markdoc rendering scripts and the schemas for our custom Markdoc components that we’ll use to juice up our content and make it more interactive, but still easy to author.
mkdir -p markdoc/{src,dist}
A new file named markdoc/src/index.js will contain our source for our rendering JavaScript and might look something like this (to start):
const Markdoc = require('@markdoc/markdoc')

const tags = {};

function markdocRender(doc) {
  const ast = Markdoc.parse(doc);
  const content = Markdoc.transform(ast, { tags });
  return Markdoc.renderers.html(content);
}

globalThis.markdocRender = markdocRender;

// is this thing on?
console.log(markdocRender(`
# Testing 1.2.3.

- bang 💥
`))
Notice that I’m attaching the markdocRender function to the globalThis. That’s so we expose that method from the built JavaScript and can access it from Ruby later. If you know a better way to do this, please share 🤗.
Depending on your node version, you should be able to run this now with:
node markdoc/src/index.js
which prints the following to the console:
<article><h1>Testing 1.2.3.</h1><ul><li>bang 💥</li></ul></article>
Add a build step
Eventually, we’ll want to call this JavaScript from a Rails controller using ExecJS or MiniRacer or some similar tool. None of the Ruby-to-JavaScript gems I found were sophisticated enough to know how to load npm modules with common.js or ES module syntax, so my solution is to just build the JavaScript with a watcher and have that run as part of bin/dev.
Let’s update package.json with two new build scripts, one for our client side JS (standard), and this new one that will build our Markdoc renderer:
  // ...
  "scripts": {
    "build": "esbuild app/javascript/*.* --bundle --sourcemap --outdir=app/assets/builds",
    "build:markdoc": "esbuild markdoc/src/index.js --bundle --sourcemap --outdir=markdoc/dist"
  }
}
Then, we can update our Procfile.dev so that foreman can spin up this blog builder for us when we start the application:
web: bin/rails server -p 3000
js: yarn build --watch
markdoc: yarn build:markdoc --watch
We’re ready to move in to Ruby 💎.
Create a controller and route
For my use-case, I wanted a route like /posts to render the list of markdown files and /posts/filename to render the content of the post. Ultimately, I might want to build a frame around the content of a post (think nav, header, footer etc.) so I want to have a show template where I’ll embed the content of a post written in markdown.
Generate a Posts controller
rails g controller Posts index show
Create routes
# config/routes.rb
Rails.application.routes.draw do
  resources :posts, only: [:index, :show]
end
You can look at the source on GitHub if you’re interested in how I build the index route, as I’m most excited to show you the show route where the Markdoc magic happens.
Rendering markdown with Markdoc from Ruby
First, we’ll need some markdown to play with. I created a few files in a new directory in the root of the app at Rails.root/posts:
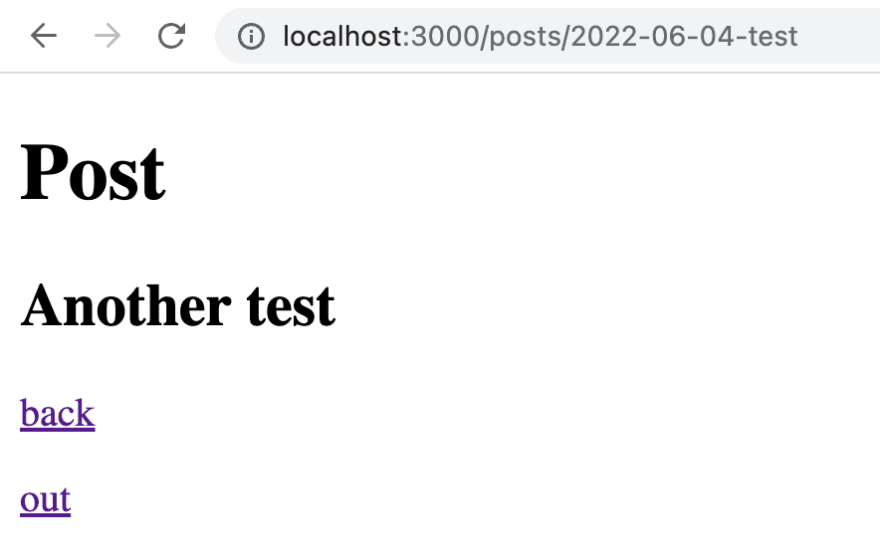
/posts/2022-06-04-test.md looks like this:
---
title: "Test with links"
date: 2022-06-04
---

# Another test

\[back\](/posts)

\[out\](https://twitter.com/cjav_dev)
/posts/2022-07-11-test-with-code.md looks like this (well sorta, dev.to also has a hard time with escaping backticks!):
---
title: Test with code
date: 2022-07-11
---

# This is a test

## This is a subtitle

- bullet

\`\`\`ruby
  class Cat
    def meow
      puts "hi"
    end
  end
\`\`\`

{% callout type="warning" %}
This is a warning callout
{% /callout %}
When we visit http://localhost:3000/posts/2022-06-04-test we should see the rendered content of the first post.
In the show action of our PostsController, the name of the post is available in params[:id]. I thought about splitting up the path later so that it was based on date, maybe something like /posts/2022/06/04/test (which is what bridgetown does). For now, we’ll keep it simple.
def show
  post_name = params[:id]
Next, we’ll need the raw markdown content which we’ll read in from the file on disk. Long term this directory could be configurable, just slapping on .md is probably a bit rigid, but it works fine.
def show
  post_name = params[:id]

  content = File.read(File.join(Rails.root, "posts", "#{post_name}.md"))
Many of the posts on my personal site use code fences with the three backticks. Since this content is passed from Ruby to JavaScript as a string, we’ll escape those backticks. It took me several tries to figure out how to actually do this. In the second argument to gsub I was passing a double quoted string at first. A pattern that I’ve solidified in my head is: double quotes when doing string interpolation, single quotes for non string interpolation. But the core difference between double and single quotes comes down to the escape sequences for each! Checkout Tom de Bruijn’s article here for much more detail.
def show
  post_name = params[:id]

  content = File.read(File.join(Rails.root, "posts", "#{post_name}.md"))

  # Escape fences so that MiniRacer can evaluate:
  content = content.gsub(/`/, '\\\`')
Now that we have the content of the post, we need to pass that down to JavaScript. I also tried a few things for this part starting with ExecJS and ultimately landing on MiniRacer, but ExecJS probably would’ve worked fine.
First add the gem:
bundle add mini_racer
Then we’ll read in the built JavaScript and evaluate with MiniRacer.
# Read in the built Markdoc rendering script
entry_point = File.read(File.join(Rails.root, "markdoc", "dist", "index.js"))

# Evaluate the JavaScript
context = MiniRacer::Context.new
context.eval(entry_point)
Finally, we call our markdocRender JavaScript function passing in the raw markdown content we read in earlier and store it in an instance variable so that we can render that in our view template:
@rendered_content = context.eval("markdocRender(`#{content}`)")
All together now:
class PostsController < ApplicationController
  def show
    post_name = params[:id]

    content = File.read(File.join(Rails.root, "posts", "#{post_name}.md"))

    # Escape fences so that MiniRacer can evaluate:
    content = content.gsub(/`/, '\\\`')

    # Run from the dist entry point
    # New markdoc components aren't added for my blog
    # too frequently, but when they are we need to rebiuld
    # with `npm run build:markdoc`
    entry_point = File.read(File.join(Rails.root, "markdoc", "dist", "index.js"))

    # Render as markdoc
    context = MiniRacer::Context.new
    context.eval(entry_point)
    @rendered_content = context.eval("markdocRender(`#{content}`)")
  end
end
Our show template will work with rendering the html safe @rendered_content 🎉:
<%= @rendered_content.html_safe %>
Adding Markdoc components with Lit
One of the major benefits of Markdoc is the authoring system is very clean. You write markdown and maybe use a few components but for the most part, the authoring experience is focused on the content instead of the code around it. This is powered by Markdoc components which are implemented outside of the markdown files and used as higher level snippets while authoring.
In the Markdoc docs, you’ll find this Callout example:
{% callout title="Yellow Snow" type="warning" %}
Don't eat the yellow snow.
{% /callout %}
Which could render with an icon and a yellow background or however we want all callouts across our blog to render.
This works by creating new tags that extend the markdown syntax.
We’ll define a new callout tag by creating a Markdoc schema:
// markdoc/src/schema/Callout.markdoc.js
module.exports = {
  render: 'Callout',
  description: 'Display the enclosed content in a callout box',
  children: ['paragraph', 'tag', 'list'],
  attributes: {
    type: {
      type: String,
      default: 'note',
      matches: ['caution', 'check', 'note', 'warning'],
      errorLevel: 'critical',
      description:
        'Controls the color and icon of the callout. Can be: "caution", "check", "note", "warning"'
    },
    title: {
      type: String,
      description: 'The title displayed at the top of the callout'
    }
  }
};
To unlock tag extensions, we’ll need to update our rendering logic to pass in a configuration object during the transform step:
const Markdoc = require('@markdoc/markdoc')
const callout = require('./schema/Callout.markdoc')

const tags = {
  callout
};

function markdocRender(doc) {
  const ast = Markdoc.parse(doc);
  const content = Markdoc.transform(ast, { tags });
  return Markdoc.renderers.html(content);
}

globalThis.markdocRender = markdocRender;
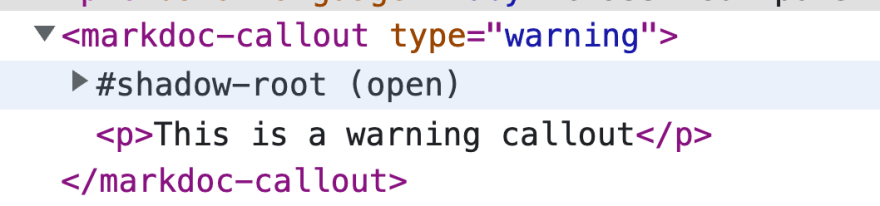
Now markdoc will render \{% callout %} tags as <markdoc-callout> web components.
We’re done extending markdown by adding our new markdoc tag, now we’ll add support for this new MarkdocCallout webcomponent using Lit.
Since this is a client side feature, I’ll create a new directory in app/javascript/components and add a new file called callout.ts. We’ll also create an index.js file that simply imports all of our components one by one, e.g.: import './callout'.
Here we can build whatever logic we’d like to see for our custom callout:
import { html, css, LitElement } from 'lit';
import {customElement} from 'lit/decorators.js';

@customElement('markdoc-callout')
export class MarkdocCallout extends LitElement {
  static styles = css`
    .note {
      background-color: #8792a2;
    }
    .caution {
      background-color: #d97917;
    }
    .check {
      background-color: #000000;
    }
    .warning {
      background-color: #ffd848;
    }
  `;

  static properties = {
    type: { type: String },
    title: { type: String },
  };

  constructor() {
    super();
    this.type = 'note';
  }

  render() {
    return html`<p class="${this.type}"><strong>${this.title}</strong><slot></slot></p>`;
  }
}
After updating our blog post to have this callout:
{% callout title="Yellow Snow" type="warning" %}
Don't eat the yellow snow.
{% /callout %}
We now see this new component rendered to the screen (checkout the #shadow-root in the dev tools, too!):

Conclusion
This was a fun exercise. Checkout the code and if you go down the Rails + Markdoc path, I'd love to hear about it. Next todo is to experiment with deployment. Since we’re calling down into JavaScript from Ruby, I’m not 100% sure how many deployment environments that’ll play nicely in. Drop a comment and share your favorite personal sites for inspiration, too!


Oldest comments (0)