
Content Management Systems (CMS) are used to develop applications while creating their content. Traditionally, CMS build applications as one. This means the backend and the frontend of the application are managed by one base system.
The system can store and manage the content as a backend. The same system will still handle the presentation layer as the frontend. The two sets of systems are closely connected to run as a monolith application.
This is a great set of powering applications. However, the approach creates some challenges; some of them are highlighted below.
- The application runs as a monolith. This means the two systems cannot be separated and run as one.
- Optimization takes a hit.
- You have less power to decide which presentation layer fits your user.
- It is hard to integrate external tools to enhance your application efficiency.
- Customizability becomes complex.
Above are a few challenges that the traditional CMS fails to solve. However, with the advances in technology, a headless CMS was born to address these challenges.
Why is a Headless CMS Important?
A headless CMS allows you to run a decoupled system. This means the content management (backend) and the presentation layer (frontend) run independently.
A headless CMS only deals with content management; it is not responsible for how the content will be represented to the user. This approach gives you a tone of advantages such as:
- You get the power and flexibility to choose while the presentation channel best fits your content model
- You get a choice to decide which fronted framework works for you.
- It becomes easier to integrate external tools to enhance content delivery as well as presentation performance.
- It is easier to customize any content to your liking.
Check the Guide to Headless CMS and learn what is a headless CMS, its benefits, and usage.
One of the most popular headless CMS that fits your content management demands is Strapi. Strapi is an open-source headless CMS based on Node.js. It helps you build and manage your backend content while producing API endpoints to consume your data.
- It is an open source headless CMS.
- It offers an easily customizable admin panel to manage your content.
- It gives you the flexibility to choose RESTful or GraphQL API endpoints.
- It is self-hosted.
Once you have created your content with Strapi, you need the right framework to handle the content presentation layer. Remix is a good choice to channel your content to the users. In this guide, we will use Remix to consume Strapi generated content.
Prerequisites
To continue in this article, it is essential to have the following:
- Node.js installed on your computer.
- VS Code or any suitable text editor downloaded and installed.
- Prior experience working with Remix.
With these, you're ready to continue.
Setting up Strapi Locally
To set up Strapi, create a remix-strapi-app project directory and open it using the VS Code editor. Using your editor, open a terminal and run the following one-time command to create Strapi CMS backend project.
npx create-strapi-app strapi-notes-app --quickstart
This command will create a local Strapi project inside the strapi-notes-app directory.

Strapi will then build an admin UI with development configurations and automatically start the administration panel on http://localhost:1337/admin.


To start using Strapi, create an admin account using your details, then click let's start. This will direct you to the Strapi administrator Dashboard.

Creating the Backend for Strapi Notes App
We are building a Notes app using Strapi; therefore, we need to model the data for a Notes app. To build the Notes app content structure, first head over to the Content-Type Builder section and Create new collection type.

Start modeling the Notes content as follows:
- Create a collection type for notes.

- Enter the fields data, and then click continue to add the Notes fields.

- Add a Note title text field.

- Add a Note description text field.

Once done, you should have the following fields:

Managing the Notes Content
The next step is to create notes content. Here, we'll add some Notes entries to the Strapi CMS.
Head over to the Content Manager section:

Manage the Notes as follows:
- Click on the Create new entry button.

- Enter a dummy title and description.

- Click save, and then publish.

Creating the API Access Token
Now we need to access this backend and use it with Remix. We need to create an API token for Strapi CMS as follows:
- Navigate to the Setting section.
- Click the API Tokens.
- Click the Create new API Token button to set a token to consume the API.

- Create a new API Token as shown below. Ensure you grant the token full access, and then click Save.

Your API token will be generated successfully.

Copy this token and save it in a safe location. We will use to consume the API using Remix. The next step is to set up the Remix Notes application.
Setting up the Remix Application
To set up Strapi, navigate to the remix-strapi-app project directory and open it using your text editor. Open a terminal and run the following one-time command to create a Remix frontend project.
npx create-remix@latest

When creating the Remix app, you will be asked basic questions to set up the Remix App. Answer these onboarding command prompts as shown in the image below:

A remix-notes-app will be created containing the bootstrapped Remix app. To test this app, open a terminal using your text editor and change the directory to the created remix folder:
cd remix-notes-app
Then start the Remix app development server:
npm run dev

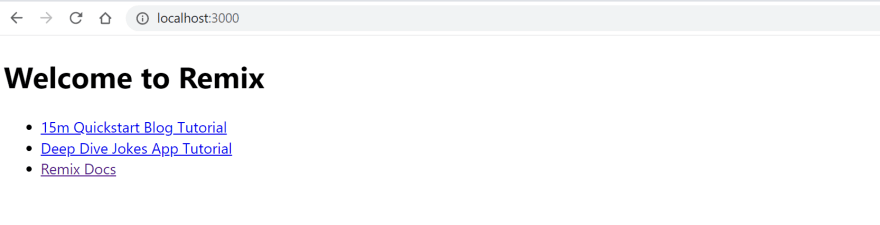
You can now access the server on your browser at http://localhost:3000.
Connecting Remix to Strapi
To start using Strapi with Remix, create a .env file at the root of the remix-notes-app folder and add in the following:
- STRAPI_URL_BASE: sets the server URL where Strapi is running. In this example, we are using
http://localhost:1337. - STRAPI_API_TOKEN: set the API Token set is the previous step.
Add these environment variables to the .env file as follows, ensuring you replace the variables with the correct parameters:
    STRAPI_URL_BASE=http://your_ip_address:port_where_strapi_is_running
    STRAPI_API_TOKEN=your_strapi_access_token
To consume these variables, head over to the app folder and create a utils directory. The directory will host errorHandling.js for handling errors while communicating to Strapi as follows:
    // Custom error class for errors from Strapi API
    class APIResponseError extends Error {
        constructor(response) {
            super(`API Error Response: ${response.status} ${response.statusText}`);
        }
    }

    // Checking the status
    export const checkStatus = (response) => {
        if (response.ok) {
            // response.status >= 200 && response.status < 300
            return response;
        } else {
            throw new APIResponseError(response);
        }
    }

    class MissingEnvironmentVariable extends Error {
        constructor(name) {
            super(`Missing Environment Variable: The ${name} environment variable must be defined`);
        }
    }

    export const checkEnvVars = () => {
        const envVars = [
            'STRAPI_URL_BASE',
            'STRAPI_API_TOKEN'
        ];

        for (const envVar of envVars) {
            if (!process.env[envVar]) {
                throw new MissingEnvironmentVariable(envVar)
            }
        }
    }
Working on the Frontend Application
Let's now work on the frontend application. We will make all the changes inside the app/routes/index.jsx file.
Showing the Notes
To display the Notes from the CMS, head over to the app/routes/index.jsx file:
- Import the necessary modules.
    import { useLoaderData} from "@remix-run/react";
    import { checkStatus, checkEnvVars } from "~/utils/errorHandling";
- Define a loader function for getting the notes.
    export async function loader () {
    checkEnvVars();

    const res = await fetch(`${process.env.STRAPI_URL_BASE}/api/notes`, {
        method: "GET",
        headers: {
        "Authorization": `Bearer ${process.env.STRAPI_API_TOKEN}`,
        "Content-Type": "application/json"
        }
    });

    // Handle HTTP response code < 200 or >= 300
    checkStatus(res);

    const data = await res.json();

    // Did Strapi return an error object in its response?
    if (data.error) {
        console.log('Error', data.error)
        throw new Response("Error getting data from Strapi", { status: 500 })
    }

    return data.data;
    }
- Edit the
Indexfunction as follows:
    export default function Index() {
    const notes = useLoaderData();
    return (
        <div style={{ fontFamily: "system-ui, sans-serif", lineHeight: "1.4" }}>
        <h1>Notes App</h1>
        {
            notes.length > 0 ? (
            notes.map((note,index) => (
                <div key={index}>
                <h3>{note.attributes.title}</h3>
                <p>{note.attributes.description}</p>
                <p>{new Date(note.attributes.createdAt).toLocaleDateString()}</p>
                <button onClick={null}>
                    delete note
                </button>
                </div>
            ))
            ) : (
            <div>
                <h3>Sorry!!, you do not have notes yet!!</h3>
            </div>
            )
        }
        </div>
    );
    }
From above, we are checking whether we have notes. If yes, we are looping through them, displaying each and every one of them, else we are displaying that no notes exist.
Based on the notes added, your page should be similar to the image below.

Adding a Note
Now, let's work on adding a note. To do this, follow the instructions below.
- Import the necessary modules:
import { Form,useActionData } from "@remix-run/react";
- Define a handler to send the data to Strapi:
    const addNote = async (formData) => {
    checkEnvVars();

    const response = await fetch(`${ process.env.STRAPI_URL_BASE } /api/notes`, {
        method: "POST",
        body: JSON.stringify({
        "data":{
            "title" : formData.title,
            "description" : formData.description
        }
        }),
        headers: {
        "Authorization": `Bearer ${ process.env.STRAPI_API_TOKEN } `,
        "Content-Type": "application/json"
        }
    });

    // Handle HTTP response code < 200 or >= 300
    checkStatus(response);

    const data = await response.json();

    // Did Strapi return an error object in its response?
    if (data.error) {
        console.log('Error', data.error)
        throw new Response("Error getting data from Strapi", { status: 500 })
    }

    return data.data;
    }
- Inside the
Indexfunction, initialize the action data hook and log the response:
    const actionData = useActionData();
    console.log("actionData",actionData);
- Build the form component after the notes app heading:
    <Form
    method="post">
    <div>
        <input type="text" name="title" placeholder="title of note" />
    </div>
    <div>
        <input type="text" name="description" placeholder="Description of note" />
    </div>
    <div>
        <button type="submit">
        add note
        </button>
    </div>
    </Form>
Test the functionality from your browser. When you add a note, it will reflect on the notes section below:

Deleting a Note
To delete a Note, define a function to handle the delete functionality:
    const deleteNote = async (noteId) => {
        const response = await fetch(`http://localhost:1337/api/notes/${noteId}`, {
            method: "DELETE",
            headers: {
            "Authorization": `Bearer your_api_token`,
            "Content-Type": "application/json"
            }
        });

        // Handle HTTP response code < 200 or >= 300
        checkStatus(response);

        const data = await response.json();

        // Did Strapi return an error object in its response?
        if (data.error) {
            console.log('Error', data.error)
            throw new Response("Error getting data from Strapi", { status: 500 })
        }

        window.location.reload(); // refresh the page
    }
- Append the functionality to the `deleteNote` button:
    <button onClick={() => deleteNote(note.id)}>
        delete note
    </button>
Now, once you click the button, the note will be deleted.
Conclusion
Headless CMSes are scalable solutions that can be incorporated into the architecture of practically any application. You can maintain and store content to be consumed by various devices, platforms, and applications. This design may be used to handle items in e-commerce apps, store material for blog apps, or create any CRUD-related application.
In this guide, we have learned to use Strapi as headless CMS to build a minimal Remix CRUD application.
I hope you enjoyed this tutorial. Happy coding!
You can find the source code for the project on this GitHub repository.


Top comments (0)