
In this article you will learn how to add pagination to your GraphQL datasets in Strapi and we will build a real-life app also to demonstrate the process.
Introduction to Strapi
Strapi is a headless CMS(Content Management System) for Nodejs to build and develop APIs, and its content super-fast and accessible in a friendly UI.
It is also self-hosted, meaning you can build your APIs in the UI, and Strapi will still host and server the API endpoints for you. With this, you can push your Strapi server to any cloud host for the world to use your APIs.
APIs are built-in Strapi in the name of collections, although they now support single-type API. For example, this collection will provide endpoints on all the HTTP verbs: POST, PUT, DELETE, GET.
For example, if we create a collections Animals. Strapi will provide us with the endpoints:
-
/animalsGET -
/animals/:idGET -
/animals/:idPUT -
/animals/:idDELETE -
/animalsPOST -
/animalsGET: This endpoint will return all the animals on the server. -
/animals/:idGET: This will return a specific animal from the server using the id to find the animal. The id is a globally unique identifier set by the server to identify/marl each animal resource in the backend uniquely. -
/animals/:idPUT: This edits an animal resource in the collection. The id is the id of the animal to edit. This request body will contain the new info of the animal that will be edited. -
/animals/:idDELETE: This endpoint deletes/removes an animal from the collection. -
/animalsPOST: This endpoint adds a new animal to the mix. The request body of this will contain the data of the new animal to be created.
That's the power of Strapi, we don't have to write the code for each endpoint, and we don't have to set up any database; everything is provided for us from the start.
Strapi has plugins and configurations that enable us to add extra custom features to Strapi. For example, you can add a database (MongoDB, MySQL, etc.). This will make Strapi use your database instead of its inbuilt DB.
Strapi is very flexible, and it allows devs to configure their backend to their taste with ease.
Requirements
We will need a few tools installed in our machine for this article.
- Node.js Strapi and React.js all run on Node.js. So we must have Node.js binaries installed on our machine. You can download it from here Node.js download page.
- NPM: This is the official Node package manager. It comes bundled with the Node.js binaries.
- Yarn: High-speed Node package manager. YOu can install via NPM: npm i yarn -g. We will use this to scaffold our Strapi project.
- VS Code: This is a code editor from Microsoft. It is unarguably the most used code editor in the world. So I prefer you use this because it has enormous support and very good for modern web development. Download it from here
What is Pagination?
This is the breaking up of web data into discrete parts. This is an optimization technique that requires the whole page to be broken up and delivered into pages.
For example, a news app can have up to ~10K news in its backend. Thus, displaying the news in one fell swoop will significantly impact performance both client and server-wise.
It will take time for the server to collect all 10K news posts and send them to the client on the server-side. The payload will be massive, and it will cause latency and high network usage on the server.
On the client-side, the news posts' requests will take time for the response to reach the client, so there will be a huge load time. Then, whenever the response comes, the UI framework will loop through the 10K news posts and render them on the UI. The looping alone will have a performance problem on the JS engine, then combine it with the rendering of each news post up to that large number.
We see that our browser will freeze. It will become unresponsive when it takes to loop and render the whole 10K news posts.
The solution here is to collect the news posts from the serve chunk by chunk. We will request a small chunk of the dataset, render it, and when the next is needed, a request is sent, and the next chunk in-line is sent from the server. Doing this, we will render the whole dataset in the browser without affecting the performance.
This is called pagination:
The 10K news posts are broken into pages. A page represents a chunk or slice of the datasets that will be rendered at a time.
Since we have 10K records, and we want 20 records in a chunk, that means we will have 500 pages (10K/20). Each page will have 20 records. We can set the limit, which will require re-calculating the number of pages that it will generate because changing the limit of records to 10 records will mean that our news app will have (10K/10) 1000 pages.
See that it increased more than when we were having 20 records per page. In the next section, we will look into the types of pagination.
Types of pagination
There are two types of ways we can achieve pagination. They are:
- Offset-based pagination
- Cursor-based pagination
Let's start with offset-based pagination.
Offset-based pagination
Offset-based pagination uses the concept of start and limits to get discrete parts from the database.
The process involves setting the number of records to fetch and the number of records to skip. This is usually done by using the limit and offset.
The limit sets the number of records to return. The offset specifies the index from where the record collection/fetching will start.
For example, we have this dataset.
1. data_1
2. data_2
3. data_3
4. data_4
5. data_5
6. data_6
7. data_7
8. data_8
9. data_9
10. data_10
11. data_11
12. data_12
13. data_13
14. data_14
Each record has a unique global identifier, and no two records can have the same identifier. Therefore, we can fetch the data in discrete parts by specifying the index in the datasets to start from and the maximum amount to return.
We want to get 5 items per request. So, on the initial request, we send the request along with limit and offset values.
limit: 5
offset: 0
This will start from the 1st record 1. data_1 and collect 5 records below it. The result will be:
1. data_1
2. data_2
3. data_3
4. data_4
5. data_5
Now, on the next request, the limit and values will be:
limit: 5
offset: 5
This will start from the 6th record and collect five records below it. The result will be:
6. data_6
7. data_7
8. data_8
9. data_9
10. data_10
This result is appended to the previous result and displayed on the UI. These techniques do away with the performance bottleneck we experienced before when fetching the whole data.
Now we won't experience any unresponsive UI, and the load time will be much lesser because each response will have a small payload size. The data are fetched in batches, and each batch contains a small subset of the whole dataset.
Coming from an SQL background, we can use clauses in SQL to fetch rows from tables in batches.
SELECT column FROM table LIMIT 10 OFFSET 10
The LIMIT states the number of rows to retrieve/return from the table. The OFFSET tells the SQL engine to start from the 11th row in the table. With the above SQL statement, we have achieved offset-based pagination in SQL.
Problems with offset-based pagination
Problems occur when data are inserted and removed from the datasets while the pagination is going on.
Offset-based pagination uses an index, and the index is the position of a record in the list.
Now, when a record is removed from the list, the indexes change.
For example, in our data list above, if data_1 is removed, the indexes change, and it affects the next set of records to be fetched because offset pagination works on the indexes. This results in missing records or duplicates records.
Cursor-based pagination
Since indexes in offset-based pagination are not reliable, we can identify the records directly in the datasets and use them as a pivot point. This point of pivot is the cursor, hence the name cursor-based pagination.
The point of pivot/cursor must be globally unique to all records in the dataset. This is useful, so even if there are duplicate records in the dataset, their unique IDs will stand them out. IDs are usually used as the cursor because it is sequential and unique.
Cursor-based pagination involves selecting a specific record from the dataset and then collect the next nth records below it. Unlike offset-based pagination that uses an index in the dataset, cursor-based pagination uses the field in the record.
A request in cursor-based pagination will be like this:
cursor: 2
limit: 5
Using id as the cursor in the records field. This request will start from the record with an id field with 2 and collect 5 records below it.
In SQL, cursor-based pagination will look like this:
select * from blogPosts where id > 0 limit 2
This statement will select blog posts from the blogPosts table starting from the record whose id field is greater than 0. Thus, the maximum number of blog post rows to select is 2 records only.
The blogPosts table is this:
    { id: 1, post: "Post_1"},
    { id: 2, post: "Post_2"},
    { id: 3, post: "Post_3"},
    { id: 4, post: "Post_4"},
    { id: 5, post: "Post_5"},
    { id: 6, post: "Post_6"},
    { id: 7, post: "Post_7"},
    { id: 8, post: "Post_8"},
    { id: 9, post: "Post_9"},
    { id: 10, post: "Post_10"}
The result will be this:
    { id: 1, post: "Post_1"},
    { id: 2, post: "Post_2"},
On the next request, we will increase the value to fetch rows whose id field value is greater than 2. This is because the last record in our result has an id of 2.
select * from blogPosts where id > 2 limit 2
Let’s look at how we achieve pagination in a GraphQL API.
Pagination and GraphQL
GraphQL is an open-source query language for data APIs created by Facebook in 2015. It uses the concept of a query (read), mutation (write), and subscription (continuous read) to fetch data from an API.
GraphQL is a runtime in the backend. This runtime provides a structure for servers to describe the data to be exposed in their APIs. Clients can then write the structure of data they want from the server using the GraphQL language. Finally, the language text is sent to the GraphQL server via the HTTP POST request.
The GraphQL runtime receives the GraphQL language, runs it, puts together the data as requested, and sends it back to the client.
A simple query looks like this:
    query {
      posts {
        title
        body
      }
    }
This tells the GraphQL runtime to give us an array of posts, and on each post record, we want the title and body fields present.
    {
      "data": [
        {
          "title": "Intro to React",
          "body": "Body content of React"
        },
        {
          "title": "Intro to Angular",
          "body": "Body content of Angular"
        },
        {
          "title": "Intro to Vue",
          "body": "Body content of Vue"
        },
        {
          "title": "Intro to Svelte",
          "body": "Body content of Svelte"
        },
        {
          "title": "Intro to Preact",
          "body": "Body content of Preact"
        },
        {
          "title": "Intro to Alpine",
          "body": "Body content of Alpine"
        }
      ]
    }
If the number of post records in our GraphQL server is huge, we will experience lag and poor performance both on the UI and lad time.
How do we employ pagination in GraphQL?
It seems complex to do with all those weird language structures used to fetch data. Yes, but it is simple to achieve.
The limit and offset arguments are used to implement offset-based pagination in GraphQL endpoints.
The limit sets the number of records to return from the endpoint. The offset sets the index in the dataset to start from.
    query {
      posts(limit: 2, offset: 7) {
        title
        body
      }
    }
The query above will start from index 7 in the record list and return two records below it. To get the next records, we know that the next index to start is 9. the query will be this:
    query {
      posts(limit: 2, offset: 9) {
        title
        body
      }
    }
The next query will be from offset 11:
    query {
      posts(limit: 2, offset: 11) {
        title
        body
      }
    }
From the query resolver, we will have to get the limit and offset args and use them to return the records.
Example:
    Query: {
      posts: (parent, args, context, info) => {};
    }
The args param will have the arguments in our query in its object body. So we destructure them:
    Query: {
      posts: (parent, args, context, info) => {
          const { limit, offset } = args
          ...
      };
    }
Then, we use them to get the data in discrete parts.
    const postArray = [];
    Query: {
      posts: (parent, args, context, info) => {
        const { limit, offset } = args;
        return postsArray.slice(offset, limit);
      };
    }
We have our DB in an array, so we use the Array#slice method to get the posts off the postsArray using the limit and offset as the starting index and the amount to slice, respectively.
The main point here is that we have the limit and offset arguments. We can then use them to get records in parts from the database we are using (e.g., MongoDB, MySQL, in-memory database, etc.)
That's a simple way to achieve offset-based pagination in GraphQL.
To implement cursor-based pagination in GraphQL, we use the cursor and limit arguments. The argument's names can be whatever you want in your implementation, and we chose these names to describe what they do.
A query will be like this:
    query {
        posts(cursor: 4, limit: 7) [
            title
            body
        ]
    }
The cursor is set to 4, this is the id of the record in the dataset to start from, and the limit is the number of records to return.
We have to know that the cursor is not always the id of the records in the list. The cursor can be any field in your records; the important thing is that the cursor should be globally unique in your records. Strapi supports GraphQL, and this is done by installing the GraphQL plugin to the Strapi mix.
With the Strapi GraphQL, we can use Strapi filters start and limit filters to achieve offset-based pagination in our Strapi endpoint. Now, we build a GraphQL Strapi API to demonstrate how to use pagination in GraphQL-Strapi.
Scaffold Strapi project — Newsfeed app
First, we will create a central folder newsapp-gpl:
➜ mkdir newsapp-gpl
Move into the folder and scaffold Strapi project.
➜ strapi-graphql-pagination cd newsapp-gpl
we will scaffold a Strapi project
➜ newsapp-gpl yarn create strapi-app newsapp-gpl-api --quickstart
The above command will create a Strapi folder newsapp-GPL-API and also start the Strapi server at localhost:1337. This is the URL from where we can build our collections and also call the collections endpoints.
Strapi will open a page to register before we can start creating endpoints: http://localhost:1337/admin/auth/register-admin.
Now, by default, Strapi creates REST endpoints from the collection. To enable the GraphQL endpoint, we will have to add the GraphQL plugin.
To do that we run the below command:
➜ newsapp-gpl-api yarn strapi install graphql
Re-start the server.
Press Ctrl+C in the terminal and then, run:
yarn develop
Open the link http://localhost:1337/graphql. the GraphQL playground will open up.
Now, we can’t perform any op (query or mutation).
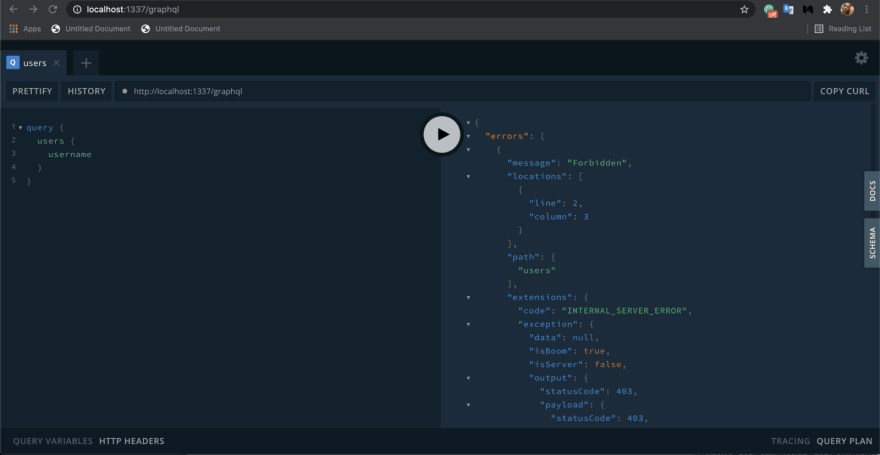
We must register ourselves before we can do anything. Open a new tab in the playground and run the below mutation:
    mutation {
      register(input: { username: "nnamdi", email: "kurtwanger40@gmail.com", password: "nnamdi" }) {
        jwt
        user {
          username
          email
        }
      }
    }


See the result:

This will create a new user in the User collection type in our admin panel.

See the "jwt" returned when we registered, we will pass it in the "Authorization" header on every request like this:
{ "Authorization": "Bearer YOUR_JWT_GOES_HERE" }
For this tutorial, we will create a newsPost collection and add the fields:
title -> Text
body -> Text
imageUrl -> Text
writtenBy -> Text
Then, you populate it with news data. Add data up to 15 items. Strapi will not generate REST endpoints for our newsPost collection. Instead, it will create GraphQL mutations and queries for the newsPost collection.
    // NewsPost's Type definition
    type NewsPost {
      id: ID!
      created_at: DateTime!
      updated_at: DateTime!
      title: String
      body: String
      imageUrl: String
      writtenBy: String
      published_at: DateTime
    }
    type Query {
      // gets a single new post via its id
      newsPost(id: ID!, publicationState: PublicationState): NewsPost
      // returns all news posts
      newsPosts(
        sort: String
        limit: Int
        start: Int
        where: JSON
        publicationState: PublicationState
      ): [NewsPost]
      // This gives us more leverage on what to return in the query. E.g, it provides an aggregator that we can use to get the total count of news post data in the backend.
      newsPostsConnection(
        sort: String
        limit: Int
        start: Int
        where: JSON
      ): NewsPostConnection
    }
    type Mutation {
      // creates a new news post
      createNewsPost(input: createNewsPostInput): createNewsPostPayload
      // updates/edits a news post
      updateNewsPost(input: updateNewsPostInput): updateNewsPostPayload
      // delete a news post
      deleteNewsPost(input: deleteNewsPostInput): deleteNewsPostPayload
    }
We have to enable role access for the newsPost collection. Go to "Settings" -> "USERS & PERMISSIONS PLUGIN " section "Roles". Enable "Select all" for newsPost. Then, scroll up and click on "Save".
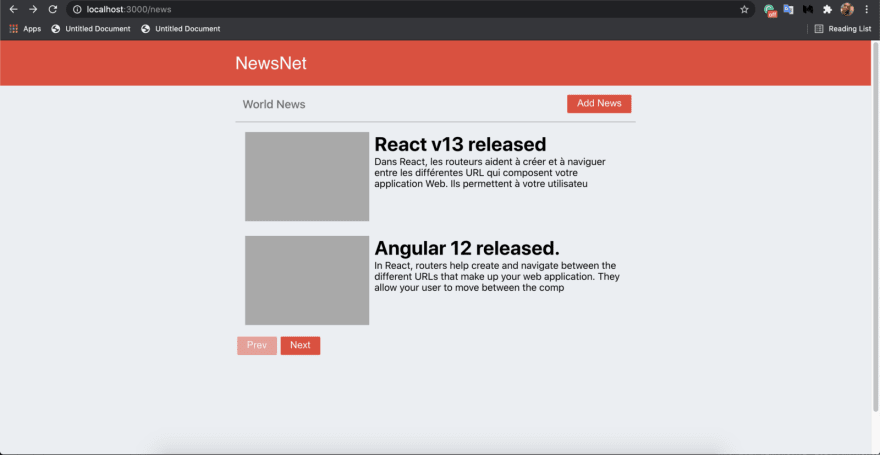
Demo — Offset-based pagination
Here, we will build a news app using React.js. This app will display all the news in our backend in a list. We will paginate the news list in a form where we will have "Next" and "Prev" buttons. These buttons will be used to navigate the pages of the news list.
The news list page will display a maximum of two news posts per page. If the "Next" button is pressed, it loads the next page. Likewise, if the "Prev" button is pressed, it loads the previous page.
Let’s code.
First, make sure the create-react-app CLI tool is already installed in your system. IF not run the below command to install it:
npm i create-react-app -g
Now, we scaffold a React.js project using the tool.
Make sure you are in the newsapp-gpl folder.
create-react-app newsapp-strapi
This will make create-react-app create a React.js project in a newsapp-strapi folder.
Now, move into the folder:
cd newsapp-strapi
Now, we will install dependencies:
npm i react-router-dom axios
-
react-router-domwill be used to add routing to our app. -
axiosan HTTP library, we will use this to perform HTTP requests to our Strapi GraphQL endpoints.
Start the server:
npm run start
Go to your browser and navigate to localhost:3000.
Our app will have the two routes:
-
/news: This route will render all the news in our app. -
/newspost/:id: This route will render a particular news post. The id will be the id of the news post.
Our app will look like this:


It will have the following components:
- Header: This will hold the header section of our app.
-
NewsList: This component will be a page component. It will be rendered when we navigate to
/newsroute. It will display the list of news. It is an intelligent component. -
NewsCard: This component will display an overview of a news post. The
NewsListcomponent will render it. -
NewsView: This component is a page component. It displays the full details of a news post. It is the news page where users will read a piece of particular news. This will be rendered when the route
/newspost/:idis navigated to. - AddNewsDialog: This is a dialog component. It is where news is added to our app.


We will create pages and components folders.
mkdir src/pages src/components
The Header, NewsCard, AddNewsDialog components will be in the components folder.
NewsList, NewsView will be in the pages folder.
Let’s create them:
mkdir src/components/AddNewsDialog
touch src/components/AddNewsDialog/index.js
mkdir src/components/Header
touch src/components/Header/index.js
touch src/components/Header/Header.css
mkdir src/components/NewsCard
touch src/components/NewsCard/index.js
touch src/components/NewsCard/NewsCard.css
mkdir src/pages/NewsList
touch src/pages/NewsList/index.js
touch src/pages/NewsList/NewsList.css
mkdir src/pages/NewsView
touch src/pages/NewsView/index.js
touch src/pages/NewsView/NewsView.css
Open App.js and paste the below code:
    import "./App.css";
    import { BrowserRouter, Route, Switch, Redirect } from "react-router-dom";
    import Header from "./components/Header";
    import NewsList from "./pages/NewsList";
    import NewsView from "./pages/NewsView";
    function App() {
      return (
        <>
          <Header />
          <div className="container">
            <head>
              <title>NewsNet</title>
              <link rel="icon" href="/favicon.ico" />
            </head>
            <main className="main">
              <BrowserRouter>
                <Switch>
                  <Route path="/news">
                    <NewsList />
                  </Route>
                  <Route path="/newspost/:id">
                    <NewsView />
                  </Route>
                  <Route exact path="/">
                    <Redirect to="/news" />
                  </Route>
                  <Route path="*">
                    <NewsList />
                  </Route>{" "}
                </Switch>
              </BrowserRouter>
            </main>
          </div>
        </>
      );
    }
    export default App;
We set routes and the components that will load when activated. The news route will render the NewsList component and the route newspost/:id will render the NewsView component.
The page components will render in the BrowserRouter tag whenever the route changes. Every other thing outside the BrowserRouter tag will render on every route.
See, we imported Header component and rendered it outside the BrowserRouter so it appears on all pages. Then, we set the head title using the title.
Let’s see the Header component:
    import "./Header.css";
    export default function Header() {
      return (
        <section className="header">
          <div className="headerName">NewsNet</div>
        </section>
      );
    }
See the CSS file:
    .header {
      height: 54px;
      background-color: rgba(234, 68, 53, 1);
      color: white;
      display: flex;
      align-items: center;
      padding: 10px;
      font-family: sans-serif;
      /*width: 100%;*/
      padding-left: 27%;
    }
    .headerName {
      font-size: 1.8em;
    }
Let’s code the NewsList component:
    import "./NewsList.css";
    import NewsCard from "./../../components/NewsCard";
    import { useEffect, useState } from "react";
    import axios from "axios";
    import AddNewsDialog from "../../components/AddNewsDialog";
    export default function NewsList() {
      const [newsList, setNewsList] = useState([]);
      const [showModal, setShowModal] = useState(false);
      const [start, setStart] = useState(0);
      const [limit] = useState(2);
      const [pageDetails, setPageDetails] = useState();
      useEffect(() => {
        async function fetchNews() {
          const data = await axios.post("http://localhost:1337/graphql", {
            query: `query {
            newsPostsConnection(limit: ${limit}, start: ${start}) {
              values {
                id
                title
                body
                writtenBy
                imageUrl
                created_at
              }
              aggregate {
                totalCount
              }
            }
          }`,
          });
          setPageDetails(data?.data?.data?.newsPostsConnection?.aggregate);
          setNewsList([...data?.data?.data?.newsPostsConnection?.values]);
          //window.location.reload();
        }
        fetchNews();
      }, [start]);
      function nextPage() {
        setStart(limit + start);
      }
      function prevPage() {
        setStart(start - limit);
      }
      function showAddNewsDialog() {
        setShowModal(!showModal);
      }
      return (
        <div className="newslist">
          <div className="newslistbreadcrumb">
            <div className="newslisttitle">
              <h3>World News</h3>
            </div>
            <div style={{ display: "flex", alignItems: "center" }}>
              <div style={{ marginRight: "4px" }}>
                <button onClick={showAddNewsDialog}>Add News</button>
              </div>
            </div>
          </div>
          <div>
            {newsList
              ?.sort((a, b) => b.created_at.localeCompare(a.created_at))
              ?.map((newsItem, i) => (
                <NewsCard newsItem={newsItem} key={i} />
              ))}
          </div>
          {showModal ? <AddNewsDialog closeModal={showAddNewsDialog} /> : null}
          <div>
            <span>
              <button disabled={limit > start} onClick={prevPage}>
                Prev
              </button>
            </span>
            <span>
              <button
                disabled={pageDetails && start + limit >= pageDetails?.totalCount}
                onClick={nextPage}
              >
                Next
              </button>
            </span>
          </div>
        </div>
      );
    }
This is where the core implementation of using pagination in Strapi GraphQL endpoint lies.
First, we set start, limit, newsList, showModal, pageDetails state. The start state holds the current offset. The limit state has the limit of news post records to return.
The newsList state holds the current list of news posts already fetched. The pageDetails has the total count of news posts in the backend.
See that we made a newsPostConnection query. We used newsPostConnection to use the aggregate field to get the total count of news posts in our backend. See that we passed in limit and start as arguments in the query with the states' values start and limit.
See that in the newsPostConnection query we set the fields we need in the news post field.
We use Axios to send the query to the Strapi GraphQL backend. We use HTTP POST because GraphQL comms via the POST method, we set the query as the payload, we do this by setting the query string as data in the POST body, the query prop in the body is what we use to set the query string.
So the server will retrieve our query string in the request body, e.g., request.body.query, and the GraphQL runtime will execute the query.
We could have used the ApolloClient library for the GraphQL query requests, but I decided to use Axios to learn how GraphQL queries can be sent without using the ApolloClient lib. It is still the same old way of sending HTTP requests; it's just that ApolloClient abstracts that away and provides many features to make GraphQL queries efficient and straightforward.
Back to our code, we retrieve the totalCount from the data return from the HTTP request and store it in the pageDetails state. Also, we retrieve the news list in the data and save it in the newsList state.
All these are done in useEffect hook callback. This hook will run whenever the component mounts or re-renders. We set the start state as a dependency in the useEffect, and this will cause the useEffect to run only when the start value changes.
We have the nextPage and prevPage functions. The nextPage function sets the next offset to start from. The math here is that the next offset will be from adding the limit to the current start.
To get the previous page will be by subtracting the limit from the start. All these are set in the start state and will cause the component to render, and the query newsPostConnection will be called with the new start value. This gives us a new news post.
The UI renders the news post in the newsList state. We see the Prev and Next buttons. These buttons are what we use to navigate the pages. Next loads the next news posts, and the Prev loads the previous page. Also, the Next button is disabled when there is no next data, and the Prev is disabled when there is no previous page.
Let's look at the NewsView component. This component will load a piece of particular news and display its details.
See the code:
    import "./NewsView.css";
    import { useParams } from "react-router-dom";
    import axios from "axios";
    import { useEffect, useState } from "react";
    export default function NewsView() {
      let { id } = useParams();
      const [news, setNews] = useState();
      useEffect(() => {
        async function getNews() {
          const data = await axios.post("http://localhost:1337/graphql", {
            query: `
          query {
            newsPost(id: ${id}) {
              id
              title
              body
              imageUrl
              writtenBy
              created_at
            }
          }`,
          });
          setNews(data?.data?.data?.newsPost);
        }
        getNews();
      }, []);
      async function deleteNews() {
        if (window.confirm("Do you want to delete this news?")) {
          await axios.post("http://localhost:1337/graphql", {
            query: `
            mutation {
              deleteNewsPost(input: {where: {id: ${id} }}) {
                newsPost {
                  title
                }
              }
            }`,
          });
          window.history.pushState(null, "", "/news");
          window.location.reload();
        }
      }
      return (
        <div className="newsview">
          <div style={{ display: "flex" }}>
            <a className="backHome" href="/news">
              Back
            </a>
          </div>
          <div
            className="newsviewimg"
            style={{ backgroundImage: `url(${news?.imageUrl})` }}
          ></div>
          <div>
            <div className="newsviewtitlesection">
              <div className="newsviewtitle">
                <h1>{news?.title}</h1>
              </div>
              <div className="newsviewdetails">
                <span style={{ flex: "1", color: "rgb(99 98 98)" }}>
                  Written By: <span>{news?.writtenBy}</span>
                </span>
                <span style={{ flex: "1", color: "rgb(99 98 98)" }}>
                  Date: <span>{news?.created_at}</span>
                </span>
                <span>
                  <button className="btn-danger" onClick={deleteNews}>
                    Delete
                  </button>
                </span>
              </div>
            </div>
            <div className="newsviewbody">{news?.body}</div>
          </div>
        </div>
      );
    }
We use the useParams hook to get the id off the URL newspost/:id. This id value is used to get the news details.
We called the http://localhost:1337/graphql endpoint and passed the query newsPost in the body in the query prop. The id is passed to the id argument in the query. This query will fetch the news post and set it to the newsPost state.
The UI will render the details of the news:
The Delete button calls the deleteNews function. This function sends a deleteNewsPost mutation to our Strapi GraphQL endpoint. The id is passed to the id argument in the mutation. After that, we navigate to the main page.
The Back navigates us back to the news page:
See the CSS code:
    .newsview {
      margin-top: 7px;
    }
    .backHome {
      /*height: 30px; */
      padding: 6px 26px;
      font-weight: 400;
      font-size: 1rem;
      line-height: normal;
      border-radius: 2px;
      cursor: pointer;
      outline: 0px;
      background-color: rgba(234, 68, 53, 1); /* rgb(0, 126, 255);*/
      border: 1px solid rgb(234, 68, 53); /*rgb(0, 126, 255);*/
      color: rgb(255, 255, 255) !important;
      text-align: center;
      margin: 3px;
    }
    .newsviewimg {
      background-color: darkgray;
      background-repeat: no-repeat;
      background-size: cover;
      background-position: center;
      height: 200px;
    }
    .newsviewdetails {
      display: flex;
      justify-content: space-between;
      align-items: center;
    }
    .newsviewtitlesection {
      margin-bottom: 20px;
    }
    .newsviewtitle h1 {
      margin-bottom: 6px;
    }
    .newsviewbody {
      font-size: large;
    }
    .newsviewbody::first-letter {
      font-weight: 700;
      font-size: 4em;
      line-height: 0.83;
      float: left;
      margin-right: 7px;
      margin-bottom: 4px;
      color: rgba(234, 68, 53, 1);
    }
    .newsviewbody {
      clear: left;
      font-size: 21px;
      line-height: 1.58;
      letter-spacing: -0.003em;
    }
Now, let’s flesh out our other components, NewsCard and AddNewsDialog.
NewsCard
This component is used by NewsList to display little details about each news on the main page.
    import { Link } from "react-router-dom";
    import "./NewsCard.css";
    export default function NewsCard({ newsItem }) {
      const { title, body, imageUrl, id } = newsItem;
      const synopsis = body.slice(0, 150);
      return (
        <Link to={"/newspost/" + id}>
          <div className="newscard">
            <div
              className="newscardimg"
              style={{ backgroundImage: `url(${imageUrl})` }}
            ></div>
            <div style={{ flex: "1 1 203%" }}>
              <div className="newscardtitle">
                <h1>{title.slice(0, 30)}</h1>
              </div>
              <div>
                <span>{synopsis}</span>
              </div>
              <div></div>
            </div>
          </div>
        </Link>
      );
    }
It receives the news post in its newsItem argument, and the details are destructured and rendered.
The CSS:
    .newscard {
      /*background-color: white;*/
      padding: 8px;
      /*box-shadow: 0 4px 8px 0 rgba(0, 0, 0, 0.2);
      transition: 0.3s;*/
      border-radius: 4px;
      margin: 8px;
      cursor: pointer;
      display: flex;
    }
    .newscardimg {
      width: 146px;
      height: 146px;
      background-color: darkgray;
      background-repeat: no-repeat;
      background-size: cover;
      background-position: center;
      margin-right: 9px;
      flex: 1 100%;
    }
    .newscardtitle {
      flex: 1 100%;
    }
    .newscardtitle h1 {
      margin-top: 0;
      margin-bottom: 1px;
    }
    AddNewsDialog
This component is used to add news posts to the server.
    import { useState } from "react";
    import axios from "axios";
    export default function AddNewsDialog({ closeModal }) {
      const [disable, setDisable] = useState(false);
      async function saveNews() {
        const title = window.newsTitle.value;
        const imageUrl = window.newsImageUrl.value;
        const writtenBy = window.newsWrittenBy.value;
        const body = window.newsBody.value;
        setDisable(true);
        await axios.post("http://localhost:1337/graphql", {
          query: `
          mutation {
            createNewsPost(input: { data: { title: "${title}", body: "${body}", imageUrl: "${imageUrl}", writtenBy: "${writtenBy}"}}) {
              newsPost {
                id
                title
                body
                writtenBy
                created_at
              }
            }
          }
          `,
        });
        window.location.reload();
        setDisable(false);
      }
      return (
        <div className="modal">
          <div className="modal-backdrop" onClick={closeModal}></div>
          <div className="modal-content">
            <div className="modal-header">
              <h3>Add News</h3>
              <span
                style={{ padding: "10px", cursor: "pointer" }}
                onClick={closeModal}
              >
                X
              </span>
            </div>
            <div className="modal-body content">
              <div style={{ display: "flex", flexWrap: "wrap" }}>
                <div className="inputField">
                  <div className="label">
                    <label>Title</label>
                  </div>
                  <div>
                    <input id="newsTitle" type="text" />
                  </div>
                </div>
                <div className="inputField">
                  <div className="label">
                    <label>ImageUrl</label>
                  </div>
                  <div>
                    <input id="newsImageUrl" type="text" />
                  </div>
                </div>
                <div className="inputField">
                  <div className="label">
                    <label>Written By</label>
                  </div>
                  <div>
                    <input id="newsWrittenBy" type="text" />
                  </div>
                </div>
                <div className="inputField" style={{ flex: "2 1 100%" }}>
                  <div className="label">
                    <label>Body</label>
                  </div>
                  <div>
                    <textarea
                      id="newsBody"
                      style={{ width: "100%", height: "200px" }}
                    ></textarea>
                  </div>
                </div>
              </div>
            </div>
            <div className="modal-footer">
              <button
                disabled={disable}
                className="btn-danger"
                onClick={closeModal}
              >
                Cancel
              </button>
              <button disabled={disable} className="btn" onClick={saveNews}>
                Save
              </button>
            </div>
          </div>
        </div>
      );
    }
It is straightforward. There are input boxes to input and collect the news title, image URL, body, and author. The saveNews function is called by the Save button when clicked. The function collects the news details from the input boxes and sends a mutation to our Strapi GraphQL endpoint http://localhost:1337/graphql.
The payload in the body is contained in the query object prop, and the mutation is createNewsPost its input argument has the news details picked from the UI: body, title, writtenBy, and imageUrl. The page is reloaded, so the new addition is displayed.
Now, we add our global CSS code in the index.css file:
    body {
      margin: 0;
      font-family: -apple-system, BlinkMacSystemFont, "Segoe UI", "Roboto",
        "Oxygen", "Ubuntu", "Cantarell", "Fira Sans", "Droid Sans",
        "Helvetica Neue", sans-serif;
      -webkit-font-smoothing: antialiased;
      -moz-osx-font-smoothing: grayscale;
      background-color: rgba(234, 238, 243, 1);
    }
    code {
      font-family: source-code-pro, Menlo, Monaco, Consolas, "Courier New",
        monospace;
    }
    button {
      height: 30px;
      padding: 0px 15px 2px;
      font-weight: 400;
      font-size: 1rem;
      line-height: normal;
      border-radius: 2px;
      cursor: pointer;
      outline: 0px;
      background-color: rgba(234, 68, 53, 1); /* rgb(0, 126, 255);*/
      border: 1px solid rgb(234, 68, 53); /*rgb(0, 126, 255);*/
      color: rgb(255, 255, 255);
      text-align: center;
      margin: 3px;
    }
    .btn-danger {
      background-color: rgb(195 18 18);
      border: 1px solid rgb(195 18 18);
    }
    .container {
      min-height: 100vh;
      /*padding: 0 0.5rem; */
      display: flex;
      flex-direction: column;
      justify-content: center;
      align-items: center;
      background-color: rgba(234, 238, 243, 1);
    }
    .main {
      /*padding: 5rem 0;*/
      flex: 1;
      display: flex;
      flex-direction: column;
      width: 46%;
      /*justify-content: center;
      align-items: center;*/
    }
    .modal {
      position: fixed;
      top: 0;
      left: 0;
      width: 100%;
      height: 100%;
      display: flex;
      flex-direction: column;
      align-items: center;
      z-index: 1000;
      font-family: "Segoe UI", Tahoma, Geneva, Verdana, sans-serif;
    }
    .modal-backdrop {
      opacity: 0.5;
      width: inherit;
      height: inherit;
      background-color: grey;
      position: fixed;
    }
    .modal-body {
      padding: 5px;
      padding-top: 15px;
      padding-bottom: 15px;
    }
    .modal-footer {
      padding: 15px 5px;
      display: flex;
      justify-content: space-between;
    }
    .modal-header {
      display: flex;
      justify-content: space-between;
      align-items: center;
    }
    .modal-header h3 {
      margin: 0;
    }
    .modal-content {
      background-color: white;
      z-index: 1;
      padding: 10px;
      margin-top: 10px;
      width: 520px;
      box-shadow: 0px 11px 15px -7px rgba(0, 0, 0, 0.2), 0px 24px 38px 3px rgba(0, 0, 0, 0.14),
        0px 9px 46px 8px rgba(0, 0, 0, 0.12);
      border-radius: 4px;
    }
    input[type="text"] {
      width: 100%;
      /*height: 3.4rem;*/
      padding: 9px;
      font-weight: 400;
      /*font-size: 1.3rem;*/
      cursor: text;
      outline: 0px;
      border: 1px solid rgb(227, 233, 243);
      border-radius: 2px;
      color: rgb(51, 55, 64);
      background-color: transparent;
      box-sizing: border-box;
    }
    .label {
      padding: 4px 0;
      font-size: small;
      color: rgb(51, 55, 64);
    }
    .content {
      display: flex;
      flex-wrap: wrap;
      flex-direction: column;
    }
    .inputField {
      margin: 3px 7px;
      flex: 1 40%;
    }
    button:disabled,
    button[disabled] {
      opacity: 0.5;
      cursor: not-allowed;
    }
    a[href] {
      text-decoration: none;
      color: black;
    }
    a:visited {
      color: black;
    }
Test
Load the app on localhost:3000. Then, press the Next and Prev buttons to navigate the pages.


Source code
Find the source code of this project below:
Conclusion
We learned a lot in this tutorial.
First, we learned what Strapi is, then next, it was GraphQL and pagination. We demonstrated how to add pagination to our Strapi GraphQL endpoint by building a news app. In the news app, we made use of the next-prev type of UX pagination to demo pagination.
There are more UX pagination types:
- load more
- infinite scroll
I urge you to implement these to learn more about both paginations in the backend and UX.


Top comments (0)