
Strapi, an open-source Node.js headless CMS, allows users to create products with their favorite tools and frameworks while saving them a lot of time.
For instance, developers can set up Strapi with little or no codes and create web applications with their favorite frameworks.
Since this article will be focusing on Strapi workflow automation, let's start by understanding workflow automation. Workflow automation leverages self-operating processes using rule-based logic to automate what would've been a manual job.
For example, Strapi allows users to consume API from a content type with Get, Post, Delete and Put requests, which is mainly done manually.
However, to save time and reduce the possibilities of errors, data from a content type can be created, collected, edited, or deleted automatically by automating the Strapi workflow.
n8n is a workflow automation tool that allows users to connect their applications with an API that can share and manipulate their data without a single line of code. n8n enables you to create a connection between nodes to route data through the workflow.
A node is an entry point for retrieving data, a function to process data, or an exit for sending data. There can be one or several nodes for your API, service, or app. n8n has a dedicated node for Strapi to perform Create, Delete, get, getAll, and Update entries of content types.
In this article, we will explore n8n and Strapi. First, we'll discuss Strapi workflow automation using a Strapi blog example. Then, we'll automate our Strapi blog workflow to a code hosting platform like GitHub.
Workflow Automation, Why is it necessary
Before we get deep into why workflow automation is necessary, let's first discuss workflow. Businesses have procedures for carrying out activities; this is the same for executing tasks with software. These procedures are called workflow.
On the other hand, just like most software that solves a problem, Strapi has a workflow. Workflow is sequential activities that follow designed rules to execute a task. For instance, if you want to consume API with Strapi, you first need to create a content type and then send requests.
Creating a content type in Strapi follows the same sequence, especially if you're making a similar content type with the same fields. Also, most users who create a Strapi project need to collaborate with their team by pushing their project to a code hosting platform like GitHub. Typically, all of these have to be done manually by the developer.
However, manual workflows are prone to a lot of errors and mistakes. For example, if you make the mistake of entering the wrong information when creating your content type, you'll get an error. Another problem with manual workflow is that it's time-consuming.
An automated workflow saves a lot of time since it requires little or no human effort to execute tasks. Other advantages of workflow automation are increased efficiency and productivity, reduction in assumptions, etc.
Strapi Setup with Blog Template
This tutorial will explore automating Strapi blog workflow using n8n. We'll explore a blog content type and workflow automation in creating, reading, updating, deleting, and sharing content on GitHub with n8n. First, we'll set up our Strapi application.
I have a template that I created earlier and discussed in this article. We'll create a Strapi project with the template because it has the configuration and model that we need for our blog. Run the command below to create a Strapi project with the template.
npx create-strapi-app myblog --template https://github.com/hannydevelop/Strapi-template
The command above will install the required dependencies and set up a Strapi project in your local environment. Notice how the project you created has a blog content type already created with field names: Blog_title, Blog_description, and Blog_content.

The next step is to spin up n8n and automate our Strapi blog workflow with it.
n8n Installation and Setup
n8n allows you to incorporate workflow automation into your application. It has different nodes which are connective points through your automation. To install n8n, make sure you have version 14 of node.js or higher. Run the command below to spin up n8n with npx.
npx n8n
However, I'll suggest you install n8n with npm in your working environment. Run the command below to install n8n with npm.
npm install n8n -g
After installation, start n8n with the command below:
n8n start
You should get a response that n8n is running on port 5678. Navigate to http://localhost:5678/ in your web browser to get to the n8n workspace so that you can start building your workspace.
Strapi Workflow Automation, With Strapi Node
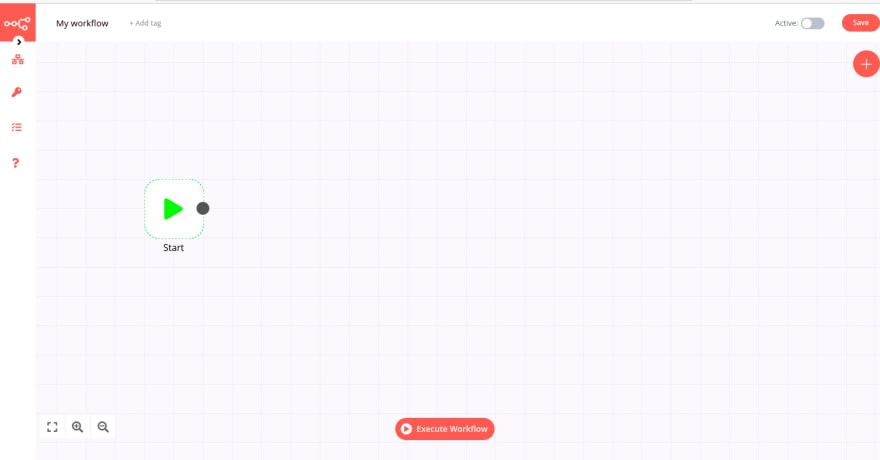
First, we'll name our workflow by clicking on My workflow at the top of your workspace. You can call your workflow whatever you like and even add tags. For me, I'll name the workflow Strapi Workflow.

Notice how the workflow has a start node by default. To connect other nodes to our workflow, click and drag horizontally the black circle on the start node.

Set Blog Entries
Let's think of our blog as a promotional blog where we give updates about our product. The blog title will always be Product new update, while the description will be the Latest Update about our product. The set node will allow us to set this information so that we don't type them repeatedly.
In the search node pop-up, type in set and click on the set node below the search bar. Click on the Add Value button under Values to Set, choose String from the drop down menu. Fill-in name with Blog_title and value with Product new update.
Next, click on Add Value button for the blog description. Fill-in name with Blog_description and value with Latest update about our product. Now, your set node entry should look like the image below.
In the search node pop-up, type in set and click on the set node below the search bar. Click on the Add Value button under Values to Set, choose String from the drop-down menu. Fill in name with Blog_title and value with Product new update.
Next, click on Add Value button for the blog description. Fill in name with Blog_description and value with Latest Update about our product. Now, your set node entry should look like the image below.

Now, click on the execute node button, you'll see that the workflow has been executed. Terminate the set node window by clicking on the close button near the execute node button.
Notice that the set node now has a green icon attached to it in your workspace. The next thing we'll do is create Strapi credentials to add the content we just created into our blog.
Create Strapi Credentials
In the search node pop-up, type in Strapi and click on the Strapi node below the search bar. Next, you'll need to fill in Strapi credentials.
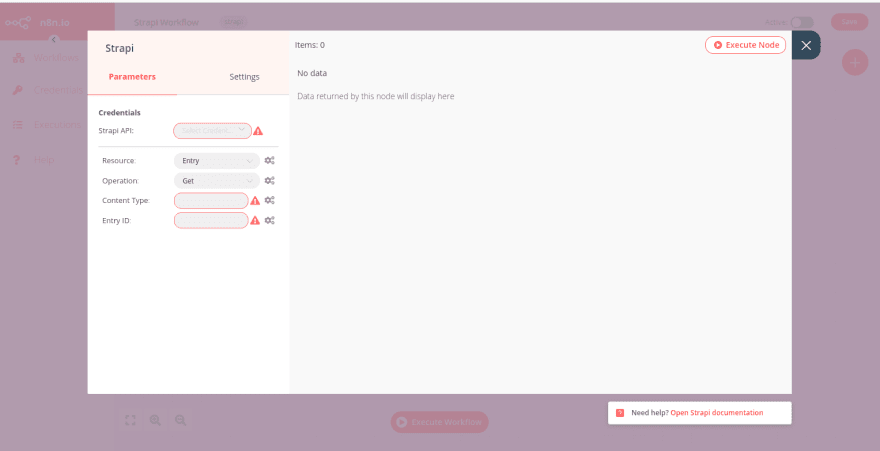
Click on the Strapi API box, select Create New. You’ll need to fill-in credential name and credential data.
Since we don't have these, we'll move over to Strapi to create some. Navigate to the Strapi blog project we created earlier in your browser localhost.
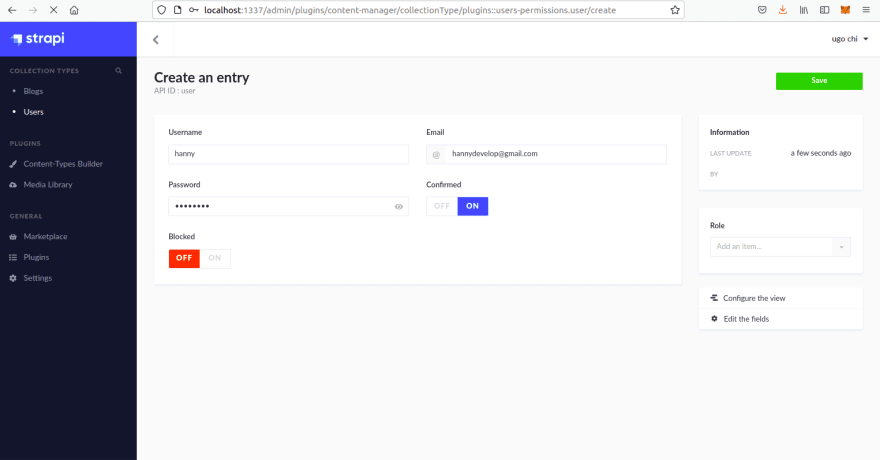
Next, we'll create an authenticated user in Strapi. Navigate to the Users collection type and click on Add New Users.

Fill in the user's username, email address, etc., and toggle the confirmed button to ON. Click on the Save button to add the new user.
Now, go to Roles in your administration panel by navigating to Settings > Users & Permissions plugin > Roles. Notice that you have one authenticated user; this is the user account you just created. Click on authenticated. Under Permissions, click on Select all and save.
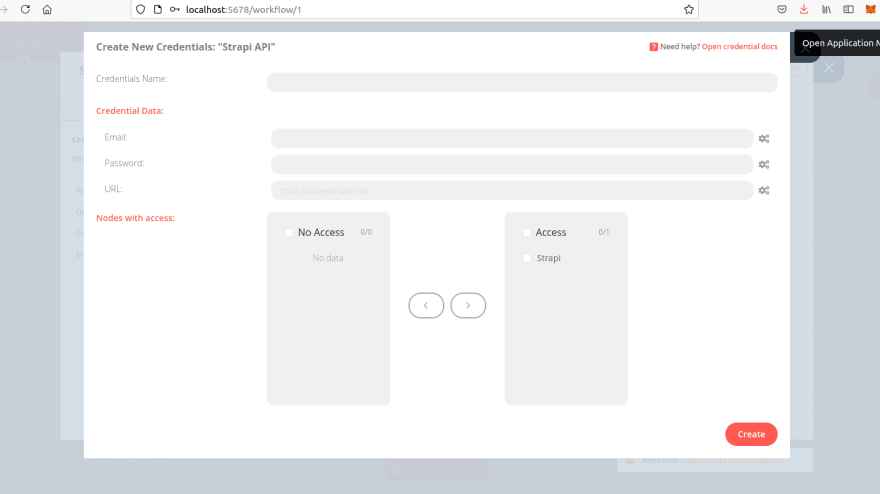
Return to your n8n, fill-in credentials name with the name of your choice. For example, I'll fill mine with a Strapi credential. Fill in the email and password with the email and password of the user you created in Strapi. Fill URL with Strapi's base URL; http://localhost:1337 and click on the create button.
Create Entry
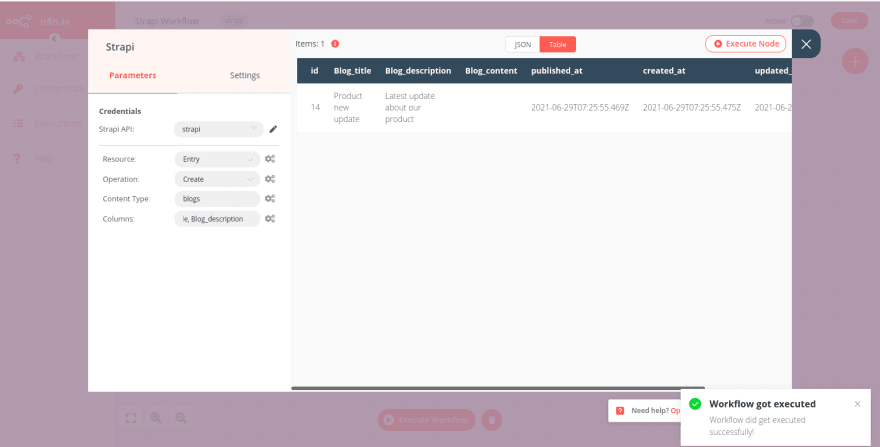
A blog project like we already have, will need to be updated with new contents from time to time. To create a new blog entry with n8n, choose the Strapi credential you created earlier. Change the Operation parameter to Create, fill-in blogs in the Content Type parameter.
The Column parameter will take in the fields of your blog. It is advisable you put in the same fields as the set node. For instance, the Column parameter should contain; **Blog_title**, **Blog_description**.
When you click on the execute node button, notice that the content we put-in in our set node has been added at the execution of Strapi's create entry node.
A blog project like we already have will need to be updated with new content from time to time. To create a new blog entry with n8n, choose the Strapi credential you created earlier. Change the Operation parameter to Create, fill-in **blogs** in the Content-Type parameter.
The Column parameter will take in the fields of your blog. It would be best if you put in the same fields as the set node.
For instance, the Column parameter should contain; **Blog_title**, **Blog_description**. When you click on the execute node button, notice that the content we put-in in our set node has been added at the execution of Strapi's create entry node.
Although the delete, get and getAll entries won’t be part of our workflow, we’ll explore them briefly.
Delete an Entry
We can delete some of our older blog posts to save space. For instance, since we won't be needing most of the data that came with our blog, we can get rid of them with Strapi's delete entry. To delete an entry:
- Create a new Strapi node.
- In the operation parameter, choose
Delete. - Fill in
blogsas the content type and put in the ID of the blog you want to delete and click on the execute node button.
Get Entries
You can get entries from your Strapi project with the GET or getAll operations in the Strapi node. For GET operation, fill in the ID of the blog item you want and click on the Execute Node button.

For the getAll operation, you don't need a blog item ID. Toggle the Return All button to show all of the blog items in your Strapi project. Click on the Execute Node button to return all of the items in your Strapi project.
We can now share our Strapi entries with our team to collaborate on our blog content. In the next step, we'll be using the GitHub node. Your workflow should look like this now.

First, we'll create a GitHub repository then add the GitHub node to your workflow. Next, register a new OAuth application by following the steps below:
- Click on Settings from your GitHub profile.
- Click on Developer settings and select OAuth Apps.
- Click on the Register a new application button to register your n8n-Strapi application.
- Enter any name as the Application name and
https://n8n.io/as your Homepage URL. - Copy the OAuth Callback URL from your Github OAuth2 API credentials window and paste it in the Authorization callback URL field.
- Click on the Register application button and copy the displayed
Client ID.

Next, in Github OAuth2 API, click on Create New and fill in your GitHub credentials. Paste the client ID from the OAuth application you created into the Client ID field.
On your GitHub application page, click on the Generate a new client secret button, paste the key generated into the Client Secret field. Finally, click on the Not connected button to connect your application to GitHub.
Once you have your application connected to GitHub, let's create a file with our new blog and push it to GitHub. Under resource, choose File, in operation, choose to Create.
Put your GitHub username in Repository Owner, in Repository Name, put in the name of the GitHub repository you created. For File Path, put in the name of your File, put in a commit message, and click on the Execute Node button.
Notice that the data we created earlier has been added to our GitHub repository. Your workflow should look like this now.

Update Entry
After collaborating with your team on the blog content, you can update the blog entry you created earlier to include blog content. First, we'll add another set node to our workflow, which will set the value of the blog content agreed by the team. Add a set node to your workflow by connecting it to your GitHub node.
Click on the Add value button and choose String from the drop-down. In the name property, fill in Blog_content and the value property put in the blog content agreed by your team. When you click on the Execute Node button, notice that blog_content is no longer empty.
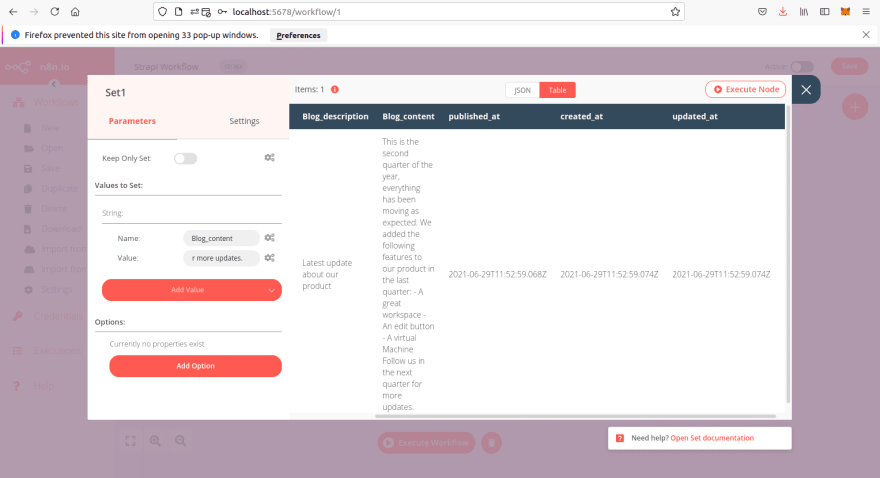
However, blog_content in our Strapi application is still empty. To allow our changes reflect in our Strapi application, we need the Update Operation of the Strapi node. Add another Strapi node to your workflow by connecting it to the second set node.
In your Strapi node, set the Operation parameter to Update, put in blogs as Content-Type, leave the value of Update Key as **id**, and put in **Blog_content** in Columns. Click on the Execute Node button and notice how the blog item in our Strapi project has been updated.

Now that we have all of this settled save your workflow with the save button.

If you want to add a blog item to your Strapi project, all you have to do is click on the Execute Workflow button. Workflows don't have to be linear.
For instance, since you won't be adding a blog item with the same contents, you can add Flow nodes like the IF node, which will split a stream according to the instructions provided.
Conclusion
Workflow automation is an essential tool if you know how to implement it well. The Strapi node in n8n can connect other nodes to the Strapi node according to your use case.
n8n has a trigger node that can listen to events and automatically start a workflow. With trigger nodes, It can activate your workflow without the need to click the Execute Workflow button.
In this article, we have explored Strapi workflow automation. First, we discussed workflow automation, what it is and why it is functional.


Top comments (0)