In this tutorial, you will learn how to leverage the cloud native technologies Docker and Kubernetes to deploy Strapi’s Official Demo App, the FoodAdvisor app.
Author: Faith Kovi
With the constant rise in the number of internet users, the demand for creating scalable web apps is at an all-time high. Gone are the days when businesses would run their servers on self-managed hardware.
The advent of cloud computing has shifted the gears toward the cloud-native model of software development. Cloud-native is more than just using a cloud provider to serve apps — it's an all-in-one approach that takes full advantage of the cloud computing model.
In a cloud-native deployment, the application is microservice-oriented and every part of the application is hosted. Containers are ordered to ensure that they are scheduled in a way that optimizes resource usage, which means that the application performs well and is balanced against the user's load. This approach is different from the traditional monolithic application that has to be scaled and maintained manually.
Docker is an open platform for developing, distributing, and running applications. Docker allows you to decouple applications from your infrastructure so you can distribute software quickly.
Kubernetes is a container orchestration system used for automated deployment, scaling, and management of containers. Kubernetes makes running a containerized application easy. Multiple worker machines are combined to form a cluster, and each worker machine hosts pools that run different application-related containers. If you're new to Kubernetes, the official tutorials are a great place to start.
Prerequisites
To follow along with this tutorial, you need to have the following:
- Basic understanding of Strapi [get started here],
- Node.js downloaded and installed,
- Understanding of Docker,
- Basic understanding of Kubernetes,
- Minikube set up locally [get started here],
- Knowledge on how to use kubectl to control Kubernetes clusters, and
- (Optional) Knowledge on how to use a cloud provider that offers Kubernetes Services(Google’s GKE or Amazon’s EKS).
What is Strapi?
Strapi is an open-source headless CMS. It’s 100% JavaScript and fully customizable. To see firsthand how it performs, Strapi provides an official demo app called FoodAdvisor that can be previewed on Strapi’s website or deployed locally or in the cloud.
The FoodAdvisor app shows a listing of different restaurants and serves as a demo of the capabilities of Strapi.
Leveraging Kubernetes with Headless CMS
Content management systems (CMS) have been around for a long time. Traditionally, these were monolithic applications serving content, images, HTML, CSS, and JavaScript from a single location. It makes it difficult to reuse content because the content is bound to the view.
A headless CMS that takes a different approach and separates the content from the view. In headless CMS, content is served through an API used by multiple clients responsible for rendering the content. This separation is ideal for cloud-native architectures because individual components can be contained and scaled independently of each other. In this tutorial, you'll learn how to leverage Kubernetes to deploy the FoodAdvisor app.
Scaffolding a Strapi Project
To scaffold a new Strapi project is very simple and works precisely as installing a new frontend framework. We are going to start by running the following commands and testing them out in our default browser.
    npx create-strapi-app strapi-api --quickstart
    # OR
    yarn create strapi-app strapi-api --quickstart
The command above will scaffold a new Strapi project in the directory you specified.
Next, run yarn build to build your app and yarn develop to run the new project if it doesn't start automatically.
The last command will open a new tab with a page to register your new admin of the system. Go ahead and fill out the form and click on the submit button to create a new Admin.
Deploying the FoodAdvisor App Using Kubernetes
Start the minikube cluster by executing the following command:
minikube start
Minkube will automatically configure kubectl to communicate with this local cluster, so no manual configuration is necessary. Check if minikube is running with this command:
minikube status
Once the Minikube cluster is up and running, you can proceed to deploy the FoodAdvisor app with Kubernetes.
Preparing the Docker Images
As the first step, you need to clone the FoodAdvisor GitHub repo. This tutorial will be using the version v4 of the FoodAdvisor app.
Clone the repo, navigate to the foodadvisor directory, and checkout to the v4 branch:
    git clone https://github.com/strapi/foodadvisor.git
    cd foodadvisor
    git checkout v4
In the repo, you'll see two directories: api and client. The api directory holds the backend Strapi server as well as the demo data. The client directory contains the frontend written in Next.js. The server uses a local SQLite file as the database, so you don't need to set up a separate database to run this app.
After cloning the repo, you will prepare the Docker images for the backend and the frontend. You will need a Docker Hub account to push the images. If you do not wish to create an account, feel free to skip to deploying the backend and use the images I have already prepared.
After creating a Docker Hub account, log in with your username and password by running the docker login command.
In the api directory, create the following Dockerfile:
    FROM node:16

    WORKDIR /app

    ADD ./package.json /app

    ADD ./yarn.lock /app

    RUN yarn install --frozen-lockfile

    ADD . /app

    RUN yarn seed

    EXPOSE 1337

    CMD ["yarn", "develop"]
Edit the .env.example file and set the CLIENT_URL variable to http://foodadvisor.client. Then, in the same directory, run the following commands:
    docker build -t <your-docker-hub-username>/foodadvisor-api .
    docker image push <your-docker-hub-username>/foodadvisor-api:latest
Don’t forget to substitute your Docker Hub username. Now, create the following Dockerfile in the client directory:
    FROM node:16

    WORKDIR /app

    ADD ./package.json /app

    ADD ./yarn.lock /app

    ADD ./.env.development /app

    RUN yarn install --frozen-lockfile

    ADD . /app

    EXPOSE 3000

    CMD ["yarn", "dev"]
Edit the .env.development file and set the NEXT_PUBLIC_API_URL to http://foodadvisor.backend and run the following commands, substituting your Docker Hub username of course:
    docker build -t <your-docker-hub-username>/foodadvisor-client .
    docker image push <your-docker-hub-username>/foodadvisor-client:latest
Deploying the Backend
With the Docker images ready, you can start deploying the backend to your Kubernetes cluster. The kubectl command will be used to handle communication with the cluster. kubectl takes a YAML file, which declares the configuration, and they’re applied to the cluster.
Save the following configuration in deploy-backend.yaml:
    apiVersion: apps/v1
    kind: Deployment
    metadata:
      name: foodadvisor-backend
    spec:
      selector:
        matchLabels:
          app: foodadvisor
          component: backend
      template:
        metadata:
          labels:
            app: foodadvisor
            component: backend
        spec:
          containers:
          - name: foodadvisor-api
            image: faithkovi/foodadvisor-api
            ports:
              - containerPort: 1337
If you created your own Docker images in the previous step, change faithkovi/foodadvisor-api to <your-docker-hub-username>/foodadvisor-api.
The YAML file sets up a Deployment named foodadvisor-backend. The deployment creates a Pod, which runs one container with your specified Docker image.
Now apply the changes:
kubectl apply -f deploy-backend.yaml
You can verify the deployment by running the following command:
kubectl get deployments

The backend is now running inside the cluster, but it is isolated from the outside world by default. To be able to send requests to the server from outside the cluster, you need to expose appropriate ports. In this case, port 1337 since this is the port Strapi listens to.
kubectl expose deployment foodadvisor-backend --port 1337
This will create a Service, which you can verify by running the following command:
kubectl get services foodadvisor-backend
![]()
Deploying the Frontend
The next step is to deploy the frontend and connect it to the backend. Save the following in deploy-frontend.yaml:
    apiVersion: apps/v1
    kind: Deployment
    metadata:
      name: foodadvisor-frontend
    spec:
      selector:
        matchLabels:
          app: foodadvisor
          component: frontend
      template:
        metadata:
          labels:
            app: foodadvisor
            component: frontend
        spec:
          containers:
          - name: foodadvisor-client
            image: faithkovi/foodadvisor-client
            ports:
              - containerPort: 3000
Again, if you created your own Docker image, replace faithkovi/foodadvisor-client with <your-docker-hub-username>/foodadvisor-client.
Like the backend, this YAML creates a deployment that contains a pod that runs the specified Docker image. Apply the changes to deploy the frontend:
kubectl apply -f deploy-frontend.yaml
Verify the deployment by running the command below:
kubectl get deployments
![]()
Similar to the backend, you need to expose port 3000 so that you can use your browser to reach the frontend.
kubectl expose deployment foodadvisor-frontend --port 3000
Verify the service by running kubectl get services foodadvisor-frontend.
![]()
Creating an Ingress
Finally, you'll need to add an Ingress to your cluster. The job of the ingress is to route the incoming requests to the frontend or the backend, depending on the URL you use.
The following ingress rule will route all requests made to http://foodadvisor.backend to the backend service you created earlier, and all requests made to http://foodadvisor.client to the frontend service.
    apiVersion: networking.k8s.io/v1
    kind: Ingress
    metadata:
      name: main-ingress
    spec:
      rules:
      - host: foodadvisor.backend
        http:
          paths:
            - path: /
              pathType: Prefix
              backend:
                service:
                  name: foodadvisor-backend
                  port:
                    number: 1337
      - host: foodadvisor.client
        http:
          paths:
            - path: /
              pathType: Prefix
              backend:
                service:
                  name: foodadvisor-frontend
                  port:
                    number: 3000
Save the YAML to ingress.yaml. If this is the first time you’re using ingress on Minikube, you need to enable the addon:
minikube addons enable ingress
Verify that the NGINX Ingress controller is running:
kubectl get pods -n ingress-nginx

You need to run this step only once. Finally, apply the ingress:
kubectl apply -f ingress.yaml
The last step is to make the hostnames http://foodadvisor.backend and http://foodadvisor.client known to your operating system so that you can open them with your browser. For that, you need to know the IP address of the minikube cluster:
minikube ip
![]()
Edit /etc/hosts and add the following lines at the end. Substitute the appropriate IP address from the previous output:
    192.168.49.2  foodadvisor.client
    192.168.49.2  foodadvisor.backend
With these changes in place, requests to http://foodadvisor.backend and http://foodadvisor.client will be sent to your minikube cluster where the ingress controller will pick them up and route them to their appropriate destinations.
Test your Application
Visit http://foodadvisor.backend/admin to access your Admin panel. Since this is the first time, you’ll be prompted to create an admin user.

Once you’ve created an admin user, you can access the Strapi dashboard and explore the sample data that’s been prepopulated.

To access the frontend, visit http://foodadvisor.client. You should see the homepage of the Foodadvisor app.
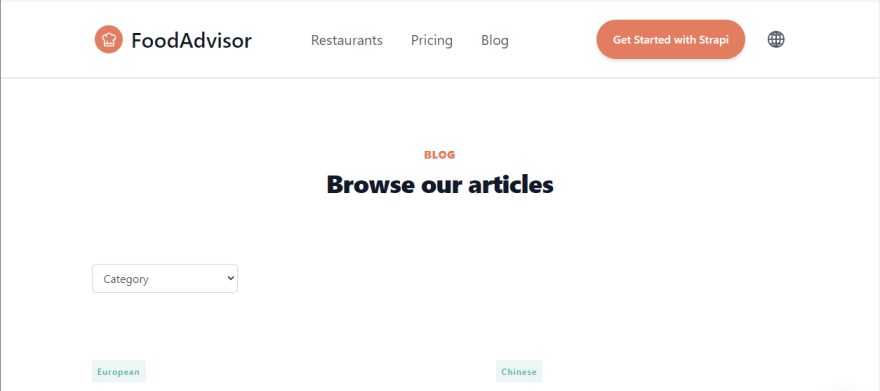
Congratulations, you have successfully deployed Foodadvisor with Kubernetes.
Conclusion
The cloud-native approach will undoubtedly become the de facto standard for application development in the near future. This approach eliminates the need for a monolithic application and instead splits the application into scalable, performant microservices. The result is an application that is easy to develop and manage that is difficult to achieve with traditional deployments.
In this tutorial, we showed how easy it is to get started with Kubernetes to deploy the official Strapi demo app. If you're interested in this, visit Strapi website to learn more about Headless CMS. You can find the project in the Github repo and the docker images for the client and api in the docker repository.


Latest comments (0)