
Introduction
One month ago, Maxime Castres published a tutorial on How to create a blog with Nuxt.js Strapi and Apollo. But he started to feel bad about React developers who may love to get a tutorial for them!
The thing is: he knows Vue.Js more than React, and he wasn't sure if he would be able to offer the community a proper tutorial. But thanks to soupette, who helped him to understand how React works, this tutorial has been made possible!
Goal
If you are familiar with our blog, you should have already learned how to create a blog with Gatsby or Nuxt. But what if you would instead use another language? Let me tell you that we got that covered as today, we are going to learn how to do it with React this time!
The goal here is to be able to create a blog website using Strapi as the backend, Next for the frontend, and Apollo for requesting the Strapi API with GraphQL.
The source code is available on GitHub.
Prerequisites
To follow this tutorial, you'll need to have Strapi and Next installed on your computer, but don't worry, we are going to install these together!
This tutorial uses Strapi v3.0.0-beta.17.5.
You need to have node v.12 installed and that's all.
Setup
- Create a blog-strapi folder and get inside!
mkdir blog-strapi && cd blog-strapi
Back-end setup
That's the easiest part, as since beta.9 Strapi has an excellent package create strapi-app that allows you to create a Strapi project in seconds without needing to install Strapi globally so let's try it out.
Note: for this tutorial, we will use yarn as your package manager.
-
yarn create strapi-app backend --quickstart --no-run.
This single command line will create all you need for your back-end. Make sure to add the --no-run flag as it will prevent your app from automatically starting the server because SPOILER ALERT: we need to install some awesome Strapi plugins.
Now that you know that we need to install some plugins to enhance your app, let's install one of our most popular ones: the graphql plugin.
yarn strapi install graphql
Once the installation is completed, you can finally start your Strapi server strapi dev and create your first Administrator.

Don't forget that Strapi is running on http://localhost:1337
Nice! Now that Strapi is ready, you are going to create your Next.JS application.
Front-end setup
Well, the easiest part has been completed, let's get our hands dirty developing our blog!
1. Next setup
- Create a Next
frontendserver by running the following command:
npx create-next-app frontend
Once the installation is completed, you can start your front-end app to make sure everything went ok.
cd frontend
yarn dev
To make your blog look pretty, we will use a popular CSS framework for styling: UiKit and Apollo to query Strapi with GraphQL.
2. Dependencies setup
Make sure you are in the frontend folder before running the following commands:
3. Apollo setup
yarn add @apollo/react-hooks apollo-cache-inmemory apollo-client apollo-link-http graphql graphql-tag isomorphic-unfetch next-with-apolloCreate a
./utilsfolder and create anapollo.jsfile containing the following code:
import { ApolloClient } from "apollo-client";
import { InMemoryCache } from "apollo-cache-inmemory";
import withApollo from "next-with-apollo";
import { createHttpLink } from "apollo-link-http";
import fetch from "isomorphic-unfetch";

// Update the GraphQL endpoint to any instance of GraphQL that you like
const GRAPHQL_URL = process.env.BACKEND_URL || "http://localhost:1337/graphql";

const link = createHttpLink({
  fetch, // Switches between unfetch & node-fetch for client & server.
  uri: GRAPHQL_URL
});

// Export a HOC from next-with-apollo
// Docs: https://www.npmjs.com/package/next-with-apollo
export default withApollo(
  // You can get headers and ctx (context) from the callback params
  // e.g. ({ headers, ctx, initialState })
  ({ initialState }) =>
    new ApolloClient({
      link: link,
      cache: new InMemoryCache()
        //  rehydrate the cache using the initial data passed from the server:
        .restore(initialState || {})
    })
);
Note: You want Apollo to point to this address http://localhost:1337/graphql. That's the one where you'll be able to fetch your data from your Strapi server.
4. UIkit setup
To import UIkit, you need, before that, to create your _app.js file.
Next.js uses the App component to initialize pages. You can override it and control the page initialization. Since we want to use UlKit we need to override this file to include the CDN on all your pages:
- Create the
./pages/_app.jsfile, override the App class, and turn it to a functional component:
import React from "react";
import Head from "next/head";
import "../assets/css/style.css";
import { ApolloProvider } from "@apollo/react-hooks";
import withData from "../utils/apollo";

const App = ({ Component, pageProps, apollo }) => {
  return (
    <ApolloProvider client={apollo}>
      <Head>
        <title>Strapi blog</title>
        <meta name="viewport" content="initial-scale=1.0, width=device-width" />
        <link
          rel="stylesheet"
          href="https://fonts.googleapis.com/css?family=Staatliches"
        />
        <link
          rel="stylesheet"
          href="https://cdn.jsdelivr.net/npm/uikit@3.2.3/dist/css/uikit.min.css"
        />
        <script src="https://cdnjs.cloudflare.com/ajax/libs/uikit/3.2.0/js/uikit.min.js" />
        <script src="https://cdn.jsdelivr.net/npm/uikit@3.2.3/dist/js/uikit-icons.min.js" />
        <script src="https://cdnjs.cloudflare.com/ajax/libs/uikit/3.2.0/js/uikit.js" />
      </Head>
      <Component {...pageProps} />
    </ApolloProvider>
  )
};

// Wraps all components in the tree with the data provider
export default withData(App);

Ok sorry! That's too much! Let me explain what's in this file.
import { ApolloProvider } from "@apollo/react-hooks";
import withData from "../utils/apollo";
...
<ApolloProvider client={apollo}>
...
</ApolloProvider>
...
export default withData(MyApp);
The _app.js file is the perfect place to put our Apollo Provider, which wraps the entire application (learn more about Apollo Client).
<head>
          <title>Strapi blog</title>
          <meta
            name="viewport"
            content="initial-scale=1.0, width=device-width"
          />
          <link
            rel="stylesheet"
            href="https://fonts.googleapis.com/css?family=Staatliches"
          />
          <link
            rel="stylesheet"
            href="https://cdn.jsdelivr.net/npm/uikit@3.2.3/dist/css/uikit.min.css"
          />
          <script src="https://cdnjs.cloudflare.com/ajax/libs/uikit/3.2.0/js/uikit.min.js" />
          <script src="https://cdn.jsdelivr.net/npm/uikit@3.2.3/dist/js/uikit-icons.min.js" />
          <script src="https://cdnjs.cloudflare.com/ajax/libs/uikit/3.2.0/js/uikit.js" />
        </head>
You should include a head component which imports UIkit and a beautiful font that you'll use for this tutorial: Staatliches.
As you can see, you are importing a css file: import "../assets/css/style.css";
Prior to coding it, we need to install some packages first:
- Install
@zeit/next-cssandnext-fontsby running the following command:
yarn add @zeit/next-css next-fonts
- Create a
next.config.jsfile containing the following code:
const withCSS = require("@zeit/next-css");
const withFonts = require("next-fonts");

module.exports = withCSS({});
- Create a
./assets/css/style.css...
a {
  text-decoration: none;
}

h1 {
  font-family: Staatliches;
  font-size: 120px;
}

#category {
  font-family: Staatliches;
  font-weight: 500;
}

#title {
  letter-spacing: 0.4px;
  font-size: 22px;
  font-size: 1.375rem;
  line-height: 1.13636;
}

#banner {
  margin: 20px;
  height: 800px;
}

#editor {
  font-size: 16px;
  font-size: 1rem;
  line-height: 1.75;
}

.uk-navbar-container {
  background: #fff !important;
  font-family: Staatliches;
}

img:hover {
  opacity: 1;
  transition: opacity 0.25s cubic-bezier(0.39, 0.575, 0.565, 1);
}
Note: Do you really want me to explain some CSS???
Awesome! Your app should be ready now!

Designing the data structure
Finally! We are now going to create the data structure of our article by creating an Article content type.
- Dive in your Strapi admin panel and click on the
Content Type Builderlink in the sidebar.

- Click on
Add A Content Typeand call itarticle.

Now you'll be asked to create all the fields for your content-type:

- Create the following ones:
-
titlewith type String (required) -
contentwith type Rich Text (required) -
imagewith type Media and (required) -
published_atwith type Date (required)
-
Press Save! Here you go, your first content type has been created. Now you may want to create your first article, but we have one thing to do before that: Grant access to the article content type.
- Click on the Roles & Permission and click on the
publicrole. - Check the article
findandfindoneroutes and save.

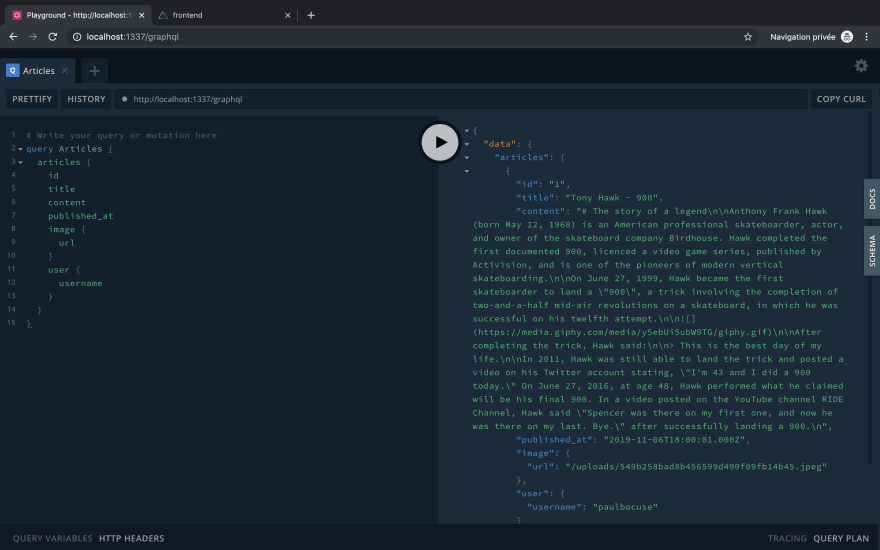
Awesome! You should be ready to create your first article right now and fetch it on the GraphQL Playground.
- Now, create your first article and as many as you need!
Here's an example:

Great! Now you may want to reach the moment when you can actually fetch your articles through the API!
Isn't that cool! You can also play with the GraphQL Playground.
Create categories
You may want to assign a category to your article (news, trends, opinion). You are going to do this by creating another content type in Strapi.
- Create a
categorycontent type with the following fields-
namewith type String
-
Press save!
- Create a new field in the Article content type which is a Relation
Category has many Articleslike below:
 .
.
- Click on the Roles & Permission and click on the
publicrole. And check the categoryfindandfindoneroutes and save.
Now you'll be able to select a category for your article in the right sidebox.

Now that we are good with Strapi let's work on the frontend part!
Create the Query component
You are going to use Apollo to fetch your data from different pages. We don't want you to rewrite the same code every time in your pages. This is why you are going to write a Query component that will be reusable!
- Create a
./components/query.jsfile containing the following code:
import React from "react";
import { useQuery } from "@apollo/react-hooks";

const Query = ({ children, query, id }) => {
  const { data, loading, error } = useQuery(query, {
    variables: { id: parseInt(id) }
  });

  if (loading) return <p>Loading...</p>;
  if (error) return <p>Error: {JSON.stringify(error)}</p>;
  return children({ data });
};

export default Query;
We are using the useQuery hook to call your Strapi server at this address http://localhost:1337/graphql. We are sending an id if it exists (it will be necessary when you'll want to fetch just one article).
If the request is successful, you will return the child component with the retrieved data as prop.
Let's try it out by creating our navbar that will fetch all our categories:
- Remove the code inside your
./components/nav.jsand replace it with the following code:
import React from "react";
import Link from "next/link"
import Query from "../components/query";
import CATEGORIES_QUERY from "../apollo/queries/category/categories";

const Nav = () => {
  return (
    <div>
      <Query query={CATEGORIES_QUERY} id={null}>
        {({ data: { categories } }) => {
          return (
            <div>
              <nav className="uk-navbar-container" data-uk-navbar>
                <div className="uk-navbar-left">
                  <ul className="uk-navbar-nav">
                    <li>
                      <Link href="/">
                        <a>Strapi Blog</a>
                      </Link>
                    </li>
                  </ul>
                </div>

                <div className="uk-navbar-right">
                  <ul className="uk-navbar-nav">
                    {categories.map((category, i) => {
                      return (
                        <li key={category.id}>
                          <Link
                            href={{
                              pathname: "category",
                              query: { id: category.id }
                            }}
                          >
                            <a className="uk-link-reset">{category.name}</a>
                          </Link>
                        </li>
                      );
                    })}
                  </ul>
                </div>
              </nav>
            </div>
          );
        }}
      </Query>
    </div>
  );
};

export default Nav;

Oh-oh! It seems like we forgot something!
In fact, you need to write the query!
- Create the
./apollo/queries/category/categories.jsfile containing the following code:
import gql from "graphql-tag";

const CATEGORIES_QUERY = gql`
  query Categories {
    categories {
      id
      name
    }
  }
`;

export default CATEGORIES_QUERY;
Great! You should now be able to see your brand new nav containing your categories. But the links are not working right now. We'll fix this later on the tutorial, don't worry.
Note: The current code is not suited to display a lot of categories as you may encounter a UI issue. Since this blog post is supposed to be short, you could improve the code by adding a lazy load or something like that.
You may want to have your nav on every page of your application, not just the index.js page.
- Move the following parts from your
index.jsand put it in your_app.js
Take from index.js
import Nav from "../components/nav";
...
<Nav />
Put in _app.js
import Nav from "../components/nav";
...
<Nav /> // Put the Nav component just after the Head component
Create the Articles component
This component will display all your articles on different pages, so listing them through a component seems a good idea.
But first, we need to do something about your Strapi URL:
You'll need to store your API URL in a .env file.
- Create a
.envfile at the root of yourfrontendfolder containing the following:
API_URL="http://localhost:1337"
- Install dotenv by running the following command:
yarn add dotenv
- Add this code to your
next.config.jsfile:
require("dotenv").config();
const withCSS = require("@zeit/next-css");
const withFonts = require("next-fonts");

module.exports = withCSS({
  env: {
    API_URL: process.env.API_URL
  }
});
Alright, you are now ready to create your Articles component.
Create a ./components/Articles.js file containing the following:
import React from "react";
import Card from "./card";

const Articles = ({ articles }) => {
  const leftArticlesCount = Math.ceil(articles.length / 5);
  const leftArticles = articles.slice(0, leftArticlesCount);
  const rightArticles = articles.slice(leftArticlesCount, articles.length);

  return (
    <div>
      <div className="uk-child-width-1-2" data-uk-grid>
        <div>
          {leftArticles.map((article, i) => {
            return <Card article={article} key={`article__${article.id}`} />;
          })}
        </div>
        <div>
          <div className="uk-child-width-1-2@m uk-grid-match" data-uk-grid>
            {rightArticles.map((article, i) => {
              return <Card article={article} key={`article__${article.id}`} />;
            })}
          </div>
        </div>
      </div>
    </div>
  );
};

export default Articles;
As you can see, you are giving this component a prop const Articles = ({ articles })!
So, where do the articles come from then ?! From your index page. You are going to edit the index.js page, but first, let's create a Card component. In fact, you want to display the right and left items in the same way. To avoid duplicating code, it is interesting to use a component:
- Create a
./components/card.jsfile containing the following:
import React from "react";
import Link from "next/link";

const Card = ({ article }) => {
  return (
    <Link href={{ pathname: "article", query: { id: article.id } }}>
      <a className="uk-link-reset">
        <div className="uk-card uk-card-muted">
          <div className="uk-card-media-top">
            <img
              src={process.env.API_URL + article.image.url}
              alt={article.image.url}
              height="100"
            />
          </div>
          <div className="uk-card-body">
            <p id="category" className="uk-text-uppercase">
              {article.category.name}
            </p>
            <p id="title" className="uk-text-large">
              {article.title}
            </p>
          </div>
        </div>
      </a>
    </Link>
  );
};

export default Card;
Awesome! Now you can modify your index.js file.
- Replace the code in your
index.jsfile with the following:
import React from "react";
import Articles from "../components/articles";
import Query from "../components/query";
import ARTICLES_QUERY from "../apollo/queries/article/articles";

const Home = () => {
  return (
    <div>
      <div className="uk-section">
        <div className="uk-container uk-container-large">
          <h1>Strapi blog</h1>
          <Query query={ARTICLES_QUERY}>
            {({ data: { articles } }) => {
              return <Articles articles={articles} />;
            }}
          </Query>
        </div>
      </div>
    </div>
  );
};

export default Home;
And don't forget the query!
- Create a
./apollo/queries/article/articles.jscontaining the following code:
import gql from "graphql-tag";

const ARTICLES_QUERY = gql`
  query Articles {
    articles {
      id
      title
      category {
        id
        name
      }
      image {
        url
      }
    }
  }
`;

export default ARTICLES_QUERY;

Look's good right? You can now list every article on your main page.
Article page
You can see that if you click on the article, there is nothing. Let's create the article page together! But first, you'll need two packages:
- Install
react-momentandreact-markdownby running the following command:
yarn add react-moment react-markdown
react-moment will give you the ability to display the publication date of your article, and react-markdown will be used to display the content of your article in markdown.
- Create a
./pages/article.jsfile containing the following:
import { useRouter } from "next/router";
import Query from "../components/query";
import ReactMarkdown from "react-markdown";
import Moment from "react-moment";
import ARTICLE_QUERY from "../apollo/queries/article/article";

const Article = () => {
  const router = useRouter();
  return (
    <Query query={ARTICLE_QUERY} id={router.query.id}>
      {({ data: { article } }) => {
        return (
          <div>
            <div
              id="banner"
              className="uk-height-medium uk-flex uk-flex-center uk-flex-middle uk-background-cover uk-light uk-padding uk-margin"
              data-src={process.env.API_URL + article.image.url}
              data-srcset={process.env.API_URL + article.image.url}
              data-uk-img
            >
              <h1>{article.title}</h1>
            </div>

            <div className="uk-section">
              <div className="uk-container uk-container-small">
                <ReactMarkdown source={article.content} />
                <p>
                  <Moment format="MMM Do YYYY">{article.published_at}</Moment>
                </p>
              </div>
            </div>
          </div>
        );
      }}
    </Query>
  );
};

export default Article;
Let's write the query for just one article now!
- Create a
./apollo/queries/article/article.jscontaining the following code:
import gql from "graphql-tag";

const ARTICLE_QUERY = gql`
  query Articles($id: ID!) {
    article(id: $id) {
      id
      title
      content
      image {
        url
      }
      category {
        id
        name
      }
      published_at
    }
  }
`;

export default ARTICLE_QUERY;
Great! You should be able to get your article now!

Categories
You may want to separate your article depending on the categories!
Let's create a page for each category then:
- Create a
./pages/category.jsfile containing the following:
import { useRouter } from "next/router";
import Articles from "../components/articles";
import Query from "../components/query";
import CATEGORY_ARTICLES_QUERY from "../apollo/queries/category/articles";

const Category = () => {
  const router = useRouter();

  return (
    <Query query={CATEGORY_ARTICLES_QUERY} id={router.query.id}>
      {({ data: { category } }) => {
        return (
          <div>
            <div className="uk-section">
              <div className="uk-container uk-container-large">
                <h1>{category.name}</h1>
                <Articles articles={category.articles} />
              </div>
            </div>
          </div>
        );
      }}
    </Query>
  );
};

export default Category;
- Create a
./apollo/queries/category/articles.jsfile containing the following:
import gql from 'graphql-tag';

const CATEGORY_ARTICLES_QUERY = gql`
  query Category($id: ID!){
    category(id: $id) {
      name
      articles {
           id
        title
        content
        image {
          url
        }
        category {
          id
          name
        }
      }
    }
  }
`;

export default CATEGORY_ARTICLES_QUERY;
Awesome! You can list articles depending on the selected category now.

Conclusion
Huge congrats, you successfully achieved this tutorial. We hope you enjoyed it!

Still hungry?
Feel free to add additional features, adapt this project to your own needs, and give your feedback in the comment section below.
If you want to deploy your application, check our documentation.
If you are interested in improving this tutorial, feel free to join our slack channel here and contact our author @Maxime Castres.


Top comments (2)
Where is your data actually stored? I don't see any mention of SQL or nosql. No database. Where are these records saved? Directly in your node server?
The command "yarn create strapi-app backend --quickstart" which creates the Strapi project, the option "--quickstart" will opt for SQLite database by default. If this switch is not mentioned, the setup asks for database type and credentials.