The problem
I've recently started coding backend and mobile stuff in kotlin, following a book, then starting a pet project, ...
In the meantime, I've also started to gain a lot of interest on Test Driven Development and found myself wondering "wow, how do I test in Kotlin ? which framework should I use?"
To learn further, I've deciced to start a serie of articles on this topic:
- Basic testing in Kotlin with JUnit5 from the Java ecosystem (this article)
- Basic testing in Kotlin with Kotest built for kotlin specificatlly (upcoming)
- Mocking, stubbing and contract testing in Kotlin with JUnit5 and Kotest (upcoming)
- A comparision of these two testing frameworks (mostly in term of features, usability, readability), this one might be a bit opinionated. (upcoming)
I'm a java-ist so my go-to test framework is JUnit, this is the sole reason why I'm starting by this one.
Agenda
- Getting started
- Execution and lifecycle
- A very simple test
- Checking exceptions
- The power of parameterized tests
- Conditional tests
- Conclusion
If you just want to jump in the code, please yourself
Basics on testing with JUnit5
Setup
For the Gradle users, here's the setup.
To be able to use the JUnit5 features, we must first add the dependencies:
  testImplementation("org.junit.jupiter:junit-jupiter-api:5.8.2")
  testImplementation("org.junit.jupiter:junit-jupiter-engine:5.8.2")
Then we must specify we want to use JUnit to run the tests :
// For Gradle + Groovy
tasks.test {
    useJUnitPlatform()
}
// For Gradle + Kotlin
tasks.test {
   useJUnitPlatform()
}
The entire necessary configuration can be found here.
Note: I'm using gradle 7.3.3.
Tests execution and orchestration
Junit will consider as a test any function annotated with @Test, @RepeatedTest, @ParameterizedTest, @TestFactory, or @TestTemplate.
We also have annotation to help us wrap test execution:
-
@BeforeAllexecuted first, before the whole test suite. useful for instiantiating external dependencies for instance. -
@BeforeEachexecuted afterBeforeAlland before any test, useful when we need to ensure the state is clean before launching for example. -
@AfterEachnot surprisingly, executed after any test. -
@AfterAllexecuted at the end of the test suite, for housekeeping purpose, pushing stats or whatever.
A very simple test
Now we're all set, time to code and test!
Let's say we have a useless class like this one :
class Dollar(val value: Int) {
    var amount: Int = 10

    operator fun times(multiplier: Int) {
        amount = value.times(multiplier)
    }
}
Obviously we want to test this class has the expected behavior, with a very basic test:
We'll need to first import the JUnit5 helpers :
import org.junit.jupiter.api.Assertions
import org.junit.jupiter.api.Test
And then we can create our test as follows:
@Test
fun `should multiply correctly`() {
    val five = Dollar(5)
    five.times(2)
    Assertions.assertEquals(10, five.amount)
}
We can now execute this, using our favorite IDE or the simple gradle command :
./gradlew test
A quick word on naming
Well, no strong rule here, but a test method should :
- test one thing, and one thing only
- have an explicit name so the expectation is clear
You may have notice that I'm using backtick here.
This is a Kotlin capability, identifier for variable and method can use them, and although there's nothing mandatory here, I find it clearer.
What about checking exceptions ?
Ok, now we don't want to multiply our dollar by zero, so we change our code a bit, to raise an exception if this occurs.
Let's write the test first:
@Test
fun `should throw exception when multiplying by 0`(){
    val one = Dollar(1)
    assertThrows<NoMoneyException> {
        one.times(0)
    }
}
Yep, it's just that easy, okay, this does not even compile, since the NoMoneyException class does not exists. Let's create it !
class NoMoneyException(message: String?) : Throwable(message) {
}
We then update our times operator :
operator fun times(multiplier: Int) : Dollar {
    if (multiplier == 0) {
        throw NoMoneyException("Can't multiply by zero")
    }
    return Dollar(amount.times(multiplier))
}
You can run since and see the green test :)
Let's execute the same test with different inputs !
I think you'll agree, if we add more test cases, we'll be loosing readability and we'll duplicate the same test again and again.
Grouped assertions
Well there's a few great Kotlin assertions that comes with Junit, let's play with assertAll and a collection with a multiplier and the expected result.
@Test
fun `should multiply using stream`() {
    val five = Dollar(5)
    val inputs = arrayListOf(
        arrayListOf(2, 10),
        arrayListOf(3, 15),
        arrayListOf(10, 50)
    )
    assertAll(
        "should provide the expected result",
        inputs
            .stream() // Remove this line and use the collection directly
            .map {
                { assertEquals(Dollar(it[1]).amount, five.times(it[0]).amount) }
            }
    )
}
Parameterized tests
Well, I've used a lot of Table Driven Tests in golang, this is super helpful to write compact and repeatable tests.
With JUnit, we can achieve the same with Parameterized tests.
Parameterized tests makes tests more readable and avoid duplicates, but don't take my word for it, let's code !
First, we'll need to add a new dependency :
testImplementation("org.junit.jupiter:junit-jupiter-params:5.8.2")
Now let's replace our previous example and use a CsvSource with the multiplier and the expected value :
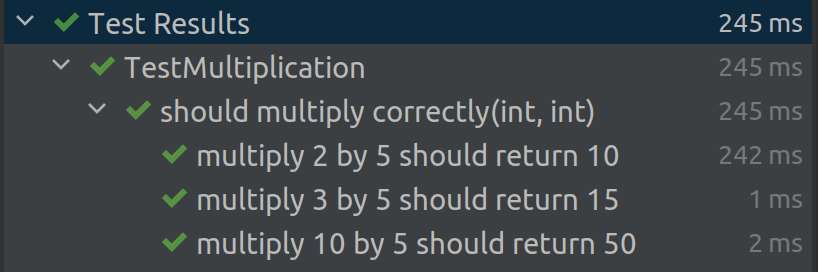
@ParameterizedTest(name = "multiply {0} by 5 should return {1}")
@CsvSource(
    "2, 10",
    "3, 15",
    "10, 50",
)
fun `should multiply correctly`(multiplier: Int, expected: Int ){
    val five = Dollar(5)
    Assertions.assertEquals(Dollar(expected).amount, five.times(multiplier).amount)
}
So basically, we :
- add the
@ParameterizedTestannotation and optionnally define a name, - add the annotation for the the type of argument source we want to provide (
@CsvSourcehere) with the related test cases - enjoy !
You may have noticed the name of the test? Well, this little trick makes our test super explicit and easier to debug, see for yourself :
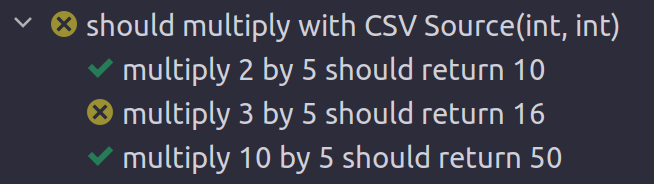
With that, you can directly see which testcase fails, see for yourself:
I don't know about you, but I personnally find it more readable than the group assertions.
For more info about customizing the display name, see this part of the JUnit documentation.
Another nice thing, is that we can use several types of arguments as inputs:
-
ValueSourceallows to pass a list of arguments of primitive types, String and Class: useful for a testing a single argument. See an example here -
CsvSourceas show-cased here, we can pass an unlimited list of arguments as a string representing a CSV input -
CsvFileSourcesame as the previous file, except we use a CSV file. See an example here -
EnumSourcelets you run the same test for each constant (or a selected set) of a given ENUM. See an example here -
MethodSourcethis one is super powerful, we can basically have anything we want as input source (say a JSON or a Parquet file), process it with theMethodSourceand use it to execute our tests. See an example here -
ArgumentSourcethis one goes even further thanMethodSource. With a new class, implementing theArgumentProviderinterface, you can generate input data. See an example here
We also have a bit of syntaxic sugar with @NullSource, @EmptySource and @NullAndEmptySource.
Be careful when using BeforeEach and "parameterized" or "repeated" tests
Each item of a parameterized or repeated test suite is considered as a single test.
Therefore, whatever is defined inBeforeEachwill be executed before each occurence of the test source.
Say we define a BeforeEach as follows :
@BeforeEach
fun initEach() {
    println("hello I'm a test")
}
After executing should multiply correctly which have 3 rows in its CsvSource, we'll have the following output:
hello I'm a test
hello I'm a test
hello I'm a test
Do we really want to execute this test ?
JUnit comes with multiple way to decide whether a test sould be executed or not, depending of the context.
First we can totally disable a test or a class, by adding the @Disabled annotation.
In addition, we can programmatically define condition execution depending on:
- the Operating System, using
@EnabledOnOs,@DisabledOnOsand theOSEnum:
@EnabledOnOs(OS.MAC)
@EnabledOnOs(OS.MAC, OS.LINUX)
- the JRE, with
@EnabledOnJre,@EnabledForJreRange,@DisabledOnJre,@DisabledForJreRangeand theJREEnum:
@EnabledOnJre(JAVA_8)
@EnabledForJreRange(min = JRE.JAVA_11, max = JRE.JAVA_16)
-
system properties, with
@EnabledIfSystemPropertyand@DisabledIfSystemProperty
@EnabledIfSystemProperty(named = "os.arch", matches = ".*64.*")
- one or multiple environment variable(s),
@EnabledIfEnvironmentVariable,@EnabledIfEnvironmentVariables,@DisabledIfEnvironmentVariableand@DisabledIfEnvironmentVariable:
@EnabledIfEnvironmentVariable(named = "EXEC_ENV", matches = ".*ci.*")
@EnabledIfEnvironmentVariable(named = "DEBUG", matches = "enabled")
Note that the two singular annotations are repeatable.
- a custom condition*, using
@EnabledIfand@DisabledIfwith a method name or its FQN (if the method is not in the same class) as string:
@EnabledIf("execAlways")
@Test
fun `something to test`(){}

private fun execAlways(): Boolean {
    return true
}
Conclusion
That's it for this first part, covering the basics on testing Kotlin code with JUnit, we can already check a lot of things with :
- grouped assertions
- exception check
- parameterized tests
- conditional tests
I hope you'll find this useful, you can find the full test implementation here.


Latest comments (1)
Great examples! Especially with @Enabled... and parameterization