I ported Ghost's Casper theme (v2) so you don't have to: it's called CasperishTheme and is available on GitHub. In this post explains how to install and customize it. It uses TailwindCSS and is based on Ghostwind with a few tweaks, upgrades and adaptations.
I'll assume that you have Xcode and its Command Line Tools installed on your machine. I detailed in another blog post how to setup a Publish website with a TailwindCSS theme that you can customize to your taste, so I won't go into much details here.
What's included with this theme
Porting the Casper theme was not only about mimicking its CSS but also about adopting its features while staying within what Publish can do (quite a lot with the help of some plugins).
So this theme includes:
- Support for both Publish sections and pages (see "Organising your articles" at the end)
- Support for subfolder hosting (compatible with GitHub Pages or /blog path of an existing landing page)
- Icons for 5 social profiles: Dev.to, GitHub, LinkedIn, Stack Overflow, Twitter
- Reading time, shown at the bottom of articles cards
- Cover images for each article
- Beautiful typographic defaults for your posts thanks to TailwindCSS typography plugin
- A newsletter form (because why not?)
- Syntax Highligthing with a Monokai theme because if you're considering Publish it's likely you will blog about code one day or the other
⬇️ Install Publish
git clone https://github.com/JohnSundell/Publish.git
cd Publish
make
✨ Create your website
Let's get out of /Publish and create your website source next to it. We'll call it MyWebsite.
cd ..
mkdir MyWebsite
cd MyWebsite
publish new
👻 Install the CasperishTheme
Open Xcode
open Package.swift
Locate Package.swift manifest (it should be the first file) add the theme as a dependency.
import PackageDescription

let package = Package(
    name: "MyWebsite",
    products: [
        .executable(
            name: "MyWebsite",
            targets: ["MyWebsite"]
        )
    ],
    dependencies: [
        .package(name: "Publish", url: "https://github.com/johnsundell/publish.git", from: "0.7.0"),
        .package(name: "CasperishTheme", url: "https://github.com/sowenjub/CasperishTheme.git", .branch("master")),
    ],
    targets: [
        .target(
            name: "MyWebsite",
            dependencies: ["Publish", "CasperishTheme"]
        )
    ]
)
Note: ideally, instead of using the master branch, we would use versioning as we do for publish itself. But we can't do that at the moment because of the syntax highlighting library, so in the meantime, we're using the master branch.
🧑🎨 Setup your website
Open MyWebsite/Sources/main.swift and customize it using the example below. The numbered comments pinpoint the changes required (more explanation below)
import Foundation
import Publish
import Plot
import CasperishTheme // 1

// This type acts as the configuration for your website.
struct MyWebsite: Website, CasperishWebsite { // 2
    enum SectionID: String, WebsiteSectionID {
        // Add the sections that you want your website to contain here:
        case posts
    }

    struct ItemMetadata: WebsiteItemMetadata, CasperishWebsiteItemMetadata { // 3
        // Add any site-specific metadata that you want to use here.
        var cover: String? // 3 bis
    }

    // Update these properties to configure your website:
    var url = URL(string: "https://your-website-url.com")!
    var name = "MyWebsite"
    var description = "A description of MyWebsite"
    var language: Language { .english }
    var imagePath: Path? { nil }

    // 4
    // Update these properties to configure your casperish-website:
    var rootPathString = "/"
    var headerColor = "#424242"
    var cover = ""
    var author = "Arnaud Joubay"
    var avatar = "http://i.pravatar.cc/300"
    var bio = "Swift & Rails Indie Maker"
    var icon = "🏝"
    var newsletterAction = ""
    var contacts: [(ContactPoint, String)] { [
        (.twitter, "sowenjub"),
        (.dev, "sowenjub"),
        (.linkedIn, "arnaudjoubay"),
        (.gitHub, "sowenjub"),
        (.stackoverflow, "229688"),
    ]}
}

// This will generate your website using the built-in Foundation theme:
try MyWebsite().publish(
     withTheme: .casperish,
     additionalSteps: [
         .installPlugin(.readingTime()),
         .installPlugin(.pygments()),
     ],
     plugins: [.pygments()]
 ) // 5
- Well, you need the CasperishTheme package obviously
- Your Website must adopt the
CasperishWebsiteprotocol, which enables theme specific configurations (see 4.) - Your ItemMetadata must adopt the
CasperishWebsiteItemMetadatawhich will allow you to add cover photos to each of your posts (which are items in the Publish jargon). So we also need to add the linevar cover: String?inside. - This is where you can really make this theme your own:
-
rootPathStringthis allows you to publish the website in a subfolder, such as on GitHub Pages without a custom domain name. Leave it to"/"if your site will leave at the root domain -
headerColorhexadecimal code for the header's background-color. It will be hidden by the cover image if you use one -
coveroptional path the to cover image. Leave blank ("") if you want to use theheaderColorinstead. If you have a cover.jpg image, the path should be"/cover.jpg"if your image is at the root of your/Resourcesfolder (don't forget the / or it won't work on subpages). -
authorandbioare displayed just above the footer -
avataris the path to your profile picture, displayed for each post. The path should be"/my avatar.jpg"if your image is at the root of your/Resourcesfolder. -
iconcan be an emoji or any short text suitable to be the icon in the navigation bar on mobile - -
newsletterActionleave blank ("") if you want to hide the newsletter, otherwise replace with the target url -
contactsis an array of nicknames used to display links to your web profiles in the header (on desktop). For now, it only supports Twitter, Dev.to, LinkedIn, Github and Stack Overflow. 5. To generate your website you need to include the 2 plugins that ships with the theme
-
⌨️ Edit your first post
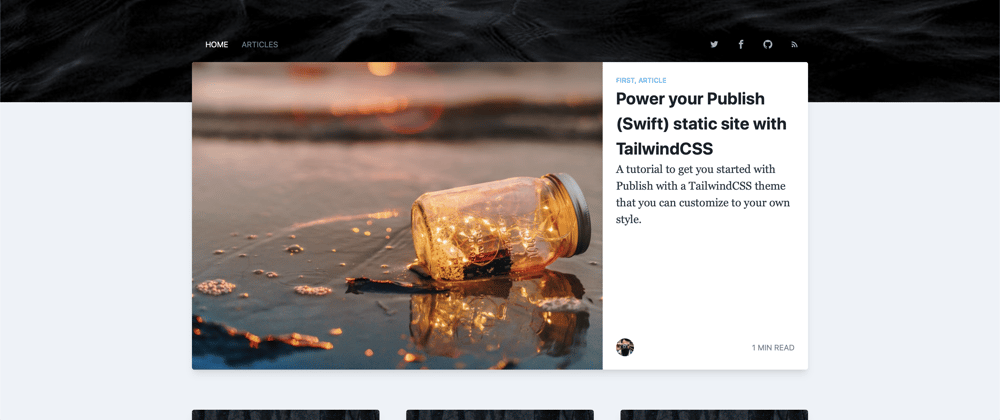
Open Content/posts/first-post.md and write your first post!
Example of first post
---
title: My first post
cover: /first_post.jpg
date: 2020-08-04 00:46
description: A description of my first post.
tags: first, article
---
# My first post's content title

My first post's text.
If you want to get up and running fast, you can cheat and replace /first_post.jpg with https://source.unsplash.com/collection/1118905/ or even remove the line entirely and your post won't have a cover.
🚀 Run your website
You're done! To see the result, just run the following command from /MyWebsite
publish run
Now open your browser and enjoy the result.
If you use this as your theme, ping me and I'll list your blog to the CasperishTheme repository. ✌️
🍻 Bonus: things to know
Posts cover images
The theme allows posts to have cover images, you just have to set it in your front matter.
So if you want to use /Resources/first_post.jpg as you cover for a post, add cover: /first_post.jpg like below:
---
title: My first post
cover: /first_post.jpg
date: 2020-08-04 00:46
description: A description of my first post.
tags: life, anew
---
# My first post

My first post's text.
And if you don't want a cover, just remove the cover line!
Title
Publish is smart: it will guess the title front your post content. But this means your title will appear twice: once above the cover image, and once below.
Instead, you should set it in your front matter (as is done is the example above).
Organising your articles
In order to organise your content, you can play two variables:
your categories (displayed in the menu, declared in your
main.swiftas SectionID)your tags (displayed above each post, declared in each post's front matter)


Top comments (0)