Have you ever wanted to share a picture on a site that doesn't let you upload files? Or had a support ticket ask you to send links to screenshots? How would host those images so that you have a link to send? I personally would upload them to discord and use the cdn.discordapp.com link that is created. But that isn't a great solution, so lets create our own file sharing server with Google Cloud Storage.
To get started you'll need to have set up GCP, you can learn how to that here.
Setting up the Bucket for public file sharing
Now that you're setup and in the GCP console, create a new project and navigate to Google Cloud Storage. In the Cloud Storage browser, create a new bucket by clicking the button in the top.

you can also create a bucket with the Google Cloud SDK with the command
gsutil mb standard gs://<bucket name>
but make sure that bucket name is globally unique.
Now that you've created the bucket we need to give it public read access so that any client can load the files in it. You can do this by going to the permissions section inside the bucket.

click "Add" in the permissions section and search for and select "allUsers" in the search bar for "principal". In the role search bar search for "Storage Object Viewer" and select it.
Congrats! you've made all the objects in the bucket open to public, make sure there's nothing private in there.
Now you have a bucket that you can upload files to and share the public link to the file, but that url will be an ugly storage.googleapis.com url. Now let's make it so you can share your files with your own custom domain.
Setting up the Custom Domain
To make a custom domain work we'll need to set up an HTTP(s) load balancer in GCP. To get started navigate to the load balancing page in the GCP console and create a load balancer with button at the top.

Select "Start Configuration" on the HTTP(S) load balancer, which is the first option on the left. Keep the defaults selected on the first page.
Now you should be on a page that looks like this.
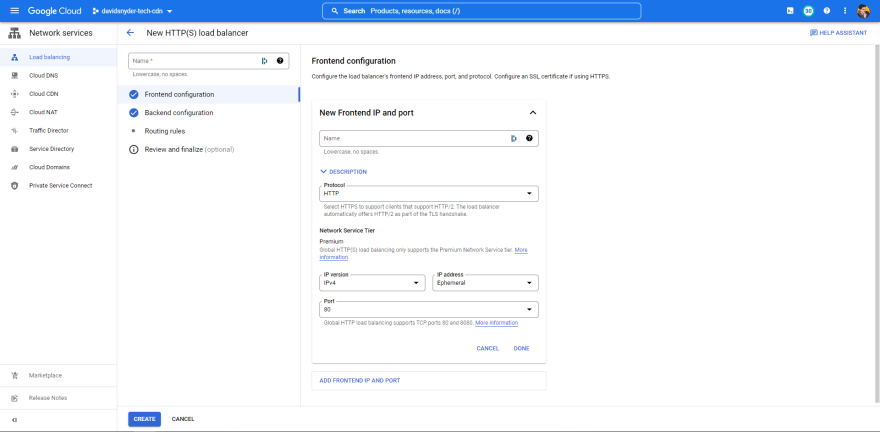
On the "Frontend Configuration" tab give any name you'd like and change the protocol to "HTTPS (Includes HTTP/2)" and for "IP address" change it from "Ephemeral" to "Create IP Adress". Creating the IP address is easy, all you have to do is give it a name and Google with reserve a public static IP for you. Then click on the "Certificate" box and select "Create a new Certificate". In the modal, give the certificate a name and select "Create a google-managed certificate". In the "domains" box enter the domain you're planning to use with this with the subdomain included. Now certificate is being provisioned, this may take up to 24 hours but I found it took 30 minutes to 2 hours. Finally check the box for "Enable HTTP to HTTPS redirect"
We're done with the Frontend tab, so navigate to the "Backend configuration" tab, click on "Backend Services & Backend Buckets", and select "Create a Backend Bucket". In the Modal give the backend bucket a name, it can be the same as your cloud storage bucket if you want, but it doesn't have to be globally unique. Then select "BROWSE" for cloud storage bucket and select the bucket you created previously. To make this file host even more powerful, check the box for "Enable Cloud CDN" and click "Create".
In the "Routing Rules" tab click the "Add Host And Path Rule" button. In the host box enter your domain name with the subdomain you'r planning to use, in the path box enter "/*" to select all paths, and the backend bucket should be automatically selected as the backend.
Now We're done in the GCP console, all that is left is to setup DNS for your domain. For that copy the IP address Google reserved for you earlier and add an "A" record in your DNS settings with the subdomain as the host and IP address.
Now you just have to wait for the SSL certificate to finish provisioning, which as I said before will hopefully take 30 minutes to 2 hours.
Congrats! you now have a file sharing server with a custom domain. To bring it all home take a look at the url for all the images in this tutorial and you'll see that I'm sharing them from cdn.davidsnyder.tech, which is my personal File Host.


Latest comments (0)