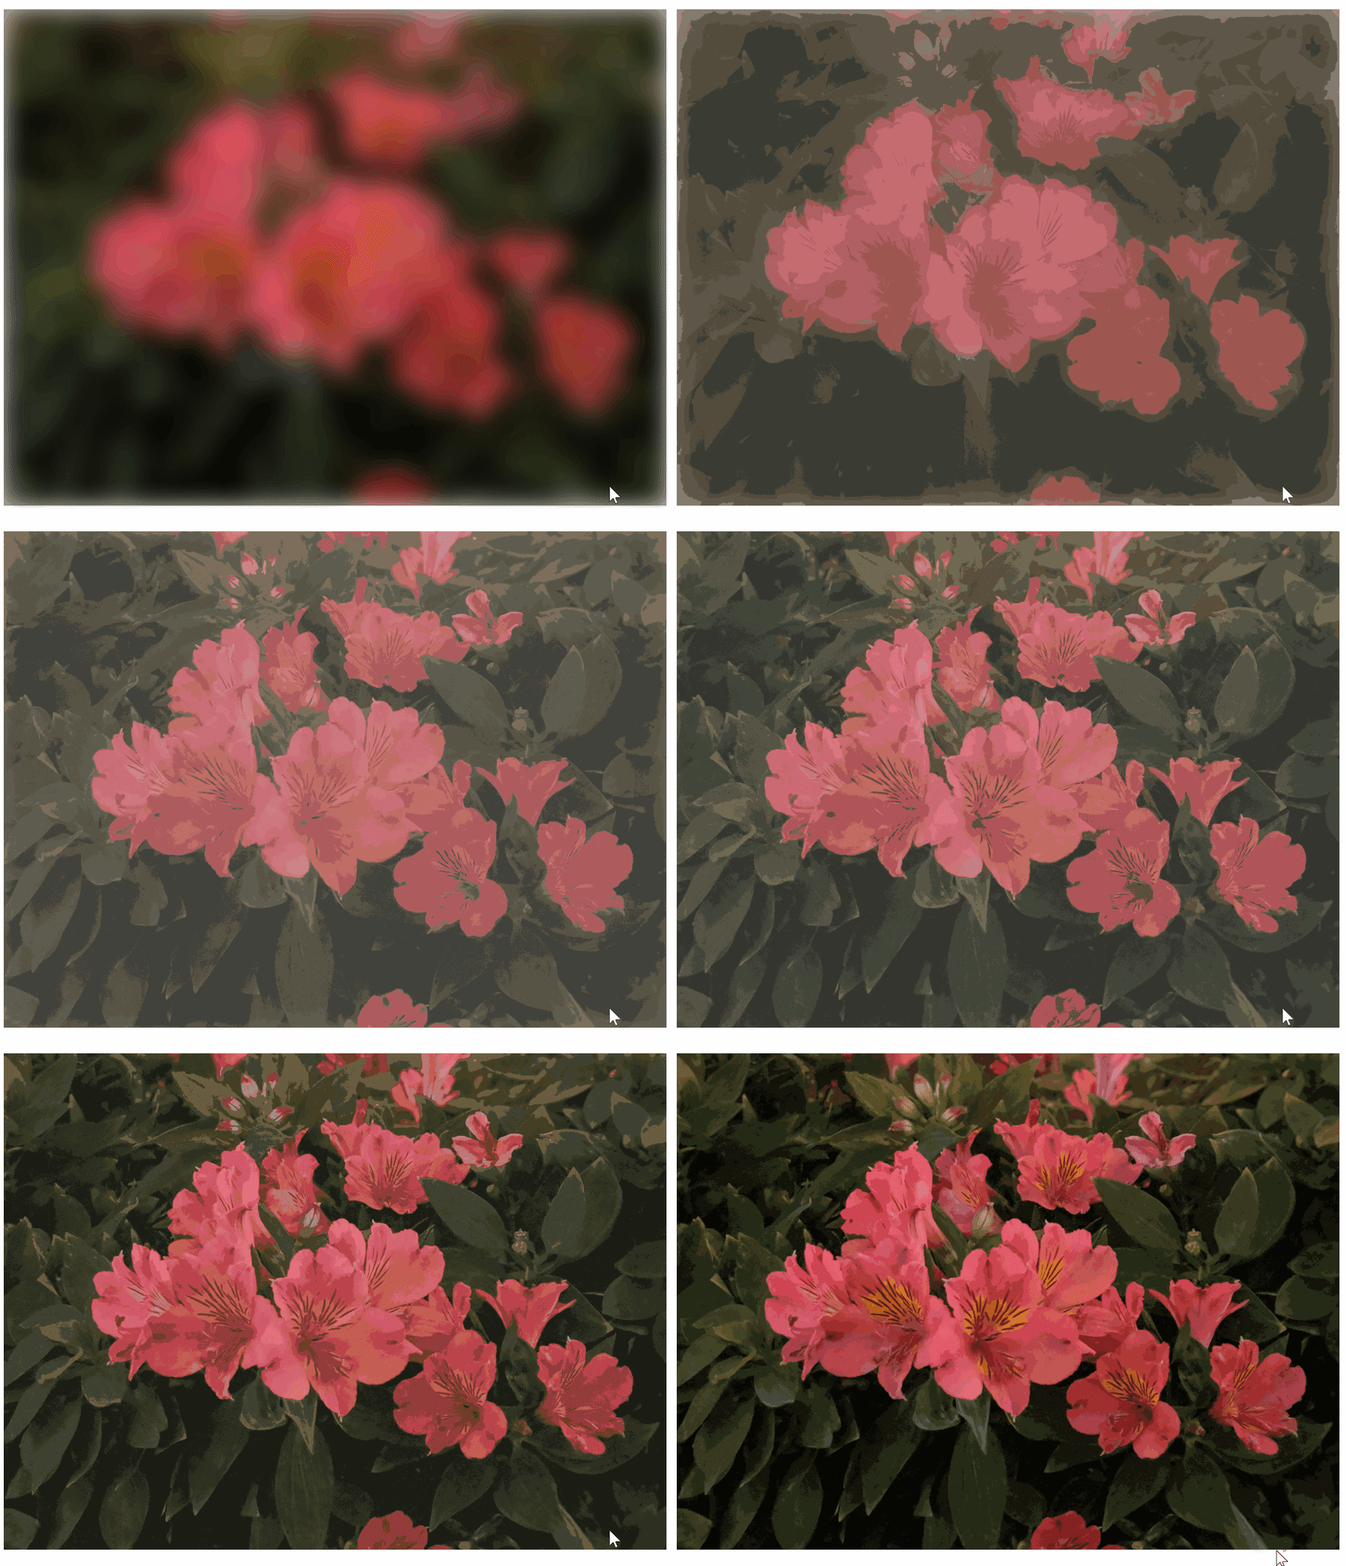
Lazy loading is a common performance optimization technique followed by almost all asset-heavy websites. We often come across web pages where a blurred version of the image loads up and is then followed up with a high-resolution image. Although the total time taken to load up the content is long, it has a perceivable effect on user experience.
This entire interaction is a three-step process:
Wait for the content to come into the view before even starting to load the image.
Once the image is in view, a lightweight thumbnail is loaded with a blur effect and the resource fetch request for the original image is made.
Once the original image is fully loaded, the thumbnail is hidden and the original image is shown.
If you have ever used Gatsby, then you would have come across a GatsbyImage component that does the same for you. In this article, we will implement a similar custom component in React that progressively loads images as they come into the view using IntersectionObserver browser API.
Although Gatsby Image does a lot more than blur and load images, we will just focus on this part:
Let’s Build It.
The first step to building the entire thing is to create a layout of your image components.
This part is pretty straightforward. For the purpose of the article, we will dynamically iterate over a set of images and render an ImageRenderer component.
import React from 'react';
import imageData from './imageData';
import ImageRenderer from './ImageRenderer';
import './style.css';

export default function App() {
  return (
    <div>
      <h1>Lazy Load Images</h1>
      <section>
        {imageData.map(data => (
          <ImageRenderer
            key={data.id}
            url={data.url}
            thumb={data.thumbnail}
            width={data.width}
            height={data.height}
          />
        ))}
      </section>
    </div>
  );
}
The next step is to render placeholders for our images inside the ImageRenderer component.
When we render our images with a specified width, they adjust their height according to the aspect ratio, i.e., ratio of width to height of the original image.
Since we are already passing the width and height of the original image as props to the ImageRenderer component, we can easily calculate the aspect ratio and use this to calculate the height of our placeholder for the image. This is done so that when our image finally loads up, our placeholders do not update their height again.
The height of the placeholder is set by using the padding-bottom CSS property in percentages.
The size of the padding when specified in percentage is calculated as a percentage of the width of the element. Here’s the code:
import React from 'react';
import './imageRenderer.scss';

const ImageRenderer = ({ width, height }) => {
  return (
    <div
      className="image-container"
      ref={imgRef}
      style={{
        paddingBottom: `${(height / width) * 100}%`,
        width: '100%'
      }}
    />
  );
};

export default ImageRenderer;
.image-container {
  background-color: #ccc;
  overflow: hidden;
  position: relative;
  max-width: 800px;
  margin: 20px auto;
}
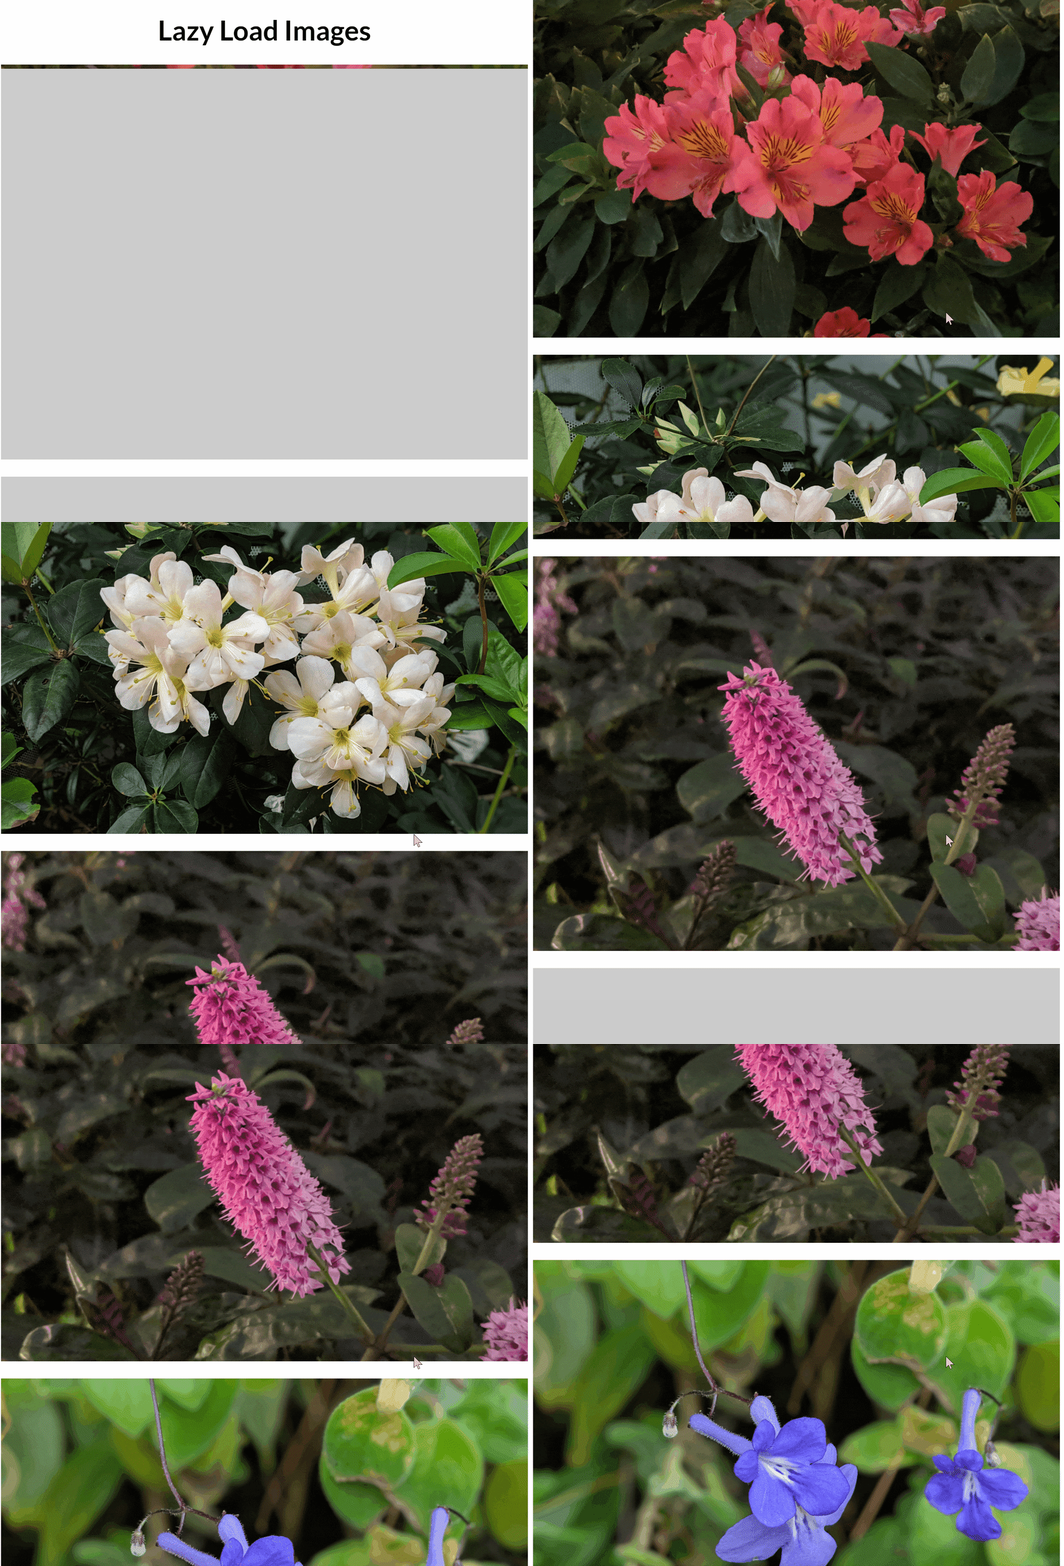
Until this point, our application looks like this:
Using Intersection Observer To Detect Visibility
What we need to know now is when our container for the image comes into view. Intersection Observer is the perfect tool for this task.
“The Intersection Observer API provides a way to asynchronously observe changes in the intersection of a target element with an ancestor element or with a top-level document’s viewport.
The Intersection Observer API allows you to configure a callback that is called when either of these circumstances occur:
A target element intersects either the device’s viewport or a specified element. That specified element is called the root element or root for the purposes of the Intersection Observer API.
The first time the observer is initially asked to watch a target element.”
We shall use a single global IntersectionObserver instance to observe all of our images. We will also keep a listener callback map, which will be added by the individual image component and will execute when the image comes into the viewport.
To maintain a Map of target-to-listener callbacks, we will use the WeakMap API from Javascript.
“The
WeakMapobject is a collection of key/value pairs in which the keys are weakly referenced. The keys must be objects and the values can be arbitrary values.”
We write a custom hook that gets the IntersectionObserver instance, adds the target element as an observer to it and also adds a listener callback to the map.
import { useEffect } from 'react';

let listenerCallbacks = new WeakMap();

let observer;

function handleIntersections(entries) {
  entries.forEach(entry => {
    if (listenerCallbacks.has(entry.target)) {
      let cb = listenerCallbacks.get(entry.target);

      if (entry.isIntersecting || entry.intersectionRatio > 0) {
        observer.unobserve(entry.target);
        listenerCallbacks.delete(entry.target);
        cb();
      }
    }
  });
}

function getIntersectionObserver() {
  if (observer === undefined) {
    observer = new IntersectionObserver(handleIntersections, {
      rootMargin: '100px',
      threshold: '0.15',
    });
  }
  return observer;
}

export function useIntersection(elem, callback) {
  useEffect(() => {
    let target = elem.current;
    let observer = getIntersectionObserver();
    listenerCallbacks.set(target, callback);
    observer.observe(target);

    return () => {
      listenerCallbacks.delete(target);
      observer.unobserve(target);
    };
  }, []);
}
If we do not specify any root element to IntersectionObserver, the default target is considered to be the document viewport.
Our IntersectionObserver callback gets the listener callback from the map and executes it if the target element intersects with the viewport. It then removes the observer since we only need to load the image once.
Using the Intersectionobserver for ImageRenderer Component
Inside our ImageRenderer component, we use our custom hook useIntersection and pass on the ref of the image container and a callback function which will set the visibility state for our image. Here’s the code:
import React, { useState, useRef } from 'react';
import classnames from 'classnames';
import { useIntersection } from './intersectionObserver';
import './imageRenderer.scss';

const ImageRenderer = ({ url, thumb, width, height }) => {
  const [isInView, setIsInView] = useState(false);
  const imgRef = useRef();
  useIntersection(imgRef, () => {
    setIsInView(true);
  });

  return (
    <div
      className="image-container"
      ref={imgRef}
      style={{
        paddingBottom: `${(height / width) * 100}%`,
        width: '100%'
      }}
    >
      {isInView && (

          <img
            className='image'
            src={url}
          />

      )}
    </div>
  );
};

export default ImageRenderer;
.image-container {
  background-color: #ccc;
  overflow: hidden;
  position: relative;
  max-width: 800px;
  margin: 20px auto;
  .image {
    position: absolute;
    width: 100%;
    height: 100%;
    opacity: 1;
  }
}
Once we have done this, our application looks like the example below:
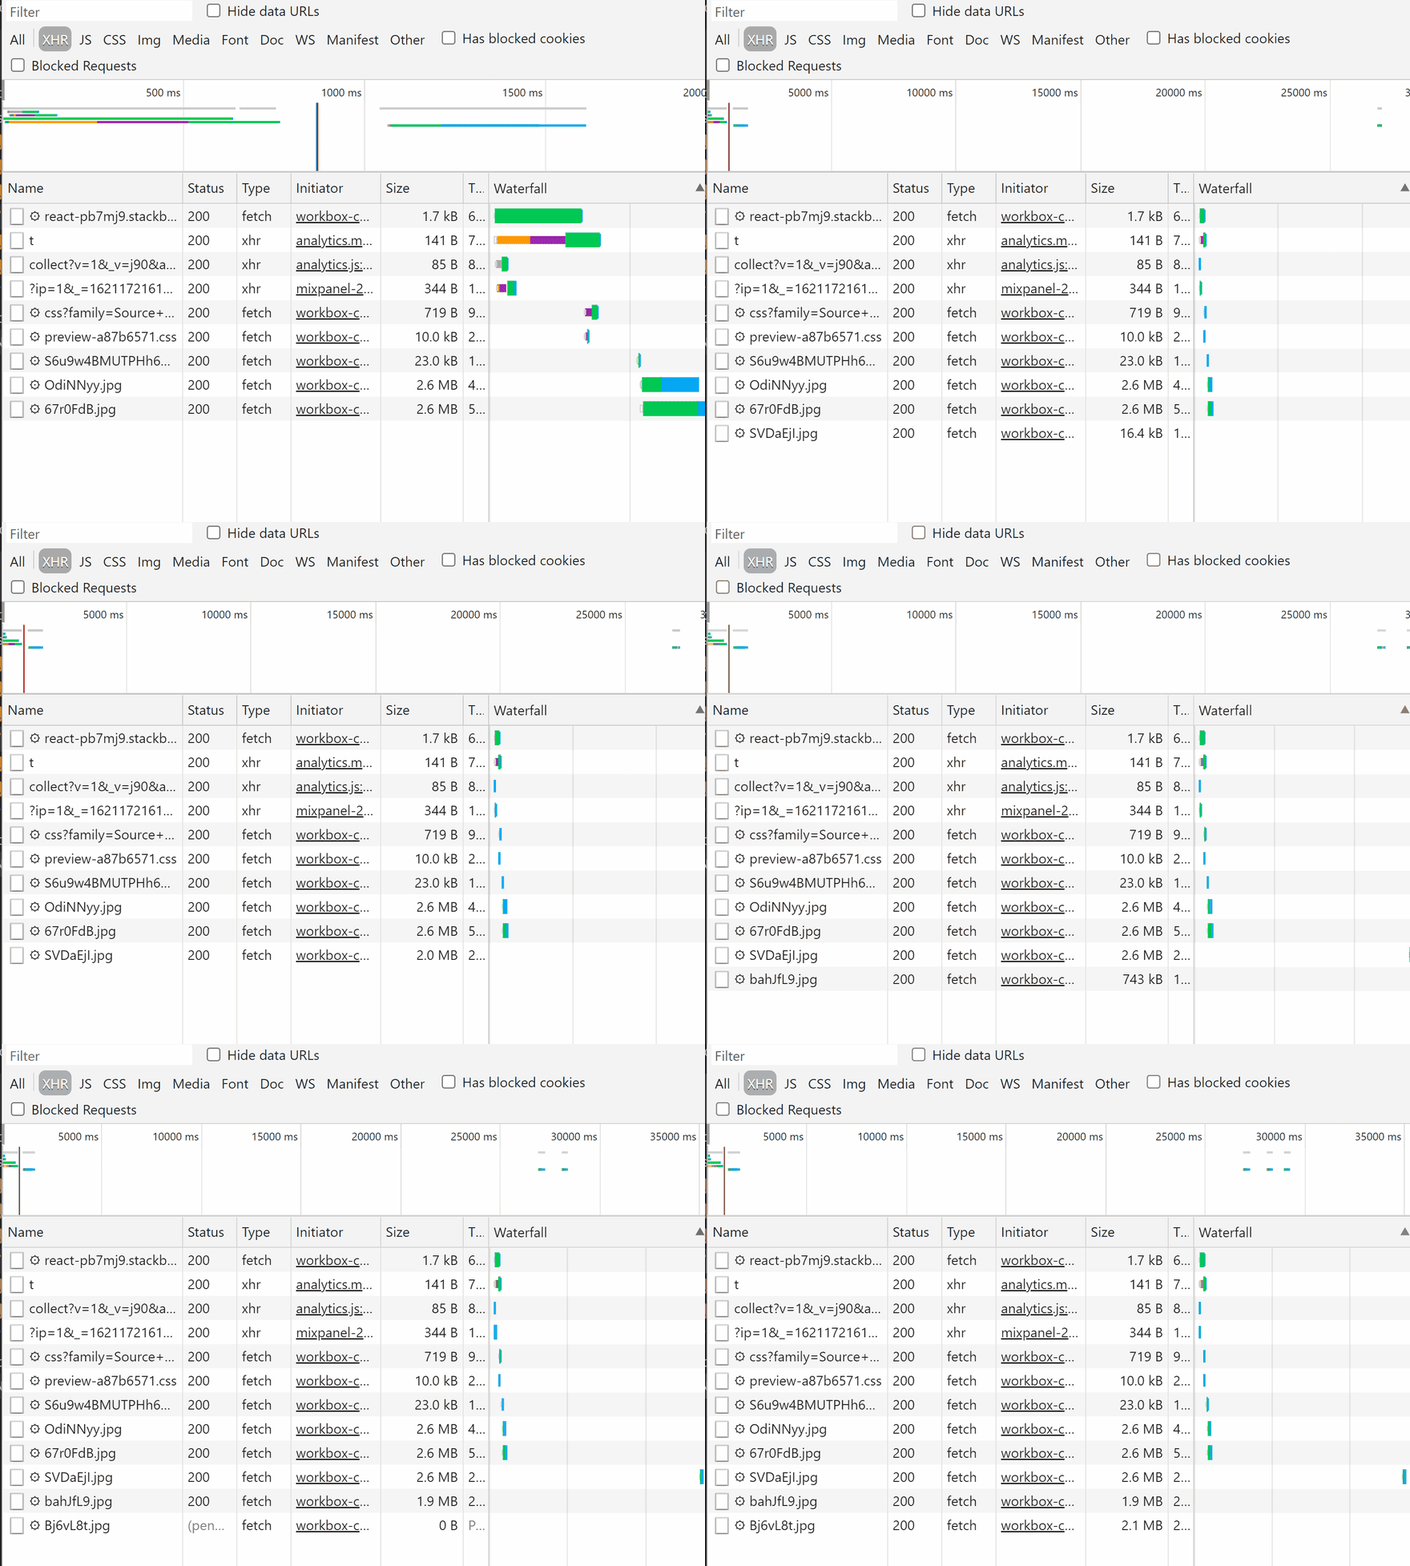
The network request looks as follows as we scroll our page:
As you can see, our IntersectionObserver works, and our images are only loaded as they come into view. Also, what we see is that there is a slight delay as the entire image gets loaded.
Now that we have our Lazy load feature, we will move on to the last part.
Adding the Blur Effect
Adding the blur effect is achieved by trying to load a low-quality thumbnail in addition to the actual image and adding a filter: blur(10px) property to it. When the high-quality image is completely loaded, we hide the thumbnail and show the actual image. The code is below:
import React, { useState, useRef } from 'react';
import classnames from 'classnames';
import { useIntersection } from './intersectionObserver';
import './imageRenderer.scss';

const ImageRenderer = ({ url, thumb, width, height }) => {
  const [isLoaded, setIsLoaded] = useState(false);
  const [isInView, setIsInView] = useState(false);
  const imgRef = useRef();
  useIntersection(imgRef, () => {
    setIsInView(true);
  });

  const handleOnLoad = () => {
    setIsLoaded(true);
  };
  return (
    <div
      className="image-container"
      ref={imgRef}
      style={{
        paddingBottom: `${(height / width) * 100}%`,
        width: '100%'
      }}
    >
      {isInView && (
        <>
          <img
            className={classnames('image', 'thumb', {
              ['isLoaded']: !!isLoaded
            })}
            src={thumb}
          />
          <img
            className={classnames('image', {
              ['isLoaded']: !!isLoaded
            })}
            src={url}
            onLoad={handleOnLoad}
          />
        </>
      )}
    </div>
  );
};

export default ImageRenderer;
.image-container {
  background-color: #ccc;
  overflow: hidden;
  position: relative;
  max-width: 800px;
  margin: 20px auto;
}
.image {
  position: absolute;
  width: 100%;
  height: 100%;
  opacity: 0;

  &.thumb {
    opacity: 1;
    filter: blur(10px);
    transition: opacity 1s ease-in-out;
    position: absolute;
    &.isLoaded {
      opacity: 0;
    }
  }

  &.isLoaded {
    transition: opacity 1s ease-in-out;
    opacity: 1;
  }
}
The img element in HTML has a onLoad attribute which takes a callback that is fired when the image has loaded. We make use of this attribute to set the isLoaded state for the component and hide the thumbnail while showing the actual image using the opacity CSS property.
You can find the StackBlitz demo for this article here:
Conclusion
So there we have it: our custom ImageRenderer component that loads up images when they come into view and shows a blur effect to give a better user experience.
I hope you enjoyed the article. You can find the full code on my GitHub repository here.
Thank you for reading!
If you like this article, consider sharing it with your friends and colleagues
Also, if you have any suggestion or doubts regarding the article, feel free to comment or DM me on Twitter


Top comments (1)
Thanks !