In the 4th article of this series, we will create a function that gets triggered when a message arrives in a Storage Queue. We will run a storage emulator and test our function locally.
Previous articles in this series: Azure Functions: overview of concepts, Creating our first Azure Function, and Deploying our first function to Azure
Before we can create and test our function locally, we need to specify the queue that will be used to trigger our function. Since we don't have any queues currently, we need to create one. We want to run and test our function locally without connecting to Azure cloud, so our queue must exist locally.
Install Azurite extension for VS Code
To create a Storage account locally on our machine, we will use Azurite, a free, open-source emulator that provides local environment for testing Azure Blob, Queue Storage, and Table Storage applications. The emulator provides cross-platform support on Windows, Linux, and macOS. There are number of ways to install Azurite. Since we are using VS Code as our IDE, we will install it as a VS Code extension.
Click the Extensions icon on the vertical left menu. Type azurite in the search field, click on Azurite in the search results. Click on Install button to install this extension.

Start Azurite
After the extension is installed, we will start up Azurite so we can create a storage queue. Open the Command Palette using keyboard shortcut Ctrl + Shift + P (use Cmd + Shift + P on Mac) or View > Command Palette... menu option. Type command Azurite: Start and click on Azurite: Start option.

Once the Azurite service starts, we should see it's status in the bottom toolbar of VS Code saying that it is running on http://127.0.0.1:10000.

Azure Storage Explorer
Now that we have the Storage emulator running, we need to create our queue. For this, let's download and install Azure Storage Explorer. Azure Storage Explorer is a desktop application to conveniently manage Azure cloud storage resources. It can also connect to Azurite and help us manage local storage.
Let's start Azure Storage Explorer and click on the Explorer icon on the menu on the left. We will then navigate to Emulator & Attached > LocalStorage (Key) and Queues. Right click on the Queues menu and click on Create Queue from the pop-up menu to create a new queue.

Let's name the new queue blog-queue. We will use this queue as the trigger for our function.

Create a function with Storage Queue trigger
Our environment is now set up, so it is time to create our function. Let's go back to VS Code, open the Command Palette and type Azure Functions: Create into text box and select Azure Functions: Create Function... option.

Next, we need to choose the function trigger. We want this function to be triggered when a message is received in a Storage Queue, so type Queue in the text box and choose Azure Queue Storage trigger.

We will name this function SimpleQueueFunction.

We will continue to use CloudBuff.Function as the namespace.

In the next step, we will choose AzureWebJobsStorage.

Next, we will provide name of the queue we created blog-queue since we want the function to run when a message arrives in this queue. 
We will then be asked to select a Storage account for internal use by the Azure Functions runtime. We will go with Use local emulator option. 
Our function will be created as SimpleQueueFunction.cs. Note that Run function has binding for blog-queue and AzureWebJobsStorage as the connection string.

As we will be using Azurite emulator for local testing, we need to verify that it is associated with our function. To do that, we can check the AzureWebJobsStorage property in file local.settings.json. It should be set to UseDevelopmentStorage=true as we chose the Use local emulator option earlier.

Test the function
To run the function, click the option Run Without Debugging under the Run menu. VS Code will build the project and run it. Since we have two functions - SimpleHttpFunction that we created previously and SimpleQueueFunction that we just created - we should see both come up.

Now, lets add a message to blog-queue. Go to Azure Storage Explorer, click on blog-queue and click Add Message button on the tab that opens.
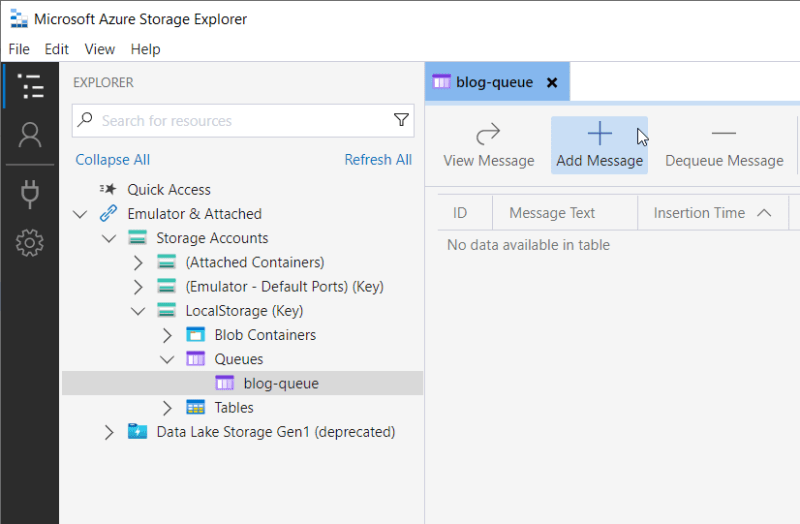
The Add Message window will pop up. Let's use a simple text message Blog Message #1. Add the message text and click OK to add it to the queue 
Adding the message to the queue should trigger our function and we should see the message content being logged in the VS Code terminal window. 
Now, let's add another message to the queue. This one is a JSON message { "message": "This is a JSON blog message" }. We should also see the message being logged in the terminal window. 
And that's it!! We have successfully created and tested our second function.
Conclusion
In this article, we created a function that gets triggered when a message arrives in a Storage Queue and tested it locally. We saw how Azurite can be used to emulate a Storage account locally. We used Azure Storage Explorer tool to create a storage queue and add test messages to it.
In the next article, we will deploy this function to Azure cloud and use an actual Azure Storage queue to test it.


Latest comments (0)