In this tutorial we will build a form with React Hook Form allowing users to create an account. We will also be styling our form with Styled Components.
Overview
React Hook Form is a library for creating forms utilizing concepts from React and HTML. Key features and benefits of React Hook Form includes:
- Hooks for reusable state logic
- HTML client-side validations
- minimal rendering(uncontrolled form)
Below are the APIs we will be using:
- useForm: hook with access to different methods from library
- register: method to register inputs and apply validation rules
- handleSubmit: function that will pass data after validation
- errors: object containing error message corresponding to input field
- reset: method to reset all fields on form
Styled Components is a library for styling UI components. It utilizes template literals for declaring styling directly to a component. Key features and benefits of Styled Components includes:
- ease of maintenance with styling bound to component
- dynamic styling using props or global themes
- compatible with HTML and CSS naming standards
Below are the APIs we will be using:
- styled: default export for using library
- TaggedTemplateLiteral: CSS properties and values passed into styled calls
- createGlobalStyle: function that generates a global styling component
Here are links to the repo and live site to get a better idea on what will be built.
Setting Up Project
My IDE setup and package manager for this project was VSCode and Yarn. If you are using a different setup your commands will be slightly different.
This project was built with React Hook Form 6.13.0 and Styled Components 5.2.1. Keep this in mind as syntax may be different from other versions.
The quickest way to get started is with Create React App. This will allow us to work on the project right away without having to install preliminary dependencies and make configurations. On the command line in VSCode navigate to the directory where you would like to have the project stored. Type yarn create react-app "project name" to initialize the project.

Setting Up Component
We are going to make some minor changes to our files and create a function component that will render a basic form. Below are key highlights along with code snippet and DOM output:
Key Highlights:
- rename App.js file to Form.js file
- rename App component to Form and have it return a basic form containing
- title, username, email, password and submit button
- rename App component to Form component in index.js
Code Snippet:
//Form.js
import React from 'react'

function Form() {
  return (
    <div>
      <h1>Almost There!</h1>
      <form>
        <div>
          <input type="text" name="username" placeholder="username" />
        </div>
        <div>
          <input type="text" name="email" placeholder="email" />
        </div>
        <div>
          <input type="password" name="password" placeholder="password" />
        </div>
        <div>
          <input type="submit" value="Create Account" />
        </div>
      </form>
    </div>
  );
}

export default Form;
//index.js
...
import Form from './Form';

ReactDOM.render(
  <Form />,
  document.getElementById('root')
);
DOM Output:

Using React Hook Form
To get started with React Hook Form we will install the library with yarn add react-hook-form. We then import useForm Hook into Form.js. Now we can start integrating some of the features from this library into our project. Below are key highlights along with code snippet:
Key Highlights:
- import and use
register,handleSubmit,errorsandresetmethods - assign register for each input field to track changes to inputs
- setup validation rules and error handling within input fields
- declare
onSubmitevent listener that will log data to console - reset all data after form is submitted
Code Snippet:
//Form.js
import React from 'react'
import { useForm } from "react-hook-form";

function Form() {
  const { register, handleSubmit, errors, reset } = useForm();

  const onSubmit = (data) => {
    reset();
    console.log(data);
  };

  return (
   <div>
      <h1>Almost There!</h1>
      <form onSubmit={handleSubmit(onSubmit)}>
        <div>
          <input
            type="text"
            name="username"
            placeholder="username"
            ref={register({
              required: "username required",
              pattern: {
                value: /^[a-z][a-z0-9]{3,14}$/i,
                message: "Username must be 5 - 15 characters long, must start with a letter, only alphanumeric characters allowed, only lowercase letters allowed"
              }
            })}
          />
          {errors.username && (<p><em>{errors.username.message}</em></p>)}
        </div>
        <div>
          <input
            type="text"
            name="email"
            placeholder="email"
            ref={register({
              required: "email required",
              pattern: {
                value: /^[A-Z0-9._%+-]+@[A-Z0-9.-]+\.[A-Z]{1,64}$/i,
                message: "Please enter a valid email"
              }
            })}
          />
          {errors.email && (<p><em>{errors.email.message}</em></p>
          )}
        </div>
        <div>
          <input
            type="password"
            name="password"
            placeholder="password"
            ref={register({
              required: "password required",
              pattern: {
                value: /^(?=.*[a-z])(?=.*[A-Z])(?=.*\d)(?=.*[@$!%*?&])[A-Za-z\d@$!%*?&]{8,15}$/i,
                message: "Password must be 8 - 15 characters long, must contain one UPPERCASE letter, must contain one lowercase letter, must contain one number, must contain one special character: @$! % * ? &"
              }
            })}
          />
          {errors.password && (<p><em>{errors.password.message}</em></p>
          )}
        </div>
        <div>
          <input type="submit" value="Create Account" />
        </div>
      </form>
    </div>
  );
}

export default Form;
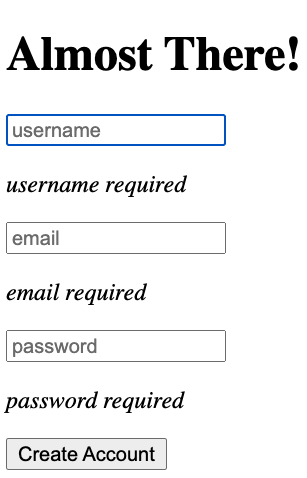
Testing the Form
Now we will test the form to make sure the following functionalities are working properly:
- error handling for empty fields
- error handling for invalid fields
- data logging after validation
- reset of all fields after validation
Dom Output:
error handling for empty fields
error handling for invalid fields

data logging to Console

-
reset of all fields after validation

Using Styled Component
To get started with Styled Component we will install the Styled Component library with yarn add styled-components. We then import styled method into Form.js. As noted in the documentation, if using Yarn, it is recommended to include a resolution field in package.json. This will help prevent issues that may result from having multiple versions installed.
//package.json
...
"resolution": {
   "styled-components": "^5"
 }
...
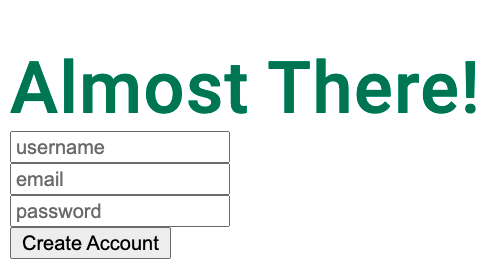
Below are key highlights along with code snippet and DOM output for styling the Title of the form. The same work flow can be applied to all other elements.
Key Highlights:
- declare a Title container and assign it to the styled method
- attach h1 to styled method to define the element type
- define the CSS properties values within template literal
- In the return statement replace h1 tag with Title
Code Snippet:
//Form.js
import styled from "styled-components";

const Title = styled.h1`
  color: #00805b;
  font-size: 3rem;
  letter-spacing: 0.0625rem;
  margin-bottom: 0rem;
`;

...
<Title>Almost There!</Title>
...
DOM Output:

Styling Font
This step is optional and is not required if you are planing to use default Web Safe Fonts.
Styling the fonts for this project was a little tricky because I wanted to use the Roboto from Google Fonts. From Styled Component's documentation it was not recommended to use @import CSS Rule with version(5.2.1). The work around was to install React Helmet in order to reference the url to in a Link tag.
Here are key highlights along with code snippet and DOM output:
Key Highlights:
- install React Helmet library and import into Form.js
- reference Google Font urls in Link tags
- import createGlobalStyle method from Styled Component library
- declare
GlobalStylecontainer with font family property and values - import self-enclosed
GlobalStyleelement into Form return statement - make changes to font weight in the Title container
Code Snippet:
import { Helmet } from "react-helmet";
import styled, { createGlobalStyle } from "styled-components";

const GlobalStyle = createGlobalStyle`
  body {
    font-family: 'Roboto', sans-serif;
  };
`;

const Title = styled.h1`
  color: #00805b;
  font-size: 3rem;
  font-weight: 500
  letter-spacing: 0.0625rem;
  margin-bottom: 0rem;
`;

...
return (
    <div>
      <GlobalStyle />
      <Helmet>
        <link rel="preconnect" href="https://fonts.gstatic.com" />
        <link
          href="https://fonts.googleapis.com/css2?family=Roboto:wght@100;300;500&display=swap"
          rel="stylesheet"
        />
      </Helmet>
      <Title>Almost There!</Title>
...
DOM Output:
Final Touches
To make sure that our form renders consistently across multiple browsers we will use Normalize.CSS. This library will preserve user defaults styling and help maintain cross browser consistency. Install the library with yarn add Normalize.CSS and import it into Form.js.
//Form.js
import 'normalize.css';
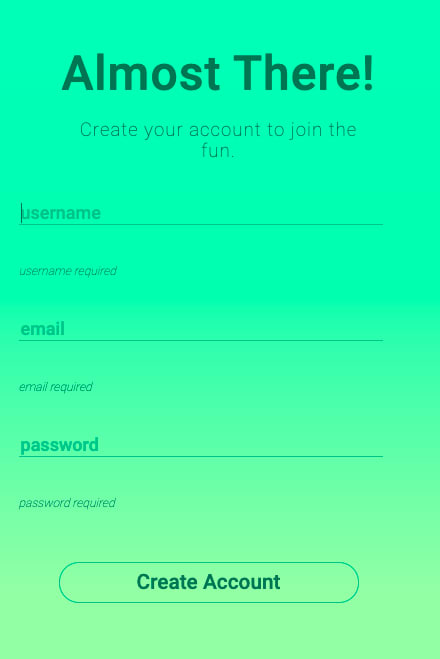
Final Testing
Now that our form application is complete we are going to perform the same test from Testing the Form. The purpose of performing the test again is to verify that layout and UI components are functioning and rendering correctly after styling. Here was the list of requirements for testing:
- error handling for empty fields
- error handling for invalid fields
- data logging after validation
- reset of all fields after validation
Dom Output:
error handling for empty fields
error handling for invalid fields

data logging to Console

-
reset of all fields after validation

Next Steps:
Forms are the most common and effective tools for collecting data from users. This form can be integrated into any website or full stack application. For best practice in development lifecycle, I am planning to write either an integration or unit test for this project. Stay Tuned! 🙌


Top comments (0)