"Nothing is more difficult, and therefore more precious, than to be able to decide." - Napoleon Bonaparte
Welcome to part four. In this series I hope to introduce the basics of coding in Python for absolute beginners in an easy to follow and hopefully fun way. In this article we will look at some of the ways we can use logical states to allow our code to make decisions in Python, but first let's take a look at the solution for the challenges set in part three.
Solutions to part three's challenges
Task 1
# Create a list and name it my_list
my_list = ["leaf", 98, False, "red kite", 4.68]
# Append your name as a string to the end of the list
my_list.append("Simon")
# Delete the 3rd item in your list
del my_list[2]
# Substitute the 1st and 2nd items in your list with different
# items
my_list[0:2] = ["flower", 26]
# Delete the entire list
del my_list
Task 2
# Create a tuple and name it my_tuple
my_tuple = (1, 2, 3, 4, 5)
# Try to append, delete or change values in my_tuple and note any # errors or messages Python gives you
"TypeError: 'tuple' object does not support item assignment"
# Tuples cannot be changed once they are created!
Task 3
#Create a dictionary and name it my_dict. In it, create the keys
# "genus", "species", "habitat" and "diet" and give them some
# appropriate values
my_dict = {'genus' : "Cervus", 'species' : "elaphus", 'habitat' : "woodland", 'diet' : "herbivore"}
# Add a new key "Lifespan" and give it an appropriate value
my_dict['Lifespan' : 20]
# Delete the genus key and value
del my_dict[genus]
Time for a new toy!
Up to this point we have been using IDLE to run and test our code. IDLE comes bundled with Python and is a great way to test lines of code and to try things out. So far, we have been running our code one line at a time and seeing what will happen. As we move now into slightly more advanced topics, we will be writing multiple lines of code before running the whole thing. While IDLE is capable of doing this, I feel it is beneficial for the learner to see everything laid out in the proper format. In addition, setting out our code in the proper way is essential for making the code human readable and in some instances it is also necessary for Python to understand our code. To this end we are now going to use a new tool - the IDE or 'Integrated Development Environment'. The IDE will allow us to write multiple lines of code, save our code in a Python file and then run the file. Many IDEs also come with handy features such as syntax highlighting and auto-completion but more on those shortly.
Choosing an IDE
There are many IDEs out there which will allow you to write and run Python applications. Some are free, some you have to paid for (just use a free one!), but they all work in a similar way. Developers are fussy creatures and everyone has their individual preferences. In time you can experiment with several and choose the one you like best but for now I am going to give you a choice of two:
First off, we have Visual Studio Code by Microsoft. Visual Studio Code is a desktop application (they are working on an online version) which works with basically any programming language and has the ability the download plugins in order to make it look and run exactly how you want. To download VS Code follow this link to download and install from the official site. There are downloads for Windows, Mac and Linux and it is also available through many Linux package managers. After installing and opening VS Code you should be presented with something similar to the following image:

To begin, either click 'New File' on the welcome screen or open the 'File' menu in the top left and select 'New File'. A small dialog window should now open asking you to name your file. Whatever name you choose make sure the file has the extension '.py' at the end so VS Code knows it is a Python file. Make a note of where you save your file, it may be a good idea to create a new folder to keep your code files separate.

Once your new Python file is created you should be presented with a blank page and a flashing cursor all ready to go.
Before we do anything look for the 'Extensions' icon on the left side of the window and click it or press Ctrl + Shift + X to open the Extensions pane. In the search bar at the top of the pane type 'python' which should show all of the available Python plugins available. Near the top of the list should be a plugin named 'Python' with the subtitle 'IntelliSense (Pylance)' by Microsoft. Click the little blue 'Install' button to add this plugin to VS Code. This plugin is gives us features such as syntax highlighting and autocompletion.
Some other optional plugins you can search for and install would be:
Pylance
Rust Syntax Highlighting
The second IDE option I am going to suggest is replit.com. Replit is an IDE for writing Python (and other languages) but it is entirely online based with nothing to download or install. Simply go to the link above and create a free account to get started. You will then be taken to the dashboard screen which will look something like the following:
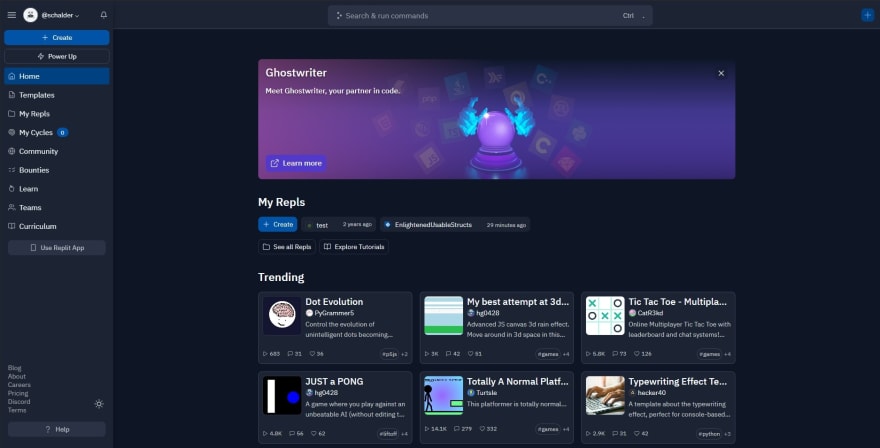
Click the '+ Create' button in the top left to get started and you will be greeted with 'Create a Repl' popup. Select 'Python' from the available templates and then give your project a name before clicking 'Create Repl'. You should then see a screen similar to the following:

The screen is divided into two panes, our code writing pane on the left and the terminal or output on the right. On the left of the screen you will see some file names. Ignore all of the packager files, we won't be touching them. Instead note 'main.py', this is the current open file and the one we will using to write our code.
Phew! IDEs are an entire topic in of themselves but we should hopefully be at a point where we can start coding in this new environment.
Taking it for a spin
Let's try out our new IDE to get a feel for how it works.
In your open Python file type the following using your own name. Press enter at the end of each line to start another:
name = "Simon"
print(name)
So...nothing happened, not yet anyway. In order to run our file we need to:
In VS Code either locate the small forward arrow icon in the top right and click the button or press Ctrl + F5.
In Replit simply press the green 'Run' button at the top of the screen
You should now see your name printed to the screen. In VS Code the terminal will appear at the bottom of the screen and with Replit it will be in the right side pane.
So what exactly is happening when we press 'Run' in the IDE? Python is known as an 'interpreted language' which is a fancy way of saying it runs code line by line. Python comes bundled with an interpreter that allows Python files to be run on your device. When we run the file, the interpreter starts at line 1 and reads left to right. If no errors are found then that line is stored to memory or the code executed and the interpreter moves on the the next line. This process repeats until all lines of code have been ran and the programme will end. For this reason in long Python files the interpreter may get most of the way through the code, running as it goes, before finding an error near the end and failing.
The other type of language available are the 'compiled languages' such as C, C++ and Java. Compiled languages use a separate piece of software known as a compiler to go through the entire file, converting everything into machine readable code before attempting to run the file.
Generally speaking, interpreted languages such as Python tend to make it easier to create smaller scripts or applications and their development time is often quicker as you do not need to wait for a compiler to convert the whole file to run it. However, once compiled language files are compiled they are generally faster to run and are used in cases where speed is a key factor.
For more information on interpreted vs compiled languages follow this link.
A quick note on Python files
Python files can also be ran outside of the IDE in a couple of different ways.
Firstly, locate the folder where your Python file is stored in your device's file explorer. We can simply double click on them like any other executable file. However, what you may find with this is that a window appears on the screen and then immediately disappears. This is because our code has nothing to stop it running to the end and it is not waiting for anything to happen so it closes down.
A better way, particularly if our file will produce output to the terminal is to actually open the file in our device's terminal. In windows click the Windows / Start Menu and type 'cmd' and hit enter. On Mac or Linux search for 'Terminal' and open. Navigate to the folder containing your Python file and type the following depending on your devices operating system:
Windows - python .\python_file_name.py
Mac / Linux - python ./python_file_name.py
Flow Control - Is it this or that?
Finally, we get to the subject of this article's discussion. There comes a time in every coder's journey where we need our code to make some decisions for itself. In order to do this we need to have some kind of control state. The control state may be a variable or the output from another piece of code and it could represent boolean values, a number, a string or pretty much anything we can check to determine if it is one thing or another. We then look at that state and depending on what we see at that time we go in one direction or another. Essentially, we ask a multi choice question in our code - does the value of this thing we have selected match one of these values? If the answer is yes then we will run a piece of code associated with that value. If not, we can run code in the event that none of our answers match.

In coding, to make these decisions we use the 'If / Else Statement'. Consider the following example where we have a variable - state, which contains boolean data (True or False). We use an if statement to check the value of state and then run some code depending on the outcome.
state = True

if state == True:
    # run this code if the answer is yes
else:
    # otherwise run this instead if the answer is no
If state is equal to 'True' then the answer to our question is yes (True) and the first indented code block will run
If state is equal to anything else then the result will be no (False) and the second code block will run
In the above example, state is equal to 'True' so the value of the state variable matches our question - does state have the booelan value 'True'? - yes it does! Had state had the value 12, 4.6, "otter", False, or anything other than 'True' the answer to our question would be no, our if statement code would not run and we would default to our wrong answer code instead.
There are some key points to go through here so let's break the if statement down line by line:
if state == True:
Our statement begins with the keyword if. Remember those protected keywords used by Python, this is another one of them and it can't be used for variables names or similar. We then say which control state we are going to be checking, in this case a variable named state. What follows are 2 '==' signs which in code mean 'equal to'. Finally, we say what we are comparing our control statement to, in this case the value 'True'. We then end the line with a colon ':' to let Python know to look for indented code below. In English what this line says is:
if my variable named 'state' has a value equal to 'True' then do what comes next
#run this code if the answer is yes
If our if statement is true, that is state is indeed equal to True then we run the code found indented from the if statement. Indentation or offsetting code from the margins is a frequently used formatting convention in coding and the subject of a furious debate which I won't get into here. Suffice to say we can either indent our code using the Tab key or using 4 spaces. Any indented code immediately following the if statement line will be ran ONLY if the if statement is true.
else:
So what if the if statement is not True? In that case we move down to the 'else statement'. The else statement is not compared to anything because it is our default and covers any outcome other than that tested in the if statement. So again, in plain English we can see the if / else statement as:
if this value is equal to this value then run the indented code that comes next:
    #Some code here
Else, for any other outcome run this indented code instead:
    #Some other code here
The indented code in the else statement will always run unless the if statement turns out to be true.
Time for a hands on example. In your chosen IDE delete any code you already have and create a variable called chance and set it equal to 'True' (capital 'T' and no quotation marks).
chance = True
Underneath on the next line write the following if statement and press enter:
if chance == True:
We have now created our if statement to check if chance is equal to 'True'. On the line under the if statement indent your cursor using either the tab key or 4 spaces and write the following and hit enter:
print("It's True!")
On the next line write our else statement and press enter. Make sure the else statement is not indented and is all the way to the left:
else:
Finally, on the last line write the code to run if the else statement comes into play, again indent this line with tab or 4 spaces:
print("It's False!")
All together we should have the following:
chance = True
if chance == True:
    print("It's True!")
else:
    print("It's False!"
Run the code, what output do you get? Hopefully you should see "It's True!" printed to the console. If not, double check for typos and make sure you are indented correctly.
"There are two ways to write error-free programs; only the third one works." - Alan Perlis
So at this point, our code is making decisions based on the state of a value. So what? Well, being able to make decisions means we can write software which can alter how it works based on the outcome of certain factors which means we can anticipate different use cases to make sure our application can handle anything we throw at it.
Now let's take a look at what happens if state is not True, what happens then? Go back into your code and change the value of state to 'False' or anything other than 'True'. Run the code again and check the output. If all is working properly you should see "It's False" displayed in the terminal.
Hopefully this is making sense, so let's try a more useful example. Clear your code from your IDE window and start with the following line:
guess = input("Guess a number between 1 and 5: ")
This line uses another inbuilt Python method to get input from the user of the application and store it in a variable named guess. We can also use this to print some text on the screen to tell the user what we want from them. So we will get a number entered by the user, now to check if they have guessed our secret number correctly. Under the first line write the following if statement:
if guess == 3:
    print("Correct! You Win!")
else:
    print("Incorrect, you lose!")
Run the code and try it out, enter a number and see if the code behaves as expected.
![]()
Variations of the If Statement
We can alter the way our if statements work with a few tweaks.
First lets look at some of the other operators we can use instead of '==' equals to:
Not equal to - !=
Greater than - >
Less than - <
Greater than or equal to - >=
Less than or equal to - <=
Example 1
if 12 != 6:
    print("True!")
else:
    print("False!")
# Output
True! # 12 is not equal to 6
Example 2
if 64 < 32:
    print("True!")
else:
    print("False!")
# Output
False! # 64 is is not less than 32
Example 3
if 128 <= 128:
    print("True!")
else:
    print("False!")
# Output
True # 12 is equal to or less than 128
Multiple Operators
As well as the operators we have already looked at such as '==' '!=', '>' etc we can also combine multiple operators to get more specific about what we are looking for. To combine operators we use the keywords and / or. When using and both if statements must be True for the result to be True. When using or only one needs to be True.
Example using and - 12 is both greater than 10 and less than 15
number = 12
if number > 10 and < 15:
    print("Maybe it's 12")
else:
    print("Could be anything!")
Example using or - 64 is not less than 10 but is greater than 60
number = 64
if number < 10 or > 60:
    print("Looks good")
else:
    print("Could be anything!")
Else If
A final addition to the way we can make decisions with if statements is with the use of the 'Else If' statement. Essentially this allows us to add more than 2 outcomes for our decision making. If the if statement is False then Python will check each else if statement for a True outcome before finally defaulting to the else statement. The syntax for an else if statement is elif followed by the condition to be met:
animal = "sheep"

if animal == "cow":
    print("It's a cow!")
elif animal = "sheep":
    print("It's a sheep!")
else:
    print("I don't know what it is!")

# Output
"It's a sheep!"
In the above example, Python checks our if statement to see if animal is equal to "cow" but this returns false so it moves down to the else if statement and checks animal to see if it is equal to "sheep' which it is and so returns True. As Python has found a True statement, the indented code under the 'elif' statement is run. The rest of the if / else statement is not run and the code will continue under the if / else statement.
Pass and Break
The final thing I want to discuss in this article is the use of pass or break. Sometimes in our if / else statements there can be an outcome where we do not want anything to happen if a statement is true.
Firstly, using the pass statement will move down to the next part of the if / else statement without doing anything
state = "Undecided"

if state = True:
    print("True")
elif state = "Undecided":
    pass
else:
   print("Not sure")
# Output
"Not sure"
In this example when state is found to be equal to "Undecided" the indented code is run. However, the pass statement moves Python on to the next part of the statement which is the else statement.
The break keyword is similar to the pass keyword except using break will cause Python to jump out of the if / else statement all together and continue on from the next line.
state = "Undecided"

if state = True:
    print("True")
elif state = "Undecided":
    break
else:
   print("Not sure")

print("must have used the break statement")
# Output
"must have used the break statement"
So why do we care about all this if / else stuff?
The ability to check values and act upon them is fundamental to software development. Consider the following uses for if / else statements in applications:
Checking the input a user gives us to make sure it is the right data type and matches our requirements. For example, if we ask for a user's name we want to ensure they have actually typed something and not just pressed Enter with a blank name. We can also check they have not entered numbers, inappropriate words etc.
When using datasets we can go through all of the values in a large spreadsheet or file and check that each value is formatted properly, is the correct data type and if we find missing values we can flag these or enter replacement values automatically.
When sending data or files over the internet we can check a variable containing an http response status code which tells us if the data or file has been received correctly.
The use cases of 'check if this is a certain way and then do something if it is' are almost endless. I definitely recommend spending some time with this topic to get to grips with it fully.
Challenge
Task
For this task I am going to set you a challenge but I am not going to give step by step points to accomplish it.
My challenge is to create a Python application using everything you have learned so far which is able to do the following:
- Ask the user for first and last name as well as their age
- Look at the age given by the user and perform some decision making to decide if they are old enough to do something where you live - vote, drink, drive etc.
- Print out to the terminal a sentence along the lines of "Hello , you are and you [can/cannot] do [activity]!"
- For an extra challenge, give yourself more decisions to make so check if the person is eligible to do several activities which require them to be a certain age.
Take your time and go back over the article if you get stuck. You can do it!
Conclusion
With the addition of 'Else If' statements we can begin to make quite complex decision making which can account for a variety of possible outcomes. Along with our new found ability to take user input we can now start to make applications that can actually do something useful. Flow control marks the point where we move from total beginner subject matter to things which get a little more complicated. All this means is that you may need to spend a little more time with things and do some extra practice to get a good understanding of things. Learning to code is not about memorising syntax it is about learning how things work on a conceptual level and then putting all of the pieces together to create something amazing. Keep going and make the most of all of those great coding resources online if you are struggling.
So far we have made code that will run and then stop when it is done. What if we could make an app which would be able to run again and again if needed until we are finished with it or maybe it could do something really repetitive many times really quickly? Well, good news that is the subject of the next article - loops! Thank you for reading and I look forward to seeing you in part five.
Simon.


Top comments (0)