
If you want to build a public landing page with Angular and email signup you likely don't want to expose any secret keys, and I'll show you how with Netlify cloud functions.
In this tutorial we will connect a simple Airtable table as some sort of backend to store emails to our Angular landing page. We do this with the help of Netlify where we will both host our application and also deploy a cloud function!
If you don't want to use Airtable for storing your users emails you could easily plug in any email service into the cloud function as well. The only thing that matters is that we don't want to expose any secret keys inside our Angular app and instead keep that kind of information hidden.
Once the technical side is done we will also make the page more polished by adding Tailwind to our Angular app and add relevant meta tags.
If you want more weekly news right to your inbox, make sure to join my newsletter!
Creating an Airtable Table
We begin by setting up our Airtable table, so simply create a new table, remove all the fluff and just make it have one column Email. Don't mind the two rows in the image below, I later removed the Name column.

Inside the URL of that table we can find most relevant information for the connection to Airtable, so right now just leave that tab open until we come back to it.
Creating the Angular Project
Next step is creating a new Angular project using the Angular CLI - install it and additionally the Netlify CLI if you haven't done before.
We create our app including a routing file and SCSS styling, and we also generate a new landing component inside. Finally we install additional packages for our cloud functions, so go ahead now and run:
# Install CLIs if you haven't done before
npm install -g netlify-cli @angular/cli

# Setup new Angular project
ng new prelaunch-page --routing --style=scss
cd ./prelaunch-page

# Generate a new component
ng generate component landing

# Install the Airtable package
npm i airtable

# Netlify functions package
npm i @netlify/functions
Because we will later encounter some Typescript warnings, we now need to add one key to the tsconfig.json to solve that issue right upfront:
  "compilerOptions": {
    "allowSyntheticDefaultImports": true,
Besides that we should import all necessary modules so we can perform Http calls with the HttpClientModule and build a form with the ReactiveFormsModule.
Therefore open up the src/app/app.module.ts and change it to:
import { NgModule } from '@angular/core';
import { BrowserModule } from '@angular/platform-browser';

import { AppRoutingModule } from './app-routing.module';
import { AppComponent } from './app.component';
import { LandingComponent } from './landing/landing.component';
import { HttpClientModule } from '@angular/common/http';
import { ReactiveFormsModule } from '@angular/forms';

@NgModule({
    declarations: [AppComponent, LandingComponent],
    imports: [BrowserModule, AppRoutingModule, HttpClientModule, ReactiveFormsModule],
    providers: [],
    bootstrap: [AppComponent]
})
export class AppModule {}
Since we want to display our new component instead of the default page, we can now touch the src/app/app-routing.module.ts and include a path to our new component like this:
import { NgModule } from '@angular/core';
import { RouterModule, Routes } from '@angular/router';
import { LandingComponent } from './landing/landing.component';

const routes: Routes = [
    {
        path: '',
        component: LandingComponent
    }
];

@NgModule({
    imports: [RouterModule.forRoot(routes)],
    exports: [RouterModule]
})
export class AppRoutingModule {}
Finally we remove all the boilerplate code of the src/app/app.component.html and change it to just one line so the Angular router simply displays the right information/component in our app:
<router-outlet></router-outlet>
If you haven't done until now you should bring up the live preview of your app by running:
ng serve -o
At this point you should see your landing component on the screen with a small message, which means we are ready to continue.
Creating the Angular Landing Page
Now it's time to implement the most basic version of our landing page to capture an email. We will tweak the UI later with Tailwind, right now we just want the fields and the logic to work.
Get started by defining a form inside the src/app/landing/landing.component.ts where we make our one email field required and add an empty submit function for the moment:
import { HttpClient } from '@angular/common/http';
import { Component } from '@angular/core';
import { FormBuilder, FormGroup, Validators } from '@angular/forms';

@Component({
    selector: 'app-landing',
    templateUrl: './landing.component.html',
    styleUrls: ['./landing.component.scss']
})
export class LandingComponent {
    form: FormGroup;

    constructor(private http: HttpClient, private fb: FormBuilder) {
        this.form = this.fb.group({
            email: ['', [Validators.required, Validators.email]]
        });
    }

    submit() {
        console.log('SUBMIT THIS: ', this.form.value);
    }
}
To use the FormGroup we connect it to a form tag and define the ngSubmit function. The one input is connected to the email field through its formControlName, and if a button inside the form has the submit type our submit action will be called!
Go ahead and change our src/app/landing/landing.component.html to this now:
<form [formGroup]="form" (ngSubmit)="submit()">
    <input formControlName="email" type="email" placeholder="saimon@devdactic.com" />
    <button type="submit">Submit</button>
</form>
It's not really a great landing page yet, but we should be able to insert our data and see a log when we submit the form.

Before we make it look nicer, we focus on the technical side which is the actual cloud function.
Adding a Netlify Cloud Function to the Angular Project
A cloud function is a simple piece of code that is executed in the cloud without you having to run and maintain your own server.
In our case, we want to use Netlify for this but there are several other hosting options available which offer the same functionality by now.
We begin by creating a new file (and the according folders in our project) at netlify/functions/signup.ts, and we insert the following:
import { Handler, HandlerEvent } from '@netlify/functions';
import Airtable from 'airtable';

// Initialize Airtable connection
const { AIRTABLE_KEY } = process.env;

// USE YOUR TABLE BASE HERE
const base = new Airtable({ apiKey: AIRTABLE_KEY }).base('appXYZ');

const handler: Handler = async (event: HandlerEvent, context: any) => {
    try {
        // Parse the body of the request
        const data = JSON.parse(event.body || '');

        // Make sure we got all data
        if (!data.email) {
            return {
                statusCode: 400,
                body: 'Please include email.'
            };
        }

        // USE YOUR TABLE NAME
        // Insert our data into the table columns
        await base('tbXYZ').create({
            Email: data.email
        });

        return {
            statusCode: 200,
            body: JSON.stringify({
                message: 'Thanks for signing up!'
            })
        };
    } catch (e: any) {
        return {
            statusCode: 500,
            body: e.message
        };
    }
};

export { handler };
Quite a lot going on:
- We initialize a connection to Airtable using an
AIRTABLE_KEYand the base name (which you can find in the URL from the beginning) - We define a
handlerfor our function which tries to load the email from the body - We call the
create()function to insert a row into our table (using the table name from the URL at the beginning) - We return the right status codes and messages along the way
It's a straight forward function, and you could make any kind of external API call in here if you are using a different API like ConvertKit.
By loading the AIRTABLE_KEY from our process environment we make sure it's save and not exposed anywhere, but right now we don't even have that environment. But hold on, we will get to that part soon.
For now we will create another file at the roo of our project called netlify.toml which holds some information for Netlify about how to build and deploy our project:
[build]
  publish = "dist/prelaunch-page"
  command = "ng build"
  functions = "./netlify/functions"
[[redirects]]
  from = "/*"
  to = "/index.html"
  status = 200
By defining this we also know upfront that our cloud function will be available at .netlify/functions/signup on our domain.
Since we want to make this work both locally and when deployed, we can now open up our src/app/landing/landing.component.ts again and implement the submit function to send the data to this endpoint and use the current window location before that:
  submit() {
    const baseUrl = window.location.origin;
    this.http
      .post(`${baseUrl}/.netlify/functions/signup`, this.form.value)
      .subscribe({
        next: (res: any) => {
          alert(res.message);
        },
        error: (err) => {
          alert('ERROR: ' + err.error);
        },
      });
  }
As you can see, making a call to a cloud function is a simple Http call, nothin more, nothing less!
Now we can also use the Netlify CLI to run all of this locally, so simply type:
netlify dev
This would host your Angular app and also deploy your cloud function locally, but it will most likely fail because we have no Airtable key defined yet.
To fix this right now you can simply insert your Airtable key hardcoded into our cloud function.
BTW, you can find that secret key inside your Airtable account page!
Once you used a real value and the Airtable connection works, you should already have a working prototype from which you can submit your email to Airtable!
Host our Angular App with Netlify
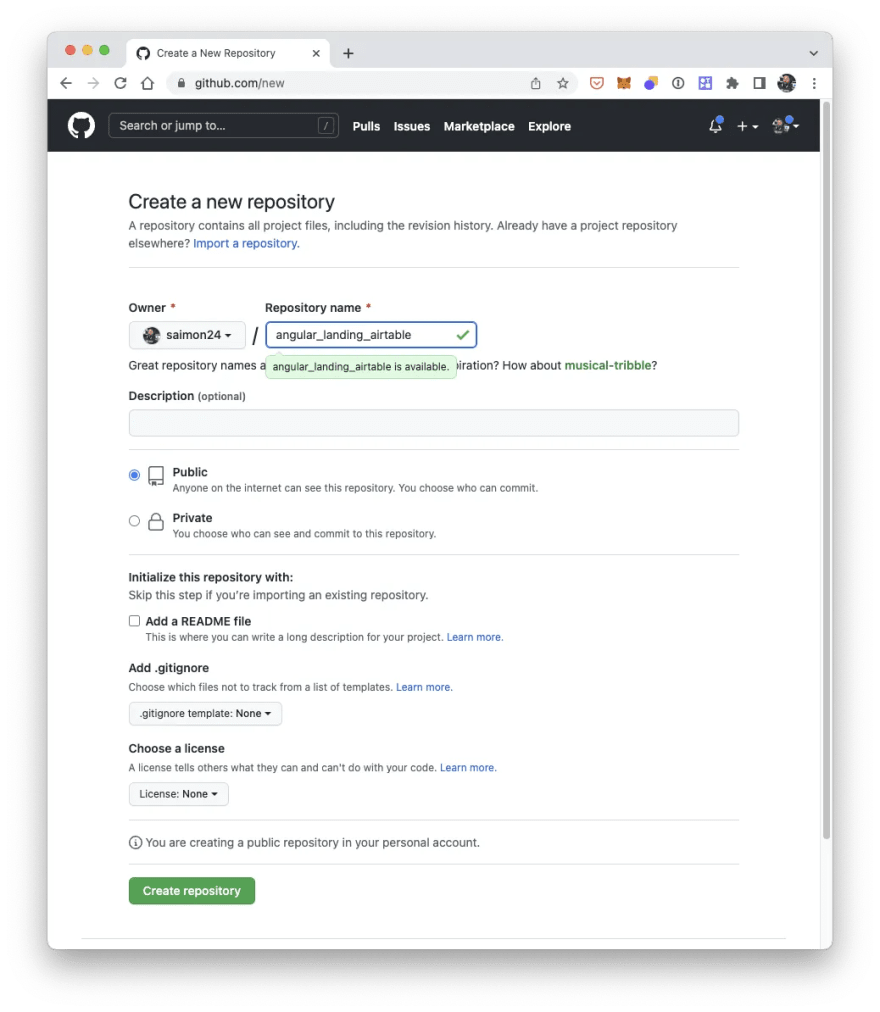
But of course we don't want it hardcoded, and we also want to host our app on Netlify. For all of this we need a new Github (or similar Git service) repository, so create a new one now.
Back in your Angular project you can add all files, commit them and add the Github repository as your remote and finally push the code:
ngit add .
git commit -am "First commit"

# If you are not using main as default
git branch -M main

git remote add origin https://github.com/...
git push -u origin main
Now your app is available on Github and we can create a connection to Netlify. We can do this through the admin UI or simply from the CLI by running:
netlify init
Go through the steps of "Create & configure a new site" and you can keep everything as it is. I'm positive that this already takes the information from the toml file we created before!
When this is done we can finally add our secret Airtable key to our Netlify environment by running:
netlify env:set AIRTABLE_KEY YOUR_AIRTABLE_KEY
Of course replace the last part with your real value - and you could also do this through the Netlify web UI if you wanted to.
At this point you can remove the hard coded value from the cloud function as even our dev environment will have access to the key!
Note: If your deployed version on Netlify isn't working yet, it might not have picked up the new environment variable. Simple rebuild the project and the whole process including the cloud function should work!
You can find the URL to your Netlify project in your account or also on the CLI after you ran the init command.
Adding Tailwind
At this point you have a very ugly but working Angular landing page - that's already a great success!
But if you want to make this a serious landing page you could now go ahead and add a UI framework like Tailwind to your Angular app, which I'll show you real quickly.
Begin with these commands to install all necessary packages, and a new file for the Tailwind configuration will be created:
npm install -D tailwindcss postcss autoprefixer
npx tailwindcss init
Now we need to include all of our templates in the configuration so open the new tailwind.config.js and change it to:
module.exports = {
  content: ["./src/**/*.{html,ts}"],
  theme: {
    extend: {},
  },
  plugins: [],
};
Finally we also need to import the Tailwind styling, which we can do right in our src/styles.scss like this:
@tailwind base;
@tailwind components;
@tailwind utilities;
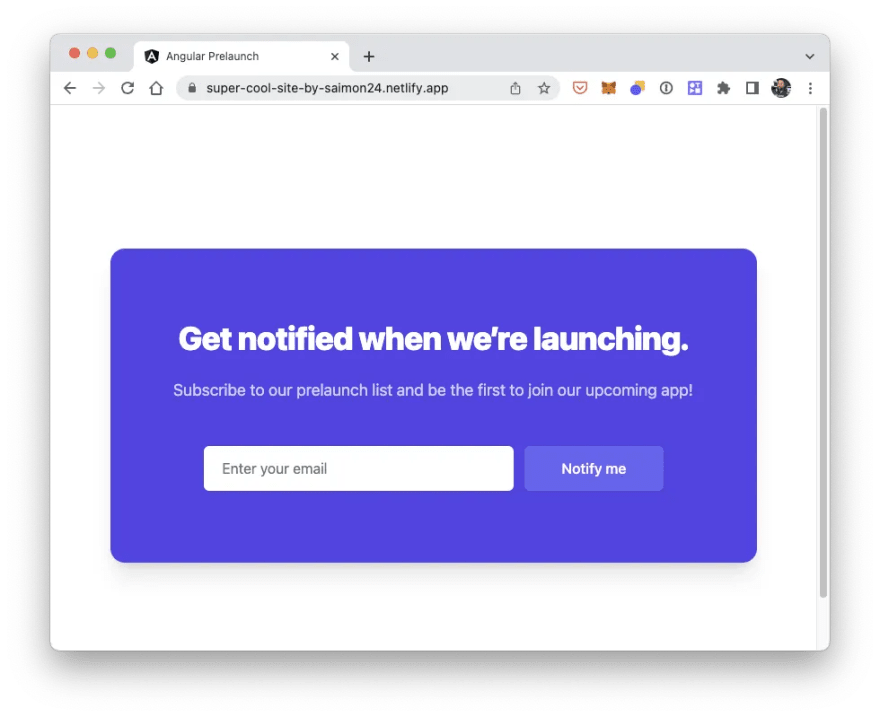
You can now try any Tailwind selector in your app and it should work fine. For the landing page you could now use the following block inside our src/app/landing/landing.component.html:
<div class="bg-white py-16 sm:py-24">
<div class="relative sm:py-16">
<div class="mx-auto max-w-md px-4 sm:max-w-3xl sm:px-6 lg:max-w-7xl lg:px-8">
<div
class="relative rounded-2xl px-6 py-10 bg-indigo-600 overflow-hidden shadow-xl sm:px-12 sm:py-20"
>
<div class="relative">
<div class="sm:text-center">
<h2 class="text-3xl font-extrabold text-white tracking-tight sm:text-4xl">
Get notified when we’re launching.
</h2>
<p class="mt-6 mx-auto max-w-2xl text-lg text-indigo-200">
Subscribe to our prelaunch list and be the first to join our upcoming app!
</p>
</div>
<form
[formGroup]="form"
(ngSubmit)="submit()"
class="mt-12 sm:mx-auto sm:max-w-lg sm:flex"
>
<div class="min-w-0 flex-1">
<label for="cta-email" class="sr-only">Email address</label>
<input
type="email"
formControlName="email"
class="block w-full border border-transparent rounded-md px-5 py-3 text-base text-gray-900 placeholder-gray-500 shadow-sm focus:outline-none focus:border-transparent focus:ring-2 focus:ring-white focus:ring-offset-2 focus:ring-offset-indigo-600"
placeholder="Enter your email"
/>
</div>
<div class="mt-4 sm:mt-0 sm:ml-3">
<button
type="submit"
class="block w-full rounded-md border border-transparent px-5 py-3 bg-indigo-500 text-base font-medium text-white shadow hover:bg-indigo-400 focus:outline-none focus:ring-2 focus:ring-white focus:ring-offset-2 focus:ring-offset-indigo-600 sm:px-10"
>
Notify me
</button>
</div>
</form>
</div>
</div>
</div>
</div>
</div>
Adding Tailwind snippets is horrible, but hopefully your app now looks a lot nicer.
You can now commit and push your changes and the project will build again on Netlify, but before you actually launch your page I recommend one more thing.
Adding Meta Tags
If some shares your Angular SPA the OG tags for social sharing don't exist. If you have multiple pages you would need a specific package to dynamically set these tags, but if you plan just a simple landing page go with the fastest method, which is simply adding the required tags and information to your src/index.html like this:
<!DOCTYPE html>
<html lang="en">
    <head>
        <meta charset="utf-8" />
        <title>Angular Prelaunch</title>
        <base href="/" />
        <meta name="viewport" content="width=device-width, initial-scale=1" />
        <link rel="icon" type="image/x-icon" href="favicon.ico" />

        <meta name="Description" content="An epic app coming soon." />

        <meta property="og:site_name" content="Angular Prelaunch" />
        <meta property="og:url" content="https://super-cool-site-by-saimon24.netlify.app/" />
        <meta property="og:description" content="An epic app coming soon." />
        <meta
            property="og:image"
            content="https://super-cool-site-by-saimon24.netlify.app/assets/meta.webp"
        />
        <meta
            property="og:image:secure_url"
            content="https://super-cool-site-by-saimon24.netlify.app/assets/meta.webp"
        />
        <meta name="twitter:text:title" content="Angular Prelaunch" />
        <meta
            name="twitter:image"
            content="https://super-cool-site-by-saimon24.netlify.app/assets/meta.webp"
        />
    </head>
    <body>
        <app-root></app-root>
    </body>
</html>
You can now paste your URL into a tool like MetaTags and see the improved preview of your page (of course only after committing and building your project)!
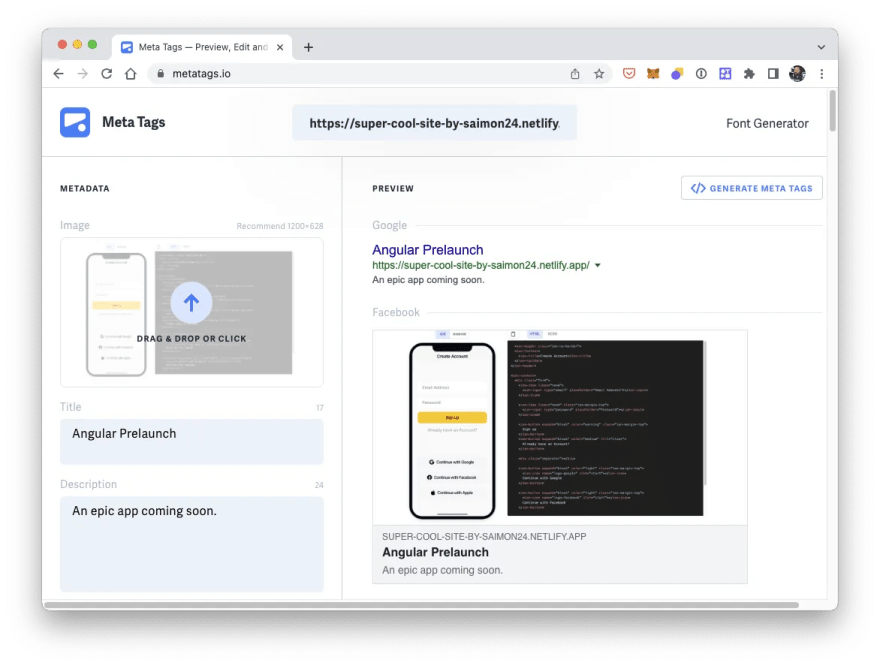
Just be aware that these tags would be used for all different pages of your app, so once you add more pages, you would need a dedicated package for this.
Teardown
It's always challenging to connect a private API to your Angular application as all your source code is basically public.
To overcome this challenge you can use a cloud function which holds the secret key to an API you want to use within the process environment and therefore sheltered from the outside world.
To make this even more secure you could also make the cloud function only callable from your domain, but by preventing access to your key you've already taken the most important step to building a landing page with Angular.
If you want to see the full process in action, you can find a video version of this tutorial below.
Want more tutorials?
Follow me on Dev.to and join my weekly newsletter ✌️


Oldest comments (0)