Hey readers 👋🏻, in this blog we are going to discuss about making our own API in just 30 lines of code.
Topics Covered :
What is an API.
Tech used to make one.
How to code it.
How to deploy it (FOR FREE).
Those who all know what APIs are and don't want to know anything else then 'How to code it', you can skip to that part directly.
What is an API :
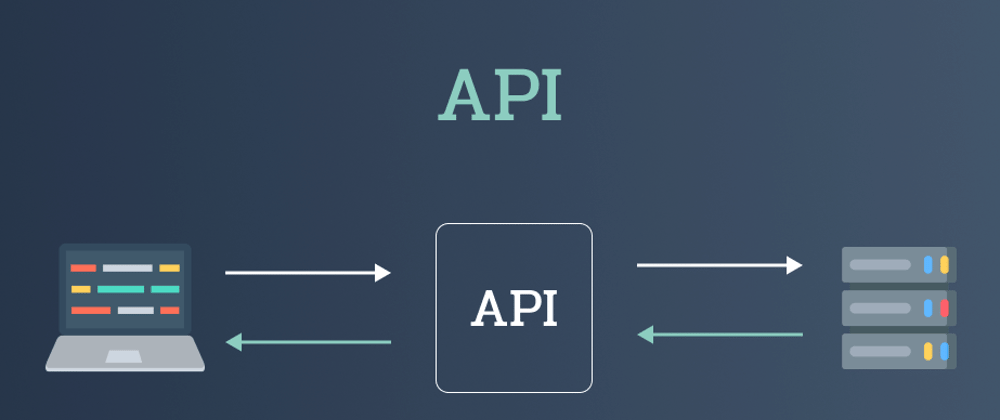
API stands for Application Programming Interface, which is a way for computer to talk to each other. APIs are just like website, except the UI part, it sends a request to a server and in return the server send a response .
Most APIs which we use are RESTFUL APIs, which means they follow a set of protocols/rules .
You all already know what URLs are, but APIs use URIs which stands for Uniform Resource Identifiers and they help to differentiate between data on a server.

There can me many more end points, like here in the above image the end point is /names.
There are many requests we can make to the server but most common ones are :
- GET: Reading the data.
- POST: Creating new data.
- PATCH: Updating new data.
- DELETE: Delete new data.
We have talked a lot about requesting, let's talk about responses.
There is a thing called status code, which tells you about the response you got from the server. The responses can be divided into 3 levels.
- 2** Level (200-300) : Everything was fine, the response is fetched.
- 4** Level (400-500): There was something with our request, and the data is not fetched.
- 5** Level (500+): Server has failed to send the data.
Tech used to make an API:
I have used :
- JavaScript
- Node.JS
- Express JS
- Replit (for deployment)
How to code an API:
This is going to be the most important part of the blog.
In this blog, I am going to make an API which returns the details of devices available at an electronic shop.
const products = [
    {
      name: 'iPhone 13',
      color: 'White',
      company: 'Apple'
    },
    {
      name: 'OnePlus 9',
      color: 'Blue',
      company: 'Oneplus'
    },
    {
      name: 'iPhone 12',
      color: 'Purple',
      company: 'Apple'
    }
]
Above is an object which we want the API to return.
By this point I am assuming that you all have initialized npm and installed express
npm init -y (Initializes NPM)
npm i express (Install Express)
Steps :
- Step 1: We have to import express in our project.
const express = require('express');
- Step 2 : Initialize a variable to call the main
express()method.-
const app = express();
-
- Step 3: Setup a port.
const PORT = 8080;
- Step 4: Use a middleware to parse the data into json.
app.use(express.json());
- Step 5: Add the Product Object to the file.
Till now the code looks like :
const express = require('express');
const app = express();
const PORT = 8080;
app.use(express.json());

const products = [
    {
      name: 'iPhone 13',
      color: 'White',
      company: 'Apple'
    },
    {
      name: 'OnePlus 9',
      color: 'Blue',
      company: 'Oneplus'
    },
    {
      name: 'iPhone 12',
      color: 'Purple',
      company: 'Apple'
    }
]
- Step 6: Make the server listen to our port / Start the server.
app.listen(PORT, () => console.log('server is 🟢'))-
.listen()is a function, which starts the server and listens at the port assigned.
The code is 👇🏻
const express = require('express');
const app = express();
const PORT = 8080;
app.use(express.json());

const products = [
    {
      name: 'iPhone 13',
      color: 'White',
      company: 'Apple'
    },
    {
      name: 'OnePlus 9',
      color: 'Blue',
      company: 'Oneplus'
    },
    {
      name: 'iPhone 12',
      color: 'Purple',
      company: 'Apple'
    }
]

app.listen(PORT, () => console.log(`API 🟢`))
-
Step 7: Make a function which handles
GETRequests.- For this we have an in-built function called as
.get(resource-link, callBack-Function)
- For this we have an in-built function called as
    app.get('/products', (req, res) =>{
      res.status(200).send(products)
    })
-
Here we are setting the resource-link as
/productswhich means the user can get the data when he heads towww.xyz.com/products.- In the callback function, we have 2 parameters one is for request and another is for response.
- Now as a server, when a user sends get request we have to respond to that and send data.
- In agreement to the above point, we are sending the data using
res(response parameter). - To send the data we use
.send()method, and additionally we are also sending thestatus codeusing.status().
That's It!! Your API is ready 🎉 and right now you can start your localhost server and head on to http://localhost:3000/products and you will be able to see the data.
How to deploy your API for FREE :
If we do not deploy our API, then what is the use of it?
Deployment in simple terms is making your API go live for 24 x 7, you can use it whenever you like.
By this point I am assuming that you all have a Replit Account
The steps are really simple :
- Step 1: Make a new project in replit account under the section of Node.JS
- Copy Paste the code you just wrote in your text editor / IDE.
- On the right hand side, you'll see a package section.
- Go inside it and download express.
- Run the code.
- You'll see a URI on the right hand side of the screen like this 👇🏻
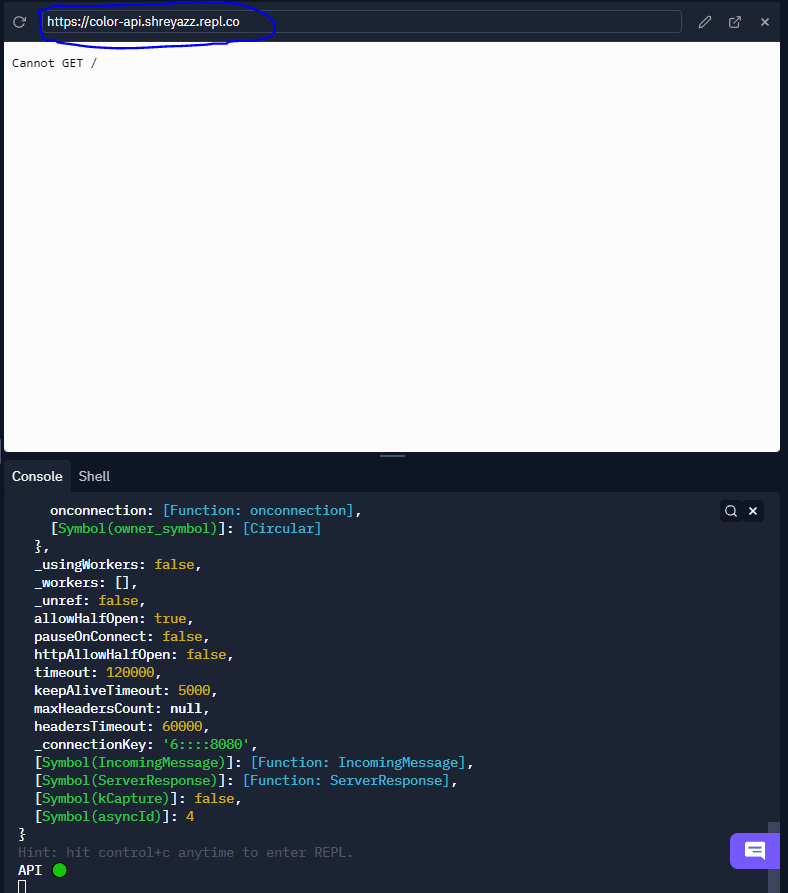
Now head on to the link and write /products or the any endpoint which you created and you'll be able to see the data in json format.
Thank you so much for reading the whole blog 👏🏻, I really appreciate it.
Till then...good bye !


Oldest comments (32)
Good Work Shreyas and I find this very informative
Thanks bro
Simple, good post 👍🏼
Great work Shreyas , and it is so informative.
Thanks bro, more informative blogs coming soon!
Very useful!!
Thanks for sharing :)
Friend... there is a little typo , 27 x 7, I think it should be 24 x 7
Thanks a lot, I edited it.
Thanks, very nice post.
Thanks bro
Thanks for sharing
Short and precise!
If you'd like to spin up these APIs and test them — try an online API development / testing platform - we're building Hoppscotch.io.
GitHub:
👽 Open source API development ecosystem https://hoppscotch.io
Hey I have used this!! Have you guys tied up with Aviyel?
Yes we did. They're doing an amazing job on growing OSS ❤️💯.
Very clean and simple. Thank you.
Loved this one! Hoping to use my own API soon.
That's awesome!
Hi Shreyas, I enjoyed the article. It was simple and to the point.
For the get request I think it would be better to use .json so that the response renders as JSON, like this:
res.status(200).json(products)
Thanks for sharing… I didn’t know this!!
you're welcome! Will you update the article?
It's shown here in the docs: expressjs.com/en/api.html#res.json
Yup I'll surely add this in it
Cool :)
Thanks a lot very helpful article
Sweet and simple Express. Awesome!
Thanks 😁💯
great job👏🤟
Thanks