For a long while, website developers have used various authentication systems such as email-password, magic links, and OTPs to identify users visiting a website; however, with the threat posed by cybercrimes, these systems are no longer 100% safe.
In addition to being vulnerable, the authentication systems are also tedious. They can cause users to abandon your website in favor of a better alternative.
To avoid such consequences, developers have now advanced to more modern authentication systems that require a user's facial data. A perfect example of such an advanced face authentication system is FaceIO.
In this post, we will introduce you to FaceIO, tell you how to get started, and finally, the benefits you'd gain if you chose to use it. Read to the end.
What is FACEIO?
FaceIO is a face authentication system that can easily integrate into any web-based app with simple JavaScript. Unlike the tedious email-password-based authentication system that requires a user to fill in their data line by line, FACEIO uses your phone camera or laptop/computer webcam to capture the unique details of your face and use it for authentication purposes. It's a speedy process that only needs you to click a button, and within a fraction of a second, the authentication process is done.
Why FACEIO is the Best Authentication System to Install in Your Website/Web App
Now that we've stated that FACEIO is the best authentication system for use in the current technology-oriented world let's find out its advantages over other methods. That way, you can figure out what you are missing if you have not yet embraced the technology.
1. FACEIO is simple and faster
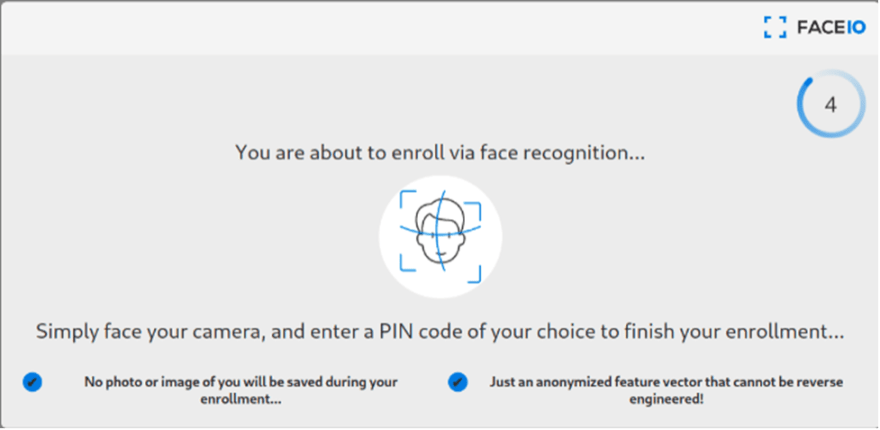
Compared to other authentication methods, facial authentication proves to be very fast. That holds because you don't have to type in your details or resolve captures to start the authentication process. Instead, you only need to click a button, and your browser will request access to the device camera. Grant the permission and then position the face on the webcam. Then choose a pin to confirm your enrollment, and it's done!
2. It doesn’t need special hardware.
The next best thing with FACEIO is that it doesn’t require you to possess any special software for the process. All you need is a camera or webcam, readily available on all smartphones, laptops, and some desktops.
3. It discourages personification on web apps.
The past method of using the email-password combination for authentication is problematic because someone can create pseudo accounts using someone else’s data. If such an account is involved in online fraud, the risk would be on the individual whose data is used – they may face legal charges for things they have not committed! Luckily, FACEIO can solve this problem because it is not possible for someone else to use your face for authentication.
4. No risk of bots or automated scripts
Whereas automated scripts and bots help individuals get rid of recurring tasks, some people have begun using them to spam others. Since it's impossible to evade encountering bots in your digital life, there's a need to find a way to stop them from spamming. The traditional method (which is still in use) is to use Captcha but unfortunately, resolving them can waste a lot of time. Websites now use facial recognition to avoid these inconveniences because robots don't have a face to validate.
5. Privacy issues
Privacy is very crucial to any person. We all want to know how our data is used once we provide it to websites and web-based apps. Whereas it is a requirement for a website to safeguard our data, some sites mishandle the data allowing it to fall into unauthorized hands. Most websites now use end-to-end encrypted facial recognition to bring this problem to an end. It only stores the unique details of your face instead of other sensitive information.
Better still, FACEIO is compliant with GDPR and CCPA, so you don't have to worry about your data falling to scammers.
Incorporating FACEIO into Your Website/Web App
If the above benefits of FACEIO arouse your interest, give it a try; here is a step-by-step guide on incorporating the system into your website.
1. Create a new app on FACEIO Console
The first step toward implementing FACEIO to your web app is creating a new app on the FACEIO Console. Doing this is easy as you are fully guided on how to go about the entire process. Just for a quick brief, the following is what you should do.

This will open a window requiring you to log in or create a new account.
Since you are not registered, choose the sign-up option.
This will request you to type your name/company name and then create a strong password.
Next, agree to the FACEIO terms and conditions and choose whether you want to receive regular updates from the platform.
Now click on submit the request, which should take you to the FACEIO dashboard.
From the FACEIO dashboard, you can see an icon labeled NEW FACEIO APPLICATION.

- Click on it and the application wizard will help you navigate through. The first thing you will need to enter is your chosen username. To ease things, FaceIO suggests that you pick a name associated with your website domain name.

Continue to the next page where you will now choose your preferred face identification engine.
There are two options – PixLab (the default) and AWS Rekognition. Each feature is highlighted so you can make a quick comparison and pick what's appropriate for you.

- Confirm your security settings.

- customizing the widget.
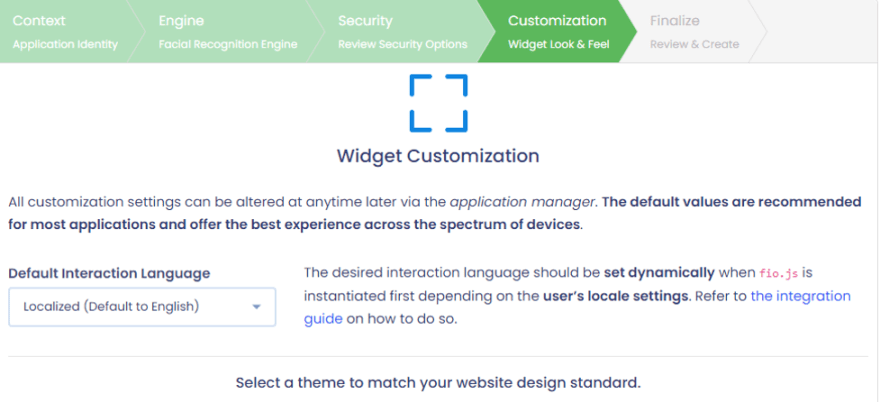
- Finalize by choosing your favorite subscription plan as shown below.

2. Add FIO.JS to your web app.
Once you've successfully created your application by following the above steps, you next must integrate FACEIO’s fio.js (facial recognition JavaScript library) on your web app or website. It is necessary before you start the process of facial authentication for your users. To achieve that, do the following;
- Go to the HTML page from which you wish to instantiate fio.js and paste the following snippet before its closing </body>tag.
<div id="faceio-modal"></div>
<script src="https://cdn.faceio.net/fio.js"></script>
The snippet will load the fio.js asynchronously; therefore, it will not impact the loading speed of the web pages.
The snippet implementation on lambda HTML pages looks as shown below.
To avoid confusion, always draw references from the HTML Integration Boilerplate. You will get the whole lambda HTML template which you can copy, modify and test on your server.
Note: It is recommendable that you always load fio.js right from cdn.faceio.net – don’t try to self-host it, as doing so can block you from receiving new features and bug fixes!
- Insert the following snippet just below your import code in the step above
 <html>
  <head>
    <title>Sign-In via Face Recognition</title>
  </head>
  <body>
    <div id="faceio-modal"></div>
    <script src="https://cdn.faceio.net/fio.js"></script>
  </body>
</html>
Once again, don't forget to reference the HTML Integration Boilerplate whenever you doubt.
To get the public ID needed in this step, go back to the FACEIO console and check the app manager.
- Invoke the widget
At this step, confirm whether your fio.js is up and functional! If approved, it is now the time to begin rolling the facial recognition procedure. To do this, call authenticate () or enroll (). These are the two faceIO() class methods you already instantiated and imported earlier.
Authenticate () – This allows you to authenticate the users already enrolled in the website or web app (Identification/Sign-in).
Enroll () – This lets you enroll (onboard) new members into the website or web app.
A regular HTML page executing fio.js initially (before invoking authenticate () or enroll ()) looks as shown below.
<html>
  <head>
    <title>Sign-In or Enroll via Face Recognition</title>
  </head>
  <body>
<button onclick="enrollNewUser()">Enroll New User</button>
    <button onclick="authenticateUser()">Authenticate User</button>
    <div id="faceio-modal"></div>
    <script src="https://cdn.faceio.net/fio.js"></script>
    <script type="text/javascript">
        // Instantiate fio.js with your application's Public ID
        const faceio = new faceIO("app-public-id");
        function enrollNewUser(){
           // call to faceio.enroll() here will automatically trigger the onboarding  process
        }
        function authenticateUser(){
           // call to faceio.authenticate() here will automatically trigger the facial authentication process
        }
        function handleError(errCode){
            // Handle error here
        }
    </script>
  </body>
</html>
How to Enroll and Authenticate Your First User
Onboarding a user involves capturing and indexing their unique facial details but only after their consent. The process is accomplished via a quick enroll () call, as shown below.
// Instantiate a new faceIO object with your application's Public ID
const faceio = new faceIO("app-public-id");
function enrollNewUser(){

// Start the facial enrollment process
  faceio.enroll({
    "locale": "auto", // Default user locale
    "payload": {
/* The payload we want to associate with this particular user is forwarded back to us upon future authentication of this user.*/
        "whoami": 123456, // Dummy ID linked to this particular user
        "email": "john.doe@example.com"
        }
    }).then(userInfo => {
        // User Successfully Enrolled!
        alert(
            `User Successfully Enrolled! Details:
           Unique Facial ID: ${userInfo.facialId}
           Enrollment Date: ${userInfo.timestamp}
           Gender: ${userInfo.details.gender}
           Age Approximation: ${userInfo.details.age}`
        );
       console.log(userInfo);
       // handle success, save the facial ID (userInfo.facialId), redirect to the dashboard...
    }).catch(errCode => {
       // Something went wrong during enrollment, log the failure
       handleError(errCode);
    })
From our illustration, the enrolling () call is done as shown in step four. The step triggers the enrolling process by requesting user consent and camera/webcam access. Once the access is granted, the most crucial step begins – extracting the user's facial features.
On line six, the payload data is associated with the user. The data bear the user’s email address and ID. You will receive these details on your end when a user is authenticated. They will help you to identify who the user is.
On line 13, the user is enrolled successfully. A unique facial ID is available to the user and will be used for future authentication. The ID is held in userinfo alongside other data such as age, gender, age approximation, and enrollment timestamp.
If any problem is encountered, you will be notified in line 24. Examine the error and see how you can resolve it.
The Authentication Process
As shown below, recognizing an already onboarded user is accomplished via a quick authenticate () call.
const faceio = new faceIO("app-public-id"); // Initialize with your application's Public ID
function authenticateUser(){
 // Facial Authentication - Identify a previously enrolled user
    faceio.authenticate({
        "locale": "auto" // Default user locale
    }).then(userData => {
        console.log("Success, user identified")
        // Grab the facial ID linked to this particular user, which will be the same
        // for each of his successful future authentication. FACEIO recommend
        // that you rely on this Facial ID if you plan to identify uniquely
        // all enrolled users on your backend, for example.
        console.log("Linked facial Id: " + userData.facialId)
        // Grab the arbitrary data you have already linked (if any) to this particular user
        // during his enrollment via the enroll() method payload parameter.
As shown above, the call to authenticate () is done in step three. The process will request your camera access in case the permission isn't granted.
Once you grant the access, it captures the unique details of the user’s face. A unique facial ID is assigned to the user and held to the userinfo data alongside the payload data.
In case of any problem, you get a notification in line 16 –check what it is, resolve and repeat the process.
Wrapping Up
If you can follow all the above steps as illustrated, then you are ready to use FACEIO authentication system on your site or web app without any problem! You shouldn’t wait any longer if you value the safety of your web app/site and the wellbeing of the users – integrate the FACEIO fio.js and begin enrolling and authenticating the modern.


Top comments (0)