
Ever wondered how to create a Turing machine using a JavaScript game library? If so, keep reading to learn how to build a Turing machine using the popular JavaScript/HTML rendering library: PixiJS!
What is a Turing Machine?
First of all, let's briefly go over what a Turing Machine is: A Turing machine is a theoretical machine originally conceived by the mathematician Alan Turing. The Turing machine can supposedly simulate any computer algorithm regardless of the level of complexity.
Although the original idea for the machine was purely abstract and hypothetical here is an image of a physical representation of this machine:

Figure 2: A physical representation of a Turing machine
Keep in mind that it is not exactly in accordance with the theoretical concept as it is not possible to have a tape of infinite length.
On a more practical level, a Turing machine can read from and write to an infinite tape(although no infinite tapes exist in real life). It manipulates symbols on this theoretically infinite tape based on a predefined set of rules also known as instructions.
The machine has a head which is positioned over a single square on the aforementioned infinite tape and performs one of the following three instructions:
- Read the value of the square that the head is currently pointing towards
- Write a value based on the predefined instruction set to the square that the head is currently pointing towards
- Move the tape either to the left or right by one square in order to do one of this three actions on a neighboring square
Development:
In this tutorial we will be building a Turing Machine application that replicates a palindrome program.
{/* */}
For this tutorial it would be easy if you could follow along with the sample application in this GitHub link: Palindrome Turing Machine Starter Code
First visit this GitHub link and clone the repo. Then open the folder in a coding editor(I'll be using VSCode for this tutorial):

Figure 3: Image of the cloned repo in VSCode
For the sake of brevity we'll only cover the most important functions in the main.js file of this program.
Developing the GUI:
So let's start out by covering some rendering functions:
function RenderTapePointer() {
    // center the sprite's anchor point
    tape_pointer.anchor.set(0.5);
    // move the sprite to the center of the screen
    tape_pointer.x = app.screen.width / 2 - 45;
    tape_pointer.y = (app.screen.height / 2) + 150;
    tape_pointer.width = 30;
    tape_pointer.height = 30;

    app.stage.addChild(tape_pointer);
}

function RenderTapeWPixi() {
    firstTapeSquare = new PIXI.Text("1", { fontName: "foo" });
    secondTapeSquare = new PIXI.Text("0", { fontName: "foo" });
    thirdTapeSquare = new PIXI.Text("0", { fontName: "foo" });
    fourthTapeSquare = new PIXI.Text("1", { fontName: "foo" });
    fifthTapeSquare = new PIXI.Text("0".toString(), { fontName: "foo" });
    sixthTapeSquare = new PIXI.Text("0", { fontName: "foo" });
    seventhTapeSquare = new PIXI.Text("1", { fontName: "foo" });

    tapeSquaresArr = [firstTapeSquare, secondTapeSquare, thirdTapeSquare, fourthTapeSquare, fifthTapeSquare, sixthTapeSquare, seventhTapeSquare];

    const style = new PIXI.TextStyle();

    for (var i = 0; i < 7; i++) {
        // Apply the font to our text
        style.x = app.screen.width / 2;
        style.y = app.screen.height / 2;
        console.log(app.screen.height / 2);
        tapeSquaresArr[i].x = (app.screen.width - 100) / 2 + (i * 25);
        tapeSquaresArr[i].y = 400;

        // Update the font style
        style.fill = 'black';

        // Update text
        tapeSquaresArr[i].updateText();

        app.stage.addChild(tapeSquaresArr[i])
    }
}

function RenderStateText() {
    stateText.x = 50;
    stateText.y = 400;

    stateText.width = 100;
    stateText.height = 50;

    app.stage.addChild(stateText);

    stateValText.x = 170;
    stateValText.y = 400;
    stateValText.width = 50;
    stateValText.height = 50;

    app.stage.addChild(stateValText);
}
Here is a brief explanation for the functions above:
-
RenderTapePointer(): This function's main job is to render the tape pointer that will indicate the current tape square that the program is computing. All image objects in the Pixi.js rendering library are called Sprites. Notice theapp.stage.addChild(tape_pointer)line which is responsible for showing the Sprite on-screen by adding it to the Pixi.js Stage object. Here is a screenshot of the tape pointer:
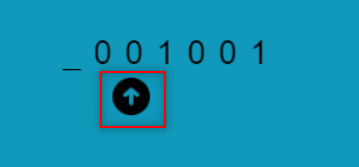
Figure 3: Tape pointer pointing to the current tape square
-
RenderTapeWPixi(): This function renders the actual tape that will be used by the Turing Machine. Since the Turing Machine is setup to run a Palindrome program, having a finite length of tape is feasible. Here is a screenshot of the tape containing some predefined values:

Figure 4: Tape containing seven binary values
-
RenderStateText(): This function renders the text that indicates the current state of the Turing Machine. The current state of the machine is important because it influences the selecting of the new symbol to be placed in the currently selected tape square. For example: If the current state is0and the current symbol is1then the new symbol that will be written into the current tape square is_(This is based on the state rules that we will cover soon). Here is a screenshot of the rendered state text:

Figure 5: Current state text rendered to the stage
Next we'll cover the functions that render the buttons and title for the application:
var startBtn = PIXI.Sprite.from("./assets/start-icon.png")
startBtn.buttonMode = true;
startBtn.anchor.set(0.5);
startBtn.position.x = 200;
startBtn.position.y = 150;
startBtn.width = 50;
startBtn.height = 50;
startBtn.interactive = true;
startBtn.on('mousedown', startPalindromeProgram);
app.stage.addChild(startBtn);

var restartBtn = PIXI.Sprite.from("./assets/restart-icon-v2.png")
restartBtn.buttonMode = true;
restartBtn.anchor.set(0.5);
restartBtn.position.x = 200;
restartBtn.position.y = 150;
restartBtn.width = 50;
restartBtn.height = 50;
restartBtn.interactive = true;
restartBtn.on('mousedown', restartPalindromeProgram);
app.stage.addChild(restartBtn);
restartBtn.visible = false;

var stopBtn = PIXI.Sprite.from("./assets/stop-icon.png")
stopBtn.buttonMode = true;
stopBtn.anchor.set(0.5);
stopBtn.position.x = 400;
stopBtn.position.y = 150;
stopBtn.width = 50;
stopBtn.height = 50;
stopBtn.interactive = true;
stopBtn.on('mousedown', stopProgram);
app.stage.addChild(stopBtn);

var resumeBtn = PIXI.Sprite.from("./assets/resume-icon.png")
resumeBtn.buttonMode = true;
resumeBtn.anchor.set(0.5);
resumeBtn.position.x = 600;
resumeBtn.position.y = 150;
resumeBtn.width = 50;
resumeBtn.height = 50;
resumeBtn.interactive = true;
resumeBtn.on('mousedown', resumeProgram);
app.stage.addChild(resumeBtn);

var moveTapeInterval = null;

function stopProgram() {
    moveTapeInterval.pause();
    toggleGameSpeedSliderVisible(true);
}

function resumeProgram() {
    moveTapeInterval.resume(gameSpeed);
    toggleGameSpeedSliderVisible(false);
}

function restartPalindromeProgram() {
    ResetGame();
    StartTape();
    restartBtn.visible = false;
    restartBtnLabel.visible = false;
}

...

const title = new PIXI.Text('Palindrome Program Turing Machine', {
    fill: '#272d37',
    fontFamily: 'Roboto',
    fontSize: 20,
    align: 'center',
});
title.roundPixels = true;
title.x = stageWidth / 2;
title.y = 40;
title.anchor.set(0.5, 0);
app.stage.addChild(title);
Here is a brief explanation of the code above:
-
startBtn: This button controls the start of the Palindrome program. Notice the eventlistener'mousedown'which makes starting the Palindrome program possible -
restartBtn: This button allows the user to restart the Palindrome program once it has reached the end state. It is not shown in the initial startup of the application -
stopBtn: This button pauses the Palindrome program. It is useful for adjusting the game speed which can only be changed when the game is paused. -
resumeBtn: This button allows the user to resume the game after being paused. Clicking it also makes the game speed slider disappear in order to prevent the user from changing the game speed while the program is running
Here are screenshots showing all four buttons:
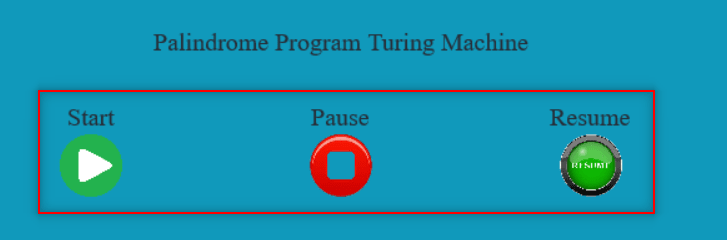

Figure 6: The start, pause, resume and restart buttons on display
Lastly the title variable is an instance of PIXI.Text(), which is used to create a title for the application on the top of the game screen.
Developing the internal logic:
Moving onto the internal logic for the application, let's start out by defining the state rules for the Palindrome program:
var palindromePrgStateRules = [
    // [<current_state>, <current_symbol>, <new_symbol>, <direction>, <new_state>]
    ['0', '0', '_', 'r', '1o'],
    ['0', '1', '_', 'r', '1i'],
    ['0', '_', '_', '*', 'accept'],
    ['0', '1', '_', 'r', '1o'],
    ['1i', '_', '_', 'l', '2i'],
    ['1i', '*', '*', 'r', '1i'],
    ['1o', '*', '*', 'r', '1o'],
    ['1o', '_', '_', 'l', '2o'],
    ['2o', '0', '_', 'l', '3'],
    ['2o', '_', '_', '*', 'accept'],
    ['2o', '*', '*', '*', 'reject'],
    ['2i', '1', '_', 'l', '3'],
    ['2i', '_', '_', '*', 'accept'],
    ['2i', '*', '*', '*', 'reject'],
    ['3', '_', '_', '*', 'accept'],
    ['3', '*', '*', 'l', '4'],
    ['4', '*', '*', 'l', '4'],
    ['4', '_', '_', 'r', '0'],
    ['accept', '*', ':', 'r', 'accept2'],
    ['accept2', '*', ')', '*', 'halt-accept'],
    ['reject', '_', ':', 'r', 'reject2'],
    ['reject', '*', '_', 'l', 'reject'],
    ['reject2', '*', ')', '*', 'halt-reject'],
];
var comparisonValues = {
    "0": ["0", "*"],
    "1": ["1", "*"],
    "*": ["0", "1", "*"],
    " ": ["_"],
    "_": ["_"],
    ")": [")"]
}
The palindromePrgStateRules 2d array is an array containing array elements, each with 5 strings in them to represent the following rules:
- The first element represents the current state value of the program
- The second element represents the current symbol that the tape pointer is pointing to
- The third element represents the new symbol that should take the place of the current symbol(second element)
- The fourth element represents the direction that the tape pointer should take for its next move.
'l'means move to the left,'r'means move to the right. - The fifth and final element represents the new state value that should take the place of the current state value(first element)
Finally, the comparisonValues object serves as a comparison reference for the current symbol that the tape pointer is pointing to and the values that are considered equivalent comparisons to it. For example: if the current symbol is 1 then the compatible equivalents to it are '1' and '*'(based on the line "1": ["1", "*"],). This object is very useful in deciding the appropriate next symbol to assign for a given square that the tape pointer is pointing to.
Next, let's cover the functions responsible for starting the Palindrome program:
function startPalindromeProgram() {
    renderTapePointer();
    renderTapeWPixi();
    renderStateText();
    startTape();
    toggleStartBtnVisible(false);
    toggleGameSpeedSliderVisible(false);
    startBtnLabel.visible = false;
}

...

function startTape() {
    moveTapeInterval = new IntervalTimer(moveTapeLogic, gameSpeed);
    moveTapeInterval.start();
}

function moveTapeLogic() {
    var moveTapeDirection = ProcessInput();
    var counter = 0;
    console.log("moveTapeDirection: " + moveTapeDirection);
    switch (moveTapeDirection) {
        case "r":
            tape_pointer.x += 25;
            currentHeadIndex++;
            break;
        case "l":
            tape_pointer.x -= 25;
            currentHeadIndex--;
            break;
        case "halt-reject":
            clearInterval(moveTapeInterval);
            moveTapeInterval.clear();
            toggleRestartButton(true);
            break;
        default:
            break;
    }
    counter++;
}
Here is a brief explanation for the two functions above:
-
startPalindromeProgram(): This the main starting function for the whole program. It calls the rendering functions to render the necessary elements on screen, hides the start button and game slider, and finally calls thestartTape()function. -
startTape(): This function starts the program by using theIntervalTimeclass to setup an interval. You might be wondering the purpose of using theIntervalTimerclass instead of the more convenientsetTimeout()function. Well here it is:IntervalTimerallows for the ability to pause, resume and clear the currently running interval by calling those respective methods. -
moveTapeLogic(): This function can be considered the controller for this application because it identifies the output received by calling theProcessInput()function. The output signifies the direction that the tape pointer should move next to, and this logic is handled by the switch statement in this function. The way the tape pointer's position is represented programmatically is via thecurrentHeadIndexvariable. When the tape pointer is moved one square to the right this variable is incremented by one, and when the tape pointer is moved to the leftcurrentHeadIndexis decremented by one. The ending state is reached when a output ofhalt-rejectis received fromProcessInput(). ThesetInterval()function underlyingmoveTapeIntervalis cleared, which brings the program to an end.
Next we'll cover the main processing function for this application:
function ProcessInput() {
    var i = 0;
    var foundMatch = false;
    for (i = 0; i < palindromePrgStateRules.length; i++) {

        var textComparison = null;
        var currentTapeVal = null;
        if (currentHeadIndex >= tapeSquaresArr.length) {
            textComparison = compareTapeValues(" ", palindromePrgStateRules[i][1]);
            currentTapeVal = " ";
        } else {
            textComparison = compareTapeValues(tapeSquaresArr[currentHeadIndex].text, palindromePrgStateRules[i][1]);
            currentTapeVal = tapeSquaresArr[currentHeadIndex].text;
        }

        if (textComparison && currentState == palindromePrgStateRules[i][0]) {
            var newTapeSymbol = setNewTapeSymbol(currentTapeVal, palindromePrgStateRules[i][2]);

            try {
                tapeSquaresArr[currentHeadIndex].text = newTapeSymbol;
                tapeSquaresArr[currentHeadIndex].updateText();
            } catch (err) {
                console.log("current head index is empty");
            }

            currentState = palindromePrgStateRules[i][4];
            stateValText.text = palindromePrgStateRules[i][4];
            foundMatch = true;
            break;
        }
    }
    if (foundMatch) {
        return palindromePrgStateRules[i][3];
    } else {
        return "halt-reject";
    }
}
The ProcessInput() function performs the following steps in determining the next action to take when presented with the current input symbol. That is, the current tape symbol that the tape pointer is pointing to.
- It loops over the
palindromePrgStateRulesarray in order to find a matching element for the current state of the game. For example: if the current state value is2iand the current tape symbol is1then the element['2i', '1', '_', 'l', '3']matches this criteria. - Following the example in the previous step: the new symbol for the tape square is set to
_, the tape pointer is moved one position to the left, and the state value is change from2ito3. - In the event that a matching element in the
palindromePrgStateRulesarray is not found to match the current state of the program, thehalt-rejectvalue is returned by the function and the program is bought to the end state.
Let's quickly look at the function for comparing the current input symbol to a given input symbol in the palindromePrgStateRules array:
function compareTapeValues(currentHeadVal, stateCurrentSymbolVal) {
    if ((currentState == "accept" || currentState == "accept2") && currentHeadVal == "_") {
        return true;
    }
    if (comparisonValues[currentHeadVal.toString()].includes(stateCurrentSymbolVal.toString())) {
        return true;
    } else {
        return false;
    }
}
The above function uses the comparisonValues object that we defined earlier in determining whether currentHeadVal and stateCurrentSymbolVal match. Keep in mind that the symbol: * that is found in some elements of palindromePrgStateRules means that the currentHeadVal gets a free pass; it will match up to any given currentHeadVal value. Another condition that is considered a match is when the current state value is set to accept and currentHeadVal is _.
Now let's visit the function responsible for restarting the program if the user wants to run it once more:
function resetGame() {
    // Reset tape numbers to defaults
    const tapeNumDefaults = ["1", "0", "0", "1", "0", "0", "1"];

    for (var i = 0; i < tapeSquaresArr.length; i++) {
        // Apply the font to our text
        tapeSquaresArr[i].text = tapeNumDefaults[i];

        // Update text
        tapeSquaresArr[i].updateText();
    }

    // Reset tape pointer to default position
    tape_pointer.x = app.screen.width / 2 - 45;
    tape_pointer.y = (app.screen.height / 2) + 150;

    // Reset current head index and current state variables to 0
    currentHeadIndex = 0;
    currentState = '0';

    toggleStartBtnVisible(false);
    toggleGameSpeedSliderVisible(false);
}
The resetGame() function resets the main state variables in the program(currentHeadIndex, currentState) to their default values along with changing the tape square symbols back to their default values and moving the tape pointer sprite back to its starting position. Finally, the start button and the game slider is hidden. The restart button will be displayed in place of the start button, which gives the user the option to restart the Palindrome program.
That brings the development section of this blog post to a close.
If you made it this far then congratulations! You have a pretty good idea of how this application functions.
Program Demo:
Here is a gif showing a demonstration of this program:
Game demonstration link on Imgur
Conclusion
Thanks for reading this blog post!
If you have any questions or concerns feel free to post a comment in this post and I will get back to you if I find the time.
If you found this article helpful feel free share it and make sure to follow me on Twitter and GitHub, connect with me on LinkedIn and subscribe to my YouTube channel.


Oldest comments (0)