
Photo by Rhii Photography on Unsplash
About a month ago, I decided I wanted to build a game. I wanted to make a game that required the player to code, but also played like an old-school RPG.
Seeing as this is a huge task, I decided to work on the game in pieces. I started working on a battle system, but realized that I needed to start from the beginning before going any further down that rabbit hole.
So, here we are, building an inventory. Before getting into the actual code, let's go over what this app will actually do.
What We're Building
This will be a split-window coding app, much like Flexbox Froggy, except instead of moving frogs, we'll be moving game items into an inventory with persistent state, and the user will be entering JavaScript instead of CSS.
We'll be using Ace Editor via the react-ace package for our code editor component.
We'll also be implementing a custom grid inspector, which will act as a separator between inventory slots.
Alright, enough yappin'; let's code!
Setup
We'll get started with our friend create-react-app
npx create-react-app dev-inventory
cd dev-inventory
Next, we'll install react-ace, then fire up the dev server:
npm install react-ace
npm start
Then we can clean up our App.js by removing just about everything (yes, the logo and CSS imports too):
function App() {
  return <div className="App"></div>;
}

export default App;
Let's make the necessary imports to get our Ace Editor component working:
// allows us to render the <AceEditor> component
import AceEditor from "react-ace";

// enable the user to enter JavaScript in the editor component
import "ace-builds/src-noconflict/mode-javascript";
// choose a theme
import "ace-builds/src-noconflict/theme-dracula";
Then we can head over to the react-ace repo to get the starter code, making a few changes for our use case:
function App() {
  function onChange(newValue) {
    console.log("change", newValue);
  }
  return (
    <div className="App">
      <AceEditor
        mode="javascript"
        theme="dracula"
        onChange={onChange}
        name="UNIQUE_ID_OF_DIV"
        editorProps={{ $blockScrolling: true }}
      />
    </div>
  );
}
Sweet! Now we have a fancy-looking editor component:

If you open your console, you'll notice that we're not actually executing the code; we're just printing the contents of the editor, as we've instructed in our onChange function:
function onChange(newValue) {
    console.log("change", newValue);
  }
We'll get to that in a second. First, let's get the rest of our layout set up.
Layout
There are four distinct sections we want to display to the user:
- Editor
- Console (for hints and errors without opening dev tools)
- Game story content
- Inventory
For simplicity's sake, we're going to create as few components as possible.
The editor and console will be in their own area, occupying the left half of the screen.
The story content and inventory will be in another area, occupying the right half of the screen.
Let's get that started by editing our App.js to have this structure:
return (
    <div className="App">
      <div className="code-area">
        <AceEditor
          mode="javascript"
          theme="dracula"
          onChange={onChange}
          name="UNIQUE_ID_OF_DIV"
          editorProps={{ $blockScrolling: true }}
        />
        <div id="console" className="console"></div>
      </div>
      <div className="content">
        Game content goes here
        <div className="inventory"></div>
      </div>
    </div>
  );
And the corresponding styles in index.css
.App {
  display: flex;
  height: 100vh;
  background-color: #16324f;
  color: #3c6e71;
  font-weight: bold;
}

.code-area {
  width: 50%;
  display: flex;
  flex-direction: column;
  border-right: 3px solid #3c6e71;
}

.console {
  border-top: 3px dashed #3c6e71;
  background-color: #13293d;
  height: 20%;
  padding: 0.5rem;
}
.inventory {
  margin-bottom: 15vh;
  display: grid;
  grid-template-columns: repeat(12, 3.5vw);
  grid-template-rows: repeat(5, 3.5vw);
  grid-gap: 0px;
  text-align: center;
  background-color: #282a37;
}
.content {
  overflow: hidden;
  width: 50%;
  padding: 2rem;
  display: flex;
  flex-direction: column;
  justify-content: space-between;
  align-items: center;
}
You'll notice that the left side of the layout looks a little wonky:

This is because we aren't able to style the <AceEditor> component directly. Instead, we need to style it via props:
<AceEditor
  mode="javascript"
  theme="dracula"
  onChange={onChange}
  width="auto"
  height="100%"
  name="UNIQUE_ID_OF_DIV"
  editorProps={{ $blockScrolling: true }}
/>
Now we should have something that looks like this:

We'll hold off on adding the grid overlay to the inventory, since it will be easier to debug with the dev tools once we start moving items into the inventory.
Speaking of which, let's start adding some items to our content section.
Game Logic
We need to start thinking about how we are going to handle the items going into our inventory. At the very least, we need a way to keep track of the state of the items, as well as a way to identify them.
Eventually, we'll want a way to handle items of varying sizes (a potion takes up less space than a dagger, which takes up less space than a sword, etc). For now, though, we'll just focus on items that take up one inventory slot.
To get this structure going, we'll create a new file, src/items.js
const items= {
  scroll: {
    height: 1,
    width: 1,
    row: 0,
    col: 0,
  },
  potion: {
    height: 1,
    width: 1,
    row: 0,
    col: 0,
  },
  gem: {
    height: 1,
    width: 1,
    row: 0,
    col: 0,
  },
  amulet: {
    height: 1,
    width: 1,
    row: 0,
    col: 0,
  },
  ring: {
    height: 1,
    width: 1,
    row: 0,
    col: 0,
  },
};

export default items;
We could display all five items to the user at once, but eventually, we are going to have enough items to fill the entire inventory, so we'll take a different approach.
Instead, we will create levels. Each level will have one item for the player to move into the inventory. Once the item is moved into the inventory, the player will be able to advance to the next level.
Since each level will contain an item, we can rename our item.js file to be levels.js, and then structure it like so:
const levels = {
  1: {
    item: {
      name: "scroll",
      width: 1,
      height: 1,
      row: 0,
      col: 0,
    },
    done: false,
  },
  2: {
    item: {
      name: "potion",
      width: 1,
      height: 1,
      row: 0,
      col: 0,
    },
    done: false,
  },
  3: {
    item: {
      name: "gem",
      width: 1,
      height: 1,
      row: 0,
      col: 0,
    },
    done: false,
  },
  4: {
    item: {
      name: "amulet",
      width: 1,
      height: 1,
      row: 0,
      col: 0,
    },
    done: false,
  },
  5: {
    item: {
      name: "ring",
      width: 1,
      height: 1,
      row: 0,
      col: 0,
    },
    done: false,
  },
};

export default levels;
Each level has a key (the level number), an item, and a done Boolean. Let's get these items rendered to the screen.
We'll start by importing the useState hook, along with our levels.js module:
import React, { useState } from "react";
import gameLevels from "./levels"
Then we'll hook up the levels to the useState hook. We also add some state to keep track of the current level:
function App() {
  const [levels, setLevels] = useState(gameLevels);
  const [currentLevel, setCurrentLevel] = useState(1);
  // the rest of the App component...
}
Now we can create a Level component to render the current level. We'll make a new file, Level.js
import React from "react";

function Level({ currentLevel, levels }) {
  return <h1>The current level is {currentLevel}</h1>;
}

export default Level;
Now we can import and render it in our App.js file:
// other imports
import Level from "./Level";

function App(){
  // state, onChange...
  return (
    <div className="App">
    {/* AceEditor, console...*/}
    </div>
    <div className="content">
      <Level currentLevel={currentLevel} levels={levels} />
      <div className="inventory"></div>
    </div>
  )
}
Now that we know the component is hooked up properly, we can start rendering the actual contents of the level. Since we're sending all of our levels to our <Level> component, and we only want the current level, we'll need to write some code to pull out the matching level:
function Level({ currentLevel, levels }) {
  let activeLevel;

  for (const [key, value] of Object.entries(levels)) {
    if (key === currentLevel.toString()) {
      activeLevel = JSON.stringify(value);
    }
  }

  const { item } = JSON.parse(activeLevel);
  return (
    <>
      <h1>You found: {item.name}!</h1>
      <p>
        {item.name} position: {item.row}, {item.col}
      </p>
    </>
  );
}
Now we can see some semblance of our first item displayed:
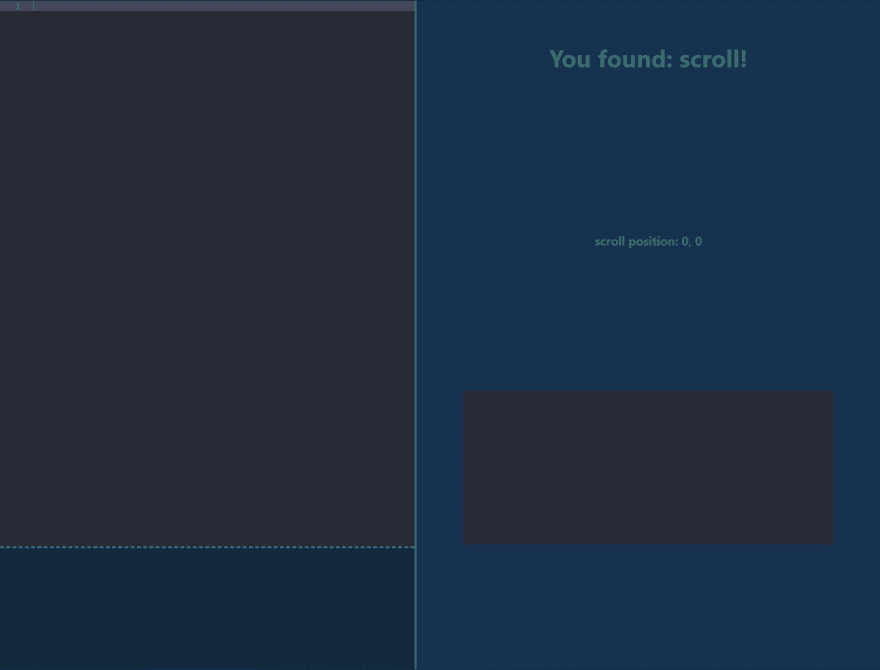
But...where's the scroll? We need to display something in the DOM for the user to actually move into the inventory. Let's grab some images from flaticon:
| Item | Image |
|---|---|
| scroll | image by Freepik |
| potion | image by Freepik |
| gem | image by Freepik |
| amulet | image by Smashicons |
| ring | image by Nikita Golubev |
We'll save these images in the public folder of our project. Then, we can update levels.js to include the image path:
1: {
    item: {
      name: "scroll",
      width: 1,
      height: 1,
      row: 0,
      col: 0,
      image: "scroll.svg",
    },
    done: false,
  },
  2: {
    item: {
      name: "potion",
      width: 1,
      height: 1,
      row: 0,
      col: 0,
      image: "potion.svg",
    },
    done: false,
  },
  // etc...
So let's edit Levels.js so that the image is displayed:
return (
    <>
      <h1>You found: {item.name}!</h1>
      <img src={item.image} alt={item.name} />
      <p>
        {item.name} position: {item.row}, {item.col}
      </p>
    </>
  );
Woah... our image is huge!

We'll need to apply some style to our image so that it's an appropriate size. Remember, we want all of our items to only take up one inventory slot for now. So we'll need to come up with some sort of scale for how large an inventory slot should be.
Let's make this change to index.css
.scroll,
.potion,
.gem,
.amulet,
.ring {
  width: 3.5vw;
  height: 3.5vw;
}
And in Level.js
      <img
        src={item.image}
        alt={item.name}
        className={item.name}
      />
We use 3.5vw because that is what we used in our grid-template. So a 1 by 1 item translates to 3.5vw by 3.5vw, a 1 by 2 item translates to 3.5vw by 7vw, and so on.
Now that we have a basic layout for our levels, we can start to write the logic that allows the player to move the items into their inventory.
Enabling the Editor
So far, we haven't done much with our <AceEditor> component. We supplied a basic onChange function, but as we've seen, it doesn't do much. We'll want to change that.
This is the part where it gets a bit tricky -- not in terms of how to code it, but rather, in terms of following best practices.
Why?
Disclaimer: I am not a a JavaScript expert or a security expert. My reasoning below is speculative. If you have any thoughts on the reasoning, I would love to hear them in a comment!
The primary concern here is that we are going to allow the player to enter JavaScript into our application, which our application will then execute. In other words, the user can type any JavaScript they want into our application.
However, we aren't exposing any sensitive information. We don't have a back end. There are no passwords, no credit card information, etc. So, in theory, a malicious user isn't able to do much harm, other than maybe lock up their own browser by executing an infinite loop.
Therefore, we are going to use the new Function() approach.
Let's set up our <AceEditor> component to execute the player's code by changing our onChange function:
function onChange(newValue) {
    try {
      const userInput = new Function(newValue);
      try {
        userInput();
      } catch (e) {}
    } catch (e) {}
  }
The first try/catch block attempts to create a function from the user input. The inner try/catch block attempts to run that function. These are necessary because our onChange function runs after each keystroke, so this prevents the app from crashing when a player is in the middle of typing.
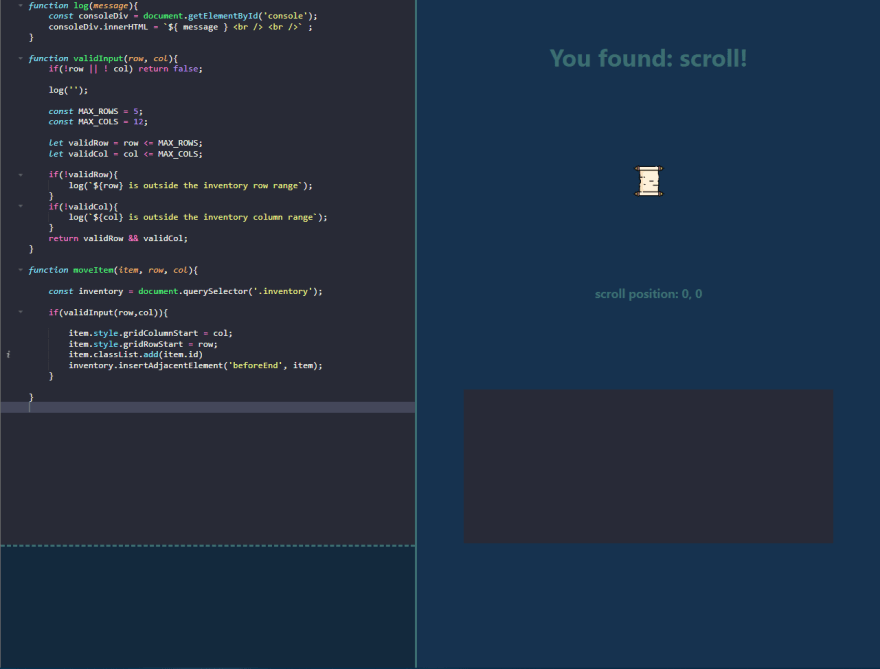
Now, if we put the following code into our editor component, we should see the scroll move:
function moveItem(item, row, col){
  const inventory = document.querySelector('.inventory');
  item.style.gridColumnStart = col;
  item.style.gridRowStart = row;
  inventory.insertAdjacentElement('beforeEnd', item);
}

const scroll = document.getElementsByClassName('scroll')[0]
moveItem(scroll,1,1)
There are a few things to take note of here:
- The scroll position in our Level component doesn't change from
(0,0), since we've only updated the DOM, and not React's state - We have to use the
[0]syntax to get the first (only) element with a class of 'scroll', because we haven't set anid. We don't want to usedocument.querySelectorbecause we will eventually have more than one item with a class of.scroll - There is no validation of the row and column value, so the player could try to move the scroll to an invalid slot
- If we refresh the page, we have to type the function into the editor again
Let's address these one by one.
State
We are going to be adding lots of state to our application very soon, so we'll leave it for now, and tackle it all together shortly.
Adding an ID
We can add an id to each item in our levels.js file:
1: {
    item: {
      id: 'scroll-1',
      name: "scroll",
      width: 1,
      height: 1,
      row: 0,
      col: 0,
      image: "scroll.svg",
    },
    done: false,
  },
  2: {
    item: {
      id: 'potion-1',
      name: "potion",
      width: 1,
      height: 1,
      row: 0,
      col: 0,
      image: "potion.svg",
    },
    done: false,
  },
  // and so on...
Then, we can reference that id in our Level.js file:
<img
  id={item.id}
  src={item.image}
  alt={item.name}
  className={item.name}
/>
Now, we should be able to change the following line in our editor code:
//const scroll = document.getElementsByClassName('scroll')[0]
const scroll = document.getElementById('scroll-1');
And we should still be able to move the scroll.
Validation
To validate the player's input, we will create two functions, one to validate the input, and another to display an error message to the console. These will be put into the editor component:
function log(message){
    const consoleDiv = document.getElementById('console');
    consoleDiv.innerHTML = `${ message } <br /> <br />` ;
}

function validInput(row, col){
    if(!row || ! col) return false;

    log('');

    const MAX_ROWS = 5;
    const MAX_COLS = 12;

    let validRow = row <= MAX_ROWS;
    let validCol = col <= MAX_COLS;

    if(!validRow){
        log(`${row} is outside the inventory row range`);
    }
    if(!validCol){
        log(`${col} is outside the inventory column range`);
    }
    return validRow && validCol;
}
Now we can edit the moveItem function in our editor to look like this:
function moveItem(item, row, col){

    const inventory = document.querySelector('.inventory');

    if(validInput(row,col)){

        item.style.gridColumnStart = col;
        item.style.gridRowStart = row;
        item.classList.add(item.id)
        inventory.insertAdjacentElement('beforeEnd', item);
    }

}
Pre-populate the editor
We don't want to have to keep pasting this code into our editor every time we need to refresh, so let's provide the functions as a string template within our code.
Since these three functions are a bit lengthy, let's create another file called editor.js to store the default editor value:
const editorValue = `function log(message){
    const consoleDiv = document.getElementById('console');
    consoleDiv.innerHTML = \`\${ message } <br /> <br />\` ;
}

function validInput(row, col){
    if(!row || ! col) return false;

    log('');

    const MAX_ROWS = 5;
    const MAX_COLS = 12;

    let validRow = row <= MAX_ROWS;
    let validCol = col <= MAX_COLS;

    if(!validRow){
        log(\`\${row} is outside the inventory row range\`);
    }
    if(!validCol){
        log(\`\${col} is outside the inventory column range\`);
    }
    return validRow && validCol;
}

function moveItem(item, row, col){

    const inventory = document.querySelector('.inventory');

    if(validInput(row,col)){

        item.style.gridColumnStart = col;
        item.style.gridRowStart = row;
        item.classList.add(item.id)
        inventory.insertAdjacentElement('beforeEnd', item);
    }

}
`;

export default editorValue;
Notice that we need to use an escape sequence everywhere we have a ${variable} to keep JavaScript from interpolating the value, and continue to treat the entire contents as a string.
Now we can import that value into App.js
import editorValue from "./editor";
And then provide that value as a prop to <AceEditor>
        <AceEditor
          mode="javascript"
          theme="dracula"
          onChange={onChange}
          width="auto"
          height="100%"
          name="UNIQUE_ID_OF_DIV"
          value={editorValue}
          editorProps={{ $blockScrolling: true }}
        />
Now, if we refresh the page, all of our pre-written functions appear!
Marking a Level Complete
We want the player to be able to advance to the next level once they have successfully moved the item for the current level into the inventory.
To do that, we need to be able to detect when the item has been moved into the inventory. We can do this in our onChange function, but how do we access the image from that function?
We could do a document.getElementById(), using the id that matches the current level, but I think it makes more sense to utilize React's useRef hook here.
First, we'll import it:
import React, { useState, useRef } from "react";
Then define a ref within our App component:
  const [levels, setLevels] = useState(gameLevels);
  const [currentLevel, setCurrentLevel] = useState(1);
  const imageRef = useRef();
Next, we'll pass the ref to our <Level> component, since that is where the image is:
        <Level
          currentLevel={currentLevel}
          levels={levels}
          ref={imageRef}
        />
Since we can't pass a ref directly as a prop, we need to use React.forwardRef for our <Level> component:
const Level = React.forwardRef(({ currentLevel, levels }, ref) => {
  // all of the code up until the return statement is the same
  return (
    <>
      <h1>You found: {item.name}!</h1>
      <img
        ref={ref}
        id={item.id}
        src={item.image}
        alt={item.name}
        className={item.name}
      />
      <p>
        {item.name} position: {item.row}, {item.col}
      </p>
    </>
  );
});
Now, we should be able to reference the ref in our onChange function:
function onChange(newValue) {
    try {
      const userInput = new Function(newValue);
      try {
        const levelItem = imageRef.current;
        console.log(levelItem);
        userInput();
      } catch (e) {}
    } catch (e) {}
  }
Now if we make a change (like pressing Enter) in our editor component, we should see the element printed to the console.
Next, we'll want some state to keep track of the current row and column position:
const [currentPosition, setCurrentPosition] = useState({ row: 0, col: 0 });
Now we can use levelItem to determine if the rows and columns have changed from 0:
        const levelItem = imageRef.current;
        userInput();

        const userRow = levelItem.style.gridRowStart;
        const userCol = levelItem.style.gridColumnStart;

        if (
          userCol &&
          userRow &&
          (userCol !== currentPosition.col ||
            userRow !== currentPosition.row)
          ) {
              //TODO: mark level as complete
              setCurrentPosition({ row: userRow, col: userCol });
        }
If we run the moveItem() function again, and then head to our React Dev Tools, we can see that the state of currentPosition was updated.
Once the item has been moved, we want to mark the level as complete, but we don't want to automatically advance the player to the next level, as they may want to change the position of the current item before moving on to the next level.
This is the reason we included a done property on each of our levels in levels.js; we can create a button to move to the next level, and render that button once the item for the current level has been moved to the inventory (which will mark 'done' as true):
But there's a problem: We calculated the activeLevel variable (which we need to mark as 'done') in our <Level> component. Now that we need to access the active level in our App component, it makes more sense to calculate the active level in App, then pass its value down to <Level> as a prop:
  // state...
  const imageRef = useRef();
  let activeLevel;

  for (const [key, value] of Object.entries(levels)) {
    if (key === currentLevel.toString()) {
      activeLevel = value;
    }
  }
  // onChange()...
  return (
    // change out props for <Level>
    <Level activeLevel={activeLevel} ref={imageRef} />
  )
And update Level.js
const Level = React.forwardRef(({ activeLevel }, ref) => {
  const { item } = activeLevel;
  return (
    <>
      <h1>You found: {item.name}!</h1>
      <img
        ref={ref}
        id={item.id}
        src={item.image}
        alt={item.name}
        className={item.name}
      />
      <p>
        {item.name} position: {item.row}, {item.col}
      </p>
    </>
  );
});
Now we can mark the level complete in App.js, in our onChange function:
          setCurrentPosition({ row: userRow, col: userCol });

          if (!activeLevel.done) {
            activeLevel.done = true;
            setLevels(levels, ...activeLevel);
          }
If we check out our React Dev Tools, we see that the state of level 1 updated done to true.
You may have also noticed that the new code we entered into the editor disappeared when we called setLevels and updated the state. This is because we haven't set up any state to keep track of our <AceEditor> component.
Let's take care of that:
function App(){

  const[value, setValue] = useState(editorValue);

  function onChange(newValue){
   // setValue in the inner try/catch
   userInput();
   setValue(newValue);
  }

  return (
    // replace the value prop
    <AceEditor value={value} />
  )
}
Now our editor state will persist between renders.
Okay, I know we said we were going to render a button like, forever ago. Luckily, now we can do that pretty easily in our Level.js
      <p>
        {item.name} position: {item.row}, {item.col}
      </p>
      <button className={activeLevel.done ? 'button': 'hidden'}>
        Next
      </button>
And then create those classes in index.css
.hidden {
  display: none;
}

.button {
  background: #13293d;
  color: #3c6e71;
  border-radius: 5px;
}
This almost works the way we want it to. The 'Next' button shows up, but not when the level state is changed. It only renders once we type another character into the editor.
We'll fix that in the next post. Our state is getting a bit messy anyways, so we're due for a refactor.
Before closing out this post, let's make our <AceEditor> component a bit more usable.
Tweaking the Editor
The log, validInput, and moveItem functions we've provided to our player aren't very long, but they still take up a good bit of real estate. It's not exactly a clean interface for the player to be greeted with.
We can clean it up a bit by taking advantage of react-ace's code folding feature, and adding an onLoad function to our editor.js file:
export const onLoad = (editor) => {
  editor.session.foldAll();
  editor.getSession().setUseWrapMode(true);
  editor.setOption("showLineNumbers", false);
};
Then import it, along with useEffect in App.js
import React, { useState, useRef, useEffect } from "react";
import editorValue, { onLoad } from "./editor";

  const editorRef = useRef(null);
  useEffect(() => {
    onLoad(editorRef.current.editor);
  });

  return(
    // add the ref to <AceEditor>
    <AceEditor ref={editorRef} />
  )
Much better!

It's also becoming a bit tedious to keep typing in our document.getElementById() and moveItem() each time we want to test our app. We'll use the available auto complete feature that react-ace provides to alleviate this a bit:
        <AceEditor
          ref={editorRef}
          mode="javascript"
          theme="dracula"
          onChange={onChange}
          width="auto"
          height="100%"
          name="UNIQUE_ID_OF_DIV"
          value={value}
          editorProps={{ $blockScrolling: true }}
          setOptions={{
            enableBasicAutocompletion: true,
            enableLiveAutocompletion: true,
            enableSnippets: true,
          }}
        />
Hm.. nothing changed. That's because we need to install the brace package for these features to work:
npm install brace
Then we can make the following two imports in App.js
import "brace/ext/language_tools";
import "ace-builds/webpack-resolver";
Sweet!

Wrap Up
We did a lot here, but there's still a long way to go. In the next section, we'll handle moving to the next level, and clean up our state. This will allow us to detect and correct collisions when a player tries to move an item to an occupied slot.
Thanks for stickin' through to the end. Hope to see you in the next one!


Top comments (0)