Overview
You might have heard of Observability given that folks have been talking about this for a while now. Sure, you might think it is just the latest tech buzzword. However, the practice has been around for a long time now.
Observability is certainly relevant today given the Microservices architectures, distributed systems, and the characteristics of modern applications being deployed at a faster pace by leveraging CI/CD pipelines to Kubernetes, in this case using Jenkins X. Indeed old practices of setting up monitoring after an app is deployed, are no longer acceptable.
Let’s face it, modern apps call for modern instrumentation, not only once they are deployed; even at build-time having proper instrumentation can help you gain insights into what is happening at various stages of the build and release process. This may include spotting any latency issues, performance and dependency download times. In other words, instrumentation and monitoring should be baked into our deployment pipeline in Jenkins X!
Given that Jenkins X is the native CI/CD platform for Kubernetes, we must start thinking of Observability in the context of the build and release of our containerized applications via this platform, and not after the deployment process itself.
What we are doing today
Today, I walk you through the process of increasing observability in your build and release pipeline by implementing tracing for a couple of events such as npm install and npm test which are part of a sample NodeJS application.
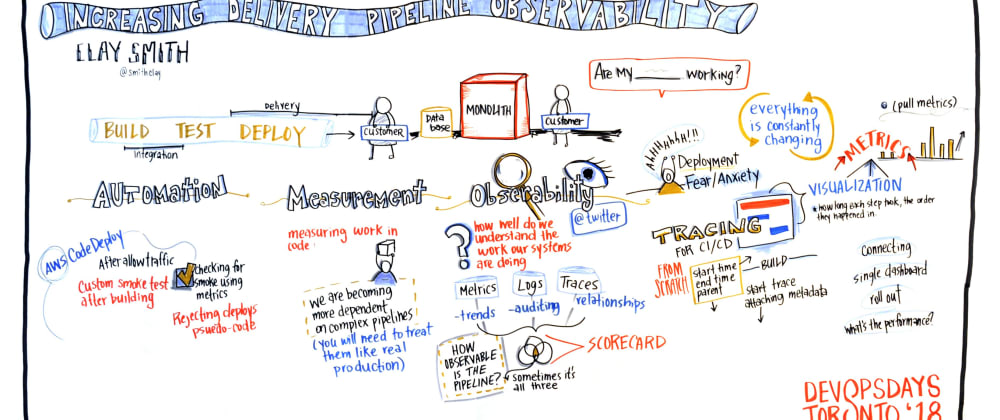
NOTE: Tracing is only a small portion of other things that need to be in place. Logging and Metrics are also required. The combination and aggregation of this data allows you to understand how observable your pipeline is.

Diagram by: Peter Bourgon
Leveraging Third-Party Tools
Jenkins X was built with extensibility and flexibility in mind. Today, you can easily create QuickStarts for a language not implemented. You can also build addOns to augment the platform functionality. There are currently addOns for istio, prometheus and anchore to name a few. Given this extensibility, we encourage our community to build these components and share with everyone.
If you look around, you’ll find that Honeycomb.io is at the forefront of Observability. We are collaborating with them to eventually have a Honeycomb addOn for Jenkins X
In this post, we use the Honeycomb.io API to trace our pipeline events.
Tracing CI/CD Pipeline Events
In this scenario we want to trace start and end times for certain events. In our example NodeJS app, we have commands such as npm install and npm test, which are part of our build-pack pipeline out of the box. To do start tracing, we modify the Tekton pipeline and inject calls to the Honeycomb.io API before and after these specific build pack named steps.
NOTE: Please be sure to sign up for honeycomb.io to obtain your API Key
Create Kubernetes Secret
Once we have our API Key, we want to create a Kubernetes Secret which is required to make API calls within our pipeline. To do this, we create it in the jx and jx-staging namespaces. For each namespace execute the following command (be sure to modify the namespace value as needed).
>$ kubectl create secret generic honeycomb-creds —from-literal=BUILDEVENT_APIKEY=<KEY> --namespace=<NAMESPACE>
Modify Tekton Pipeline
Now that we have our Kubernetes Secret in place, we will modify the jenkins-x.yaml file, which currently has exactly one line as follows:
buildpack: javascript
Let's go over the important components of the YAML file once modified. The first items I'd like to highlight, are the environment variables needed. We need to provide honeycomb.io three key pieces of information:
- CI Provider: this is the JENKINS-X environment variable. Honeycomb will add additional metadata fields to our dataset
- BUILDEVENT_DATASET: this indicates which dataset we want to populate (you can have many).
- BUILDEVENT_APIKEY: the Kubernetes Secret value, which is the API Key provided via the honeycomb site
buildPack: javascript
pipelineConfig:
  env:
  - name: JENKINS-X
    value: JENKINS-X
  - name: BUILDEVENT_DATASET
    value: jx
  - name: BUILDEVENT_APIKEY
    valueFrom:
      secretKeyRef:
        key: BUILDEVENT_APIKEY
        name: honeycomb-creds
The build-pack used for a NodeJS app is javascript as detected by the language. Hence the single line we had as the contents of the jenkins-x.yaml file.
Because we know which build-pack is being used, we can determine which named steps exist. Typically they include an npm install and npm test.
Therefore, we want to inject a timestamp before and after each of these named steps are called. The following shows how I inject this.
  pipelines:
    overrides:
    - name: npm-install
      pipeline: pullRequest
      stage: build
      steps:
      - command: echo ===== pullrequest:build:before  sending honeycomb step trace  ===============
      - name: honeycomb-npm-install-set-step-start-timestamp
        sh: echo $(date +%s) > step_start
      - name: honeycomb-npm-install-before-timestamp
        sh: echo =================================  $(cat step_start)  =================================
      type: before

    - name: npm-install
      pipeline: pullRequest
      stage: build
      steps:
      - command: echo ===== pullrequest:build:after   sending honeycomb step trace  ===============
      - name: honeycomb-npm-install-after-timestamp
        sh: echo =================================  $(cat step_start)  =================================
      - name: honeycomb-step-log-after-npm-install
        sh: ./buildevents step "${APP_NAME}-${PULL_NUMBER}-${VERSION}-${BUILD_NUMBER}" $(echo npm-install | sum | cut -f 1 -d \ ) $(cat step_start) npm-install
      type: after
    - name: npm-test
      pipeline: pullRequest
      stage: build
      steps:
      - name: honeycomb-npm-test-set-step-start-timestamp
        sh: echo $(date +%s) > step_start
      - name: honeycomb-npm-test-before-timestamp
        sh: echo =================================  $(cat step_start)  =================================
      type: before
    - name: npm-test
      pipeline: pullRequest
      stage: build
      steps:
      - name: honeycomb-npm-test-after-timestamp
        sh: echo =================================  $(cat step_start)  =================================
      - name: honeycomb-step-log-after-npm-test
        sh: ./buildevents step "${APP_NAME}-${PULL_NUMBER}-${VERSION}-${BUILD_NUMBER}" $(echo npm-test | sum | cut -f 1 -d \ ) $(cat step_start) npm-test
      type: after
Now that I have captured timestamps for these two named steps, I want to send an API call to honeycomb as follows. You will notice how I am using a binary called buildevents this is downloaded during the setup of my pipelines which I discuss shortly.
By concatenating a few metadata pieces that exist as environment variables in Jenkins X, I build a unique name which is needed by honeycomb to track things correctly.
    - pipeline: pullRequest
      stage: build
      steps:
      - name: honeycomb-build-name-concat
        sh: echo the build is "${APP_NAME}-${PULL_NUMBER}-${VERSION}-${BUILD_NUMBER}" and HONEYCOMB_BUILD_START=$(cat build_start)
      - name: honeycomb-send-success
        sh: ./buildevents build "${APP_NAME}-${PULL_NUMBER}-${VERSION}-${BUILD_NUMBER}" $(cat build_start) success
      type: after
We do the same for the Release pipeline...
# release pipeline releated calls

    - name: npm-install
      pipeline: release
      stage: build
      steps:
      - command: echo ===== release:build:before  sending honeycomb step trace  ===============
      - name: release-honeycomb-npm-install-step-start-timestamp
        sh: echo $(date +%s) > release_step_start
      - name: release-honeycomb-npm-install-before-timestamp
        sh: echo ================================= release  release-npm-install step start  $(cat release_step_start)  =================================
      type: before

    - name: npm-install
      pipeline: release
      stage: build
      steps:
      - name: release-honeycomb-npm-install-after-timestamp
        sh: echo ================================= release npm-install step end  $(cat release_step_start)  =================================
      - name: release-honeycomb-step-log-after-npm-install
        sh: ./buildevents step "${APP_NAME}-${PULL_NUMBER}-${VERSION}-${BUILD_NUMBER}" $(echo release-npm-install | sum | cut -f 1 -d \ ) $(cat release_step_start) release-npm-install
      type: after

    - pipeline: release
      stage: build
      steps:
      - name: release-honeycomb-build-name-concat
        sh: echo the build is "${APP_NAME}-${PULL_NUMBER}-${VERSION}-${BUILD_NUMBER}" and HONEYCOMB_BUILD_START=$(cat release_start)
      - name: release-honeycomb-build-send-success
        sh: ./buildevents build "${APP_NAME}-${PULL_NUMBER}-${VERSION}-${BUILD_NUMBER}" $(cat release_start) success
      type: after
This is portion of the pipeline executes first hence the setup node. There are several things we want to accomplish in the setup of our pipelines.
- Download the Build Events binary provided by Honeycomb, make it executable
- Create the timestamp we will use to track the pullRequest pipeline execution. I do this by saving a temporary file with the timestamp.
This is done for both pipelines, as we are working with both.
    pullRequest:
      setup:
        steps:
          - command: echo =========================== pullrequest:setup downloading Honeycomb.io buildevents binary ===========================
          - name: pullrequest-download-honeycomb-binary
            sh: curl -L -o buildevents https://github.com/honeycombio/buildevents/releases/latest/download/buildevents-linux-amd64
          - name: honeycomb-set-binary-permissions
            sh: chmod 755 buildevents
          - name: honeycomb-display-buildevents-version
            sh: ./buildevents --version
          - name: honeycomb-setup-build-timestamp
            sh: echo $(date +%s) > build_start
          - name: honeycomb-output-debug
            sh: echo the build is "${APP_NAME}-${PULL_NUMBER}-${VERSION}-${BUILD_NUMBER}" and HONEYCOMB_BUILD_START=$(cat build_start)   =======================================================
    release:
      setup:
        steps:
        - command: echo =========================== release:setup downloading Honeycomb.io buildevents binary ===========================
        - name: release-download-honeycomb-binary
          sh: curl -L -o buildevents https://github.com/honeycombio/buildevents/releases/latest/download/buildevents-linux-amd64
        - name: release-honeycomb-set-binary-permissions
          sh: chmod 755 buildevents
        - name: release-honeycomb-setup-build-timestamp
          sh: echo $(date +%s) > release_start
        - name: release-honeycomb-output-debug
          sh: echo the build is "${APP_NAME}-${PULL_NUMBER}-${VERSION}-${BUILD_NUMBER}" and HONEYCOMB_BUILD_START=$(cat release_start)   =======================================================
Once this pipeline executes, the dashboard on the honeycomb.io site will show us the execution tracing as follows.
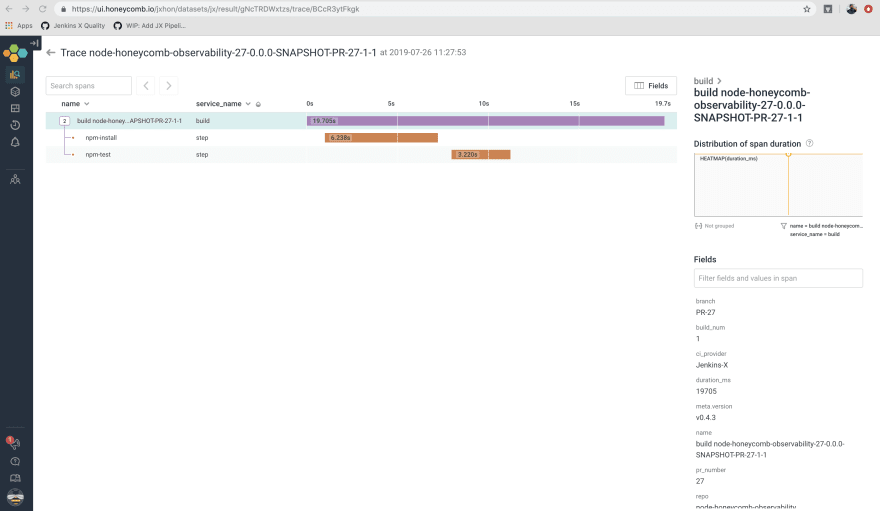
As you can see, we have a unique name for our build being traced, underneath that we are tracking the two events npm install and npm test time spans. We can easily see how long our dependencies are taking to download, and how long does it take to run the tests for the app.
Conclusion
Hopefully I’ve enticed you to at least look into why you might consider incorporating observability into your build and release process. There is a lot more that can be done. In a future post, we will cover additional setup.
Jenkins World | DevOps World 2019
I'll be demoing this solution at various times while at the conference this year. You can still register and get a big discount by using code: PREVIEW. Instead of your cost being $1499, with discount is only $799
You can find my full schedule on the official website
Cheers,
@SharePointOscar


Top comments (0)