this week I have learned about payload or body validation in AWS API Gateway and want to share it. Last week we learned how to create API using the AWS API Gateway service. Here, you can read about it
In this session, we will learn about how to validate body or payload in the AWS API. we have already set up the API gateway and we just focus on API body validation, how can active body validation and how its works.
Overview of basic request validation in API Gateway
Request validation is used to ensure that the incoming request message is properly formatted and contains the proper attributes. API Gateway can perform the basic validation. This enables you, the API developer, to focus on app-specific deep validation in the backend. For the basic validation, API Gateway verifies either or both of the following conditions:
- The required request parameters in the URI, query string, and headers of an incoming request are included and non-blank.
- The applicable request payload adheres to the configured JSON schema request model of the method.
First, we need to create a model to set up JSON schema request. Before creating model, we need to know about the model.
Models
In API Gateway, a model defines the data structure of a payload. In API Gateway models are defined using the JSON schema draft 4.
The following JSON object describes sample data that describes the fruit or vegetable inventory in the produce department of a likely supermarket.
Suppose we have an API for managing clothing inventory in the produce department of a supermarket. When a manager queries the backend for the current inventory, the server sends back the following response payload:
{
  "department": "produce",
  "categories": [
    "jeans",
    "shirt"
  ],
  "dress": [
    {
      "category": "jeans",
      "type": "pants",
      "price": 1.99,
      "quantity": 232
    },
    {
      "category": "jeans",
      "type": "casual",
      "price": 0.19,
      "quantity": 112
    },
    {
      "category": "jeans",
      "type": "shorts",
      "price": 1.29,
      "quantity": 57
    }
  ]
}
you can see detail about Models here
Create a model
Sign in to the API Gateway console at https://console.aws.amazon.com/apigateway.
Choose a REST API. In my case I will choose
sample-Api, that I have been created in last story. see hereChoose the Models tab from left and Choose Create.

For Model Name, type name for the model 'item'.
For Content Type, type the model's content type (for example, application/json for JSON).
(Optional) For Model description, type a description for the model.
For Model schema, type the model's schema.
{
    "$schema": "http://json-schema.org/draft-04/schema#",
    "title":"Item Schema",
        "type": "object",
        "properties":{
            "ID":{ "type": "number"},
            "name":{ "type": "string"},
            "price":{ "type": "number"}
        },
        "required":["ID","name","price"]

}
- Choose Create model.

Request validation using the API Gateway console with model
The API Gateway console lets you set up the basic request validation on a method using one of the three validators:
- Validate body: This is the body-only validator.
- Validate query string parameters and headers: This is the parameters-only validator.
Validate body, query string parameters, and headers: This validator is for both body and parameters validation.
To enable a request validator on a method
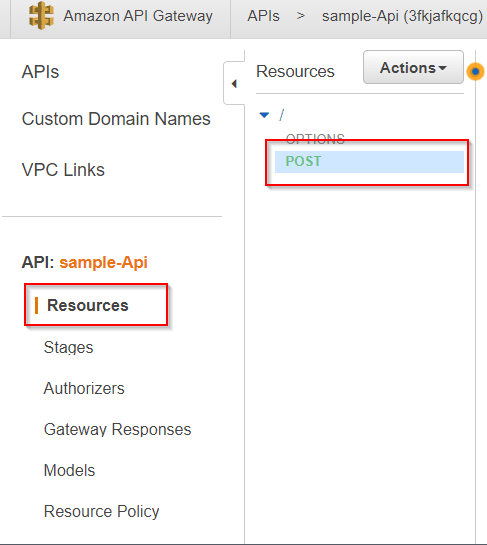
- Choose resource tab and then choose method the resource 'POST'.
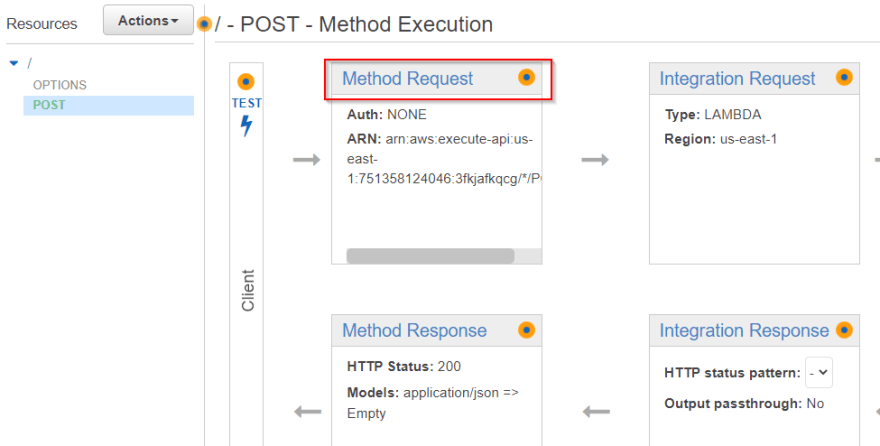
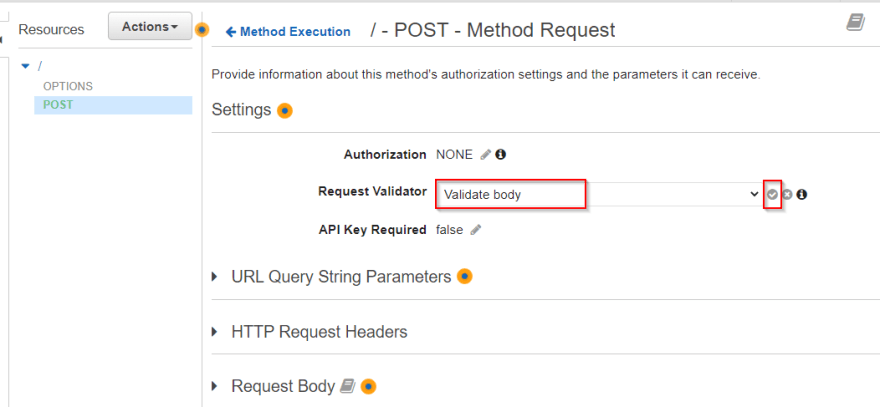
- Choose Method Request.
- Choose the pencil icon of Request Validator under Settings.
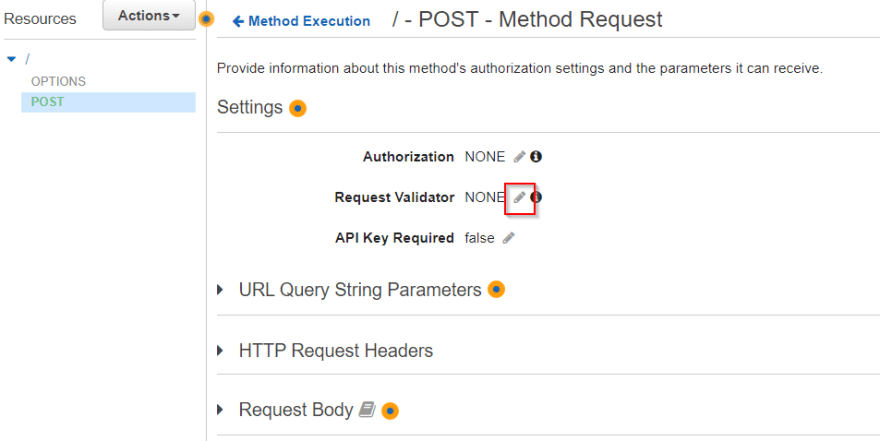
- Choose Validate body from drop down list. Then choose the check mark icon to save your choice.
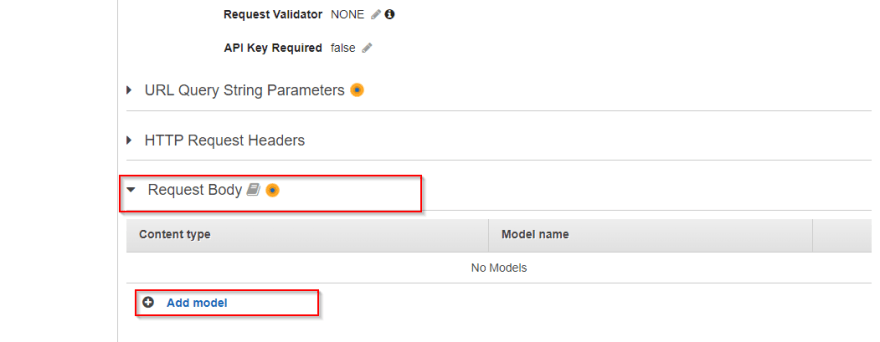
- Choose the Body Request and choose add model.
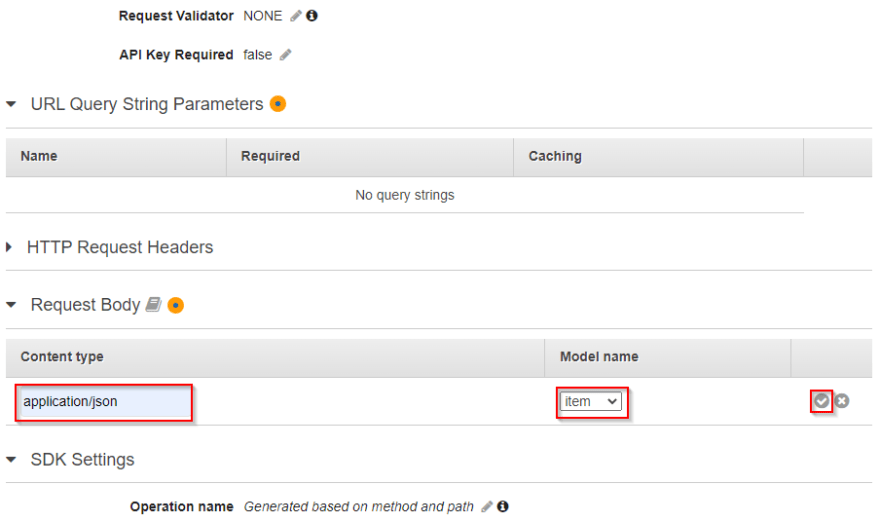
- Now add Content type 'application/json' and Model name 'item' from drop down list under the Modle Name. Then choose the check mark icon to save your choice.
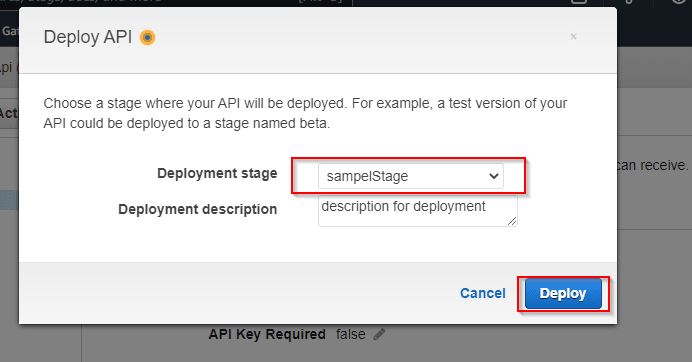
- last step to deploy the API to sample stage. Select Actions button and choose Deploy API.
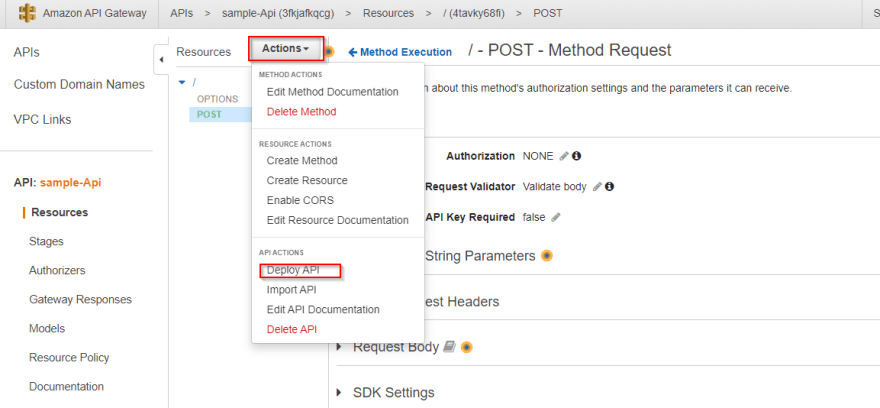
- A pop up appear, choose 'smapleStage' from Deployment stage drop down and Deploy.
How does it work
we need to check this out request body validation is working fine with the rest API. For this, we need to use the postman to generate the post request with the request body
Test REST API in postman to verify that body validation working file with rest API
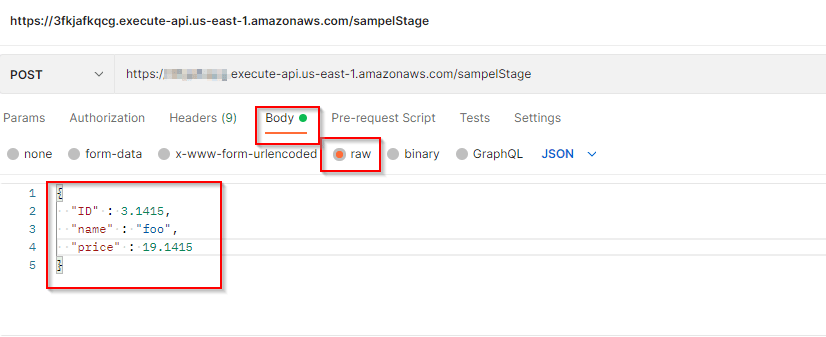
- CHoose POST request, Set header 'Content-Type' with value 'application/json' and body

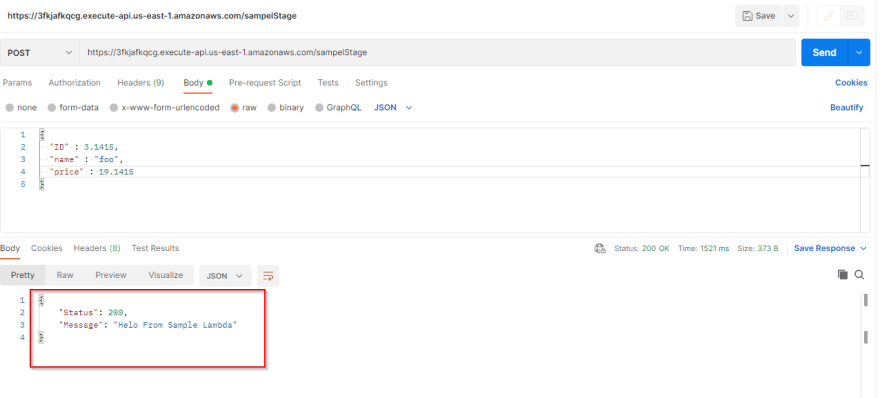
- Set request body with dummy data and hit the send button.
you can see that our Lambda function invoked and its return response.
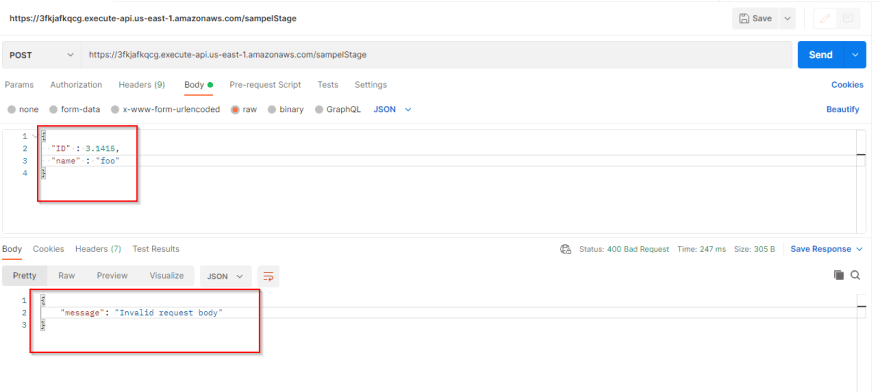
Now change the body request and remove the any field and its value. Hite the send button. This time you can see its return error "Invalid request body".


Oldest comments (0)