
This article was originally posted on my personal blog
Knex.js is a SQL Query Builder for JavaScript. What it does is that it provides easy to use interface to access a database and perform actions on it and its data. It supports many database management systems like MySQL, SQLite, Postgres, and more.
With Knex.js, you can have all your configurations for your different environments in one file. Then, you can use the library's methods to perform actions against your database. So, regardless of what database management system you're running for different environments, you can use the same methods.
In this tutorial, you'll learn how to use Knex.js with Node.js and Express. We'll create migrations, seeders, then query and insert data with Knex.js.
You can find the code for this tutorial in this GitHub repository.
Prerequisites
Before we start, make sure you have Node.js installed along with NPM. NPM is installed with Node.js by default, so you just need to install Node.js
To check if you have it installed, run the following commands:
node -v
npm -v
If the output is a version, then they're installed on your machine.
Set Up Project
The first step is to set up the project. Open a terminal and create a directory to place the project inside:
mkdir knex-tutorial
Then change to that directory:
cd knex-tutorial
Once inside the directory, run the following command to initialize the project with NPM:
npm init -y
The option -y is added to fill the generated package.json with default values.
The next step is to install the dependencies needed for this tutorial:
npm i express body-parser knex nodemon
With the command above you'll install Express, which is what we'll use to build the server; body-parser, which is used in Express to parse body parameters; knex for Knex.js; and nodemon, which is used to watch changes and restart the server.
Now, create the file index.js in the root and add the following content in it:
const express = require('express');
const bodyParser = require('body-parser');
const app = express();
const port = 3000;
app.use(bodyParser.json());

app.get('/', (req, res) => {
  res.send('Hello World!');
});

app.listen(port, () => {
  console.log(`Example app listening at http://localhost:${port}`);
});
This will create a simple server with Express.
Finally, add the start script in scripts in package.json:
"scripts": {
    "start": "NODE_ENV=development nodemon index.js"
},
Now, you can run the server with the following command:
npm start
You can test the server by going to localhost:3000. You should see "Hello, World".
Set Up Knex.js
In this section, you'll set up and configure Knex.js.
Knex.js has a CLI you can use to create migrations, seeders, and more. So, start by installing it globally:
npm i -g knex
After the installation is done, you can start making use of the CLI.
The first step in initializing Knex.js is to create the knexfile. The knexfile is a file that contains the configuration for Knex.js, including which database client to use for each environment and the connection configuration.
Create the db directory which will hold all files related to the database setup:
mkdir db
Then, change to the db directory:
cd db
Inside the directory, run the following command to create knexfile.js:
knex init
This will create knexfile.js with the following content:
// Update with your config settings.

module.exports = {

  development: {
    client: 'sqlite3',
    connection: {
      filename: './dev.sqlite3'
    }
  },

  staging: {
    client: 'postgresql',
    connection: {
      database: 'my_db',
      user: 'username',
      password: 'password'
    },
    pool: {
      min: 2,
      max: 10
    },
    migrations: {
      tableName: 'knex_migrations'
    }
  },

  production: {
    client: 'postgresql',
    connection: {
      database: 'my_db',
      user: 'username',
      password: 'password'
    },
    pool: {
      min: 2,
      max: 10
    },
    migrations: {
      tableName: 'knex_migrations'
    }
  }

};
As you can see, it exports configuration for the development, staging, and production environments. You can specify the client to use and the connection details for each environment.
In this tutorial, we'll just cover setting up the development environment using SQLite. However, if you are interested in setting up another DB management system, you can follow along but refer to Knex.js's documentation to understand how you should set up your connection to your database.
Replace the content of knexfile.js with the following:
const path = require('path');
// Update with your config settings.

module.exports = {

  development: {
    client: 'sqlite3',
    connection: {
      filename: path.join(__dirname, 'db.sqlite3')
    },
    migrations: {
      tableName: 'knex_migrations'
    },
    useNullAsDefault: true
  }

};
This will use sqlite3 for the development environment. Unlike other DB management systems, you just need to specify the file name for SQLite.
This configuration also specifies that the database should have a table called knex_migrations to keep track of the migrations. As for useNullAsDefault, it's necessary for SQLite configuration if you have columns that you want to default to Null.
As you are using sqlite3, you need to install its library:
npm install sqlite3
If you're using another DB management system, then you need to install its library instead.
Finally, go back to index.js in the root and add the following to add the configuration when the server runs:
const knexConfig = require('./db/knexfile');
//initialize knex
const knex = require('knex')(knexConfig[process.env.NODE_ENV])
This initializes knex based on the current environment.
Create a Migration
Migration allows you to easily modify a database schema. Inside each migration, you'll have 2 functions: up is executed when the migration runs, whereas down is executed the migration is rolled back. This means when you don't need the changes that were done by the migration anymore.
Before you create a migration, make sure you're still in the db directory.
Then, inside that directory run:
knex migrate:make create_users_table
This will create a migration file inside a directory that knex will create called migrations. If you open it, you'll see that there are already up and down functions.
Replace the content of the file with the following:
exports.up = function(knex) {
  return knex.schema
    .createTable('users', function (table) {
      table.increments('id');
      table.string('name', 255).notNullable();
      table.string('email', 255);
      table.timestamps();
    });
};

exports.down = function(knex) {
  return knex.schema
    .dropTable('users');
};
Inside the up function, a new table called users is created. The table has an auto-increment column id, string columns name and email, and timestamp columns which by default are created_at and updated_at.
Inside the down function, the table is dropped. This means that when you don't want the users table anymore, you just rollback the migration.
Now, go to package.json in the root of the project and the migrate script inside scripts:
"migrate": "knex migrate:latest --knexfile db/knexfile.js"
This script uses Knex's CLI command migrate:latest to migrate the latest migrations that have not been migrated yet. The option --knexfile specifies the location of the knexfile.
Now, change back to the root directory of the project. Then, run the following command:
npm run migrate
This will create a new SQLite database db/db.sqlite3, then using the migration you created earlier creates the users table.
You can check this if you have an SQLite viewer. I use DB Browser for SQLite.
You'll see that the database has the users table with the columns you added in the up function.

Create a Seed
A Seed file allows you to add data into your database without having to manually add them. This is helpful when filling the database with demo data to be able to easily test your website or server.
To create a seed file, run the following command:
knex seed:make users --knexfile db/knexfile.js
This will create the seed file users.js inside db/seeds. The knexfile option specifies the location of knexfile.js.
If you open db/seed/users.js, you'll see the function seed. This function first deletes all current users in the database then adds new ones.
Replace the content of the file with the following:
exports.seed = function(knex) {
  // Deletes ALL existing entries
  return knex('users').del()
    .then(function () {
      // Inserts seed entries
      return knex('users').insert([
        {id: 1, name: 'Hettie Marshall', email: 'lantunde@acbo.va'},
        {id: 2, name: 'Hester Owens', email: 'zo@girih.lv'},
        {id: 3, name: 'Henry Jackson', email: 'bekamohi@owo.mt'}
      ]);
    });
};
Now this function inserts 3 users into the users table.
Now, add the seed command to package.json:
"seed": "knex seed:run --knexfile db/knexfile.js"
Then, run the command:
npm run seed
This will add the 3 users to the database. You can use the SQLite viewer again to check it.

Read Data with Knex.js
In this section, you'll create a GET endpoint to retrieve users. You'll use Knex.js to retrieve the users.
In index.js add the new route:
app.get('/user', (req, res) => {
    // TODO get users
})
To retrieve data from the database using Knex.js, you first use knex(<TABLE_NAME>) to access the table, then use the method select to specify which columns you want to retrieve.
Finally, to use the retrieved data you can either use a Promise or a callback.
Add the following inside the callback function for the newly created route:
knex('users')
  .select({
    id: 'id',
    name: 'name'
  })
  .then((users) => {
    return res.json(users);
  })
  .catch((err) => {
    console.error(err);
    return res.json({success: false, message: 'An error occurred, please try again later.'});
  })
This accesses the table users with knex, then selects id and name. Inside then's fulfillment handler returns a JSON response with the users array. catch handles any errors that might occur.
Let's test it out! If you don't have the server running make sure to run it again:
npm start
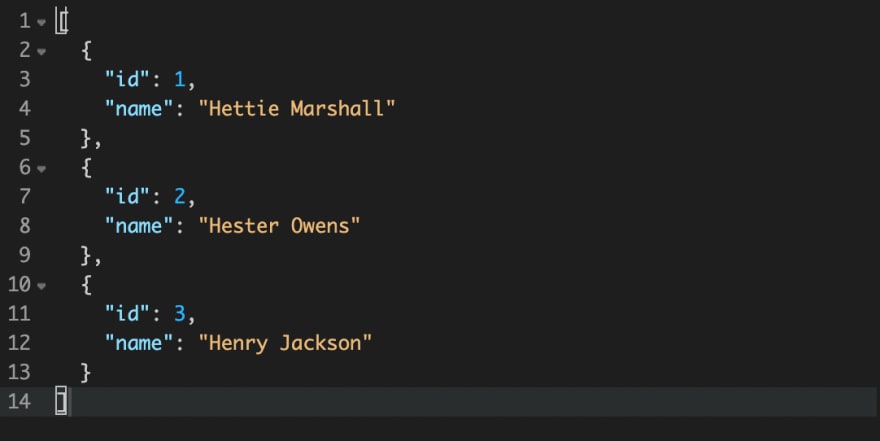
Then, send a GET request to localhost:3000/user. You will receive an array of users.
Insert Data with Knex.js
In this section, you'll learn how to insert data in the database using Knex.
Create a new POST route that allows us to add a new user:
app.post('/user', (req, res) => {
    // TODO insert user
});
Inside the function, you need to first get the data from the body of the request. Then if it all looks good, you can use the insert method on knex to insert new data.
Add the following inside the callback function of the route:
const name = req.body.name ? req.body.name : '';
const email = req.body.email ? req.body.email : '';

if (!name) {
    return res.json({success: false, message: 'Name is required'});
}

knex('users')
    .insert({name, email})
    .then((id) => {
    //get user by id
    knex('users')
        .select({
        id: 'id',
        name: 'name'
    })
        .where({id})
        .then((user) => {
        return res.json(user[0]);
    })
})
    .catch((err) => {
    console.error(err);
    return res.json({success: false, message: 'An error occurred, please try again later.'});
});
This first get name and email from the body of the request. If name isn't found then it returns an error.
If all is good, a new user will be inserted. Then, inside the fulfillment handler then, you receive as a parameter the id of the newly added user. Use it to retrieve the user and return it.
Now, send a POST request to localhost:3000/user and in the body add a name and email parameter. The new user will be inserted and returned in the request.

Conclusion
With Knex.js, you can easily prepare for different environments and setups. You can use the same methods and code to perform actions on the database and just change the configuration for the connection in one file when needed.
Make sure to read the Knex.js documentation to learn more about how to use it in your projects.


Top comments (0)