
This article was originally published on my personal blog.
2-Factor Authentication (2FA) adds an extra level of security to your website or app. Using 2FA, the user can rest at ease that just because someone has their password doesn't mean that they can access their account.
One form of 2FA is using authenticator apps like Google's Authenticator. What happens is that after your user registers or enables 2FA on their account, you generate a secret and create a QR code based on that secret. Then, the user can scan that QR code with their authenticator app.
After the user scans the QR code, they'll start getting time-based one-time passwords (TOTP) in the app. A 6-digit code will be shown and changed every 30 seconds. When the user needs to log in, they'll be asked to enter the code they see in the app. If the code is correct, they're allowed to log in. Otherwise, the login fails.
In this tutorial, you'll learn how to implement this process in Node.js. You'll create a simple website that requires users to enable authentication with an authenticator app when they register and then to enter the code every time they log in. This doesn't only work with Google's Authenticator, but also with Microsoft's Authenticator, or any other TOTP authentication apps.
For simplicity, this tutorial only focuses on authentication with the authenticator app. So, a lot of the necessary details related to 2FA, validation, and security might be omitted from the tutorial.
You can find the code for this tutorial in this GitHub repository.
Prerequisites
You need Node.js installed on your machine to be able to follow along with this tutorial.
Project Setup
Start by creating a directory for our project and changing to it:
mkdir 2fa-tutorial
cd 2fa-tutorial
Then, initialize the project with NPM:
npm init -y
The -y option will fill the fields of package.json with default values.
Next, install the dependencies that you'll use for this tutorial:
npm i express ejs body-parser express-session express-jwt jsonwebtoken sqlite3 otplib qrcode nodemon
Here's what each dependency is for:
-
express: To create a server -
ejs: View engine to be used to create pages -
body-parser: To parse body parameters from the request -
express-session: Manage session in the server -
express-jwtandjsonwebtoken: Create JSON Web Token (JWT) and add middleware to ensure that a user is authenticated -
sqlite3: To interact with an SQLite database -
otplib: To generate the secret which will be used to add 2FA with the authenticator app -
qrcode: To generate the QRCode that should be scanned by the authenticator app -
nodemon: To restart the server whenever there are changes
Out of all these dependencies, the important ones for 2FA are otplib and qrcode. The rest are more related to setting up the server and website.
Create Server
Create index.js in the root directory with the following content:
const express = require('express')
const sqlite3 = require('sqlite3')
const session = require('express-session')
const { authenticator } = require('otplib')
const QRCode = require('qrcode')
const jwt = require('jsonwebtoken')
const expressJWT = require('express-jwt')
const bodyParser = require('body-parser')
const app = express()
const port = 3000

app.set('view engine', 'ejs')

app.use(session({
  secret: 'supersecret',
}))

app.use(bodyParser.urlencoded({ extended: false }))

//create database with tables if it doesn't exist
const db = new sqlite3.Database('db.sqlite')
db.serialize(() => {
  db.run('CREATE TABLE IF NOT EXISTS `users` (`user_id` INTEGER PRIMARY KEY AUTOINCREMENT, `email` VARCHAR(255) NOT NULL, `secret` varchar(255) NOT NULL)')
})
db.close()

app.listen(port, () => {
  console.log(`2FA Node app listening at http://localhost:${port}`)
})
This imports all the dependencies that you'll use throughout the tutorial. Then, you create a server with Express and create an SQLite database with a users table if they don't exist. The users table, for simplicity, will only have the columns user_id, email and secret.
Create Sign Up Page
The home page of the website will be the signup page.
In index.js add the route for / as follows:
app.get('/', (req, res) => {
  res.render('signup.ejs')
})
This will only render the EJS view signup.ejs which you'll create next.
Create views/signup.ejs with the following content:
<!DOCTYPE html>
<html lang="en">
<head>
  <meta charset="UTF-8">
  <meta http-equiv="X-UA-Compatible" content="IE=edge">
  <meta name="viewport" content="width=device-width, initial-scale=1.0">
  <title>Sign Up</title>
  <link href="https://cdn.jsdelivr.net/npm/bootstrap@5.1.3/dist/css/bootstrap.min.css" rel="stylesheet"
    integrity="sha384-1BmE4kWBq78iYhFldvKuhfTAU6auU8tT94WrHftjDbrCEXSU1oBoqyl2QvZ6jIW3" crossorigin="anonymous">
</head>
<body>
  <div class="container mx-auto mt-4">
    <h1>Sign Up</h1>
    <form action="/sign-up" method="POST">
      <div class="mb-3">
        <label for="email" class="form-label">Email</label>
        <input type="email" class="form-control" id="email" name="email">
      </div>
      <button type="submit" class="btn btn-primary">Sign Up</button>
    </form>
    <p class="mt-4">
      Have an account? <a href="/login">Login</a>
    </p>
  </div>
</body>
</html>
This will show a form with only an email input and a submit button. After the user enters their email and clicks on submit, their account will be redirected and will be redirected to scan the QR code.
Back in index.js, create the POST route to handle the registration:
app.post('/sign-up', (req, res) => {
  const email = req.body.email,
    secret = authenticator.generateSecret()

  const db = new sqlite3.Database('db.sqlite')
  db.serialize(() => {
    db.run('INSERT INTO `users`(`email`, `secret`) VALUES (?, ?)',
      [email, secret],
      (err) => {
        if (err) {
          throw err
        }

        //generate qr and put it in session
        QRCode.toDataURL(authenticator.keyuri(email, '2FA Node App', secret), (err, url) => {
          if (err) {
            throw err
          }

          req.session.qr = url
          req.session.email = email
          res.redirect('/sign-up-2fa')
        })
      })
  })
})
You first retrieve the email from the body and you create a secret using authenticator.generateSecret. authenticator is from the otplib library. generateSecret generates a base32 encoded hex secret that will be used to add your app into an authenticator app like Google Authenticator.
Then, you connect to the database and insert a new user with the email and secret. If all goes well, you generate a QRCode from qrcode library. The QRCode content should be a Key Uri of the following format:
otpauth://{type}/{app}:{accountName}?secret={secret}{query}
Where {type} is either totp for TOTP or hotp for HMAC-based one-time password (HOTP). For this tutorial, we're going with the default type for authenticator in otplib which is totp.
{app} is the name of the app this 2FA is for. It will appear in the user's app after they scan the code. {accountName} is their email in the app.
{secret} is the secret you generated earlier. You can also pass additional query parameters in the place of {query} to customize the authentication. For example, you can change the number of digits of the TOTP codes from 6 to 8 using the query parameter &digits=8.
authenticator has the method keyuri which accepts an email (accountName), the app's name (app), and the secret (secret) as parameters. You can, instead, pass an object of options, which will allow you to add customizations like the digits query parameter.
The qrcode library has the method toDataURL. You'll use that to get the Data URL of the QRCode image and store it in the session to view it on the next page. You'll also set the email in the session for access on the next page.
If everything is successful, the user will be redirected to sign-up-2fa where they add authentication with their authenticator app.
Create Add Authentication Page
In index.js, add the new route sign-up-2fa:
app.get('/sign-up-2fa', (req, res) => {
  if (!req.session.qr) {
    return res.redirect('/')
  }

  return res.render('signup-2fa.ejs', { qr: req.session.qr })
})
If qr isn't in the session, then you redirect the user to the home page. Otherwise, you render the signup-2fa.ejs view passing it the QRCode data URL.
Create views/signup-2fa.ejs with the following content:
<!DOCTYPE html>
<html lang="en">
<head>
  <meta charset="UTF-8">
  <meta http-equiv="X-UA-Compatible" content="IE=edge">
  <meta name="viewport" content="width=device-width, initial-scale=1.0">
  <title>Sign Up - Set 2FA</title>
  <link href="https://cdn.jsdelivr.net/npm/bootstrap@5.1.3/dist/css/bootstrap.min.css" rel="stylesheet"
    integrity="sha384-1BmE4kWBq78iYhFldvKuhfTAU6auU8tT94WrHftjDbrCEXSU1oBoqyl2QvZ6jIW3" crossorigin="anonymous">
</head>
<body>
  <div class="container mx-auto mt-4">
    <h1>Sign Up - Set 2FA</h1>
    <form action="/sign-up-2fa" method="POST">
      <p>Scan the QR Code in the Authenticator app then enter the code that you see in the app in the text field and click Submit.</p>
      <img src="<%= qr %>" class="img-fluid" />
      <div class="mb-3">
        <label for="code" class="form-label">2FA Code</label>
        <input type="text" class="form-control" id="code" name="code">
      </div>
      <button type="submit" class="btn btn-primary">Submit</button>
    </form>
  </div>
</body>
</html>
This will show the QRCode with input to enter the code after the user scans the QRCode. This is just to verify that the user actually scanned the QRCode and now can log in using the authenticator app.
Now, you'll add the /sign-up-2fa POST route in index.js:
app.post('/sign-up-2fa', (req, res) => {
  if (!req.session.email) {
    return res.redirect('/')
  }

  const email = req.session.email,
    code = req.body.code

  return verifyLogin(email, code, req, res, '/sign-up-2fa')
})
This will retrieve the user's email and code from the session and request body respectively. Then, it will call the verifyLogin function which you'll create next:
function verifyLogin (email, code, req, res, failUrl) {
  //load user by email
  const db = new sqlite3.Database('db.sqlite')
  db.serialize(() => {
    db.get('SELECT secret FROM users WHERE email = ?', [email], (err, row) => {
      if (err) {
        throw err
      }

      if (!row) {
        return res.redirect('/')
      }

      if (!authenticator.check(code, row.secret)) {
        //redirect back
        return res.redirect(failUrl)
      }

      //correct, add jwt to session
      req.session.qr = null
      req.session.email = null
      req.session.token = jwt.sign(email, 'supersecret')

      //redirect to "private" page
      return res.redirect('/private')
    })
  })
}
This function, first, retrieves the user by their email. Then, the code is validated with the secret in the database using authenticator.check method. This method takes the code as the first parameter and the secret as the second parameter. It returns a boolean value.
If the check method returns true, it means that you can authenticate the user. You set the token in the session to a JWT created by the jwt library. Then, you redirect the user to the private page that you'll create later.
Create Log In Page
Now you'll create the login page. This page will allow the user to enter their email and the code from the app to log in.
In index.js add the /login route:
app.get('/login', (req, res) => {
  return res.render('login.ejs')
})
This will just render the login.ejs view.
Create views/login.ejs with the following content:
<!DOCTYPE html>
<html lang="en">
<head>
  <meta charset="UTF-8">
  <meta http-equiv="X-UA-Compatible" content="IE=edge">
  <meta name="viewport" content="width=device-width, initial-scale=1.0">
  <title>Log In</title>
  <link href="https://cdn.jsdelivr.net/npm/bootstrap@5.1.3/dist/css/bootstrap.min.css" rel="stylesheet"
    integrity="sha384-1BmE4kWBq78iYhFldvKuhfTAU6auU8tT94WrHftjDbrCEXSU1oBoqyl2QvZ6jIW3" crossorigin="anonymous">
</head>
<body>
  <div class="container mx-auto mt-4">
    <h1>Log In</h1>
    <form action="/login" method="POST">
      <div class="mb-3">
        <label for="email" class="form-label">Email</label>
        <input type="email" class="form-control" id="email" name="email">
      </div>
      <div class="mb-3">
        <label for="code" class="form-label">Code</label>
        <input type="code" class="form-control" id="code" name="code">
      </div>
      <button type="submit" class="btn btn-primary">Log In</button>
    </form>
    <p class="mt-4">
      Don't have an account? <a href="/">Sign Up</a>
    </p>
  </div>
</body>
</html>
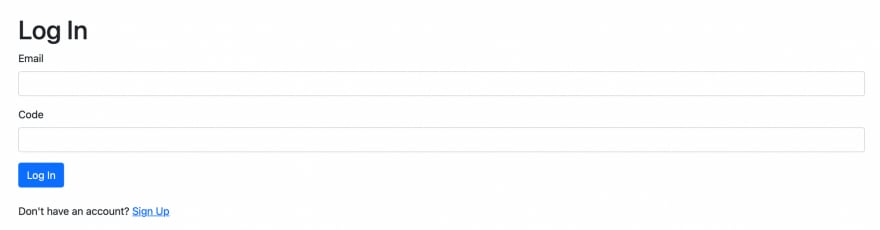
As mentioned, this page shows a form with 2 inputs: Email and Code. This form then sends the form data to the /login POST route.
In index.js add the POST route for login:
app.post('/login', (req, res) => {
  //verify login
  const email = req.body.email,
    code = req.body.code

  return verifyLogin(email, code, req, res, '/login')
})
This function has similar functionality as the sign-up-2fa. It retrieves the email and code from the body parameters then calls verifyLogin to either log in the user or redirect them back to the form.
Create Private Page
Now, you'll create a private page, which is only accessible by logged-in users.
In index.js add the route private:
const jwtMiddleware = expressJWT({
  secret: 'supersecret',
  algorithms: ['HS256'],
  getToken: (req) => {
    return req.session.token
  }
})

app.get('/private', jwtMiddleware, (req, res) => {
  return res.render('private.ejs', {email: req.user})
})
This route uses the jwtMiddleware, which is created using the express-jwt library. If the JWT token is not in the session, an error will be thrown and the user can't access the page. Else, the private.ejs view is rendered.
Create views/private.ejs with the following content:
<!DOCTYPE html>
<html lang="en">
<head>
<meta charset="UTF-8">
<meta http-equiv="X-UA-Compatible" content="IE=edge">
<meta name="viewport" content="width=device-width, initial-scale=1.0">
<title>Private</title>
<link href="https://cdn.jsdelivr.net/npm/bootstrap@5.1.3/dist/css/bootstrap.min.css" rel="stylesheet"
integrity="sha384-1BmE4kWBq78iYhFldvKuhfTAU6auU8tT94WrHftjDbrCEXSU1oBoqyl2QvZ6jIW3" crossorigin="anonymous">
</head>
<body>
<div class="container mx-auto mt-4">
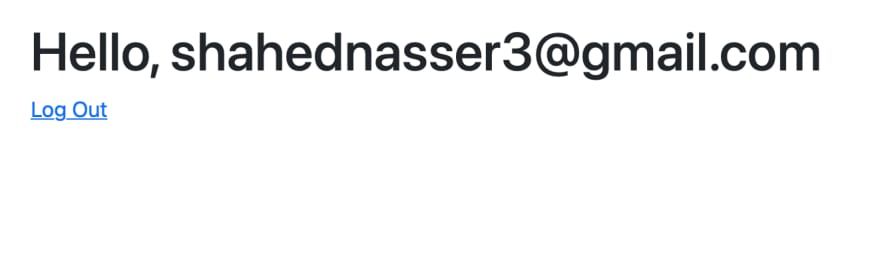
<h1>Hello, <%= email %></h1>
<a href="/logout">Log Out</a>
</div>
</body>
</html>
This will only show a greeting to the user with their email and a log-out button.
Create Log Out Route
Finally, you just need to add a log-out route.
In index.js, add the logout route:
app.get('/logout', jwtMiddleware, (req, res) => {
  req.session.destroy()
  return res.redirect('/')
})
This just destroys the session to remove the JWT token from the session, which would disallow the user from accessing the private page. Then, the user is redirected to the home page.
Test it Out
Let's test it all out. First, run the server:
npm start
This will create the SQLite database db.sqlite and start the server at localhost:3000. Open it in your browser. You'll see the signup form.

Enter an email and click Sign Up. You'll then be redirected to add the 2FA with the authenticator app. You'll see a QRCode with a code input to enter the code after scanning the QRCode.

After you scan the QRCode in Google's Authenticator app or any other authenticator app, you'll see a 6-digit code in the app. Enter that code in the 2FA Code field and click Submit. If it's correct, you'll be redirected to the private page.
Try to log out now and go to the login page from the sign up (home) page. You'll see a form to enter an email and a code.
Enter the email you just used to create the account and the code from the Authenticator app. If it's all correct, you'll be authenticated and redirected to the private page.
Conclusion
In this tutorial, you learned how to add authentication with time-based one-time password apps like Google Authenticator. Ideally, your website should have an initial authentication method (for example, with a password set by the user), then this method will be used to add an extra layer of authentication.
Also, secrets in your app should be kept in environment variables and you should handle errors and validation. This app was kept simple for the sake of the tutorial.


Top comments (0)