
Widget Experiments
This series dives into Kentico Xperience MVC Widgets and the related technologies that are part the Page Builder technology - Widget Sections, Widgets, Form Components, Inline Editors, Dialogs, and Page Templates 🧐.
Join me 👋, as we explore the nooks and crannies of the Kentico Xperience Page Builder and discover what might be possible with this powerful technology...
If you aren't yet familiar with Xperience MVC Widgets, check out the Youtube video on Building a Page with MVC Widgets in Xperience.
The previous version of this blog series is Kentico EMS - MVC Widget Experiments
Goals
This post is going to show how we can use the Page Builder to insert custom HTML into the <head> of a Page and any other area of the DOM outside of our Page's View!
🔭 Use Case - Page Specific Marketing Tags
If we want to be effective Kentico Xperience application developers, we need to think 🤔 like content managers and marketing professionals, since these are the very people that will leverage Xperience to bring value to a business.
Something that all marketing professionals will want out of a Digital Experience Platform (DXP), like Kentico Xperience, is the ability to place marketing tags on various pages, in specific places in the DOM.
Ideally, application developers should not be needed every time a tag is added or removed from a page 😁, and since the Page Builder is such a powerful tool where marketing professionals will already be working (performing A/B tests, building landing pages), it makes sense to give them the ability to add their tags here.
It should be simple enough to add a Widget to a Page, select some content from the Content Tree, and have the selected content's HTML render in the DOM in the correct place, right 🤨?
Problem - Rendering Outside @RenderBody()
The problem we immediately encounter is that every Page in the Content Tree that has the Page Builder enabled is going to render the Page Builder Widgets and Widget Sections in that Page's View.
Why is this a problem 🤷?
A Page's View (whether this is a Controller View, or a Page Template) has no easy access 😣 to the <head> of a Page.
If we look at a simple MVC _Layout.cshtml, we can see a call to RenderBody():
<!DOCTYPE html>
<html lang="en">
<head>
    <!-- ... -->

    @RenderSection("head", required: false)
</head>
<body>
    @RenderSection("afterBodyStart", required: false)

    @RenderBody()

    @RenderSection("beforeBodyEnd", required: false)
</body>
</html>
That RenderBody() call is where all of our Page's HTML will be added to the overall Page.
How can we get some HTML rendered by a Widget inside the RenderBody() call to instead add that HTML to a place in the DOM (like the <head>) that's controlled by the _Layout.cshtml?
What About Using @section?
I know what you're thinking 🧠 (because I was thinking it too, initially)!
"Use the Razor @section { } directive, which lets us tunnel some markup out of View and into the parent Layout through a @RenderSection() call!"
If we use the above _Layout.cshtml as an example and also have a Home.cshtml that is our Home Page's View, we can see how this works:
<!-- Home.cshtml -->

<h1>Home Page</h1>

@section head {
    <img src="https://my-marketing-tool.co/px/1234"
         width="1" height="1" border="0">
}
The rendered HTML of our Home Page would look like this:
<!DOCTYPE html>
<html lang="en">
<head>
    <img src="https://my-marketing-tool.co/px/1234"
         width="1" height="1" border="0">
</head>
<body>
    <!-- Home.cshtml -->

    <h1>Home Page</h1>
</body>
</html>
This, obviously, does work... but with a few caveats 😯.
- We need to include
@section head { }in every View where we might want to add HTML to the section 😑 - We don't have a good (read: centralized) way to disable adding HTML Tags for users who have opted out of those features of the site for privacy reasons 😒
- This won't work with the Page Builder because
@section { }is only available in the Page's View, not in any Widgets or Sections 🤦🏽♂️
1 and 2 are inconvenient or would require some enhancements, but 3 is a show stopper - it's just not going to help us reach our goal of using the Page Builder to add custom HTML Tags to the <head>.
After trying this approach with @section { } we might notice something interesting...
The Page's View code (@RenderBody()) is executed before the Page's Layout!
This means if we perform an operation in a Widget in the Page, we know the effects of that action will complete before anything in the Layout is rendered.
🧪 Solution - Widget + Service + Tag Helper
So, here's the first part of our solution:
- Create a Page Type called
HTMLTag, with a text area fieldContentHTMLto paste the tags into - Create a Widget called
HTMLTagWidgetwith 2 Widget Properties-
HTMLTags- anHTMLTagPage'sNodeGUIDcan be stored using the PageSelector Form Component -
TagLocation- astringvalue from aDropDownComponentForm Component indicating where in the DOM theHTMLTag's content should in inserted
-
- Create a service class
HTMLTagStoreto store the Tags (and their positions) from anyHTMLTagWidgets on the Page. - Create a View Component
PageHTMLTagsViewComponentthat we'll place in key spots throughout our Layout as the outlet for any HTML Tags from our Widgets
I like naming Page Type fields that could contain HTML with an
HTMLsuffix. HTML is handled very differently than plain text when rendering it on a Page (it needs to skip Razor's encoding).This means we want to wrap it in an
HtmlString, which tells Razor to skip encoding. UsingHtmlStringincludes the information of how to use (or be careful with the value) into the type itself 💪🏿.
Creating our Widget
Assuming we've already created the custom Page Type, which should have 1 string field named ContentHTML, we can jump right into creating our Widget:
public class HTMLTagWidget : ViewComponent
{
    private readonly IPageRetriever retriever;
    private readonly HTMLTagStore store;

    public HTMLTagWidget(
        IPageRetriever retriever,
        HTMLTagStore store)
    {
        this.retriever = retriever;
        this.store = store;
    }

    public async Task<IViewComponentResult> InvokeAsync(
        ComponentViewModel<HTMLTagWidgetProperties> vm)
    {
        var props = vm.Properties;

        var tagNodeGuid = props.HTMLTags
            .FirstOrDefault(t => t.NodeGUID);

        if (tagNodeGuid == default)
        {
            string error = "No HTMLTag Page has been selected";

            return View("_Error", error);
        }

        var htmlTag = await retriever.RetrieveAsync<HTMLTag>(
            q => q.WhereEquals("NodeGUID", tagNodeGuid));

        if (htmlTag is null)
        {
            string error = $"Could not find Page [{tagNodeGuid}]";

            return View("_Error", error);
        }

        var (location, description) =
            vm.Properties.TagLocation switch
            {
                "Head" => (TagLocation.Head, "in the <head>"),
                "AfterBodyStart" => (TagLocation.AfterBodyStart,
                    "after the <body> start"),
                "BeforeBodyEnd" => (TagLocation.BeforeBodyEnd,
                    "before the </body> end"),
                "Widget" or _ => (TagLocation.Widget,
                    "to this Widget's location in the Page")
            };

        store.Add(location, htmlTag.ContentHTML);

        var model = new HTMLTagWidgetViewModel(
            location, description, htmlTag);

        return View(model);
    }
}
We start the Widget with some data validation and then we query for the HTMLTag Page that was selected. If the Page data exists, we use a switch expression and some tuples to match the string position value with an Enum (TagLocation) and some friendly description text.
Then we store our tag in the HTMLTagStore service and create our Widget's HTMLTagWidgetViewModel model.
View Model and Widget Properties
Let's look at the model and then the HTMLTagWidgetProperties definition:
public class HTMLTagWidgetViewModel
{
    public HTMLTagWidgetViewModel(
        HTMLTagLocation location,
        string description,
        HTMLTag htmlTag)
    {
        Tag = new HtmlString(htmlTag.ContentHTML);
        Description = description;
        Location = location;
    }

    public HTMLTagLocation Location { get; }
    public string Description { get; }
    public HtmlString Tag { get; }
}
And here's our Widget's properties:
public class HTMLTagWidgetProperties : IWidgetProperties
{
    [EditingComponent(
        PageSelector.IDENTIFIER,
        Order = 0,
        Label = "HTML Tag",
        ExplanationText = "The HTML Tag Page that is source of content for this Widget")]
    public IList<PageSelectorItem> HTMLTags { get; set; } =
        Array.Empty<PageSelectorItem>();

    [EditingComponent(
        DropDownComponent.IDENTIFIER,
        Order = 1,
        Label = "Tag Location",
        ExplanationText = "The location on the current Page where the HTML Tag should be added")]
    [EditingComponentProperty(
        nameof(DropDownProperties.DataSource),
        "Widget;This Widget's Location\r\nHead\r\nAfterBodyStart;After Body Start\r\nBeforeBodyEnd;Before Body End")]
    public string TagLocation { get; set; } = "";
}
The View Model is pretty simple 😃, so let's look at a clip of what the Widget properties will show in the Page Builder:

The content manager can select a Page using the PageSelector Form Component, and specify a location for the Tag 👏🏼.
HTMLTagWidget View
Let's quickly look at our Widget's View and see how we can enhance the content management experience by supplying helpful information:
I'm using the PageBuilder Mode Tag Helper NuGet package to make sure our helpful information only shows up when the site is rendered in Edit mode for content managers using the Page Builder 🤓.
@model Sandbox.Components.Widgets.Tags.HTMLTagWidgetViewModel

<page-builder-mode include="Edit">
    <div>
        <h4>Tags added @Model.TagLocation in Preview/Live</h4>

        <p>
            <pre>@html.Value</pre>
        </p>
    </div>
</page-builder-mode>

@if (Model.Location != TagLocation.Widget)
{
    return;
}

<page-builder-mode exclude="Edit">
    @html
</page-builder-mode>
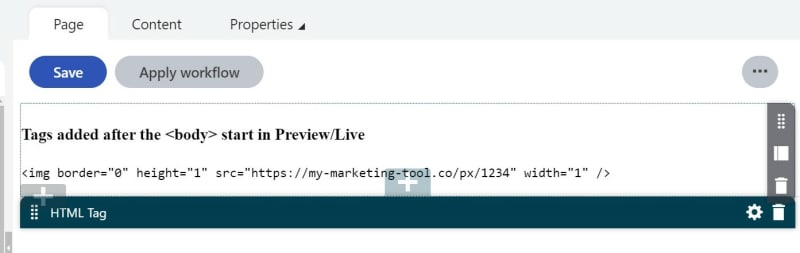
The view shows the exact content of the HTML Tag using <pre>, so that anyone using the Page Builder can see exactly what the Widget is doing to the Page, since normally these Tags don't have any visual impact.
If a tag is added to a Page and no one can see it, is it really even there? 🤣
We also include the helpful description so that we know where in the Page to check for the rendered Tags when inspecting the DOM when viewing the site in Preview / Live mode.
Here's a screenshot in the Page Builder using our original example Tag:
If the Tag isn't be rendered in the Widget, then we exit early and leave the Tag rendering up to other parts of our Page 😎.
Create a Tag Store
Now that our Widget is complete, we can move onto the HTMLTagStore.
This class is going to contain all of our Tags, from all HTMLTagWidgets for the whole request, and it will expose them to the PageHTMLTagsViewComponent so they can be rendered:
public enum TagLocation
{
    Widget,
    Head,
    AfterBodyStart,
    BeforeBodyEnd
}

public class TagStore
{
    private readonly Dictionary<TagLocation, List<string>> store =
        new();

    public IEnumerable<HtmlString> GetTags(
        TagLocation location) =>

        store.TryGetValue(location, out var tags)
            ? tags.Select(t => new HtmlString(t)).AsEnumerable()
            : Enumerable.Empty<HtmlString>();

    public void StoreTag(TagLocation location, string tag)
    {
        if (store.ContainsKey(location))
        {
            store[location].Add(tag);

            return;
        }

        store.Add(location, new() { tag });
    }
}
I use a C# 9 target-type new expression to add the tag to a new array and add that to my store 🧐.
This service class has an internal Dictionary<TagLocation, List<string>>, where it stores all tag strings by their location, and exposes them by location as a collection of HtmlString instances, ready to be rendered.
This service is simple because its only role is to act as a pipe 👩🏽🔧 between our Widgets and the PageHTMLTagsViewComponent we will create. Dependency injection makes sure the ends of the pipe point to the correct places.
We register this class in the ASP.NET Core dependency injection container as scoped, so that a single instance is shared by all consumers for the duration of each request:
If you want to learn why and how to keep your
Startup.csclean 🚿, check out my post Kentico Xperience Design Patterns: Good Startup.cs Hygiene.
public class Startup
{
    public void ConfigureServices(IServiceCollection services)
    {
        // ...

        services.AddScoped<HTMLTagStore>();
    }
}
Create an HTML Tag Tag Helper
We only need one more piece to finish our HTML Tag puzzle 🧩.
We need a way to get the right tags from the HTMLTagStore into the Page in the right location.
We could use dependency injection in Views to inject our HTMLTagStore directly into our _Layout.cshtml, but I prefer to move logic out of Razor and into C# classes 👍🏾, which are going to be more easily testible and reusable.
Let's create our View Component class below:
public class PageHTMLTagsViewComponent : ViewComponent
{
    private readonly HTMLTagStore store;

    public PageHTMLTagsViewComponent(HTMLTagStore store) =>
        this.store = store;

    public IViewComponentResult Invoke(TagLocation location) =>
        View(new PageHTMLTagsViewModel(location, store));
}
And here's our View Model:
public class PageHTMLTagsViewModel
{
    public PageHtmlTagsViewModel(
        TagLocation location, HTMLTagStore store) =>

        Tags = store.GetTags(location);

    public IEnumerable<HtmlString> Tags { get; }
}
These classes are pretty simple now, but there's some enhancements we could make that would add complexity:
- Query for global Tags that should be added to every page
- Allow macros in Tags so that they could take into account the current Page's Context (URL, NodeID, ect...)
- Excluding a certain subset of tags when visitors have opted out of data collection
Creating a View Component now, puts us on the best architectural path for future enhancements 😇, without much ceremony or overhead.
Now, let's look at the View Component's View:
@model Sandbox.Components.Tags.PageHTMLTagsViewModel

@foreach (var tag in Model.Tags)
{
    @tag
}
Wheeew. Almost done!
Executing the View Component in Our Layout
Now we need to call our PageHTMLTagsViewComponent in the _Layout.cshtml to render the right Tags in the right location in the DOM. Let's go back to our original example:
<!DOCTYPE html>
<html lang="en">
<head>
    <vc:page-html-tags location="Head" />
</head>
<body>
    <vc:page-html-tags location="AfterBodyStart" />

    @RenderBody()

    <vc:page-html-tags location="BeforeBodyEnd" />
</body>
</html>
This seems maintainable, and flexible enough that we could enhance it with the scenarios we listed above!
It also provides a helpful content management experience by clearly showing which Tags are going to be used on the Page, and where they should be expected to show up 🤩.
Conclusion
To make our Kentico Xperience sites useful to others (and not just us developers), we need to think about the site's features from their perspectives!
When stepping into the shoes of a marketing professional, we quickly realize the need to add custom HTML marketing tags to any Page in our Xperience application.
Using the Page Builder to accomplish this enables the best content management experience.
Fortunately using a combination of features from ASP.NET Core and Kentico Xperience, we're able to give marketers the flexibility to place specific tags on each Page using the Page Builder, and clearly show which tags will be rendered in which area of the Page 🥳.
By encapsulating each set of responsibilities in a separate class, we make our implementation flexible for feature growth and maintainable for other developers working on the application 🙌🏻.
I plan on turning the code above into a NuGet package at some point in the future, so if you have any recommendations for feature additions, let me know in the comments below.
...
As always, thanks for reading 🙏!
We've put together a list over on Kentico's GitHub account of developer resources. Go check it out!
If you are looking for additional Kentico content, checkout the Kentico tag here on DEV:
Or my Kentico Xperience blog series, like:


Latest comments (0)