In this tutorial, we wil be learning how to deploy a simple web application to the cloud using AWS and Nginx.
Prerequisites
- A web application you want to deploy
- An AWS account
Step 1: Select a region
Regions are very important in deploying your application to the cloud. Why? The closest the region is to the user, the faster they can access resources from the server.
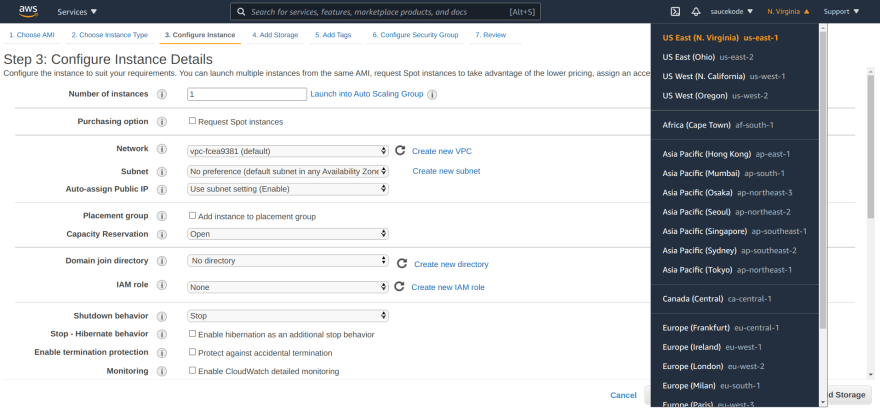
In the image above, I selected North Virginia as my server region, and you are free to choose a different one.
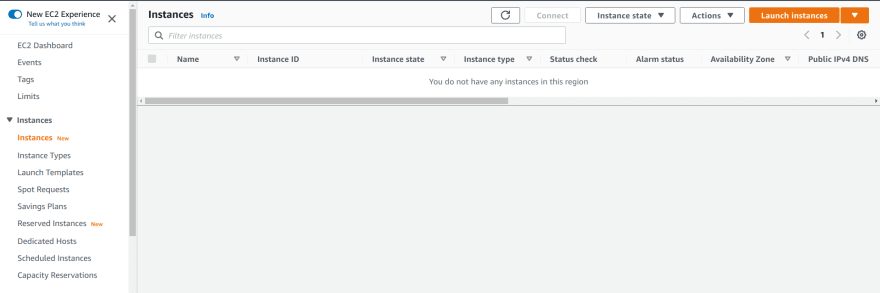
Step 2: Create an instance
First step, we need to set up the instance where we would be deploying our application.
An instance in layman term is a remote computer or as written in the AWS docs - a virtual computing environment. Instance is the term given to a remote machine by AWS, other cloud service providers like Digitalocean and Microsoft's Azure simply call theirs Droplets and Virtual Machines respectively.
Log into your AWS console as a root user. Navigate to the AWS services card and select EC2 (Elastic Compute Cloud) service.
You should be presented with this page. Click on Launch instances. You will be required to choose an Amazon Machine Image. A machine image represents the type of OS your virtual computer would run on, because, what's a computer without an OS?
I selected the Ubuntu Server 20.04 LTS (HVM), SSD Volume Type, you are free to choose a different image.
Next up, select an instance type needed to run your application. Instance types are more like CPU capacity and processor type for your machine.
Here, I picked the t2.micro instance type. It's on the free tier plan. You can choose a different instance type, depending on what your application demands.

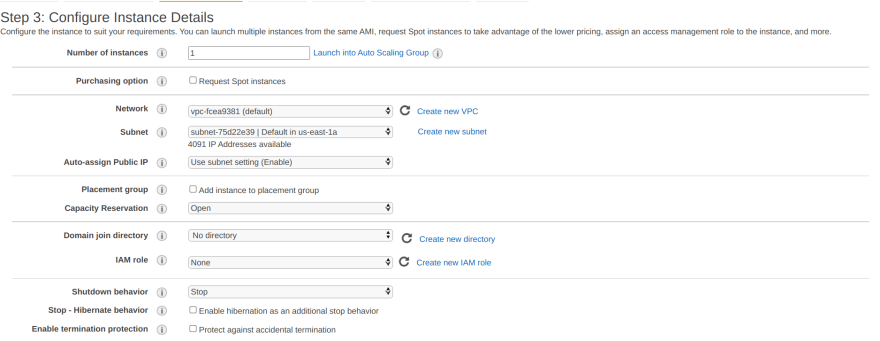
Next up, we configure the details for our instance.
Here, we are going to edit two things. Our subnet information and user data. The idea behind user data is to preinstall softwares you will be needing in your virtual machine.
Select any subnet for your machine, after this is done, an IP address is assigned to your VM. IP addresses are ways to identify a computer, communicate and share resources with them.
There is an option to create your own subnet and if you decide to make your newly created subnet private, you cannot be able to access resources provided to public subnets in that region. Simply, AWS provides every instance internet to pull resources. If you make your subnet private, you will have to find a way to pull resources.

In the userdata, I specified that I want git preinstalled into my vm.
Next, set up storage for your vm. This is more like your SSD. Remember my machine image is of SSD volume type.

Next, tags. Leave your tags empty. Tags are more like labels you give to your AWS resources. It is presented as a key-value pair data structure.
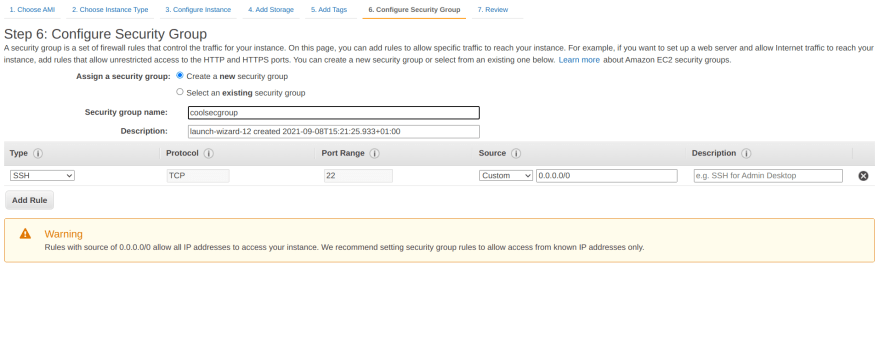
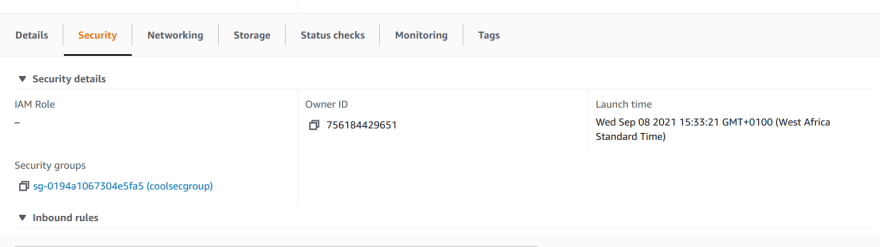
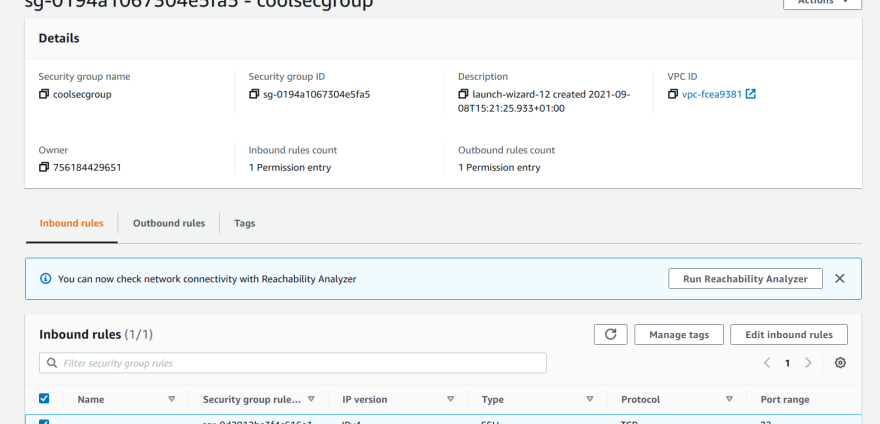
Next, security groups. There is a default security group set for your instance. Security groups are more like firewalls.
Firewalls are protective walls for what type of requests come into our server. For example: you can block HTTP requests from accessing your web application
You can choose to use an existing security group or create a new one. I will be creating a new one.
Finally, review everything and launch.
After launch, you will be required to create a key pair either RSA or ED25519 format. This is required to securely log into your ec2 instance shell. Select a pair type and give it a name. Download the key pair. Once done, launch your instance.
After this, your instance should be up and running.

Step 3: Log into your virtual machine
Our remote machine is ready for deployment but we need to login and perform the deployment operation. The way you have a physical machine and log into with a username and password. We are dealing with a remote machine and so we need a way to connect to it, the key pair you created and downloaded is the way to connect.
Click on your instance ID and click connect. Copy the highlighted command (I highlightd it, not AWS) using the copy icon situated left of the command.
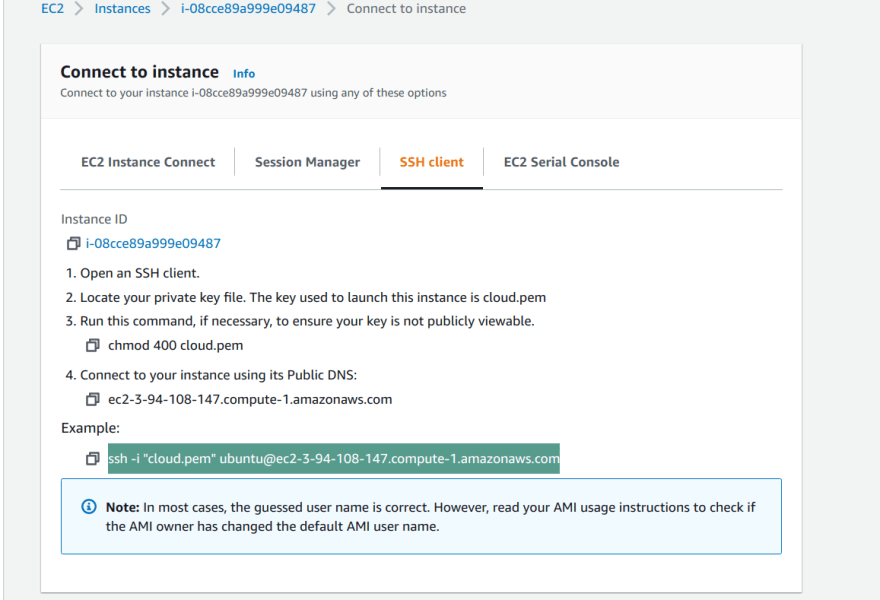
Open your terminal. If you are using a Windows machine, download git bash or WSL (Windows subsystem for Linux). If you are using a Linux machine, don't bother. Now, cd into the directory where you downloaded that ssh key pair, paste the command you copied and press enter to run it.
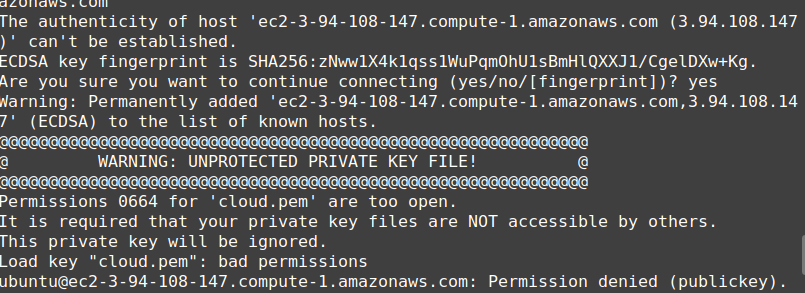
Follow the prompt. If you get the error in the image below, don't worry, simply run:
chmod 400 <name of RSA file>.pem
Once done, run the ssh command again and now you should be logged into your vm. Yippie! 😊
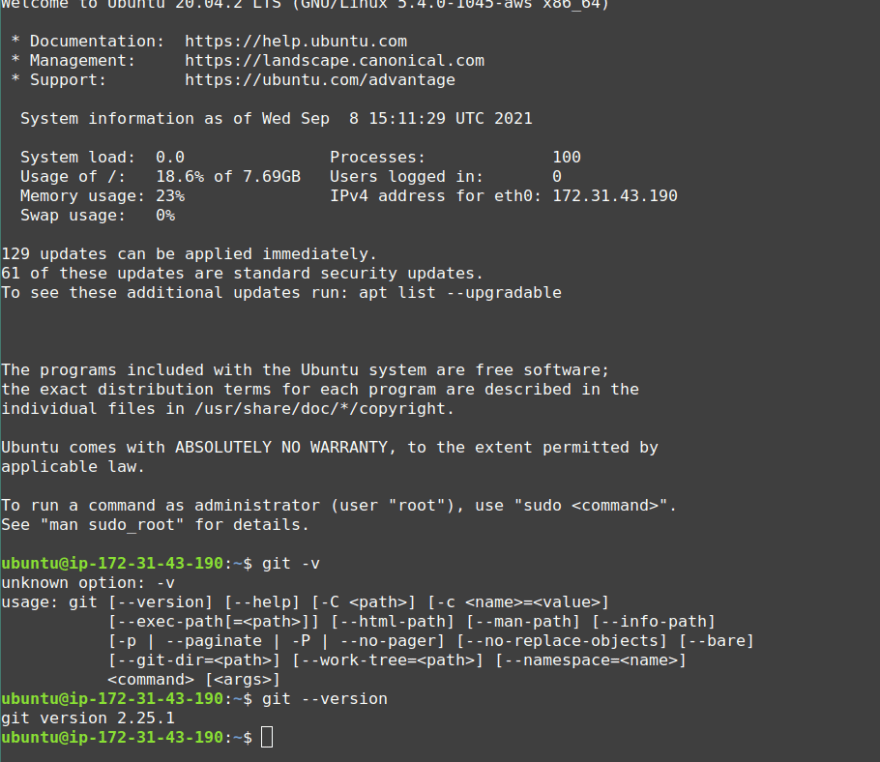
Also, git was successfully installed. Remember what we specified in our user data.
Step 4: Set up Nginx server
Before we set up the Nginx server, we have to install Nginx.
NGINX is an open source software for web serving, reverse proxying, caching, load balancing, media streaming, and more - www.nginx.com
Generally in Linux, there are operations that require administrator rights so you would need the sudo command. We can choose to eliminate that and carry out those operations without admin rights by running the sudo su command.
Download the nginx signing key
wget http://nginx.org/keys/nginx_signing.key
Add the downloaded key
apt-key add nginx_signing.key

This should be the response.
cd into the /etc/apt directory and edit the sources.list file by running
nano sources.list
Once your nano editor is open, add this to the end of the file.
deb http://nginx.org/packages/ubuntu xenial nginx
deb-src http://nginx.org/packages/ubuntu xenial nginx
Return to home directory
cd /home/ubuntu
Run the apt-get update command to update the Nginx software.
Once the update is complete, install Nginx. Run this command:
apt-get install nginx
If you have issues installing nginx. If this error comes up, demanding you install libssl1.0.0 dependency.

Run this command sequentially.
echo "deb http://security.ubuntu.com/ubuntu bionic-security main" | sudo tee -a /etc/apt/sources.list.d/bionic.list

sudo apt update

apt-cache policy libssl1.0-dev

sudo apt-get install libssl1.0-dev
Then run again to install nginx,
apt-get install nginx
Start the nginx service. Run the command:
service nginx start
To ensure the nginx service is up and running. Run this command:
systemctl status nginx
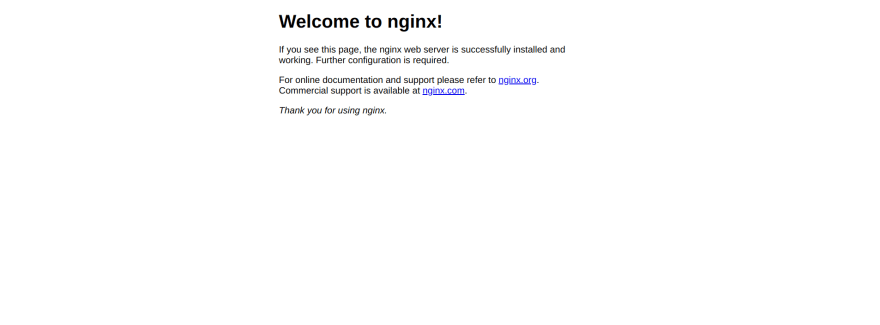
Let's run our instance over the browser, if the default nginx page is served, then it works perfectly.
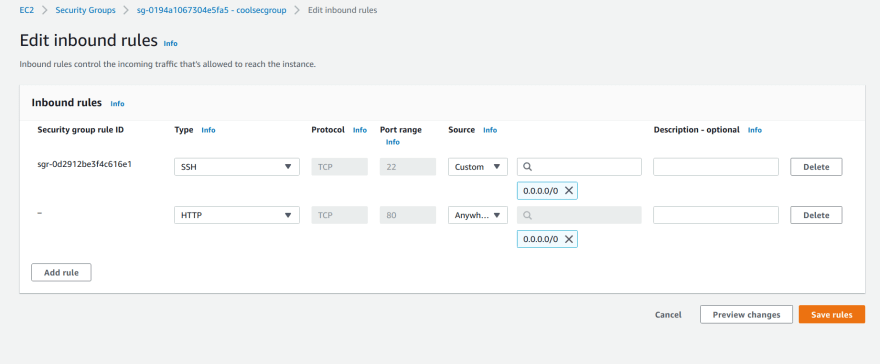
Right now, our web page will not be served, you will notice the browser loading without an information. We missed one vital step. The protocol for web browsers to fetch web pages is HTTP. When we set up our security groups, we had only one rule which is the SSH rule. We need to edit our security group to add in the HTTP rule.
Click on the security groups. Click on Edit inbound rules
Click on Add rule. Select HTTP. Set CIDR blocks to 0.0.0.0/0 and click Save rules
Restart the nginx server. Run this command:
service nginx restart
Run the instance over the browser again. Edit the protocol in the url from https to http.
This is what we should have now. Yippie!
Step 5: Deploying our web app
I will be deploying a react app.
First, we need to install nodejs. A react application cannot function without nodejs.
apt update
apt install nodejs
Confirm node and npm is intalled
node -v
npm -v
If node is installed but npm is not, simply run:
apt-get install npm
Next, clone your react project from github.
git clone <project repository on github>
Then, navigate into the project directory, install the dependencies and build the react project. Run these commands respectively.
npm install
npm run build
Next, copy the contents of your build to the html directory in nginx.
cp -r /home/ubuntu/<directory name>/build/. /usr/share/nginx/html
After this, restart your nginx service and run your instance over the browser.
Congratulations! You've successfully deployed a web app to AWS.
Conclusion
This article taught us how seamless it is to deploy a web application using AWS and Nginx. Head over to the AWS docs for more tutorials on using AWS services.


Latest comments (0)