Table of Contents
- Introduction
- Landing Page
- Registering with Sashido
- Parse Users
- Using Parse Objects
- Google Teachable Machine
- GMaps API and Parse Queries
- Final Thoughts
Introduction
The goal of my website is to facilitate the process of mapping and understanding our ocean's coral reefs. My website allows users to take pictures of coral reefs and enter the location of the coral. Then, our machine learning model classifies the coral as either healthy or unhealthy. Finally, all this data is plotted on our map that is accessible to anyone, without the need for a log-in. Our application aims to help track the health of the world's coral reefs by consolidating all our data into one map accessible to all. The front-end of the website is made with HTML, CSS, Javascript, and the GMapsAPI. The backend management of the user data is done in Parse and Sashido, a platform that adds useful functionalities on top of the Parse framework. If you want to check out my code in more detail it is on this GitHub page.
If you are interested in making a similar project using Google Teachable Machine and Sashido, this tutorial can act as an example for your own project. I also introduce how to use the Imgur API and the GMaps API, which are both great tools to simplify some parts of your project.
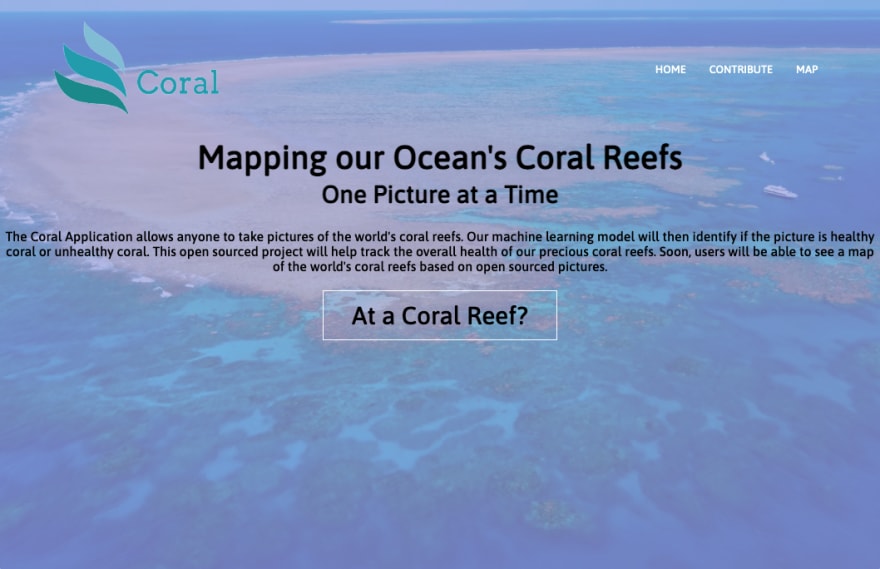
Landing Page
This is the landing page where the user can navigate to the contribution page or the map of the coral reefs.
 When building a application like mine, you can customize how your website looks with any HTML and CSS code(it's all up to you), but the most important part of using Parse with Javascript is this code is put at the bottom of your HTML page where Parse is used:
<script src='parse/dist/parse.min.js'></script>
    <script src="https://cdnjs.cloudflare.com/ajax/libs/parse/3.1.0/parse.min.js"></script>
These scripts allow your website to connect to the Parse Servers to store important data that your users enter.
Registering with Sashido

Once you create an account with Sashido, you will be directed to this page above. Make sure that you select the Javascript tab above. You need to copy your Parse initialization and serverURL found on this page into your Javascript file. You will not be allowed to make calls and queries to Parse unless you add the Parse initialization and serverURL.
Implementing Parse Users

If you click the "Contribute" or "At a Coral Reef?" buttons on the home page, the user will be led to this log-in page because users need an account before they can contribute to the site. You can direct users to different html pages on your website with this line of Javascript.
window.location.replace("pageDirectedToNext.html");
To implement the log-in/sign-up page above, I used the User functionalities in Parse. Below is the Javascript that is executed when you click on the log in or sign up button.
First, you need to initialize your connection to the Parse servers with your unique code and serverURL. Then we send each user's log-in and sign-up information to the Parse servers using the set function. To get this information from the user we use the document.getElementByID("id").value function.
async function signup(){
  Parse.initialize(
  "VmVG7QHqLMLl55A7HBS41M9VVEcHSBkOLRYPMFrV",
  "Fn00cz1HubhArl6Qe3htiqjSVFBRzzkPHfMGOFEY"
  );
  Parse.serverURL = 'https://pg-app-x0nn57scg4turute43zp66450ts38l.scalabl.cloud/1/';
  const signup_username = document.getElementById("username-field").value;
  const signup_password = document.getElementById("password-field").value;
  const user = new Parse.User();
  user.set("username", signup_username);
  user.set("email", signup_username);
  user.set("password", signup_password);
  try {
    await user.signUp();
    document.getElementById("status-message").innerHTML = "Successfully Signed Up " + signup_username;
  }
  catch (error) {
    document.getElementById("status-message").innerHTML = "Error: " + error.code + " " + error.message;
  }
}
async function login(){
  Parse.initialize(
  "VmVG7QHqLMLl55A7HBS41M9VVEcHSBkOLRYPMFrV",
  "Fn00cz1HubhArl6Qe3htiqjSVFBRzzkPHfMGOFEY"
  );
  Parse.serverURL = 'https://pg-app-x0nn57scg4turute43zp66450ts38l.scalabl.cloud/1/';
  const login_username = document.getElementById("username-field").value;
  const login_password = document.getElementById("password-field").value;
  try{
    await Parse.User.logIn(login_username, login_password);
    document.getElementById("status-message").innerHTML = "Successfully Logged In: " + login_username;
    window.location.replace("contribute.html");
  }
  catch (error) {
    document.getElementById("status-message").innerHTML = "Error: " + error.code + " " + error.message;
  }
}
Using Parse Objects
Once the user logs in to their account, they will be allowed to upload their images and location on this page. With the help of the Imgur API, the images and the latitude/longitude data are uploaded to a database powered by Sashido. 
When sending data to the Parse Servers that is not User(log-in, sign-up) data, you must use Parse Objects. I use Parse Objects here to send latitude and longitude data back to be stored in the database. In the following code, LocationObject is an example of how you would use a Parse Object.
function submitLocation(){
  Parse.initialize(
  "VmVG7QHqLMLl55A7HBS41M9VVEcHSBkOLRYPMFrV",
  "Fn00cz1HubhArl6Qe3htiqjSVFBRzzkPHfMGOFEY"
  );
  Parse.serverURL = 'https://pg-app-x0nn57scg4turute43zp66450ts38l.scalabl.cloud/1/';
  const LocationObject = Parse.Object.extend("Location");
  const lat_input = document.getElementById("lat-field").value;
  const long_input = document.getElementById("long-field").value;
  const location = new LocationObject();
  location.set("latitude", lat_input);
  location.set("longitude", long_input);
  location.save()
      .then((location) => {
  // Execute any logic that should take place after the object is saved.
  alert('Response Submitted! Now you are being directed to our sitewide map.');
}, (error) => {
  // Execute any logic that should take place if the save fails.
  // error is a Parse.Error with an error code and message.
  alert('Failed to create new object, with error code: ' + error.message);
});
  window.location.replace("map.html"); //removes current html page and puts in map.html
}
After sending the LocationObject to the Parse Servers, you should see something like this on your Sashido dashboard:

Google Teachable Machine
Where to make your own Teachable Machine Model

I found that the easiest way to upload images to Google Teachable Machine is with a folder on your computer or a folder from Google Drive. You need to upload a folder of images to Class 1 and Class 2, so that the model can learn the defining characteristics of each class. The more correctly classified images you add to each class the more accurate your model will be. After you upload all your images, you can click the train your model button. Finally, you need to export your Teachable model's URL, so that it can be loaded in your website code.
After the user uploads their image to the site, the machine learning model we created above will predict the health of the coral and will add a line of text displaying the prediction. Here the prediction is "Healthy Coral: 1.00". This means that the model is 100% confident in its prediction of "Healthy Coral". Once the user presses the submit button, all their data is sent to the database and to the map page. 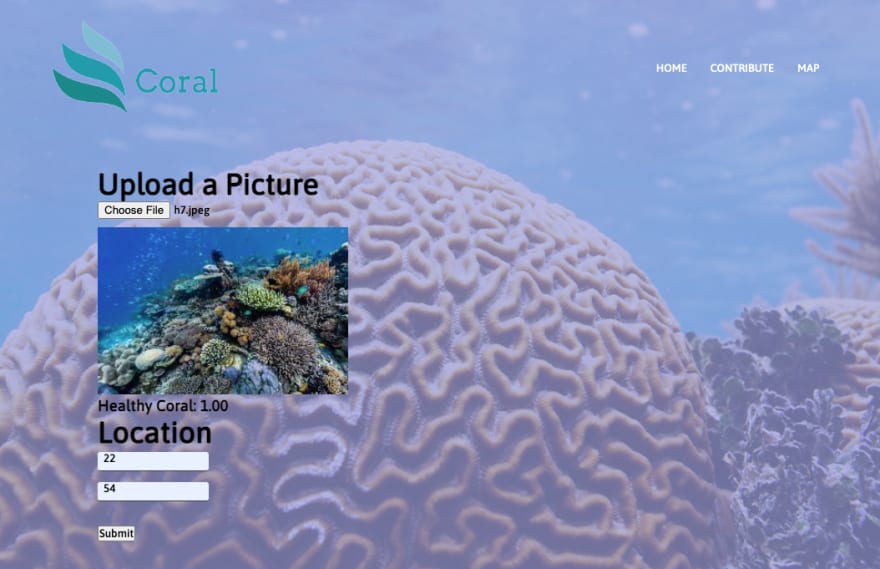
Google Teachable Machine identifies the picture of coral uploaded as either healthy or unhealthy. The main two things about running Google Teachable Machine in Javascript are the tmImage functions: load and predict. Here is how to use them:
model = await tmImage.load(modelURL, metadataURL);
const prediction = await model.predict(image);
You get modelURL and metadataURL when you export your Teachable Machine Model.
Also don't forget to add this code to the html file where you run the Teachable Machine to access the tmImage functions.
<script src="https://cdn.jsdelivr.net/npm/@tensorflow/tfjs@1.3.1/dist/tf.min.js"></script>
<script src="https://cdn.jsdelivr.net/npm/@teachablemachine/image@0.8/dist/teachablemachine-image.min.js"></script>
Managing user's photos
In the following code, an imgur picture link of the coral and the health status of coral are both sent to Parse Servers, so we can later place these data points on the map. The latter half of the code fully shows how I ran the Teachable Machine model on my website.
async function loadFile(){
  Parse.initialize(
  "VmVG7QHqLMLl55A7HBS41M9VVEcHSBkOLRYPMFrV",
  "Fn00cz1HubhArl6Qe3htiqjSVFBRzzkPHfMGOFEY"
  );
  Parse.serverURL = 'https://pg-app-x0nn57scg4turute43zp66450ts38l.scalabl.cloud/1/';
  file = event.target.files[0]; //image put in by user
  //creating a imgur link with the file put in by the user
  const formdata = new FormData();
  formdata.append("image", file);
  fetch("https://api.imgur.com/3/image/", {
    method: "post",
    headers: {
      Authorization: "Client-ID 14e494303e30a2d"
    }
    , body: formdata
  }).then(data => data.json()).then(data => {
    link = data.data.link;
  })

  var image = document.getElementById('output');
    image.src = URL.createObjectURL(event.target.files[0]);
  const mainmodelURL = "https://teachablemachine.withgoogle.com/models/b2ldFt-gT/";
  const modelURL = mainmodelURL + "model.json";
  const metadataURL = mainmodelURL + "metadata.json";
  model = await tmImage.load(modelURL, metadataURL);
  maxPredictions = model.getTotalClasses();
  const prediction = await model.predict(image);
  var classPrediction = "";
  if (parseFloat(prediction[0].probability.toFixed(2))>=parseFloat(prediction[1].probability.toFixed(2))){
    classPrediction = prediction[0].className + ": " + prediction[0].probability.toFixed(2);
    healthy = "green";
  }
  else {
    classPrediction = prediction[1].className + ": " + prediction[1].probability.toFixed(2);
    healthy = "red";
  }
  document.getElementById("image-results").innerHTML = classPrediction;
}
GMaps API and Parse Queries
This is the map page with green markers signifying healthy coral and red markers signifying unhealthy coral. All the data on this map page, powered by GMaps API, is pulled from our database powered by Sashido. Additionally, if you hover a marker, you can access the picture that the user uploaded. As you can see, I am hovering the red marker in the Philippine Sea, and a link for a picture of that captured coral appears.
To get data from our databases we use a Parse query. We will use this data to place location points onto our map.
const Location = Parse.Object.extend("Location");
  const query = new Parse.Query("Location");
  const results = await query.find();
Here I iterate through the whole query and index each Location object to get all the information(latitude, longitude, health of coral, and coral image) for the Google Map.
for(var i = 0; i < results.length; i++){
    var dict = {"position": new google.maps.LatLng(results[i].get('latitude'), results[i].get('longitude')), "type":results[i].get('health'), "link":results[i].get('photo_link')};
    features.push(dict);

  }
Finally, here is a video tour of the Coral Project Website.
https://youtu.be/gLmabszfWh0
Final Thoughts
Reflecting on this internship opportunity from Sashido, I throughly enjoyed this experience and thank the Sashido team for assisting me throughout. Particularly, I enjoyed working with a database for the first time thanks to infrastructure of Sashido/Parse. I found that this would be the hardest part of the project and the part where I would learn a ton. Parse makes it super easy to send and query data from databases, so it was perfect for a beginner like me. I challenged myself to make a website that looked better than my previous ones using HTML and CSS, and I'm pretty happy with the result. Finally, I also learned a lot about Javascript to program the interactions behind the scenes in the website. This is one area that I feel like I really honed in my skills during this project.
Useful Links:
Getting Started Guide Part 1 and Part 2
The Awesome Teachable Machine List
Teachable Machine Node
Parse Users
Intro to Parse Query
How to upload images with Imgur API


Top comments (0)