Is it possible to embed audio and video files into web pages without using Flash or other plugins?
HTML5 is a new standard for creating websites and apps. It was developed by the World Wide Web Consortium (W3C) and aims to provide developers with better tools for building cross-platform applications. The W3C has also created a specification called Web Audio API that allows developers to create interactive audio experiences within their sites.
Audio files, as well as video files, are now part of HTML5, allowing you to add audio content and videos to your site without having to rely on external plug-ins. This means that you don’t need to download additional software to play music or listen to podcasts. Just some custom controls are enough to add the media.
1)- Video
In HTML, to add a video to your website all you have to do is use the <video></video> tag.
Let’s take a simple HTML page with only a heading and a video.
The code is:
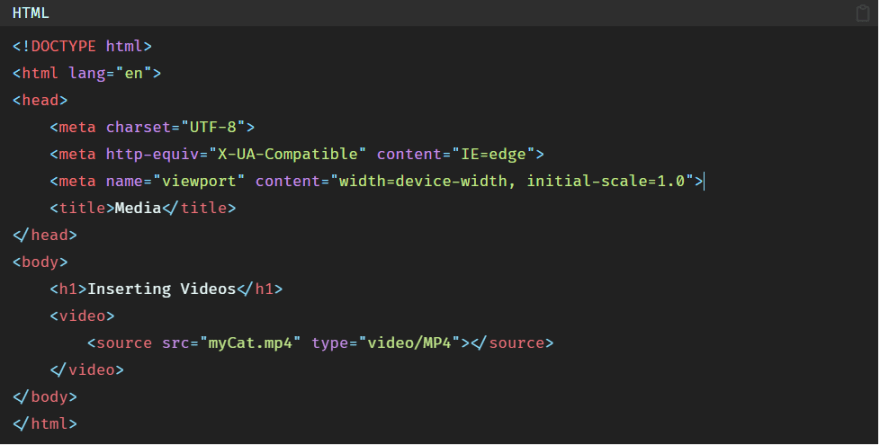
Inside the <video></video> tag we added the <source></source> tag.
The <source></source> tag is used to specify which video should be displayed, or in other words, to determine the source element of the video.
For that, the <source></source> tag accepts one essential attribute which is the src attribute. The src attribute is the one that takes in the name of the video we want to display plus the extension of the video.
Another attribute can be added to determine the type of the video, this attribute is type but it is optional.
So in the browser we have:

As you can see here, the video is now added to the browser. But there are 2 main problems here:
The first problem is that the video is taking up too much space, and the second problem is that there are no controls. So if we want to play the video or pause it or turn up the volume, we can’t.
Let’s see how to fix these problems.
For the first one, regarding the width of the video, we will just set a width using CSS. You can also set a height if you want , but in this example, we will add a width only:
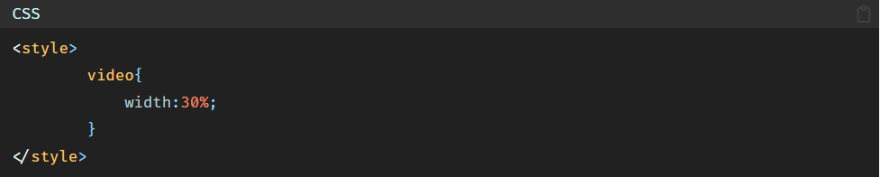
So the video now looks like this:

Now, let’s solve the second problem, which is to add the video controls.
To add video controls simply we will add the controls attribute inside the <video></video> tag like this:
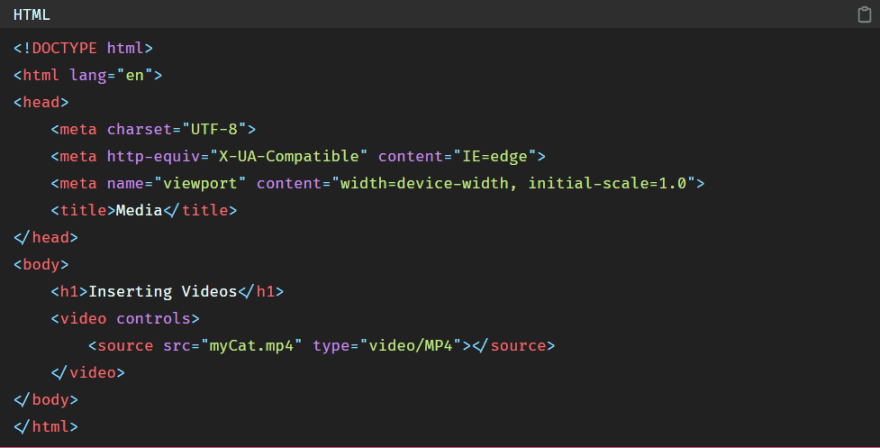
So the video now becomes:
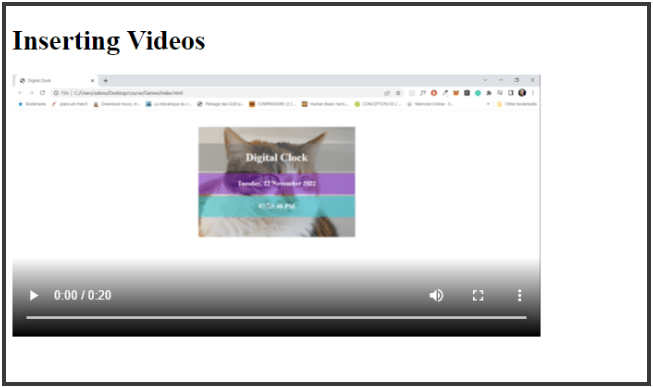
As you have noticed at the bottom of the video you have now this bar where you can play, pause the video, turn up the volume(volume controls)…
There are other attributes you can add to the <video></video> tag to have more control over the video.
a)- muted
To play the video without any sound the muted attribute should be added like this:

Now if you refresh the browser and play the video, you will see that the sound is muted.
b)- autoplay
autoplay attribute makes the video play automatically when the page is displayed. However, there are some “autoplay policies”: Recently, many browsers allow the video to be automatically played only if it is muted, and that is because when the user loads the page and the video is suddenly played the sound can be annoying. So to counter this problem, browsers now authorize the video to be played automatically if the sound is muted. Which is the case for Chrome autoplay policies for example.
The code is:
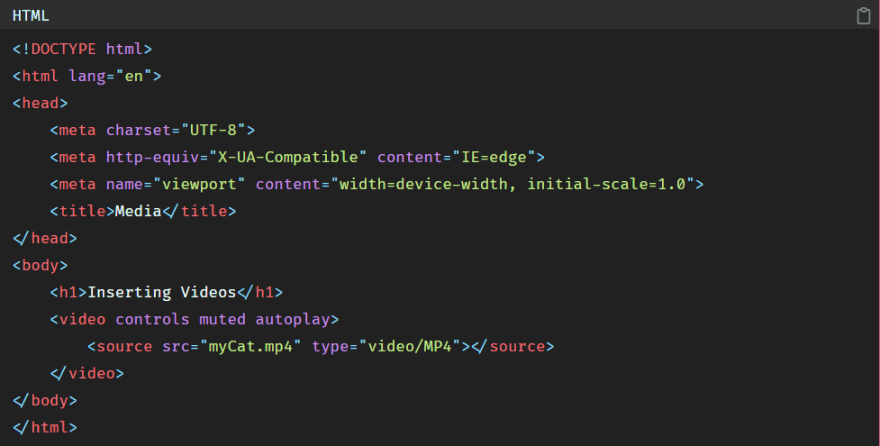
Now if you refresh the page you will see that the video plays on the page load.
c)- loop
To play the video again and again in a loop you can add the loop attribute.
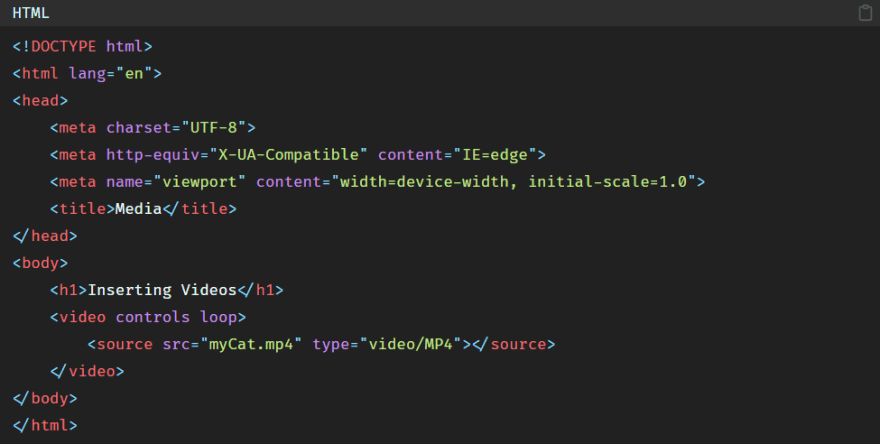
Now if you refresh the page and play the video, at the end you will see that the video will be played once again automatically, you don’t have to do anything.
That makes the video playback easy.
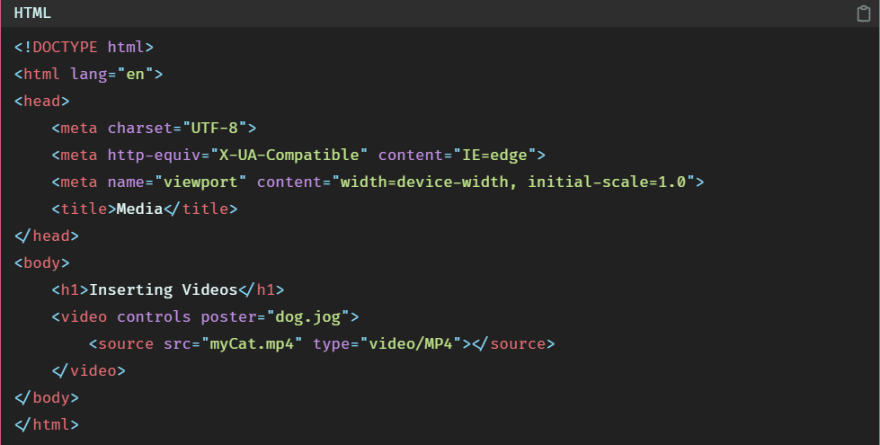
d)- poster
poster attribute allows us to add an image to the video that will be shown as long as the video is not played yet or while the video is downloading.
It is like a thumbnail for Youtube videos for example.
Let’s say that for this video I want an image of a dog to be shown.
In the browser we have:

So as you can see, as long as the user does not hit the play button, the dog picture will be shown. But if the user plays the video, then the dog picture will disappear.
2)- Audio
To add an audio to the HTML page we’ll use the same code we used to add a video, except this time instead of using <video></video> tag we’ll use <audio></audio> .
So the code is:

Here the src attribute takes in the audio source.
And the type attribute gives more information about the type of the audio file. So if the audio was an MP3 file for example, we would have added type=audio/mpeg.
The type attribute changes according to the type of the file formats
Now if you refresh the browser you will not see anything, and that is because to display the audio elements we need to add the controls.
So to add audio controls we’ll use the controls attribute.
Now we can see the audio file add to the browser:

As for <video></video> tag, we can use the same attributes to have more control over the audio file.
a)- muted
To play the audio without any sound the attribute muted should be added like this:
If you refresh the browser and play the audio, you will notice that the sound is now muted.
b)- autoplay
Audio autoplay attribute makes the audio play automatically when the page is displayed. However if you use Chrome, you will not be able to get the audio displayed automatically even if it is muted, and that is because Chrome has forbidden this.
But, if you try with Firefox, you will see that the audio can be played automatically if it is muted.
So the code is:
So the muted autoplay audio works well in Firefox.
c)- loop
To play the audio again and again in a loop you can add the loop attribute.

You can refresh the browser and see that the audio will be played again and again in a loop.
That makes the audio playback easy.
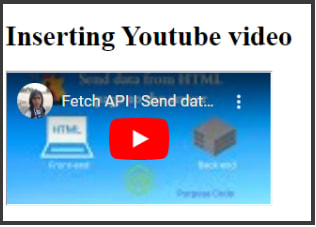
3)- YouTube video
Sometimes instead of adding a video directly to the web page, it would be better if we upload it to YouTube first and then add the link to the video to the web page. This will help avoid slowing down the loading of the web page and giving the user a bad experience.
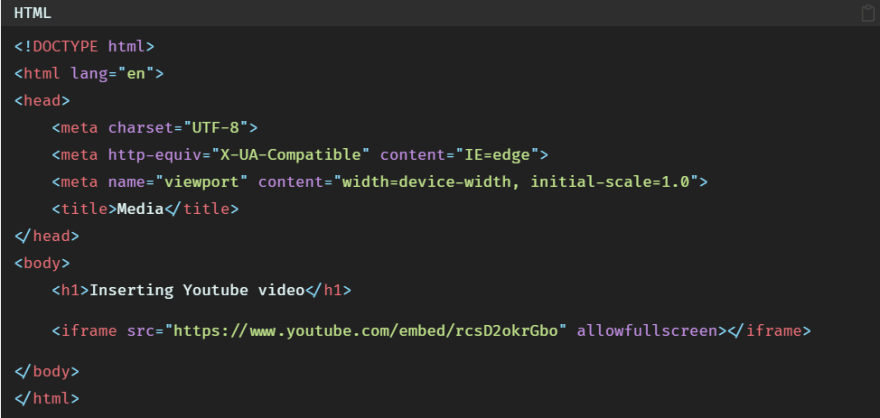
So to insert a YouTube video all we have to do is to use the <iframe></iframe> tag.

The src attribute accepts the link to the YouTube video we want to add to our website.
However, if you notice, the link of the YouTube video is not a “watch” link, but it is an “embed” link. Because inside the link there is this “/embed/” keyword.
So where can we find this “embed” link?
Simply by going to the YouTube video of your choice and click on the Share button.
When you click on the share button you will have this box of choices you can choose from, either you can share the video via WhatsApp or Facebook or Twitter…But you will also have at the beginning the “Embed” button like below:

So now if you click on the “Embed” button you will have this window:

So now you will see on the right the <iframe></iframe> tag we’re learning about in this tutorial.
This is how YouTube inserts the videos and this is exactly what we will do.
So if you want you can either copy/paste the <iframe></iframe> tag as it is to your code editor and you’re ready to go.
Or if you don’t want all the attributes that are inside the <iframe></iframe> tag then you can just copy the “embed” link as below and paste it to your code editor:

So in the browser we have:
You can of course adjust the width and the height of the video either by adding the width and height attributes inside the <iframe></iframe> tag, But the best practice is to keep HTML separated from CSS, so we will do that through CSS:

So now we have a bigger video on the screen:

Let’s see some attributes that we can use to have more control over the video.
a)- allowfullscreen
To display the video full screen there is an attribute for that, and that is allowfullscreen.
If we add the “embed” link only without this attribute then this feature below will be disabled.
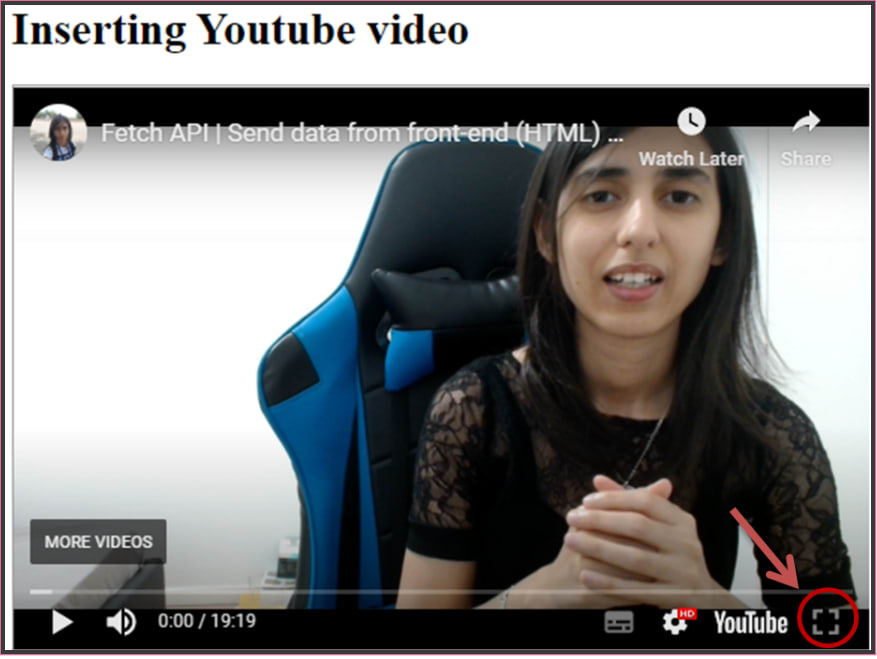
But if we add the allowfullscreen attribute then the feature will be enabled.
Now if we refresh we’ll have:

This is the full screen video Mode.
b)- mute
To make the video muted we’ll use the mute attribute.
The mute attribute is added inside the link, and it is given a value of 1.

If you refresh the browser and play the video, you will see that the sound is muted now.
c)- autoplay
To play the video automatically it should be muted first.
The attribute that will help us to play the video automatically is autoplay.
This attribute will also be added to the link and given a value of 1.
The mute and autoplay attributes will be separated by an ampersand “&”.

Now if you refresh the browser, the video will start playing with a muted sound.
d)- loop
If you want to play the video over and over again, then loop attribute will help you do that.
However, this attribute will not be added directly after the link like mute and autoplay attributes.
The syntax will be:

As you notice, we added the “playlist” keyword first and we set the value of this keyword to the exact string value that comes after “embed/“, and then we added an ampersand “&” and the loop attribute.
You can refresh the browser and see that the video will be played in a loop.
e)- controls
To display the video without any controls you can use the controls attribute and set the value to 0.
The default value of the controls attribute is 1.

4)- Conclusion
Adding sound files and videos to the web page enhances the user experience.
In this tutorial we’ve seen how to add these media to a website using different tags and default controls and attributes to have more control over the elements.
We can add different audio formats and sound content to the website using audio tags.
We can add a video directly to the website or through YouTube as well as some features using the video elements attributes.


Top comments (1)
Сongratulations 🥳! Your article hit the top posts for the week - dev.to/fruntend/top-10-posts-for-f...
Keep it up 👍