
Disclaimer
This article serves as a sequel to my tutorial on creating generative NFT art. If you haven’t read it, I suggest you do so. I assume your system is already set up (with Python and required packages), and you have used the generative-art-nft library.
Introduction

In the previous tutorial, you learned how to create a generative art collection with custom rarities. If you followed along with your custom artwork (or used my samples), you should now have a collection of PNG images, and a metadata CSV file that contains information on traits for each image.
This is a great first step towards creating an NFT collection but we still have a long way to go. The images that we generated exist on our local systems and are not really accessible to anyone. The metadata we generated is ideal for analyzing on Excel but is not in a format that adheres to standards (and by extension, cannot be used by an NFT marketplace platform like OpenSea).
I will be addressing these issues in this article. More specifically, we will show you how to:
- Upload Images to IPFS
- Generate compliant JSON NFT metadata
- Upload metadata files to IPFS
Don’t worry if some of these words don’t make sense right now. I will be explaining them as and when required.
How NFT Minting Works
To understand why we’re doing what we’re doing, we need to understand how NFT minting works. If you know this already, feel free to skip this section.
Let’s say you want to mint a collection of 10,000 NFTs. What does that really mean?
This means that you’re writing some code (called a smart contract) that tells the blockchain to initialize a table for you. This table stores ownership and metadata information about your NFTs. More specifically, each row of the table consists of the following information:
- The Token Identifier (or ID)
- The Owner of the Token
- The Metadata associated with the token
Here is an example table:

You can see here that the ID is nothing but a unique positive integer that identifies a particular NFT. The Owner column stores the addresses associated with each NFT’s holder. Finally, the Metadata is a column that may contain data of the NFT or about the NFT.
It is possible to store the entire image in the Metadata column of the table. However, storing data on a blockchain is expensive. To give you some context, our collection of 10,000 squirrels occupies a disk space of 600 MB. If we wanted to store 600 MB worth of data on the Ethereum blockchain, it would cost us $1 million dollars.
This is clearly not a great option. Therefore, in most cases, instead of storing data of the NFT, we instead simply store data about the NFT. This data (or metadata) is stored in a format called JSON. If you don’t know what JSON is, don’t worry about it. For our purposes, think of them like Python dictionaries (encapsulated in {}) that you encountered in the previous article to define layers.
This JSON file needs to have information about the NFT such as its name, description, image URL, attributes, etc. In order to make sure that everyone in the ecosystem (including NFT marketplaces like OpenSea) understands what’s in our JSON files, we need to format them in a way that is compliant with the standards. In our case, we will use the standards recommended by OpenSea.
Here is a JSON metadata file for a sample NFT.
my-nft.json

{
   "description": "Friendly OpenSea Creature",
   "image": "https://opensea-prod.appspot.com/puffs/3.png",
   "name": "Dave Starbelly",
   "attributes": [
       { "trait_type": "Base", "value": "Starfish" },
       { "trait_type": "Eyes", "value": "Big" },
       { "trait_type": "Mouth","value": "Surprised" },
   ]
}
Storing metadata in this format on the blockchain is still very expensive. Hence, we add an additional layer of abstraction, and upload this JSON to the cloud as well and simply store a URL pointing to the JSON file.
Therefore, at the end of the data, all you’re storing on the blockchain is https://mywebsite.com/my-nft.json.
To summarize, here is what we need to do:
- Upload all our images online and get a URL associated with each image. (This URL will go into our metadata).
- Generate a separate JSON file for each image containing metadata in the standard shown above (Image URL, attributes/traits, name, etc.)
- Upload all the JSON files to the cloud and get a URL associated with each JSON file.
Uploading Images to IPFS
Uploading images to the internet is pretty simple. We’re sure you must have used a service like Google Drive, GitHub, or AWS to upload folders to the cloud.
While uploading images to such centralized services (AWS, Google Drive, your own server, etc.) would work, it would not be a very good idea.
Why not? For two reasons, mainly.
Centralized Storage tends to be location based
Imagine you upload an image of a dog (called dog.jpeg) to a centralized storage service. Your dog image would then be available by accessing a URL (something like https://mystorage.com/dog.jpeg).
However, it is very easy to swap this image for another. I could upload another image with the same name (dog.jpeg) that replaces the original image.
Now, if I visited the same URL as before (https://mystorage.com/dog.jpeg), I will see a different image. You can see why this is not ideal in NFT world. People spend thousands of dollars on NFTs and they would be pissed if you simply replaced an avatar with extremely rare traits with something else.
Centralized Storage can be taken down
Let’s say you upload an image to a Google Drive or AWS. If you removed the image from these services or the services themselves shut down, the URL pointing to the image would break. Therefore, it is very easy to pull the rug if your images and data exist on a centralized storage service.
For these reasons, almost every serious NFT project uses a service called IPFS (or Interplanetary File System).
IPFS is a peer-to-peer filesharing system that is decentralized, uses content-based addressing, and is secure.
If none of the words above make sense, don’t worry. All you need to know is this:
IPFS used content-based addressing
On the IPFS network, the address (URL) of a file will be dependent on the content of the file. If you change the contents of a file, then the address of the file on the IPFS will also change.
Therefore, on the IPFS network, it is impossible to make one URL point to two different images.
IPFS never goes down
Like most decentralized systems (like blockchains), IPFS never goes down. This means that once you’ve uploaded a file (or image) to IPFS, it will always be available as long as at least one node in the network has the file. This means that you cannot pull the rug at will. Nor is there a threat that the system will be shut down.
We’re not going to go into the nitty-gritties of how IPFS works. If you’re interested, we suggest you give the following two articles a read:
- https://hackernoon.com/a-beginners-guide-to-ipfs-20673fedd3f
- https://docs.ipfs.io/how-to/mint-nfts-with-ipfs/#a-short-introduction-to-nfts
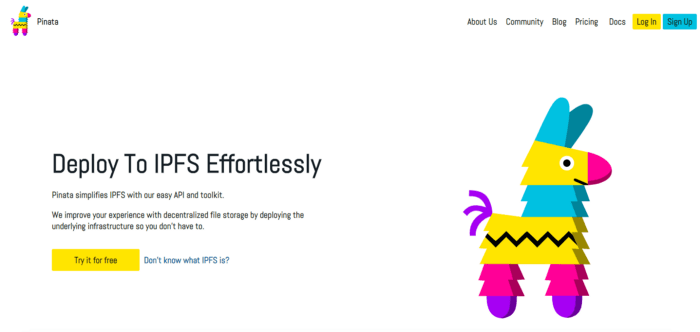
Uploading to IPFS is as easy as uploading to Google Drive, thanks to a service called Pinata.
Go to the Pinata website and create an account. It’s free if you’re uploading up to 1 GB of data.
Once you have signed up, you will be taken to the Pin Manager window. Upload your folder using the interface. Once you’ve uploaded your folder, you will get a CID associated with it. It should look something like this.

This CID was generated based on the contents of the folder. If the contents of the folder change (an image removed, an image swapped with another of the same name, etc.), the CID will also change.
For my folder, the CID is QmRvSoppQ5MKfsT4p5Snheae1DG3Af2NhYXWpKNZBvz2Eo.
Therefore, the IPFS URL for this folder is ipfs://QmRvSoppQ5MKfsT4p5Snheae1DG3Af2NhYXWpKNZBvz2Eo.
This URL will not open in a browser. In order to do that, you can use a HTTP URL of an IPFS gateway. Try visiting this link: https://ipfs.io/ipfs/QmRvSoppQ5MKfsT4p5Snheae1DG3Af2NhYXWpKNZBvz2Eo/00001.png
This will display an image that I named 00001.png and uploaded to my folder.
Congratulations! That is all there is to uploading images on IPFS using Pinata. For the next step, you will need the CID. Keep that handy.
Generate compliant NFT JSON metadata

Since we uploaded our images to IPFS, we now have IPFS URLs for each and every image.
Our next task is to create a JSON file for each image and populate it with data (including the image URL) in a format that is compliant and understandable by platforms like NFT marketplaces.
Fortunately, the generative-art-nft library does all the heavy lifting for you.
Check that the metadata.py file exists in the repository. If not, clone the latest version of the repository and transfer the assets and output folders into the new repo.
Open the metadata.py file in a text editor. Don’t worry if you don’t understand the code here. The only things you need to fill are BASE_NAME, BASE_URL, and BASE_JSON.
In line 17, replace ←Your CID Code → with the CID code of the image folder you uploaded to Pinata.
In line 18, add a base name for your NFTs. This is strictly optional. If you do not add a base name, your NFTs will be named 0, 1, 2, and so on. If you put a base name like “Scrappy Squirrel #”, your NFTs will be named Scrappy Squirrel #0, Scrappy Squirrel #1, etc.
Finally, in line 22, add a description for your collection. Like the base name, this is optional.

Now, open a Terminal in this folder and run the following command.
python metadata.py
The program will ask you the edition to generate metadata for. In our case, it was v2, so that’s what we enter.
It should take less than 15 seconds to generate 10,000+ JSON files. All these files will be conveniently available in a json folder within your edition folder.
That’s it for step 2!
Upload JSON metadata files to IPFS
The third step is probably the simplest. Just like you did with the images, upload your json folder to Pinata.
Conclusion
Congratulations! You now have a very good setup for your NFT metadata. The last and most important step is to write a smart contract that can use this metadata and assign ownership to various holders. That is, however, a topic of a future article. Stay tuned!
If you have any questions or would like us to add additional features to this library, please reach out to us on our Discord server, or drop them in the comments below. We will try to address as many of them as possible.
Until next time!
About Scrappy Squirrels
Scrappy Squirrels is a collection of 10,000+ randomly generated NFTs. Scrappy Squirrels are meant for buyers, creators, and developers who are completely new to the NFT ecosystem.
The community is built around learning about the NFT revolution, exploring its current use cases, discovering new applications, and finding members to collaborate on exciting projects with.
Join our community here: https://discord.gg/8UqJXTX7Kd


Oldest comments (9)
You mention saving the files in IPFS to avoid the files dissapearing and you don't want to store them centrally.
However, what is to stop the creator of unpinning/removing the files from the IPFS? Then your blockchain would refer to a Json file on IPFS which is no longer accessible.
I agree its better than storing it on a central server, even a simple IP / dns change could break that... just wondering if there is any idea about how to solve the "evil creator" issue? (I know, not an issue that would occur easily, but Satoshi can't just unplug bitcoin anymore... while the NFT creator could remove parts of it).
Read up a bit more. To avoid this issue, you could run your own IPFS node and "pin" all related files yourself. So they are not removed when the original author "unpins" them.
I wonder how many NFT holders actually do this... because hosting a node is not trivial? Or is it very common to use services like Pinata to keep the pins alive?
(Sorry if questions to basic, don't know much about NFTs nor cryptocurrencies, yet).
Pinning is trivial using Pinata which is why I use it in this tutorial. Pinata will pin up to 1 GB of data for free, and charge $0.50/month for every extra GB. You can, of course, choose to host your own node should you choose to do so.
There is no solution to the 'evil creator' issue. NFT projects will always have its creator as a potential centralized point of failure. If I wanted to conduct a rug pull, all I'd have to do is change the base token URI to point to something else. IPFS would not prevent this. IPFS is useful because it helps an honest creator prove that the original collection hasn't been tampered with, and also gives the community control and freedom to host the media files should they see fit.
Thanks for the clear response. Does OpenSea in any way support pinning NFTs? Seems like they should at least host their own IPFS node.
Opensea has a feature that allows you to freeze the metadata of your collection on their platform. I'm not sure if they host their own IPFS node though.
Good question
I wonder if description could be unique for each single NFT and not generic as in your example...
What to do with the metadata file ? do we have to upload the xls metadata file also along with images and json ?
Hi , in .sol setbaseURI to the image folder or json folder? I was having issue to setbaseuri with image folder url