You may have seen XState appear on your feed lately as an up-and-coming javascript library promoting the usage of state machines for UI development and testing. A presentation (by David Khourshid at the 2020 React Rally conference) on using state machines to auto-generate model based tests is what got me hooked on XState.
In this post I will explain how I:
- Used XState to define a state machine that reflects the users interaction with a UI.
- Used XState's @xstate/test library to auto generate testable pathways given the state machine.
- Tested each state using puppeteer or Cypress.io
- Mocked all possible API responses, both good and bad, and included testable states for those in my machine.
I'll try to address an audience that is completely new to XState as well as guide those that are somewhat familiar already. If you are new to XState: To get an idea of what we are talking about here I highly recommend watching David's presentation at a ReactConf AU titled "Model-based testing in React"
Code examples
For the impatient, code examples are available here:
An explanation of how I maintained control on the order of execution between tested states, machine events, and the intercepted requests can be found here
What we're building
I forked David's repository where he built a simple feedback app with auto-generated tests. I added some asynchronous behaviour to it as well as a success and failure state. We're building on top of what he had in place. I'll formalize in a a set of requirements:
Story
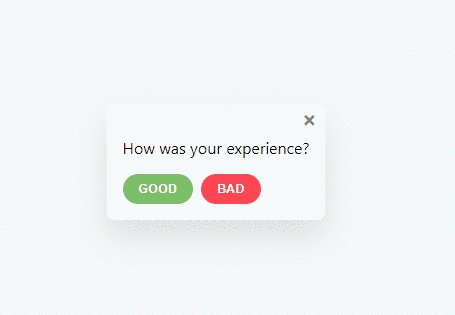
As visitor of the site wanting to give feedback I should be able to rate my experience as Good or Bad and provide additional feedback if I choose Bad.
Requirements
- Users can exit at any time by pressing the Escape key on the keyboard.
- Users can choose between a Good or Bad experience.
- A thank you message is displayed when they give a Good rating.
- Users can provide additional feedback using a text input when they give a Bad rating.
- The UI should indicate the request is being processed while their additional feedback is being submitted.
- Once submitted, a thank you message or if the submission failed a message indicating that should be displayed.
Steps we'll take
- First we have to come up with a state machine that reflects the users interaction with our application and create a test model.
- Then we have to define what should happen for each event the machine handles.
- Next we should write a test for each state the machine can be in.
- Followed by iterating each pathway and testing it.
- We'll continue with looking at how both Puppeteer and Cypress.io allow you to intercept and stub network requests.
- Talk about order of execution between your tested states, the events and the intercepted network requests and how to control the order of execution using a buffer of promises.
- How I intercepted and blocked network requests in Cypress.io
1. The State Machine
You'll want to put yourself a user's shoes when coming up with a state machine specifically targeting tests. Think about the things a user can do (events) and the things they can see (states).
In our case the first screen needs an option to rate the user experience as Good or Bad. And so the first state could be labelled "question" while the possible events are RATE_GOOD, "RATE_BAD, or PRESS_ESC.
To create a state machine import createMachine from xstate:
import { createMachine } from "xstate";

const feedbackMachine = createMachine({
  id: "feedback",
  initial: "question",
  on: {
    ESC: ???
  },
  states: {
    question: {
      on: {
        CLICK_BAD: ???
        CLICK_GOOD; ???,
      }
    }
  }
});
In the above code example we gave the machine an initial state and a possible "question" state. The .on map of events indicate the events that can occur at the state they are part of. As you can tell the ESC event is defined at a top level since that event can occur any time while the click events are only defined for the "question" state.
There are quite a few options when it comes to defining what should happen within the state machine when responding to events. For this example we are going to only show the option where you define what state the machine should transition to:
...
  states: {
    question: {
      on: {
        CLICK_BAD: "form",
        CLICK_GOOD: "thanks"
      }
    },
    form: {},
    thanks: {},
    closed: {}
  }
});
This configuration instructs the state machine to transition to the states assigned to the events. Since the user can give additional feedback when they give a Bad rating and that submitting that is an asynchronous process our state machine configuration needs a few more events and states:
const feedbackMachine = createMachine({
  id: "feedback",
  initial: "question",
  on: {
    ESC: "closed",
  },
  states: {
    question: {
      on: {
        CLICK_BAD: "form",
        CLICK_GOOD: "thanks"
      }
    },
    form: {
      on: {
        SUBMIT: 'submitting',
        CLOSE: 'closed',
      }
    },
    submitting: {
      on: {
        FAILURE: 'failure',
        SUCCESS: 'thanks',
        CLOSE: 'closed',
      }
    },
    failure: {
      on: {
        CLOSE: 'closed',
      }
    },
    thanks: {
      on: {
        CLOSE: 'closed',
      }
    },
    closed: {}
  }
});
The "CLOSE" event reflects the interaction the user can have with a "close" button that is available at every step after the user has selected a rating. Submitting the form takes the user to the submitting state and from there the request can succeed and transition to thanks or to failure.
The last piece of the configuration puzzle is adding a condition to the transition the machine makes when the form is submitted. We want the machine to transition to a "thanks" state if the user leaves the input for additional feedback empty and essentially ignore the additional feedback.
    form: {
      on: {
        SUBMIT: {
          target: "submitting",
            // Only transition to submitting if the user has entered a value.
            cond: (ctx, evt) => evt.value.trim().length > 0
          },
          { target: "closed" }
        ...
      }
    },
That's it. That's our state machine. You can view it in XState's vizualiser here.
With our machine in hand we can create model using @xstate/test's createModel function:
const testModel = createModel(feedbackMachine)
2. Given, when ...
Our list of possible events are:
- CLICK_GOOD
- CLICK_BAD
- CLOSE
- ESC
- SUCCESS
- FAILURE
- SUBMIT
For each event that reflects a user interaction we have to instruct our test model what simulation action to take. In our case the FAILURE and SUCCESS events are not user driven events but API driven events. For those we don't have to define any actions.
Using a test model's .withEvents API we can instruct XState what code to execute per event. This is different for Cypress then for Puppeteer:
Puppeteer:
const testModel = createModel(feedbackMachine).withEvents({
  CLICK_GOOD: page => page.click('[data-testid="good-button"]'),
})
Cypress:
const testModel = createModel(feedbackMachine).withEvents({
  CLICK_GOOD: () => new Cypress.Promise(resolve => {
    cy.get('[data-testid="good-button"]')
      .click()
      .then(resolve);
  }),
});
The function provided for an event can return a promise. This allows you to block the transition of the machine and subsequently the execution of the next test.
In the case of Cypress we are forced to use Cypress.Promise since cypress tests internally work quite different. I have a faint idea of what is going on in the background but if you know of a good explanation to link to I would love to add that to this post.
You can check out the full configuration of events in the linked repositories. I will discuss the configuration of the SUBMIT later.
3. Given, when, then
To define a test for each state that the model has access too you define a function named test on each state configuration's .meta property:
Puppeteer:
states: {
  question: {
    on: {
      CLICK_GOOD: "thanks",
      CLICK_BAD: "form",
      CLOSE: "closed"
    },
    meta: {
      test: async (page: Page) => {
        await page.waitFor('[data-testid="question-screen"]');
        await page.waitFor('[data-testid="bad-button"]');
        await page.waitFor('[data-testid="good-button"]');
      }
    }
  },
Cypress:
states: {
  question: {
    on: {
      CLICK_GOOD: "thanks",
      CLICK_BAD: "form",
      CLOSE: "closed"
    },
    meta: {
      test: () =>
        new Cypress.Promise(resolve => {
          cy.get('[data-testid="question-screen"]');
          cy.get('[data-testid="question-screen"]');
          cy.get('[data-testid="good-button"]').then(() => {
            resolve();
          });
        })
    }
  },
Again, to block the state machine from transitioning we return a promise and in the case of Cypress we resolve that promise in the last line of the test. From what I understand the calls to cy are automatically chained and so resolve should only be called when all three tests are done.
We continue this pattern of checking the DOM for each state node. When in state A, I expect the DOM to look like .., etc. Similar to the SUBMIT event, the submitting state has a slightly different test that we will talk about as well. This is what is so cool about XState. It's fairly trivial to think of the states your application can be in and write tests for those. Transitioning between them is what XState is good at!
4. XState, do the work!
With a state machine configured, events mapped out and tests written for each state we are ready to do the actual testing:
Puppeteer:
// Create the test plans
const testPlans = testModel.getSimplePathPlans();

// Iterate the plans and paths and test each:
testPlans.forEach((plan, planIndex) => {
  describe(`${planIndex}: ${plan.description}`, () => {
    plan.paths.forEach((path, pathIndex) => {
      it(`${pathIndex}: ${path.description}`, async () => {
        await page.goto(`http://localhost:7777`);
        await path.test(page);
      },
      10000);
    });
  });
});
Cypress:
// Iterate the plans and paths and test each:
testPlans.forEach((plan, planIndex) => {
  describe(`Plan ${planIndex}: ${plan.description}`, () => {
    // Start with an empty list for the failur patterns for this plan.
    plan.paths.forEach((path, pathIndex) => {
      it(`Path ${pathIndex}: ${path.description}`, () => {
        cy.visit(`http://localhost:7777`);

        return new Cypress.Promise(async resolve => {
          await path.test();
          resolve();
        });
      });
    });
  });
});
The test model provides an API for us to generate plans and paths. Each path represents a set of transitions a machine can go through. And since our machine is based on the user's interaction each path represents a possible outcome the user can encounter.
Check out @xtate/test's documentation on
.getSimplePathPlansvs.getShortestPathPlans
The rest of this post has very little to do with XState and is mostly on making generated tests using XState work with Puppeteer and Cypress and being able to intercept network requests and stub their responses.
We will come back to XState in a bit and talk about the SUBMIT event and the submitted and failed states.
5. Stubbing network requests
Puppeteer provides a way to intercept network requests out-of-the-box and you can also choose to let the request continue or respond with a custom response. Cypress has limited support for this. At the time of writing this post they do not support intercepting promise based requests using fetch. They do have support for stubbing responses for requests made using XMLHttpRequest but I was unable to figure out how to block a request, do some work and let it continue with a stubbed response.
5.1 Stubbing network requests with Puppeteer
With puppeteer you have to explicitly indicate you want to intercept requests and register a callback function that will handle requests. You can do this in your test's beforeAll and afterAll hooks:
describe("feedback app", () => {
  const onRequest = request => { request.continue() }

  beforeAll(async () => {
    await page.setRequestInterception(true);
    page.on("request", onRequest);
  });

  afterAll(async () => {
    page.off("request", onRequest);
    await page.setRequestInterception(false);
  });
The issues I have encountered were related to security and mostly affected running the tests in headless mode. Adding the appropriate headers resolved this for me:
async (interceptedRequest: Request): Promise<void> => {
  const url = interceptedRequest.url();

  // If the url matches an API our app would use
  if (/foobar/.test(url)) {
    if (interceptedRequest.method() === "OPTIONS") {
      return interceptedRequest.respond({
        status: 200,
        headers: {
          "Access-Control-Allow-Origin": "*",
          "Access-Control-Allow-Headers": "*"
        }
      });
    }

    return interceptedRequest.respond({
      status: 200,
      contentType: "application/json",
      headers: {
        "Access-Control-Allow-Origin": "*"
      },
      body: JSON.stringify({
      ...
For all requests that you aren't stubbing you use request.continue(). I also used request.abort() if the requested url matched assets such as fonts or images that weren't important to the test. This can help speed up the test.
5.2 Stubbing network requests with Cypress
Stubbing network requests with Cypress was a different story. I first looked at the cypress-unfetch plugin but I couldn't get it to work with just that. However, after having a look at the plugin's source code I made it work by:
- Installing cypress-unfetch
- Importing
import "@rckeller/cypress-unfetch/await";at the top of my file as per the README. - Creating my own wrapper around unfetch:
// unfetch-wrapper.ts
import unfetch from 'unfetch'
import { Deferred } from '../src/delay';

export default (buffer: Deferred[]) => async (url: RequestInfo, options: RequestInit) => {
  while (buffer.length > 0) {
    const deferred = buffer[0];

    if (deferred) {
      await deferred;
      // Pop it once it's resolved. Don't pop it before that otherwise
      // the test won't have access to it to resolve it.
      buffer.shift();
    }
  }

  if (/FAILURE/.test(url as string)) {
    throw Error("500")
  }

  return unfetch(url, options)
}
- Importing my version of unfetch and executing the same code as in
@rckeller/cypress-unfetch/indexbut slightly adjusted:
before(() => {
    cy.log("Cypress-Unfetch: Polyfill Fetch >>> XHR Fallback");
    // Load the standalone polyfill w/ a closure, prevents race
    Cypress.on("window:before:load", win => {
      Object.assign(win, { fetch: unfetch(buffer) });
    });
  });
Essentially what is happening here is: unfetch gives us a promise based wrapper around XMLHttpRequest and since Cypress supports that API we should be able to intercept requests. Before the test runs we use a hook provided by Cypress giving us access to the window object. We import our wrapper around unfetch, call it and give a bit more information and assign that to window.fetch
6. Race to the finish line
Ok, we're ready to talk about tying it all together. First we need to address the issue of the order of execution. The problem is as follows:
When the model executes the SUBMIT event we might test if the button is available using cy.get or page.waitFor. We then simulate the user clicking the button by calling cy.get(..).click() or page.click(..). After this the state machine should transition to submitting and the network requests should be intercepted and stubbed.
However we need a solution so that we can make sure that the tests written for the submitting state are executed before the network promise resolves. You could do this with a delay inside the intercepted request but that doesn't give you guarantees. To guarantee the order of execution I am using a buffer of promises. The order is as follows:
- Model executes callback for SUBMIT event.
- A promise is pushed to an array buffer.
- The click is simulated
- The UI responds to the click and makes a network call.
- The request is intercepted.
- The "interceptor" checks if there is a promise in the array buffer and blocks the execution (async/await).
- The state machine runs the "submitting" state's test
- The test resolves the promise that is in the buffer after it's test has run.
- The interceptor continues now that the promise is resolved and stubs the response.
- The UI updates according to the stubbed response.
- The model executes the events that are defined for the "submitting" state.
- Tests for each state transitioned to after "submitting" are run.
I should also add that I'm using a hack to resolve a promise outside of it's callback function:
export type Deferred<T = any> = Promise<T> & {
  id: string;
  resolve: () => void;
}

export const defer = <T = any>(value: T, id: string): Deferred<T> => {
  let resolve: () => void = () => {
    throw Error("Unexpected deferral")
  }

  const promise = new Promise<T>(r => {
    resolve = () => r(value)
  })

  return Object.assign(promise, { resolve, id })
}
If you know of a better solution for this let me know. Right now it does the job :).
Here's what our SUBMIT event mapping and submitting test look like for both Puppeteer and Cypress:
Puppeteer:
...
submitting: {
  on: {
    SUCCESS: 'thanks',
    FAILURE: 'failure'
  },
  meta: {
    test: async (page: Page) => {
      // Wait for the loading message
      await page.waitFor('[data-testid="submitting"]');

      // And resolve the promise in the buffer so that the
      // request interceptor can continue
      buffer.forEach(deferred => {
        deferred.resolve()
      })
    }
  }
},
...
SUBMIT: {
  exec: async (page, event: any) => {
    await page.type('[data-testid="response-input"]', event.value);

    if (event.value.length > 0) {
      // Put a promise in the buffer to be resolved
      // in the "submitting" state's test.
      buffer.push(defer('Submitting' ,'Submitting'))
    }

    await page.click('[data-testid="submit-button"]');
  },
  cases: [{ value: "something" }, { value: "" }]
}
Cypress:
submitting: {
  on: {
    SUCCESS: "thanks",
    FAILURE: "failure"
  },
  meta: {
    test: () => {
      return new Cypress.Promise(resolve => {
        cy.get('[data-testid="submitting"]').then(() => {
          // And resolve the promise in the buffer so that the
          // request interceptor can continue
          buffer.forEach(deferred => {
            deferred.resolve();
          });

          resolve();
        });
      });
    }
  }
},
...
SUBMIT: {
  exec: (_, event: any) =>
    new Cypress.Promise(async resolve => {
      const handle = cy.get('[data-testid="response-input"]');
      const nextHandle = event.value ? handle.type(event.value) : handle;

      nextHandle.then(() => {
        if (event.value.length > 0) {
          // Put a promise in the buffer to be resolved
          // in the "submitting" state's test.
          cy.log(`Buffer Submitting`);
          buffer.push(defer("Submitting", "Submitting"));
        }

        cy.get('[data-testid="submit-button"]')
          .click()
          .then(resolve);
      });
    }),
  cases: [{ value: "something" }, { value: "" }]
}
7. Just give me a reason
As a last step we have to create the link between a path that wants to test a certain API outcome and the request interception itself. The best way I've found to to do this is via query parameters added to the url visited by both Cypress and Puppeteer.
A path' description might look like:
Path 3: via CLICK_BAD → SUBMIT ({"value":"something"}) → SUCCESS → CLOSE
I use regular expressions to parse that into: [SUCCESS] and include that information in the page visit's url:
// Puppeteer
await page.goto(
  `http://localhost:7777?pathIndex=${pathIndex}&planIndex=${planIndex}&outcomes=${outcomes.join(
    ","
  )}`
);

// Cypress
cy.visit(
  `http://localhost:7777?pathIndex=${pathIndex}&planIndex=${planIndex}&outcomes=${outcomes.join(
    ","
  )}`
);
This is probably sufficient for most cases but it could be that you are making multiple API calls. For example, if we allowed the user to retry a failed network call our test path description might look like:
Path 3: via CLICK_BAD → SUBMIT ({"value":"something"}) → FAILURE → RETRY → SUBMIT → SUCCESS → CLOSE
Indicating that the set of events and transitions includes a first try that failed and a second one that succeeded.
For this case just using query parameters is not sufficient and you will need an additional mapping of plan and path index to a list of instructions on how the API should resolve.
This is what that looks like:
const failurePattern: string[][][] = []
...
// Iterate the plans and paths and test each:
testPlans.forEach((plan, planIndex) => {
  describe(`${planIndex}: ${plan.description}`, () => {
    // Start with an empty list for the failur patterns for this plan.
    failurePattern[planIndex] = [];

    plan.paths.forEach((path, pathIndex) => {
      it(
        `${pathIndex}: ${path.description}`,
        async () => {
          // Populate this path's failure pattern
          failurePattern[planIndex][pathIndex] =
            path.description.match(
              /SUCCESS|FAILURE/g
            ) || [];

          const outcomes = failurePattern[planIndex][pathIndex];

          // Outcomes is added to the frame url for info but pathIndex and planIndex are important
          // as they are read in the request interceptor
          await page.goto(
            `http://localhost:7777?pathIndex=${pathIndex}&planIndex=${planIndex}&outcomes=${outcomes.join(
              ","
            )}`
          );

          await path.test(page);
        },
        10000
      );
    });
  });
});
While the test model's plans and paths are iterated, failurePattern is built up with information for each plan and path index on how the API should respond given the order of SUCCESS and FAILURE events in the path's description.
The plan and path index are added as query parameters and the request interceptor should have access to the failurePattern data set similarly as to the buffer of promises. When a request is made it checks the query parameters and pops from failurePattern[planIndex][pathIndex] the next "how it should respond" code.
Puppeteer
const makeRequest = (failurePattern: string[][][], buffer: Deferred[])
  (request: Request) => {
    const frameUrl = interceptedRequest.frame()?.url()
    const [, pathIndex, planIndex] = (frameUrl.match(/\d+/g) || []).map(Number);
    const outcome = failurePattern[planIndex][pathIndex].shift();
Cypress
// unfetch.ts
export default (failurePattern: string[][][], buffer: Deferred[])
  => async (url: RequestInfo, options: RequestInit) => {
    const frameUrl = window.location.href
    const [, pathIndex, planIndex] = (frameUrl.match(/\d+/g) || []).map(Number);
    const outcome = failurePattern[planIndex][pathIndex].shift();

// e2e.spec.ts
Cypress.on("window:before:load", win => {
  Object.assign(win, { fetch: unfetch(failurePattern, buffer) });
});
Both failurePattern and buffer are passed by reference and mutated.
When path.test(..) is executed the state machine will transition from state to state given the set of events that the path describes. The first time the SUBMIT event occurs and is simulated; Once the request is intercepted the interceptor pops the first "how to respond" from the failurePattern array for the given plan and path index that were derived from the frame url or window location. The second time SUBMIT is dispatched in the test, the next "how to respond" is popped from the stack.
Summary
This may have been a lot to take in. One the main reasons for me to write this was to have some document out in the open recording the process. I went trough a lot of trial and error to figure this out and I am very much open to other, maybe less hacky, solutions. Feel free to DM me if you have any questions or need a bit help with this!


Top comments (0)