
Author: Michael Hungbo
Introduction
Data is unquestionably an important component of any modern web application today. And, as the web evolves and innovates, new methods of interacting with this data must emerge in order to provide users with a better experience when interacting with our applications.
There have been a variety of technologies used for client-side data fetching. JavaScript, for example, has the native Fetch() API for data fetching. Axios is a promised-based HTTP client library for making asynchronous HTTP requests and fetching any data on the client-side.
SWR is one of the most powerful client-side data fetching libraries for frontend frameworks today. In this article, we will explore the features and benefits of using SWR in an example Next.js application, and provide a step-by-step guide for getting started with the library.
Whether you are new to React.js or an experienced developer looking to optimize your data fetching strategy, SWR is a powerful tool worth considering! Now, let's get started!
Steps we'll cover:
Prerequisites
To follow along well with this tutorial, it's essential that you have basic knowledge of JavaScript and React. SWR is a library for use with React and its frameworks, so it's required that you're familiar with the basics of both of these technologies.
In addition, make sure you have Node installed on your computer before continuing.
What is SWR and useSWR?
SWR is an acronym for stale-while-revalidate. It's a lightweight React.js library with hooks for data fetching on the client-side. SWR is bootstrapped with various hooks that are used for various performance improvement techniques such as data caching, re-validation, pagination, and many others.
The latest version of SWR, SWR 2.0, was released on December 9 and it features some new and exciting updates such as data preloading, new mutation APIs, improved optimistic UI capabilities, and a brand new DevTools for better developer experience.
useSWR, on the other hand is the most basic hook from the SWR library for data fetching. A basic example using the hook is shown below:
const { data, error} = useSWR(key, fetcher)
The useSWR hook accepts two arguments. One, a key value (usually the API endpoint to fetch data from), and a fetcher, which is an async function that contains the logic for fetching the data.
From the above example, useSWR returns two values: data, which is the value returned from the resource you're fetching, and a error, which contains error, if any is caught. It also returns two additional values, isLoading and isValidating, depending on the state of the fetcher function.
In the next section, we'll see how we can use this powerful hook as well as the other capabilities of SWR in an example application.
Setting up an Example App With SWR
We'll create an example application in React to get started with understanding how SWR works and how to start using it. Basically, we'll compare and contrast fetching data with the native 'Fetch() API' (or other client-side data fetching libraries such as Axios) you're used to and fetching data with SWR.
You can check out the complete code for the application on GitHub.
Run the following command in your terminal to create a new React project with create-react-app:
npx create-react-app my-swr
or with Yarn:
yarn create react-app my-swr
NOTE: I named the app my-swr for brevity but you can also choose any name you're okay with.
After the installation is complete, cd into the project directory and start the development server with npm start or yarn start.
Next, run the following command to install the necessary packages for our example application.
npm install styled-components swr
or with Yarn:
yarn add styled-components swr
Creating a Server
For the example application we'll be building, we'll set up a server with express running on http://localhost:3001. The server basically returns a list of users that will be rendered on the client-side.
In the project root folder, create a new server folder, navigate to it on the command line and run the following command to create a new Node.js project with an auto-generated package.json file:
npm init -y
or with Yarn:
yarn init -y
Next, we'll install the necessary packages to build up our server.
npm install express cors nodemon
with Yarn:
yarn add express cors nodemon
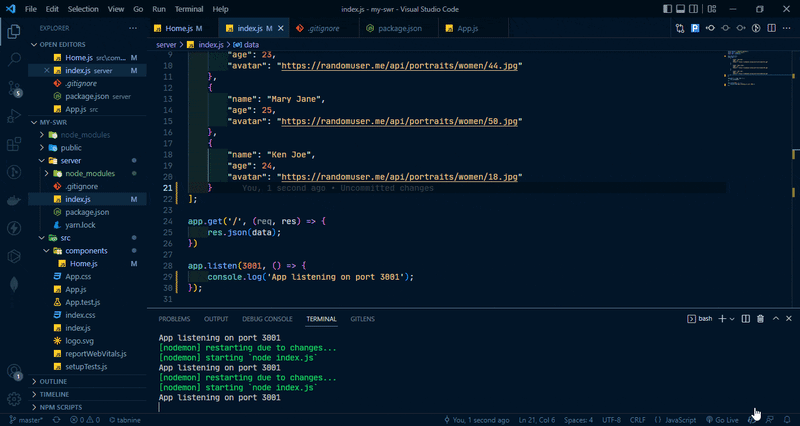
Still in the server folder, create a file named index.js with the following code:
// server/index.js

const express = require('express');
const cors = require('cors')
const app = express();

app.use(cors());
const data = [
    {
        "name": "Kim Doe",
        "age": 23,
        "avatar": "https://randomuser.me/api/portraits/women/44.jpg"
    },
    {
        "name": "Mary Jane",
        "age": 25,
        "avatar": "https://randomuser.me/api/portraits/women/50.jpg"
    },
    {
        "name": "Ken Joe",
        "age": 24,
        "avatar": "https://randomuser.me/api/portraits/women/18.jpg"
    }
    ];

app.get('/', (req, res) => {
    res.json(data);
});

app.listen(3001, () => {
    console.log('App listening on port 3001');
});
In the above code, we're basically creating a server in express.js and also, we created a dummy data array for the list of users we'll render on the client-side. We also added cors to allow our client application communicate with the server without running into errors.
Next, we'll edit the content of server/package.json to the following:
// server/package.json

{
  "name": "server",
  "version": "1.0.0",
  "main": "index.js",
  "license": "MIT",
  "dependencies": {
    "cors": "^2.8.5",
    "express": "^4.18.2"
  },
  "scripts": {
    "dev": "nodemon index.js"
  }
}
NOTE: I have nodemon installed globally so it's not included in the list of dependencies, but you'll find it included in yours. Also, if you're using git you may want to create a .gitignore file in the server folder to avoid pushing the files in node_modules.
We can now run npm dev or yarn dev (depending on the package manager you used) to start up the server. If everything works correctly you should see App listening on port 3001 logged to the console.
Data Fetching with Fetch() API
Let's go back to the client-side code now that we have the server up and running. In this part, we'll fetch the users from our backend (the server we created earlier) and display them in a simple component.
Navigate to the src folder in the root directory and create a folder named components. In the components folder create a Home.js file with the following code:
// src/components/Home.js

import React from 'react'
import { useState, useEffect } from 'react'

const Home = () => {
  const [users, setUsers] = useState(null);
    useEffect(() => {
      async function fetchUsers() {
        const response = await fetch('http://localhost:3001');
        const data = await response.json();
        setUsers(data)
      }
      fetchUsers();
    }, [])

    if (!users) return <h2>Loading...</h2>
    return (
      <>
        <div>
          {
            users.map((user, index) => {
             return <h2 key={index}>{user.name}</h2>
            })
          }
        </div>
      </>
    )
}

export default Home
Next, edit the content of src/App.js to the following:
// src/App.js

import './App.css';
import Home from './components/Home'

function App() {
  return (
    <div className="App">
      <header className="App-header">
        <Home/>
      </header>
    </div>
  );
}

export default App;
In the code above, we're importing the Home.js component we created to render it in the homepage of our application. Now, if you navigate to http://localhost:3000, the list of users from the server should be displayed as shown below:

Our app works correctly. Awesome! Now, let's see how the application behaves when we add a new user to the user list on the server.
In the server/index.js file, add a new user to the data array like below:
// server/index.js

...
const data = [
    ...
    //highlight-start
    {
        "name": "John Doe",
        "age": 24,
        "avatar": "https://randomuser.me/api/portraits/women/18.jpg"
    }
    //highlight-end
]
Notice how the list isn't updated with the new user when we navigate back to http://localhost:3000. It's only when we reload the page before we get the updated list of users.
The GIF below shows this even better:
Inconsistencies in UI updates and data fetching behavior could be disastrous for applications that rely on real-time data to provide a reactive and seamless experience to users. This is one major problem that SWR aims to solve.
Data Fetching With SWR
In this part, we'll see how SWR outshines other data fetching methods by automatically re-validating and updating data without requiring us to manually refresh or reload the application.
Edit the content of src/components/Home.js to the following:
// src/components/Home.js

import React from 'react'
import useSWR from 'swr'

const Home = () => {
  const fetcher = (...args) => fetch(...args).then(res => res.json());
  const { data, error, isLoading } = useSWR('http://localhost:3001', fetcher)

    if (error) return <div>Failed to fetch users.</div>
    if (isLoading) return <h2>Loading...</h2>
    return (
      <>
        <div>
          {
            data.map((user, index) => {
             return <h2 key={index}>{user.name}</h2>
            })
          }
        </div>
      </>
    )
}

export default Home
Let's go through the code above to understand what's going on.
From the code above, we import the useSWR hook from SWR. The hooks take a key, that is, the URL of our server and a fetcher function that contains the logic for fetching the data. The hook then returns three values based on the state of the result from the server.
The data object contains the list of users and the error will contain any error that is thrown. Next, we map through the users array that is returned in the data object and render them on the page.
Now, if you navigate to http://localhost:3000, the list of users should be displayed like below:

So far so good. Now, let's also add a new user to the list on the server and see how the application behaves. Open the server/index.js file and add a new user to the data array like so:
// server/index.js

...
const data = [
    ...
     //highlight-start
    {
        "name": "Peter Pan",
        "age": 24,
        "avatar": "https://randomuser.me/api/portraits/women/21.jpg"
    }
    //highlight-end
]
Go to http://localhost:3000 in the browser and note how the users list is automatically updated with the new user we added without us reloading the page.
The GIF below shows this in action.

Notice how fast and consistent the UI is updated with the new user!
This example shows one of the incredible powers of SWR over other client-side data fetching methods. It shows how SWR is able to auto re-validate and update the UI instantly using cached data and returning the latest user from the server.
How SWR is able to infer that the data has been updated and then re-validating and updating the UI is beyond the scope of this article. However, if you're curious to know, you can read more about it here in the docs.
Is your CRUD app overloaded with technical debt?
Meet the headless, React-based solution to build sleek CRUD applications. With refine, you can be confident that your codebase will always stay clean and boilerplate-free.
Try refine to rapidly build your next CRUD project, whether it's an admin panel, dashboard, internal tool or storefront.

Additional Features of SWR
We saw one of SWR's best features in action in the previous section; this section will show you even more of what SWR is made and capable of.
Pagination
SWR simplifies paginating data using the useSWR hook. We'll see a basic example of paginating data with useSWR using the Rick and Morty Character API.
In the components folder of our example application, create a file named Characters.js and add the following code to it:
// src/components/Characters.js

import React from "react";
import { useState } from "react";
import useSWR from "swr";
import styled from "styled-components";

const Wrapper = styled.div`
  margin: 50px auto;
`;
const Character = styled.div`
  width: 250px;
  height: 200px;
  border-radius: 6px;
  outline: none;
  border: none;
`;

const Button = styled.button`
  width: 120px;
  height: 40px;
  border-radius: 6px;
  background-color: #6c6ce3;
  margin-inline: 10px;
  outline: none;
  border: none;
  color: white;
  font-weight: bold;
`;

const Container = styled.div`
width: 100%;
margin: 0 auto;
display: grid;
gap: 10px;
padding-block: 20px;
grid-template-columns: 2fr 2fr 2fr 2fr;
`;


const Characters = () => {
  const [pageIndex, setPageIndex] = useState(1);

  const fetcher = (...args) => fetch(...args).then((res) => res.json());

  const { data, error, isLoading } = useSWR(`https://rickandmortyapi.com/api/character/?page=${pageIndex}`,fetcher);

  if (error) return <div>Failed to fetch characters.</div>;
  if (isLoading) return <h2>Loading...</h2>;

  return (
    <>
      <Container>
        {data.results.map((character) => (
            <Character key={character.id}>
                <img width={100} height={100} src={character.image} />
                <div>{character.name}</div>
            </Character>
        ))}
      </Container>
        <Wrapper>
          <Button onClick={() => setPageIndex(pageIndex - 1)}>Previous</Button>
          <Button onClick={() => setPageIndex(pageIndex + 1)}>Next</Button>
        </Wrapper>
    </>
  );
};

export default Characters;
In the above code, we are fetching characters from the Rick and Morty API. The endpoint returns 20 characters per request. We also used a React state to keep track of the pages so we can simply move forward and backward through the fetched characters to create a pagination effect.
Next, open the App.js file in the root folder and edit its content to this:
// App.js

import './App.css';
// import Home from './components/Home'
import Characters from './components/Characters'

function App() {
  return (
    <div className="App">
      <header className="App-header">
        {/* <Home/> */}
        <Characters/>
      </header>
    </div>
  );
}

export default App;
Basically, what we're doing is commenting out the previous Home component and then import and render the Characters component on the homepage instead.
Navigate to http://localhost:3000 and you should see the characters rendered as shown in the GIF below, with pagination enabled:

You can read more about pagination in SWR in the docs.
Preloading Data With SWR
Another notable use case of SWR is data preloading. With SWR, we can prefetch data, for example, fetching blog posts from a CMS or prefetching page routes in Next.js for faster and smooth client-side transitions.
We can prefetch data using the preload API from SWR. The following example from the docs shows how you can preload a user component on the click of a button:
import { useState } from 'react'
import useSWR, { preload } from 'swr'

const fetcher = (url) => fetch(url).then((res) => res.json())

// Preload the resource before rendering the User component below,
// this prevents potential waterfalls in your application.
// You can also start preloading when hovering the button or link, too.
preload('/api/user', fetcher)

function User() {
  const { data } = useSWR('/api/user', fetcher)
  ...
}

export default function App() {
  const [show, setShow] = useState(false)
  return (
    <div>
      <button onClick={() => setShow(true)}>Show User</button>
      {show ? <User /> : null}
    </div>
  )
}

SWRDevTools
The newest version of SWR comes with developer tools for debugging and writing your code more efficiently and confidently. You can install the SWRDevTools extensions for both Chrome and Firefox from their respective stores.
- Chrome: https://chrome.google.com/webstore/detail/swr-devtools/liidbicegefhheghhjbomajjaehnjned
- Firefox: https://addons.mozilla.org/en-US/firefox/addon/swr-devtools/
Be aware that SWRDevTools is not an official project of Vercel. You can learn more about the project from their website.
TypeScript Support
SWR also comes with full TypeScript support out of the box. If you're using TypeScript you can be rest assured of type safety in your application. For example, SWR will infer the argument types of fetcher from key, so you can have the preferred types automatically.
You can also explicitly specify the types for key and fetcher's arguments like so:
import useSWR, { Key, Fetcher } from 'swr'

const uid: Key = '<user_id>'
const fetcher: Fetcher<User, string> = (id) => getUserById(id)

const { data } = useSWR(uid, fetcher)
// `data` will be `User | undefined`.
You can read more about using TypeScript with SWR here.
This section only touched on a few of SWR's many capabilities, so your first encounter with it will not be overwhelming. You can however, check the documentation for other features that might interest you.
Conclusion
In this article, we learned about the basics of SWR, its importance in developing modern web applications, and how you can get started with it. We also created an example application in React and explored some capabilities of SWR to see its use cases and benefits over other conventional client-side data fetching methods.
I hope you found this article useful and that you will begin using SWR to achieve the performance improvements you've always desired in your applications!


Top comments (4)
Very well explained and straight to the point.
Nice article, thank you!
Thank you!
amazing article thank you dear.