
Heroku is a cloud service provider and software development platform which facilitates fast and effective building, deploying and scaling of web applications. It offers you a ready-to-use environment that allows you to deploy your code fast.
Some of the notable benefits of Heroku include:
- Users can get started with the free tier of Heroku
- Let developers concentrate on coding and not server management
- Integrates with familiar developer workflows
- Enhance the productivity of cloud app development teams
- Helps your development, QA, and business stakeholders create a unified dashboard
- Support for Modern Open Source Languages
In this tutorial, you will see how to deploy Rate Limiting application built using Java and Redis on Heroku platform.
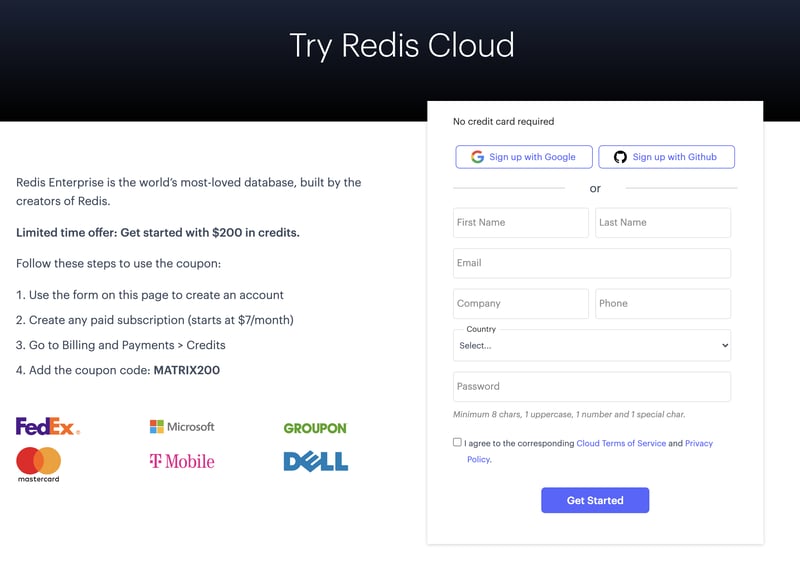
Step 1. Create a Free Redis Enterprise Cloud account

Create your free Redis Enterprise Cloud account by visiting this link. Use Coupon code MATRIX200 and get $200 free credit for using Redis Enterprise Cloud.
Follow this link to create a Redis Enterprise Cloud subscription and database as shown below:
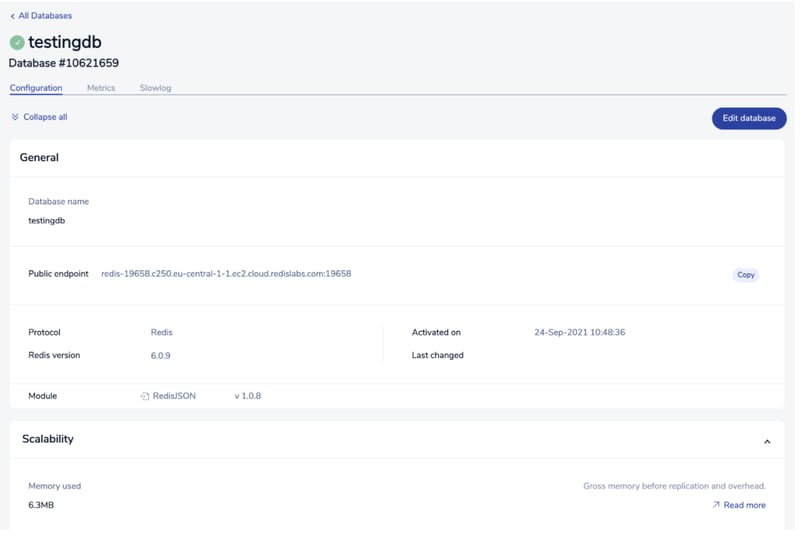
The database endpoint URL is unique for all and hence might be different in your case. Save it for future reference.
Step 2. Create a Heroku account
If you are using Heroku for the first time, create your new Heroku account through this link

Step 3. Install Heroku CLI on your system
brew install heroku
Step 4. Login to Heroku
 heroku login
 heroku: Press any key to open up the browser to login or q to exit:
 Opening browser to https://cli-auth.heroku.com/auth/cli/browser/XXXXXXXXXXA
 Logging in... done
 Logged in as your_email_address
Step 5. Connect your application to Redis Enterprise Cloud
For this demonstration, we will be using a Sample Rate Limiting application.
Clone the repository
git clone https://github.com/redis-developer/basic-rate-limiting-demo-java
heroku create
Creating app... done, ⬢ hidden-woodland-03996
https://hidden-woodland-03996.herokuapp.com/ | https://git.heroku.com/hidden-woodland-03996.git
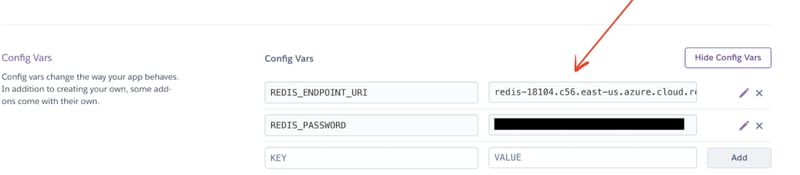
Step 6. Setting up Environment Variables
Go to Heroku dashboard, click "Settings" and set REDIS_ENDPOINT_URI and REDIS_PASSWORD under the Config Vars. Refer to Step 1 for the correct values to use.
You now have a functioning Git repository that contains a simple application as well as a package.json file, which is used by Node’s dependency manager.
Read the complete blog https://developer.redis.com/create/heroku/herokujava
Have queries? Reach out to me over Twitter


Top comments (0)