Introduction
As we know ASP.NET Core is one of the best open source frameworks it used to build a modern web applications and that has the most users in the world wide today the reason is that a significant change has been made to it is that it will work very good and more efficiently on many types of Linux distributions as well as on Windows and Mac operating systems that is why it is called cross-platform. Obviously, we want our app to have the best performance and reliable so in this article I am going to explaining how to install Asp.Net Core and configure Nginx web server on Azure Linux Virtual Machine (Ubuntu 18.4).
Let's get started
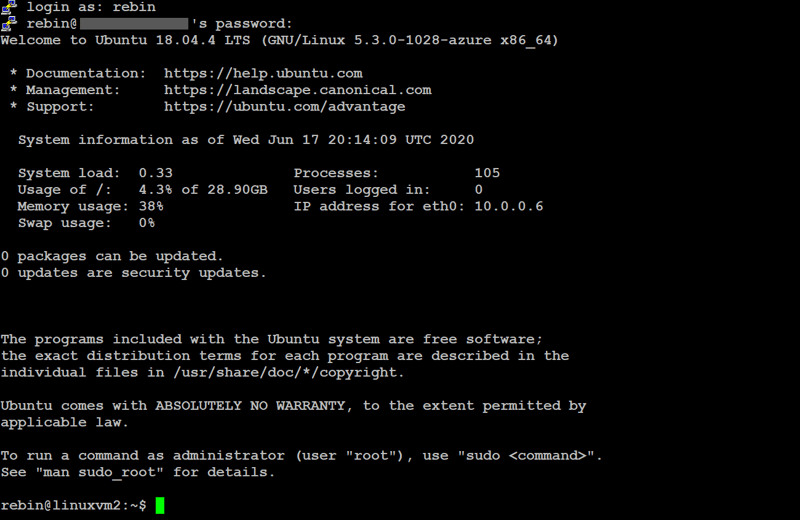
Step 1 : Connect to Azure Linux Virtual Machine
Putty terminal emulator is used to connect with Virtual Machine as well as run some commands to perform tasks, after you have connected with the Ubuntu Linux VM you will see something like this now we are ready to achieve our goals.
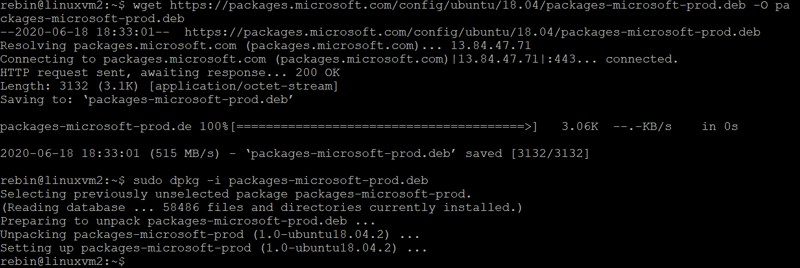
Step 2 : Register Microsoft key and repository feed
Before we dive into installing .Net Core we will need to register the Microsoft key register the product repository on Linux Ubuntu We run the following commands to register it.
wget https://packages.microsoft.com/config/ubuntu/18.04/packages-microsoft-prod.deb Jump -O packages-microsoft-prod.deb

sudo dpkg -i packages-microsoft-prod.deb
Step 3 : Install .NET Core
There are two types of .Net Core is available SDK and Runtime the difference between them is that:
The SDK includes everything you need to build and run .NET Core applications by using command line, tools and any editor (like Visual Studio) as well as .Net Core runtime type has included in this type.
The runtime includes everything you need to run .NET Core applications that allows you to run apps that were made with .NET Core (already created and compiled).
To install .Net Core SDK is also include runtime so run the following commands to install it.
sudo apt-get update; \
sudo apt-get install -y apt-transport-https && \
sudo apt-get update && \
sudo apt-get install -y dotnet-sdk-3.1
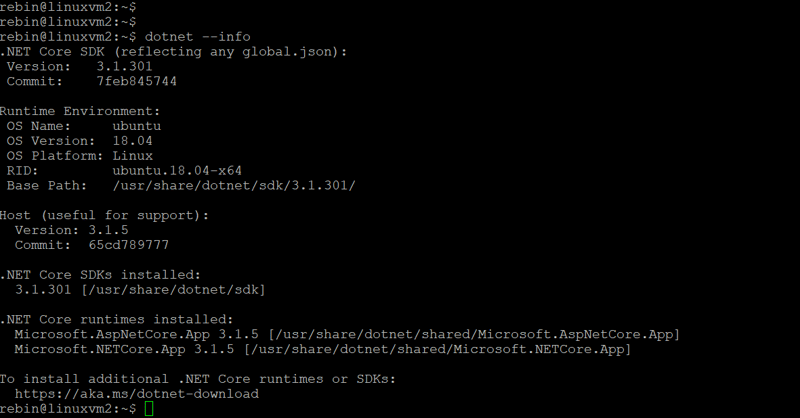
To make sure everything is fine run the following commands
dotnet --info

# Or run this command to get dotnet core version

dotnet --version
Now the .Net Core SDK successfully installed on Linux Ubuntu 18.4.
Step 4 : Install Nginx Web Server
Why choose Nginx as a Web Server ?
NGINX is open source software for web serving, reverse proxying, caching, load balancing, media streaming, and more. It started out as a web server designed for maximum performance and stability. In addition to its HTTP server capabilities a reverse proxy and load balancer for HTTP, TCP, and UDP servers.
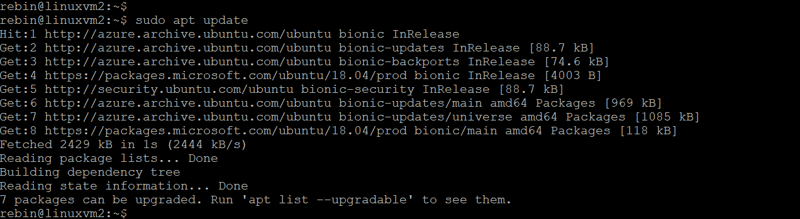
Before install any packages we need to ensure that our local package lists is up-to-date to update all installed packages run the following command.
sudo apt-get update
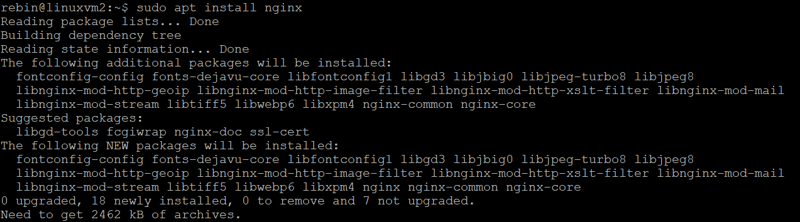
To install Nginx we server packages run the following command.
sudo apt-get install nginx
After successfully installed Nginx we should enable it at boot time (load at startup) so we are running the following commands one by one.
#Enable Nginx

$ sudo systemctl enable nginx

#Start Nginx

$ sudo systemctl enable nginx
To make sure everything is fine and the status of Nginx web server on our Linux Ubuntu 18.4 we are running the following command.
$ sudo systemctl status nginx
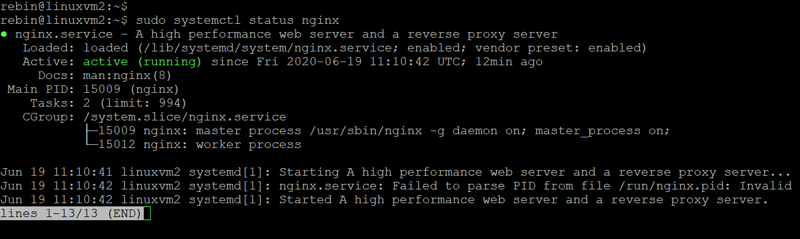
To exit the status and return to home press (Ctrl + C)
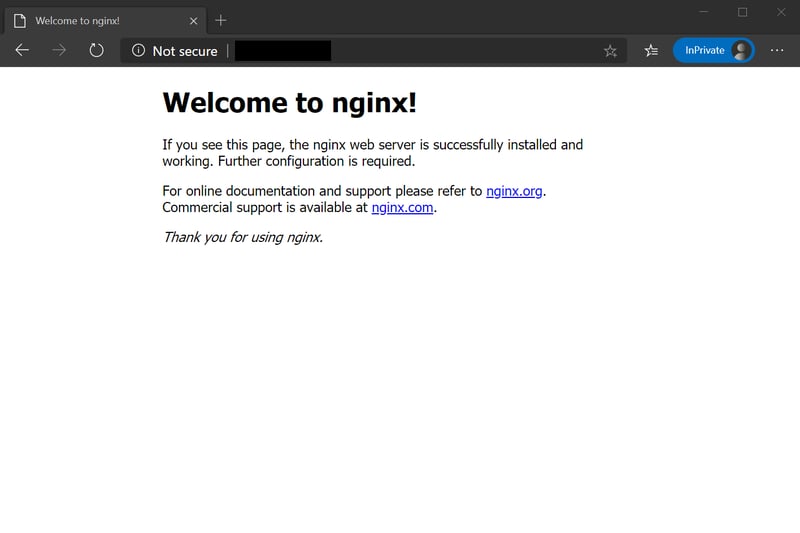
To make sure Nging is working open a web browser type the IP of Virtual Machine then hit the enter you will see the result of your goal.
Step 5 : Deploying ASP.NET Core App
Simple asp.net core mvc app has created before, so we are going to deploying it to Nginx web root default directory on Virtual Machine.
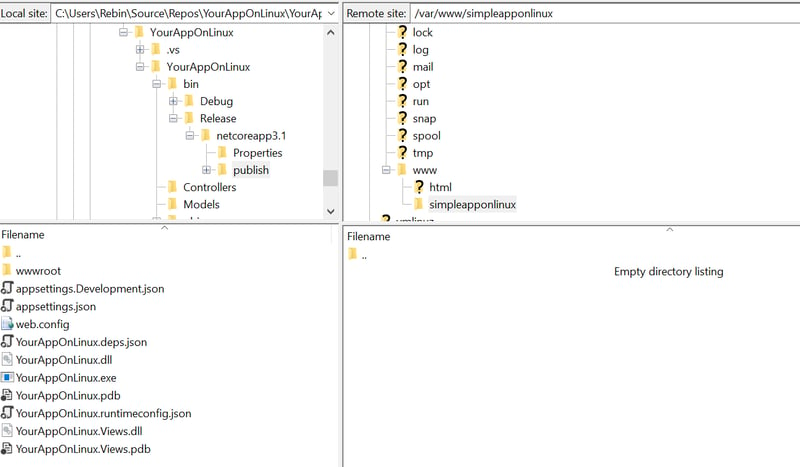
Run the following command to create a new directory is called ( simpleapponlinux ) in Nginx web root /var/www
sudo mkdir /var/www/simpleapponlinux
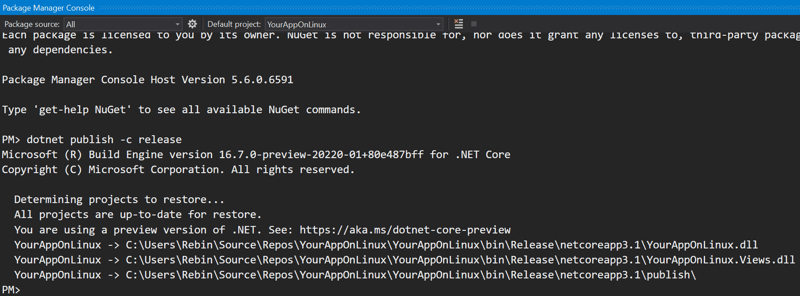
We run the following command in Package Manager Console inside Visual Studio 2019 to publish the app and its dependencies to a directory then deploy all compiled files to host system.
dotnet publish -c release
We are going to use FileZilla as SFTP server to deploy the app on my local machine to /var/www/simpleapponlinux on Ubuntu Virtual Machine.
May we are getting this error during transferring app files
Tip: Error: /var/www/simpleapponlinux/YourAppOnLinux.dll: open for write permission denied Error: File transfer failed
to fixed that we are going to running the following command.
sudo chown -R rebin /var/www/simpleapponlinux
sudo chown -R used to change the ownership of files or directories to rebin user.
After we have given the permission and uploaded entire our app content to /var/www/simpleapponlinux directory we need to run the app to ensure that is working well and getting some information like localhost url and its ports that is required in the next step.
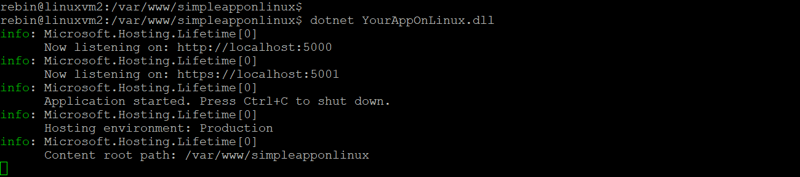
To do that we are running the following command.
cd /var/www/simpleapponlinux
Now we should be here ( /var/www/simpleapponlinux$ ) and we running the following command.
/var/www/simpleapponlinux$ dotnet YourAppOnLinux.dll
Step 6 : Create Server Block
Ngnix server block allows us to run or host multiple websites on a single virtual Machine, so in this step we need to create our server block in order to forward all requests to our app
I use nano simple text editor to modify the Nginx default server block in /etc/nginx/sites-available we are running the following command to modify the default Ngnix server block.
sudo nano /etc/nginx/sites-available/default

- Mark the text you want to cut press (Ctrl + ^).
- Use the arrow keys to select the text you want to cut.
- Cut the selected the text press (Ctrl + K)
- Right click and paste the following simple server block
server {
    listen 80;
    location / {
  proxy_pass http://localhost:5000;
  proxy_http_version 1.1;
  proxy_set_header Upgrade $http_upgrade;
  proxy_set_header Connection keep-alive;
  proxy_set_header Host $http_host;
  proxy_cache_bypass $http_upgrade;
  }
}
- Save the modified default file press (Ctrl + O) and hit the enter
- To exit the nano editor press (Ctrl + x) it will ask you to exit write Y and hit the enter on your keyboard.
We have replaced content of the default server block file on Nginx so we need to reload changes that we have made before we running the following command.
sudo nginx -s reload
Step 7 : Creating Service Unit File
In this step we are going to create a custom service unit file so
The service unit files define processes that are managed by systemd or contains information about a process which is managed by systemd to start or stop the service.
To keep running our app in the background as unite service we will take advantage of that file, so we need to create a. service file in the systemd directory and run the following command for that purpose.
sudo nano /etc/systemd/system/appserviceunitefile.service
After running that command, the nano simple text editor will be open immediately just copy the following configuration and past it into the nano text editor.
[Unit]
Description=Asp.NET Web App now is running on Ubuntu

[Service]
WorkingDirectory=/var/www/simpleapponlinux
ExecStart=/usr/bin/dotnet /var/www/simpleapponlinux/YourAppOnLinux.dll
Restart=always
# Restart service after 10 seconds if the dotnet service crashes:
RestartSec=10
KillSignal=SIGINT
SyslogIdentifier=myapponlinux-log
User=rebin
Environment=ASPNETCORE_ENVIRONMENT=Production
Environment=DOTNET_PRINT_TELEMETRY_MESSAGE=false

[Install]
WantedBy=multi-user.target
Now it is time to save the modified. service file press (Ctrl + O) and hit the enter, to exit the nano editor press (Ctrl + x).
To enable and register (appserviceunitefile.service) unite file service at a boot we should running the following command.
sudo systemctl enable appserviceunitefile.service
Now we should see the following message to ensure the our unite file of service has been created successfully.
Created symlink /etc/systemd/system/multi-user.target.wants/appserviceunitefile.service →
/etc/systemd/system/appserviceunitefile.service.
Run the following command to perform and start the unite of service.
sudo systemctl start appserviceunitefile.service
The last command we want to use is to check the status of the ( appserviceunitefile.service ) to ensure the service is active or not run the following command.
sudo systemctl status appserviceunitefile.service

To make sure the Asp.net Core MVC app is working open a web browser and type the IP of Virtual Machine and hit the enter you will see that Asp.Net Core is working on Linux very well.
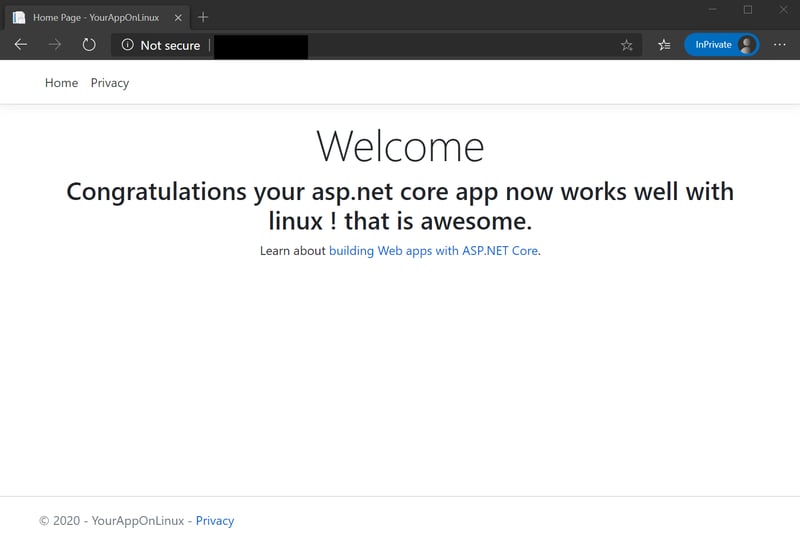
Congratulations 🎉
You have successfully run an Asp.Net Core App on Linux (Ubuntu 18.04 LTS)
Conclusion
In this tutorial you have learned how to deploy an ASP.NET Core MVC App as well as install Nginx web server on Linux Ubuntu 18.04 LTS Azure virtual machine.
ASP.NET Core is an open source, cross platform and high-performance web framework to build the modern web applications.
Nginx is a powerful web server open source, which can also be used as a reverse proxy or load balancing.
The source code of the app used as a demo can be found this link on GitHub.


Top comments (11)
Hi Rebin. Thanks for the nice walkthrough. I exactly follow the same steps with our sample core app. If I browse to
http://40.85.162.27/I am getting onlyWelcome to nginx!page, if I try to browsehttp://40.85.162.27/home, I am getting 404 error. Even I tried to upload web API app and for api also I am getting 404. Could you please suggest!Hi ajmaly
Make sure you don't miss any of the steps please try to deploy this simple demo github.com/4Rebin/Asp.netCoreAppDemo
Please let me know, if you face any issue.
Things still looks good ,could you please run the following commands one by one I think the server need a restart
sudo systemctl enable appserviceunitefile.service
sudo systemctl start appserviceunitefile.service
sudo systemctl status appserviceunitefile.service
sudo systemctl restart appserviceunitefile.service
Hi Rebin, I got the reason. While creating Server block, in your command it's,
proxy_pass http://localhost Jump :5000;I think this is typo (jump), it should be
proxy_pass http://localhost :5000;After changing it, it's Rocks. Working!!! Thanks again for this article.
Hi amaly,
I am sorry about that, now it is fixed.
Thank you for being here
Could you share me the content of /etc/nginx/sites-available/default
Sure, here is the content of the default file.
thank you so much