
Hosting your website on Azure is very simple. Just a few clicks 👀.
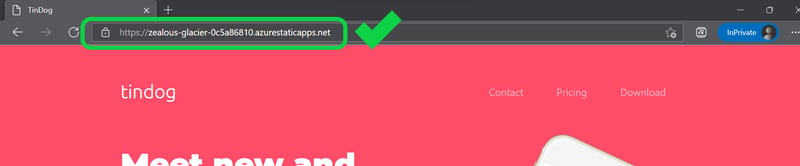
Final result
Prerequisites
- Signup for an Azure account for free if you don't have already. (Note: If you are a student you can get free credits)
- Basic git knowledge and a GitHub account.
- Your website.
Let's get started
- After creating Azure account, login into portal.azure.com.
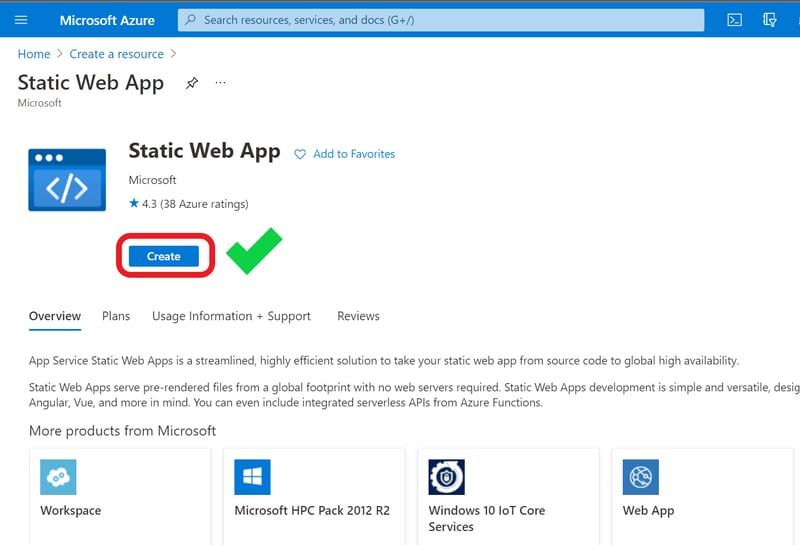
- Click on Create a resource.
- Search for Static Web App and select static web app.
- Click on Create.
Here we need to fill in a few details.
- In the project details, choose your subscription.
- For Resource Group click on create new and name it anything you like.
- Next, give your app a Name.
- Hosting plan: Free: For hobby or personal projects
- Next, select a region.
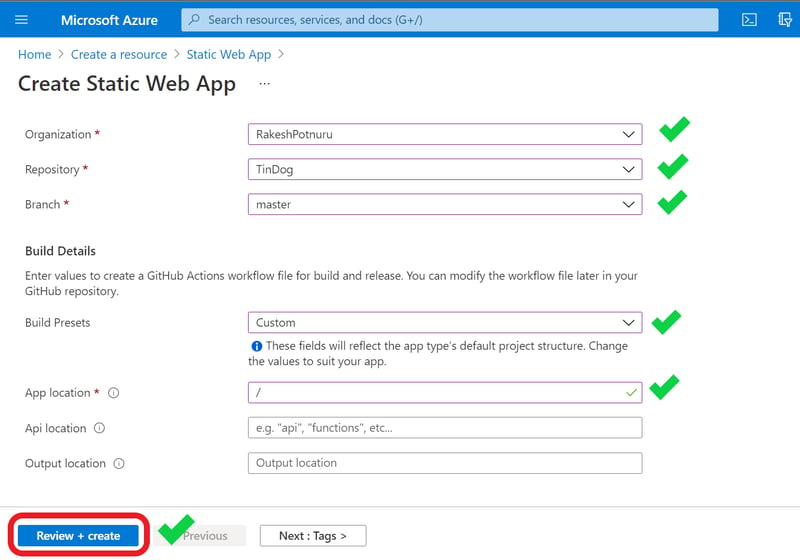
- After that, in deployment details select GitHub as source and sign in with your GitHub account.
- For Organization, choose your GitHub account from the dropdown.
- Next, select Repository and Branch.
- Now Build details
- For Build Presets, if your website is built with a framework or a static site generator then choose accordingly otherwise choose Custom.
- For App location, choose where your app files are there or if it is a simple website with only HTML and CSS files leave it as
/.
Click on Review + Create.
Verify all the provided details and click Create.
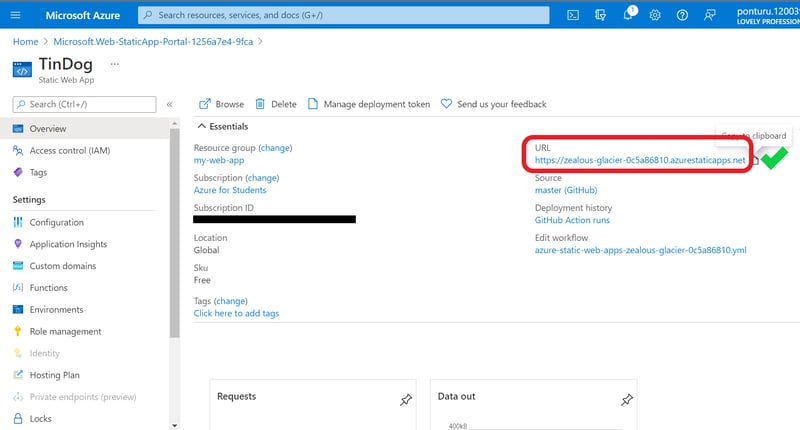
Wait for a few seconds, after deployment is complete click on Go to resource.
Copy the URL, paste in a new tab and see.
Congrats 🎉🎉🎉! Your website is now live on internet.

If you have any doubts ask in the comments below 👇.
Also read,
Hope this helps you!
Save for reference.
Connect with me on Twitter and GitHub. Follow me for more 😃.


Top comments (0)