Hey guys, so recently I had this requirement which required me to integrate a build process for .Net Core app using the Github, TeamCity Cloud server and Docker Hub.
So I researched about it and went on to implement it, and here's in brief what I did.
I used the out of box project created by Visual studio and manually added a docker file in it.
I then went on to create a free trial account on the TeamCity cloud server where I used this docker file to build, publish and then push the docker image to my Docker Hub repository
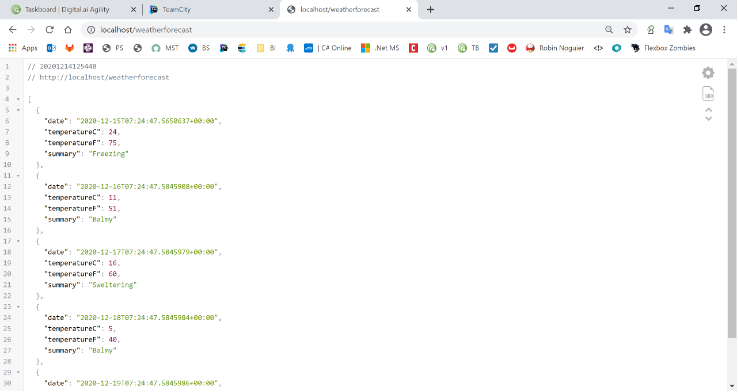
Finally I pulled the docker image on anther machine and there it was our weatherforecast api up and running 🚀 🚀.
Since I did could find a proper resource for implementing the same I thought why not give it a go myself. So here I am trying to explain the steps I followed.
Pre-requisite
Account on Team City Cloud Server https://www.jetbrains.com/teamcity/cloud/
Docker Hub account with a repository to publish the image of the asp.net core solution https://hub.docker.com
Docker Desktop Installed on local to pull and run the deployed image
Sample Dot Net core solution with a docker file. You can refer the one I am using here https://github.com/rajat-srivas/dotnetcore-teamcity-docker
I am also assuming you know about docker and are here to understand how to implement this integration
Project Setup On TeamCity Cloud Server
- Login into your team city cloud server
- Click on Project and then create project

Next we will be connecting our TeamCity server to the GitHub repository so as it can pull up the code every-time there is a new commit
Provide the repository URL (https://github.com/rajat-srivas/dotnetcore-teamcity-docker), and credentials to access the repository
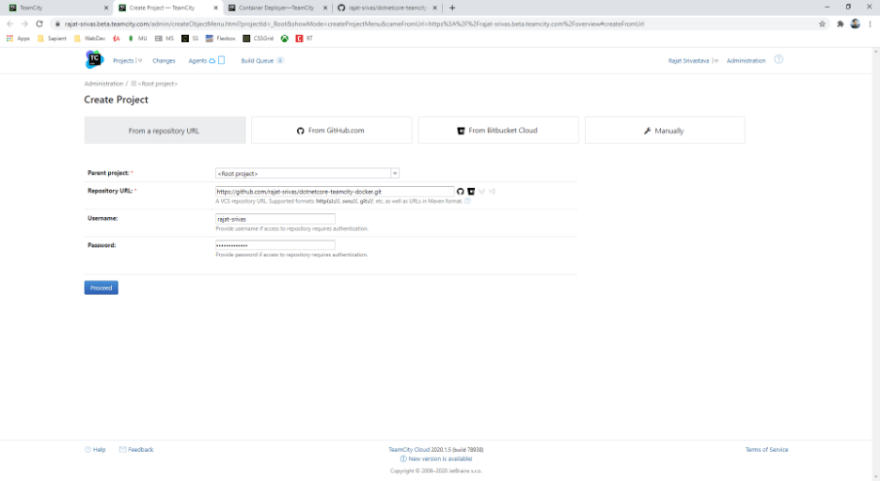
- Provide the project name and click on Proceed
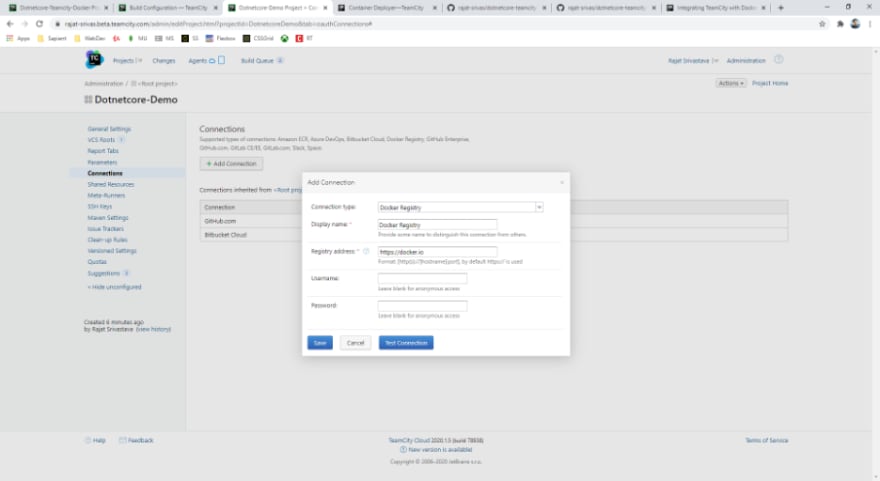
- Next we need to connect our Docker Hub repository to team city.
- Go the Projects setting page and click on Connections.
- Click on Add Connection and configure Docker Registry
- Go back to the build page
- Click on Add Build Feature and select Docker Support.
- Click on Add Registry Connection and use the docker connection created

Implementing the Build Pipeline 🏗
- Click on Build Steps to start creating the build pipeline
- For the current solution we need four build steps:
- Net Build => Build the .net solution
- Net Publish => Publishes the .Net Solution in the specified output directory
- Docker Image Build => Reads the specified docker file to create the docker image which contains the content of the folder where .net core solution was published
- Docker Image Push => Pushes the image on Docker hub
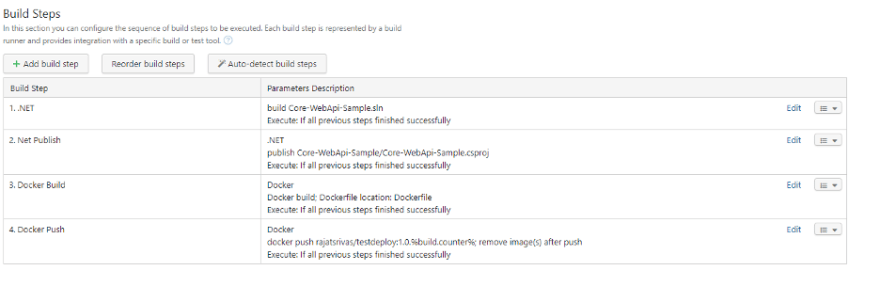
- Refer the above image to create the builds as mentioned
- Lets now move on the configure the individual steps
.Net Build

- Here we just need to set the Command as Build and provide the name of the solution from the repository
.Net Publish
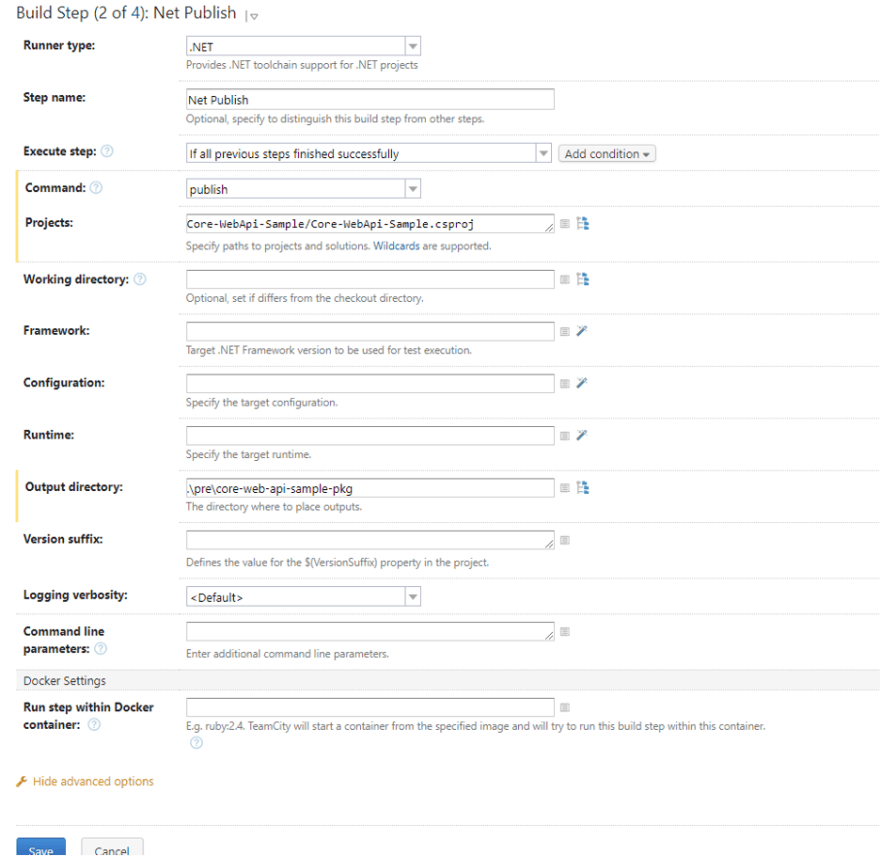
- Next we need to specify the folder where the files will be published. This needs to be same as the COPY command source in the docker file.
Docker Build
- Here rajatsrivas/testdeploy is the repository name on Docker hub in which my image will be published

- I'm using the build.counter flag to automatically version the docker image generated so as to keep track of it with the actual build which was triggered
Docker Push

- Now here the only thing left to do in the build configuration is to push the image which was created to our Docker Hub repo
Trigger/Run Build Manually
- Click on Run at the top right corner to trigger the build.
- Once the build is success, the image should be published in the docker repository specified 😄🍻


Running the App using the Docker Hub Image
Finally lets try and run the application using the image on our docker repository
- Pull the image from docker hub using the command. docker pull rajatsrivas/testdeploy:
- Run the container using the command below Docker run -p 80:80 --name rajatsrivas/testdeploy:
Conclusion
That's it, we have successfully implemented our first build pipeline for a Asp.Net core project using Github, TeamCity and Docker Hub.
Hope you find these steps useful and you can use it to build upon your own more complex build pipelines. Keep learning keep building...


Top comments (1)
We use TeamCity to build the code and run tests, and we use Octopus Deploy to deploy and promote releases. Marriage spell